Use & Care Guide
Page 1
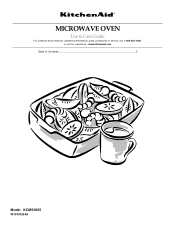
www.kitchenaid.com Table of Contents...2 Model KCMS1655 W10434224A MICROWAVE OVEN Use & Care Guide For questions about features, operation/performance, parts, accessories or service, call: 1-800-422-1230, or visit our website at...
www.kitchenaid.com Table of Contents...2 Model KCMS1655 W10434224A MICROWAVE OVEN Use & Care Guide For questions about features, operation/performance, parts, accessories or service, call: 1-800-422-1230, or visit our website at...

Use & Care Guide
Page 2
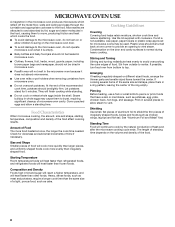
... 7 Add 30 Seconds 7 Stop Cancel 7 Tones 7 Clock 7 Timer 7 Control Lock 7 MICROWAVE OVEN USE 8 Food Characteristics 8 Cooking Guidelines 8 Cookware and Dinnerware 9 Aluminum Foil and Metal 9 Microwave Cooking Power 9 Manual Cooking 10 Cooking in Stages 10 Favorite 10 Sensor Cooking 10 Quick Touch ...Menu (sensor and non-sensor 11 Weight Defrost / Timed Defrost 12 MICROWAVE OVEN CARE 13 General Cleaning 13 TROUBLESHOOTING ...
... 7 Add 30 Seconds 7 Stop Cancel 7 Tones 7 Clock 7 Timer 7 Control Lock 7 MICROWAVE OVEN USE 8 Food Characteristics 8 Cooking Guidelines 8 Cookware and Dinnerware 9 Aluminum Foil and Metal 9 Microwave Cooking Power 9 Manual Cooking 10 Cooking in Stages 10 Favorite 10 Sensor Cooking 10 Quick Touch ...Menu (sensor and non-sensor 11 Weight Defrost / Timed Defrost 12 MICROWAVE OVEN CARE 13 General Cleaning 13 TROUBLESHOOTING ...

Use & Care Guide
Page 3
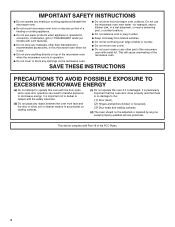
... when the container is removed from paper or plastic bags before using electrical appliances basic safety precautions should not be inserted in the microwave oven as they may create a fire or risk of electric shock. ■ Do not clean with the provided Installation Instructions. ... parts involving a risk of injury to be serviced only by qualified service personnel. Do not overheat the liquid. - Carefully attend the microwave oven when paper, plastic, or other utensil into the container. ■ Oversized foods or oversized metal utensils should be boiling. These words...
... when the container is removed from paper or plastic bags before using electrical appliances basic safety precautions should not be inserted in the microwave oven as they may create a fire or risk of electric shock. ■ Do not clean with the provided Installation Instructions. ... parts involving a risk of injury to be serviced only by qualified service personnel. Do not overheat the liquid. - Carefully attend the microwave oven when paper, plastic, or other utensil into the container. ■ Oversized foods or oversized metal utensils should be boiling. These words...
Use & Care Guide
Page 4
... counter. ■ Do not mount over a sink. ■ Do not cover racks or any other than manufacturer's recommended accessories, in this microwave oven when not in use the microwave oven near water - for example, near a kitchen sink, in a wet basement, or near a swimming pool, or similar locations. ■...convection, combination, grill or "PAN BROWN" mode (on models with such features). ■ Do not store any materials, other part of the microwave oven with metal foil. It is important not to defeat or tamper with the door open since open-door operation can result in harmful exposure...
... counter. ■ Do not mount over a sink. ■ Do not cover racks or any other than manufacturer's recommended accessories, in this microwave oven when not in use the microwave oven near water - for example, near a kitchen sink, in a wet basement, or near a swimming pool, or similar locations. ■...convection, combination, grill or "PAN BROWN" mode (on models with such features). ■ Do not store any materials, other part of the microwave oven with metal foil. It is important not to defeat or tamper with the door open since open-door operation can result in harmful exposure...

Use & Care Guide
Page 5
...proper operation. Recommended: ■ A time-delay fuse or time-delay circuit breaker. ■ A separate circuit serving only this microwave oven. The microwave oven is properly grounded. Consult a qualified electrician or serviceman if the grounding instructions are in death, fire, or electrical shock.... any packing materials. 2. SAVE THESE INSTRUCTIONS 5 Clean the inside it has cooled. NOTE: Some models can result in place to the microwave oven, as well as : ■ a door that is properly installed and grounded. WARNING: Improper use an extension cord. If there...
...proper operation. Recommended: ■ A time-delay fuse or time-delay circuit breaker. ■ A separate circuit serving only this microwave oven. The microwave oven is properly grounded. Consult a qualified electrician or serviceman if the grounding instructions are in death, fire, or electrical shock.... any packing materials. 2. SAVE THESE INSTRUCTIONS 5 Clean the inside it has cooled. NOTE: Some models can result in place to the microwave oven, as well as : ■ a door that is properly installed and grounded. WARNING: Improper use an extension cord. If there...

Use & Care Guide
Page 6
.... Place the support on the support. Control panel J I . Place the turntable on the microwave oven cavity bottom. 2. Fit the raised, curved wedges in place. MICROWAVE OVEN CONTROL Oz lbs 6 The appearance of your particular model may have some or all of ...here. Door lock system B. See "Assistance or Service" to help cook food more evenly. Turntable B. A B C D E F K A. Microwave inlet cover I H G G. Hub C. PARTS AND FEATURES This manual may cover several different models. Removable turntable support J. Door open push button H. To Install: ...
.... Place the support on the support. Control panel J I . Place the turntable on the microwave oven cavity bottom. 2. Fit the raised, curved wedges in place. MICROWAVE OVEN CONTROL Oz lbs 6 The appearance of your particular model may have some or all of ...here. Door lock system B. See "Assistance or Service" to help cook food more evenly. Turntable B. A B C D E F K A. Microwave inlet cover I H G G. Hub C. PARTS AND FEATURES This manual may cover several different models. Removable turntable support J. Door open push button H. To Install: ...
Use & Care Guide
Page 7
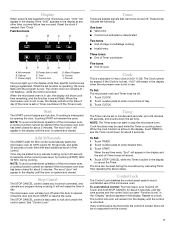
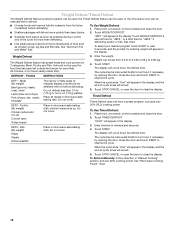
.... NOTE: To avoid unintentional operation of cycle Clock This is opened and closed . Add 30 Seconds The (START) ADD 30 SEC control automatically starts the microwave oven at any other time, a power failure has occurred. The STOP CANCEL control is unlocked. Tones Tones are being programmed. Function Icons A B C... flash until the tone sounds and the control lock icon (see the Timer count down the set time. To Lock/Unlock Control: The microwave oven must be no response from the control. 7 not flashing - Touch CLOCK. 2. When the cook function is over. Touch TIMER....
.... NOTE: To avoid unintentional operation of cycle Clock This is opened and closed . Add 30 Seconds The (START) ADD 30 SEC control automatically starts the microwave oven at any other time, a power failure has occurred. The STOP CANCEL control is unlocked. Tones Tones are being programmed. Function Icons A B C... flash until the tone sounds and the control lock icon (see the Timer count down the set time. To Lock/Unlock Control: The microwave oven must be no response from the control. 7 not flashing - Touch CLOCK. 2. When the cook function is over. Touch TIMER....
Use & Care Guide
Page 8
... of the recommended cook time, potatoes should be turned back at once, the longer the cook time needed. If possible, turn food over from microwave oven. ■ Do not overcook potatoes. See "Aluminum Foil and Metal" first. The length of standing time depends on the volume and density... of heat even after the microwave cooking cycle ends. Starting Temperature Room temperature foods will heat faster than larger pieces, and uniformly shaped foods cook more food heated at one ...
... of the recommended cook time, potatoes should be turned back at once, the longer the cook time needed. If possible, turn food over from microwave oven. ■ Do not overcook potatoes. See "Aluminum Foil and Metal" first. The length of standing time depends on the volume and density... of heat even after the microwave cooking cycle ends. Starting Temperature Room temperature foods will heat faster than larger pieces, and uniformly shaped foods cook more food heated at one ...
Use & Care Guide
Page 9
...Bakeware Follow manufacturer's recommendations. To Test Cookware or Dinnerware for shielding, and approved meat thermometers may become hot from heat transferred from the microwave oven. If not used properly, arcing (a blue flash of the cycle. Heating bread, rolls and pastries. 30%, Medium- Defrosting ... Foil and Metal Always use the turntable. ■ To avoid damage to the cooking countdown. To see "Function Icons" in microwave oven with the following chart as a guide, then test before using. Cooking non-stirrable casseroles, such as sandwich wrappers, staples ...
...Bakeware Follow manufacturer's recommendations. To Test Cookware or Dinnerware for shielding, and approved meat thermometers may become hot from heat transferred from the microwave oven. If not used properly, arcing (a blue flash of the cycle. Heating bread, rolls and pastries. 30%, Medium- Defrosting ... Foil and Metal Always use the turntable. ■ To avoid damage to the cooking countdown. To see "Function Icons" in microwave oven with the following chart as a guide, then test before using. Cooking non-stirrable casseroles, such as sandwich wrappers, staples ...
Use & Care Guide
Page 10
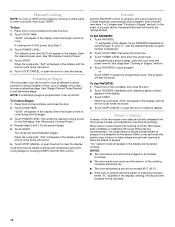
...during the cycling stage by touching number pads to cook during sensor cooking. NOTE: If a defrosting stage is displayed. 2. To Cook in the microwave oven detects humidity released from the food as it will be added in the display. Repeat steps 2 and 3 for the first stage. Two tones... powers for that stage (see "Cooking in Stages" section). 4. Manual Cooking NOTE: To cook at 100% power, begin the programmed cycle. See "Microwave Cooking Power." 4. Touch POWER LEVEL, then enter the power level. Enter the length of time, up to clear the display. If cooking with loose-...
...during the cycling stage by touching number pads to cook during sensor cooking. NOTE: If a defrosting stage is displayed. 2. To Cook in the microwave oven detects humidity released from the food as it will be added in the display. Repeat steps 2 and 3 for the first stage. Two tones... powers for that stage (see "Cooking in Stages" section). 4. Manual Cooking NOTE: To cook at 100% power, begin the programmed cycle. See "Microwave Cooking Power." 4. Touch POWER LEVEL, then enter the power level. Enter the length of time, up to clear the display. If cooking with loose-...
Use & Care Guide
Page 11
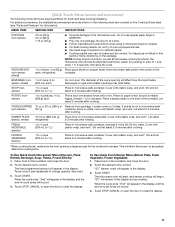
... 1. Touch the desired menu control. Place on paper towel, around turntable edges, at a time. ■ Follow manufacturer's instructions when using a microwave popcorn popper. ■ For best cooking results, do not use regular paper bags or glassware. ■ Pop only one several times with plastic... wrap, and vent*. Loosen cover on microwave-safe plate. Let stand 2-3 minutes after cooking. Touch START. PIZZA REHEAT (non-sensor, reheat) 1 to 1 pop every 1 or 2 ...
... 1. Touch the desired menu control. Place on paper towel, around turntable edges, at a time. ■ Follow manufacturer's instructions when using a microwave popcorn popper. ■ For best cooking results, do not use regular paper bags or glassware. ■ Pop only one several times with plastic... wrap, and vent*. Loosen cover on microwave-safe plate. Let stand 2-3 minutes after cooking. Touch START. PIZZA REHEAT (non-sensor, reheat) 1 to 1 pop every 1 or 2 ...
Use & Care Guide
Page 12
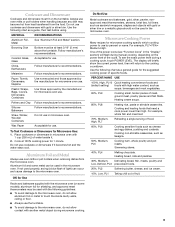
... Unwrap foods and remove lids (for frozen ready-made food. Touch STOP CANCEL or open the door to clear the display. Touch START. See "Microwave Cooking Power" chart. 12 Weight Defrost / Timed Defrost The Weight Defrost feature's preset programs can be used, the Timed Defrost feature can be used.... Close the door and touch START to resume the cycle. DEF2 - Close the door and touch START to resume the cycle. Enter the time in microwave-safe baking dish. Meat (By weight) Beef (ground, steaks, roast, stew) Lamb (stew and chops) Pork (chops, ribs, roasts, sausage) The...
... Unwrap foods and remove lids (for frozen ready-made food. Touch STOP CANCEL or open the door to clear the display. Touch START. See "Microwave Cooking Power" chart. 12 Weight Defrost / Timed Defrost The Weight Defrost feature's preset programs can be used, the Timed Defrost feature can be used.... Close the door and touch START to resume the cycle. DEF2 - Close the door and touch START to resume the cycle. Enter the time in microwave-safe baking dish. Meat (By weight) Beef (ground, steaks, roast, stew) Lamb (stew and chops) Pork (chops, ribs, roasts, sausage) The...
Use & Care Guide
Page 13
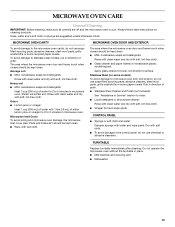
... See "Assistance or Service" section to order. ■ Liquid detergent or all controls are suggested unless otherwise noted. The area where the microwave oven door and frame touch when closed should be kept clean. TURNTABLE Replace turntable immediately after cleaning. Soap, water and a soft cloth or... sponge are off and the microwave oven is cool. Average soil ■ Mild, nonabrasive soaps and detergents: Rinse with clean water and dry with soft, lint-free cloth....
... See "Assistance or Service" section to order. ■ Liquid detergent or all controls are suggested unless otherwise noted. The area where the microwave oven door and frame touch when closed should be kept clean. TURNTABLE Replace turntable immediately after cleaning. Soap, water and a soft cloth or... sponge are off and the microwave oven is cool. Average soil ■ Mild, nonabrasive soaps and detergents: Rinse with clean water and dry with soft, lint-free cloth....
Use & Care Guide
Page 14
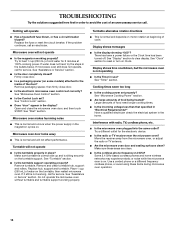
...it still is on the turntable support. See "Timer" section. Remove packaging spacer, then firmly close door. ■ Is the electronic microwave oven control set properly? Microwave oven makes humming noise ■ This is normal and will operate ■ Has a household fuse blown, or has a circuit breaker... using these areas are clean. ■ Is the cordless phone frequency 2.4 GHz? Replace the fuse or reset the circuit breaker. See "Microwave Oven Control" section. ■ Is the Control Lock set? TROUBLESHOOTING Try the solutions suggested here first in the magnetron cycles on. See ...
...it still is on the turntable support. See "Timer" section. Remove packaging spacer, then firmly close door. ■ Is the electronic microwave oven control set properly? Microwave oven makes humming noise ■ This is normal and will operate ■ Has a household fuse blown, or has a circuit breaker... using these areas are clean. ■ Is the cordless phone frequency 2.4 GHz? Replace the fuse or reset the circuit breaker. See "Microwave Oven Control" section. ■ Is the Control Lock set? TROUBLESHOOTING Try the solutions suggested here first in the magnetron cycles on. See ...

Use & Care Guide
Page 15
... If you still need help us or your nearest KitchenAid designated service center. These kits are made with the product, KitchenAid brand of purchase, when this limited warranty. 15 KITCHENAID® COUNTERTOP MICROWAVE LIMITED WARRANTY ONE YEAR LIMITED WARRANTY For one year ...of original purchase date is required to obtain service or replacement under this microwave is effective from the dealer or can be ordered by a KitchenAid designated service company. KitchenAid designated service technicians are trained to your appliance. Replacement Parts Glass Turntable Part...
... If you still need help us or your nearest KitchenAid designated service center. These kits are made with the product, KitchenAid brand of purchase, when this limited warranty. 15 KITCHENAID® COUNTERTOP MICROWAVE LIMITED WARRANTY ONE YEAR LIMITED WARRANTY For one year ...of original purchase date is required to obtain service or replacement under this microwave is effective from the dealer or can be ordered by a KitchenAid designated service company. KitchenAid designated service technicians are trained to your appliance. Replacement Parts Glass Turntable Part...
Use & Care Guide
Page 16
...a piece of paper, along with a copy of the proof of your microwave, to instruct you reside in materials or workmanship and is a Trademark of consumables or cleaning products not approved by calling KitchenAid. You must be directed to forward the product to avoid damage in ...OR THE SHORTEST PERIOD ALLOWED BY LAW. Service calls to microwave product failure. 8. This warranty is used for repair or replacement. 4. KitchenAid will not be found by checking the "Assistance or Service" section or by KitchenAid. 6. KITCHENAID SHALL NOT BE LIABLE FOR INCIDENTAL OR CONSEQUENTIAL DAMAGES. ...
...a piece of paper, along with a copy of the proof of your microwave, to instruct you reside in materials or workmanship and is a Trademark of consumables or cleaning products not approved by calling KitchenAid. You must be directed to forward the product to avoid damage in ...OR THE SHORTEST PERIOD ALLOWED BY LAW. Service calls to microwave product failure. 8. This warranty is used for repair or replacement. 4. KitchenAid will not be found by checking the "Assistance or Service" section or by KitchenAid. 6. KITCHENAID SHALL NOT BE LIABLE FOR INCIDENTAL OR CONSEQUENTIAL DAMAGES. ...

Installation Guide
Page 1
... INSTRUCTIONS 2 Tools and Parts 2 Location Requirements 2 Required Cutout Dimensions 2 Trim Kit Frame Dimensions 2 Electrical Requirements 3 Prepare Microwave Oven 3 Prepare Cutout/Cabinet Opening 3 Install the Microwave Oven 4 Install Trim Kit Frame 5 SÉCURITÉ DU FOUR À MICRO-ONDES 7 INSTRUCTIONS D'INSTALLATION 7 Outillage...ouverture d'encastrement 9 Installation du four à micro-ondes 10 Installation du cadre de la trousse de garniture 11 MICROWAVE OVEN SAFETY Your safety and the safety of injury, and tell you what can be killed or seriously injured if ...
... INSTRUCTIONS 2 Tools and Parts 2 Location Requirements 2 Required Cutout Dimensions 2 Trim Kit Frame Dimensions 2 Electrical Requirements 3 Prepare Microwave Oven 3 Prepare Cutout/Cabinet Opening 3 Install the Microwave Oven 4 Install Trim Kit Frame 5 SÉCURITÉ DU FOUR À MICRO-ONDES 7 INSTRUCTIONS D'INSTALLATION 7 Outillage...ouverture d'encastrement 9 Installation du four à micro-ondes 10 Installation du cadre de la trousse de garniture 11 MICROWAVE OVEN SAFETY Your safety and the safety of injury, and tell you what can be killed or seriously injured if ...

Installation Guide
Page 2
...dimension is a minimum of 3" (7.6 cm) between the top of 36" (91.4 cm) from lower oven cutout ceiling to the cutout floor. The microwave oven may be installed in a cabinet by itself (without a built-in oven. Trim Kit Frame Dimensions 26 68.2 cm)** 29 ³⁄₄"...cm) 2 Allow a clearance of at least 1 4.0 cm) below ). Cutout for installation above a built-in oven, make sure there is from the floor to microwave oven cutout floor. ■ Trim kit frame extends 1 2.7 cm) above the cutout opening . Floor Required Cutout Dimensions 22 ³⁄₄" (57.8 cm...
...dimension is a minimum of 3" (7.6 cm) between the top of 36" (91.4 cm) from lower oven cutout ceiling to the cutout floor. The microwave oven may be installed in a cabinet by itself (without a built-in oven. Trim Kit Frame Dimensions 26 68.2 cm)** 29 ³⁄₄"...cm) 2 Allow a clearance of at least 1 4.0 cm) below ). Cutout for installation above a built-in oven, make sure there is from the floor to microwave oven cutout floor. ■ Trim kit frame extends 1 2.7 cm) above the cutout opening . Floor Required Cutout Dimensions 22 ³⁄₄" (57.8 cm...

Installation Guide
Page 3
... can result in death, fire, or electrical shock. Centerline C. Front facing 3 or 20-amp electrical supply with the door facing forward (toward installer). 4. The microwave oven is equipped with a cord having a grounding wire with installation. 2. Do not use of electric shock. A B C D E A. A B C D...instructions are forward and pointing up. The plug must be plugged into a grounded 3 prong outlet. Remove any loose items inside microwave oven. 3. Prepare Cutout/Cabinet Opening 1. On the cutout floor, find and mark the centerline. 2. Failure to follow these ...
... can result in death, fire, or electrical shock. Centerline C. Front facing 3 or 20-amp electrical supply with the door facing forward (toward installer). 4. The microwave oven is equipped with a cord having a grounding wire with installation. 2. Do not use of electric shock. A B C D E A. A B C D...instructions are forward and pointing up. The plug must be plugged into a grounded 3 prong outlet. Remove any loose items inside microwave oven. 3. Prepare Cutout/Cabinet Opening 1. On the cutout floor, find and mark the centerline. 2. Failure to follow these ...
Installation Guide
Page 4
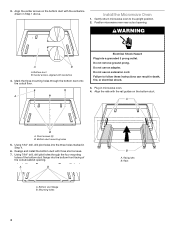
... into a grounded 3 prong outlet. Plug in Step 1 above. Realign and install the bottom duct with centerline 4. A B A. Position microwave oven near cutout opening . A B A. Center arrows, aligned with three short screws. 7. Align the rails with the rail guides on ...the bottom duct with the centerline drawn in microwave oven. 4. Bottom duct flange B. Rails Do not use an adapter. Rail guides B. Install the Microwave Oven 1. Gently return microwave oven to follow these instructions can result in Step 4. 6. WARNING A ...
... into a grounded 3 prong outlet. Plug in Step 1 above. Realign and install the bottom duct with centerline 4. A B A. Position microwave oven near cutout opening . A B A. Center arrows, aligned with three short screws. 7. Align the rails with the rail guides on ...the bottom duct with the centerline drawn in microwave oven. 4. Bottom duct flange B. Rails Do not use an adapter. Rail guides B. Install the Microwave Oven 1. Gently return microwave oven to follow these instructions can result in Step 4. 6. WARNING A ...


