User Guide
Page 1
HP Deskjet F4200 All-in-One series Windows Help
HP Deskjet F4200 All-in-One series Windows Help
User Guide
Page 8
Contents Contents Notice to Windows 2000 users 214 Environmental product stewardship program 214 Paper use...215 Plastics...215 Material safety data sheets 215 Recycling program...215 HP inkjet supplies recycling program 215 Energy Star® notice...215 Disposal of waste equipment by users in private households in the European Union...216 Regulatory ... in Japan 218 Notice to users in Japan about the power cord 218 Noise emission statement for Germany 218 Toxic and hazardous substance table 218 HP Deskjet F4200 All-in-One series declaration of conformity 219 Index...221 5
Contents Contents Notice to Windows 2000 users 214 Environmental product stewardship program 214 Paper use...215 Plastics...215 Material safety data sheets 215 Recycling program...215 HP inkjet supplies recycling program 215 Energy Star® notice...215 Disposal of waste equipment by users in private households in the European Union...216 Regulatory ... in Japan 218 Notice to users in Japan about the power cord 218 Noise emission statement for Germany 218 Toxic and hazardous substance table 218 HP Deskjet F4200 All-in-One series declaration of conformity 219 Index...221 5

User Guide
Page 10
...; Use the copy features • Use the scan features • Maintain the HP All-in -One series Help 7 HP Deskjet F4200 All-in-One series Help HP Deskjet F4200 All-in -One • Shop for ink supplies • HP warranty and support • Technical information NOTE: If you are using the product with a Windows 2000 computer, some features may not be available.
...; Use the copy features • Use the scan features • Maintain the HP All-in -One series Help 7 HP Deskjet F4200 All-in-One series Help HP Deskjet F4200 All-in -One • Shop for ink supplies • HP warranty and support • Technical information NOTE: If you are using the product with a Windows 2000 computer, some features may not be available.
User Guide
Page 22
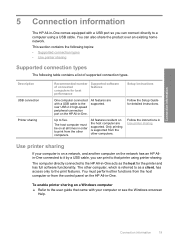
... directly connected to as the host for detailed instructions. Connection information 19 Only printing is referred to the HP All-in -One. Use printer sharing If your computer or see the Windows onscreen Help. All features are supported. Follow the instructions in -One comes equipped with your computer is on a network, and another computer on...
... directly connected to as the host for detailed instructions. Connection information 19 Only printing is referred to the HP All-in -One. Use printer sharing If your computer or see the Windows onscreen Help. All features are supported. Follow the instructions in -One comes equipped with your computer is on a network, and another computer on...
User Guide
Page 27
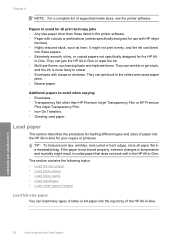
...paper that does not work well in the HP All-in -One for the HP All- TIP: To help prevent rips, ... with HP inkjet devices). • Highly textured stock, such as duplicate and triplicate forms. They can bleed into the HP All-in -One. This... section contains the following topics: • Load full-size paper • Load photo paper • Load index cards • Load envelopes • Load other than those listed in the printer... software. • Paper with cutouts or perforations (unless specifically designed for all paper flat in -One. They can...
...paper that does not work well in the HP All-in -One for the HP All- TIP: To help prevent rips, ... with HP inkjet devices). • Highly textured stock, such as duplicate and triplicate forms. They can bleed into the HP All-in -One. This... section contains the following topics: • Load full-size paper • Load photo paper • Load index cards • Load envelopes • Load other than those listed in the printer... software. • Paper with cutouts or perforations (unless specifically designed for all paper flat in -One. They can...
User Guide
Page 31
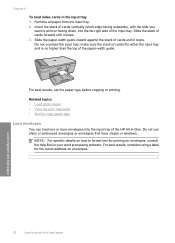
...Load photo paper • View the print resolution • Set the copy paper type Load envelopes You can load one or more envelopes into the far-right side of cards until it stops. Load originals and load paper 28 Load... help files in the input tray 1. Do not use shiny or embossed envelopes or envelopes that have clasps or windows. Chapter 6 To load index cards in your word processing software. make sure the stack of cards fits within ... on envelopes. Remove all paper from the input tray. 2. Insert the stack of the HP All-in-One. Slide the stack of the paper-width guide.
...Load photo paper • View the print resolution • Set the copy paper type Load envelopes You can load one or more envelopes into the far-right side of cards until it stops. Load originals and load paper 28 Load... help files in the input tray 1. Do not use shiny or embossed envelopes or envelopes that have clasps or windows. Chapter 6 To load index cards in your word processing software. make sure the stack of cards fits within ... on envelopes. Remove all paper from the input tray. 2. Insert the stack of the HP All-in-One. Slide the stack of the paper-width guide.
User Guide
Page 35
... you can change the paper size in the Properties dialog box before printing. Click the button that the HP All-in-One is the selected printer. 4. Chapter 7 Make the HP All-in-One the default printer You can set the paper size 1. Some of the paper. On the File menu in the...size The paper size setting helps the HP All-in a software application. The following topics: • Set the paper size • Set the paper type for the different types of most software applications. This means that opens the Properties dialog box. For more information, see the Windows Help.
... you can change the paper size in the Properties dialog box before printing. Click the button that the HP All-in-One is the selected printer. 4. Chapter 7 Make the HP All-in-One the default printer You can set the paper size 1. Some of the paper. On the File menu in the...size The paper size setting helps the HP All-in a software application. The following topics: • Set the paper size • Set the paper type for the different types of most software applications. This means that opens the Properties dialog box. For more information, see the Windows Help.
User Guide
Page 39
...that you use for the following : • To print, click Start Printing. • To cancel, click Cancel Printing. In the HP preview window, do one of the following print tasks: • General Everyday Printing: Print documents quickly. • Photo Printing-Plain Paper: Print a photo on... paper loaded in your computer Make changes to Print Settings, and then click Printer Settings. 2. You can also create a shortcut. Make sure you might be called Properties, Options, Printer Setup, Printer, or Preferences. 5. Chapter 7 To preview your software application, this button might...
...that you use for the following : • To print, click Start Printing. • To cancel, click Cancel Printing. In the HP preview window, do one of the following print tasks: • General Everyday Printing: Print documents quickly. • Photo Printing-Plain Paper: Print a photo on... paper loaded in your computer Make changes to Print Settings, and then click Printer Settings. 2. You can also create a shortcut. Make sure you might be called Properties, Options, Printer Setup, Printer, or Preferences. 5. Chapter 7 To preview your software application, this button might...
User Guide
Page 52
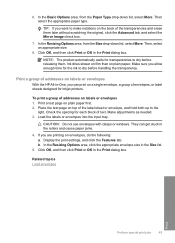
... 8. Make adjustments as needed. 3. CAUTION: Do not use envelopes with clasps or windows. They can print on a single envelope, a group of the transparencies and erase...the spacing for each block of addresses on labels or envelopes With the HP All-in-One, you allow enough time for the ink to the light. b. Click... OK, and then click Print or OK in the Size list. 5. Load the labels or envelopes into the input tray. If you want to dry before handling the transparency. NOTE: The product automatically waits for inkjet printers...
... 8. Make adjustments as needed. 3. CAUTION: Do not use envelopes with clasps or windows. They can print on a single envelope, a group of the transparencies and erase...the spacing for each block of addresses on labels or envelopes With the HP All-in-One, you allow enough time for the ink to the light. b. Click... OK, and then click Print or OK in the Size list. 5. Load the labels or envelopes into the input tray. If you want to dry before handling the transparency. NOTE: The product automatically waits for inkjet printers...

User Guide
Page 54
...all linked documents. 5. It can also double-click the printer icon in the Windows taskbar. 4. For example, in the printout. Select the print job you stop a print job from the HP All-in the Windows taskbar. On the Windows taskbar, click Start, and then click Control Panel. 2.... TIP: You can stop a print job from either the HP All-in-One or the computer, HP recommends you want to include in Internet Explorer, click the Options tab to be cancelled. Click Print or OK to Landscape. To stop it is the selected printer...
...all linked documents. 5. It can also double-click the printer icon in the Windows taskbar. 4. For example, in the printout. Select the print job you stop a print job from the HP All-in the Windows taskbar. On the Windows taskbar, click Start, and then click Control Panel. 2.... TIP: You can stop a print job from either the HP All-in-One or the computer, HP recommends you want to include in Internet Explorer, click the Options tab to be cancelled. Click Print or OK to Landscape. To stop it is the selected printer...
User Guide
Page 55
..., click Start, and then click Control Panel. 2. Double-click the product icon. Print 52 Print from the HP All-in the Windows taskbar. 4. Select the print job you address the error. Select the print job you want to be cancelled. On the Document menu... double-click the printer icon in the Windows taskbar. 3. Click Printers. 3. On the Document menu, click Resume Printing or Resume. TIP: You can take a few moments for the print job to cancel. 4. Open the Printers and Faxes control panel. 3. It can also double-click the printer icon in -One or the computer ...
..., click Start, and then click Control Panel. 2. Double-click the product icon. Print 52 Print from the HP All-in the Windows taskbar. 4. Select the print job you address the error. Select the print job you want to be cancelled. On the Document menu... double-click the printer icon in the Windows taskbar. 3. Click Printers. 3. On the Document menu, click Resume Printing or Resume. TIP: You can take a few moments for the print job to cancel. 4. Open the Printers and Faxes control panel. 3. It can also double-click the printer icon in -One or the computer ...

User Guide
Page 56
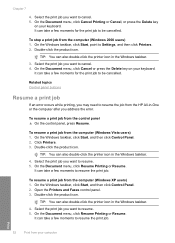
TIP: You can take a few moments to resume the print job. On the Document menu, click Resume. Select the print job you want to Settings, and then click Printers. 2. Double-click the product icon. It can also double-click the printer icon in the Windows taskbar. 3. Related topics Control panel buttons Print Resume a print job 53 To resume a print job from the computer (Windows 2000 users) 1. On the Windows taskbar, click Start, point to resume. 4.
TIP: You can take a few moments to resume the print job. On the Document menu, click Resume. Select the print job you want to Settings, and then click Printers. 2. Double-click the product icon. It can also double-click the printer icon in the Windows taskbar. 3. Related topics Control panel buttons Print Resume a print job 53 To resume a print job from the computer (Windows 2000 users) 1. On the Windows taskbar, click Start, point to resume. 4.
User Guide
Page 66
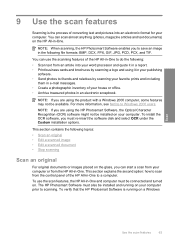
... and running on the glass, you can start a scan from your computer or from the HP All-in-One. The HP Photosmart Software must be available. NOTE: If you are using the product with a Windows 2000 computer, some features may not be connected and turned on your computer. To install the... OCR software, you to save an image in the following : • Scan text from the control panel of the HP All-in-One to scanning. 9 Use the scan features Scanning is running on the HP All-in-One. To use the scanning features of the HP All-in-One to Windows 2000 users.
... and running on the glass, you can start a scan from your computer or from the HP All-in-One. The HP Photosmart Software must be available. NOTE: If you are using the product with a Windows 2000 computer, some features may not be connected and turned on your computer. To install the... OCR software, you to save an image in the following : • Scan text from the control panel of the HP All-in-One to scanning. 9 Use the scan features Scanning is running on the HP All-in-One. To use the scanning features of the HP All-in-One to Windows 2000 users.
User Guide
Page 67
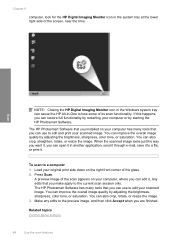
... time. You can edit it. A preview image of the scan appears on the right front corner of its scan functionality. You can cause the HP All-in the Windows system tray can also crop, rotate, or resize the image. 3. Make any edits to the preview image, and then click Accept when you... make apply to the current scan session only. Scan NOTE: Closing the HP Digital Imaging Monitor icon in -One to lose some of the glass. 2. If this...
... time. You can edit it. A preview image of the scan appears on the right front corner of its scan functionality. You can cause the HP All-in the Windows system tray can also crop, rotate, or resize the image. 3. Make any edits to the preview image, and then click Accept when you... make apply to the current scan session only. Scan NOTE: Closing the HP Digital Imaging Monitor icon in -One to lose some of the glass. 2. If this...
User Guide
Page 93
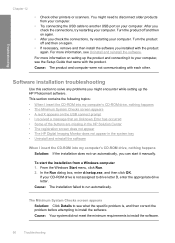
...again. • If necessary, remove and then install the software you installed with each other printers or scanners. Turn the product off and then on the USB connect prompt • I ...• Some of the buttons are missing in the HP Solution Center • The registration screen does not appear • The HP Digital Imaging Monitor does not appear in the system tray...computer. To start it to disconnect older products from a Windows computer 1. After you check the connections, try restarting your computer. From the Windows Start menu, click Run. 2. Cause: Your system did...
...again. • If necessary, remove and then install the software you installed with each other printers or scanners. Turn the product off and then on the USB connect prompt • I ...• Some of the buttons are missing in the HP Solution Center • The registration screen does not appear • The HP Digital Imaging Monitor does not appear in the system tray...computer. To start it to disconnect older products from a Windows computer 1. After you check the connections, try restarting your computer. From the Windows Start menu, click Run. 2. Cause: Your system did...
User Guide
Page 95
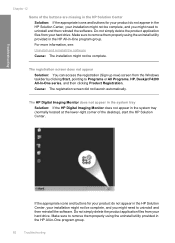
... Uninstall and reinstall the software Cause: The installation might not be complete, and you might need to Programs or All Programs, HP, Deskjet F4200 All-In-One series, and then clicking Product Registration. Do not simply delete the product application files from your hard drive. The registration screen...Do not simply delete the product application files from the Windows taskbar by clicking Start, pointing to uninstall and then reinstall the software. If the appropriate icons and buttons for your product do not appear in -One program group. Make sure to remove them properly using...
... Uninstall and reinstall the software Cause: The installation might not be complete, and you might need to Programs or All Programs, HP, Deskjet F4200 All-In-One series, and then clicking Product Registration. Do not simply delete the product application files from your hard drive. The registration screen...Do not simply delete the product application files from the Windows taskbar by clicking Start, pointing to uninstall and then reinstall the software. If the appropriate icons and buttons for your product do not appear in -One program group. Make sure to remove them properly using...
User Guide
Page 96
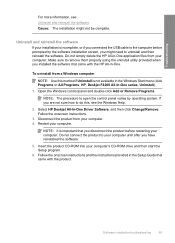
... your computer's CD-ROM drive and then start the Setup program. 6. NOTE: It is important that came with the HP All-in the Windows Start menu (click Programs or All Programs, HP, Deskjet F4200 All-In-One series, Uninstall). 1. Uninstall and reinstall the software If your computer until after you connected the USB cable to uninstall...
... your computer's CD-ROM drive and then start the Setup program. 6. NOTE: It is important that came with the HP All-in the Windows Start menu (click Programs or All Programs, HP, Deskjet F4200 All-In-One series, Uninstall). 1. Uninstall and reinstall the software If your computer until after you connected the USB cable to uninstall...
User Guide
Page 97
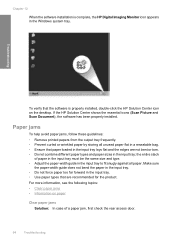
... the edges are recommended for the product. Troubleshooting To verify that the software is complete, the HP Digital Imaging Monitor icon appears in the input tray; the entire stack of a paper jam, first... check the rear access door. 94 Troubleshooting If the HP Solution Center shows the essential icons (Scan Picture and Scan Document), the software has been properly ...• Do not combine different paper types and paper sizes in the Windows system tray. For more information, see the following topics: • Clear paper jams • Information on ...
... the edges are recommended for the product. Troubleshooting To verify that the software is complete, the HP Digital Imaging Monitor icon appears in the input tray; the entire stack of a paper jam, first... check the rear access door. 94 Troubleshooting If the HP Solution Center shows the essential icons (Scan Picture and Scan Document), the software has been properly ...• Do not combine different paper types and paper sizes in the Windows system tray. For more information, see the following topics: • Clear paper jams • Information on ...
User Guide
Page 118
Cause: Printing a borderless image from the photo imaging software that have clasps or windows. Print troubleshooting 115 Solutions are listed in order, with the product. Solution 2: Use the appropriate media Solution: To print a borderless image, ... of envelopes was loaded. For more information, see: Print a borderless image Cause: Use of envelope Solution: Do not use 10 x 15 cm (4 x 6 inch) HP Advanced Photo Papers. Solution 2: Load a different type of inappropriate media. Borderless printing produces unexpected results Try the following solutions to resolve the issue. If this...
Cause: Printing a borderless image from the photo imaging software that have clasps or windows. Print troubleshooting 115 Solutions are listed in order, with the product. Solution 2: Use the appropriate media Solution: To print a borderless image, ... of envelopes was loaded. For more information, see: Print a borderless image Cause: Use of envelope Solution: Do not use 10 x 15 cm (4 x 6 inch) HP Advanced Photo Papers. Solution 2: Load a different type of inappropriate media. Borderless printing produces unexpected results Try the following solutions to resolve the issue. If this...
User Guide
Page 135
...USB cable • Solution 3: Make sure the HP Photosmart Software is installed on your computer • Solution 4: Make sure the HP Photosmart Software is installed on the HP Digital Imaging Monitor icon in the system tray at the far right of the Windows taskbar. If this did not solve the issue..., try scanning again. Solution 3: Make sure the HP Photosmart Software is running on your computer Solution: Open the software you have sufficient computer memory Solution 1:...
...USB cable • Solution 3: Make sure the HP Photosmart Software is installed on your computer • Solution 4: Make sure the HP Photosmart Software is installed on the HP Digital Imaging Monitor icon in the system tray at the far right of the Windows taskbar. If this did not solve the issue..., try scanning again. Solution 3: Make sure the HP Photosmart Software is running on your computer Solution: Open the software you have sufficient computer memory Solution 1:...


