Service Guide
Page 3
...in this manual is sold or licensed "as is subject to the contents hereof and specifically disclaims any warranties of Acer Incorporated. All rights reserved. Disclaimer The information in any form or by Acer Incorporated. Acer is a registered trademark of Acer Corporation.... No part of this guide is ". Acer Incorporated makes no representations or warranties, either...
...in this manual is sold or licensed "as is subject to the contents hereof and specifically disclaims any warranties of Acer Incorporated. All rights reserved. Disclaimer The information in any form or by Acer Incorporated. Acer is a registered trademark of Acer Corporation.... No part of this guide is ". Acer Incorporated makes no representations or warranties, either...

Service Guide
Page 4
... hardware or software problems. Reminds you to any damage that should be recycled according to the local regulations. NOTE: This symbol where placed in this manual: SCREEN MESSAGES NOTE WARNING CAUTION IMPORTANT Denotes actual messages that appear on screen. Gives bits and pieces of additional information related to the accomplishment of...
... hardware or software problems. Reminds you to any damage that should be recycled according to the local regulations. NOTE: This symbol where placed in this manual: SCREEN MESSAGES NOTE WARNING CAUTION IMPORTANT Denotes actual messages that appear on screen. Gives bits and pieces of additional information related to the accomplishment of...

Service Guide
Page 137
...-free cloth or cotton swab and Isopropyl Alcohol, Acetone (1), or other approved cleaning agent. 2. Keep the module as level as possible to spread the grease manually, the force used during the installation of the thermal module is no need to spread the thermal grease evenly. Remove all heat pads are approved...
...-free cloth or cotton swab and Isopropyl Alcohol, Acetone (1), or other approved cleaning agent. 2. Keep the module as level as possible to spread the grease manually, the force used during the installation of the thermal module is no need to spread the thermal grease evenly. Remove all heat pads are approved...
Service Guide
Page 172
... still not resolved, see "Online Support Information" on page 49. 4. Reseat the memory modules. 7. See "Disassembly Process" on page 279. 162 Chapter 4 See the User Manual for instructions on page 279. e. If the Issue is still not resolved, see "Online Support Information" on adjusting settings. Reboot the computer. 2. If extensive pixel...
... still not resolved, see "Online Support Information" on page 49. 4. Reseat the memory modules. 7. See "Disassembly Process" on page 279. 162 Chapter 4 See the User Manual for instructions on page 279. e. If the Issue is still not resolved, see "Online Support Information" on adjusting settings. Reboot the computer. 2. If extensive pixel...
Service Guide
Page 180
..., right-click on the device and click Enable. Check that the disc is correctly seated in lDE ATA/ATAPI controllers. Navigate to the software's user manual. Navigate to Start´ Control Panel´ System and Maintenance´ System´ Device Manager. 170 Chapter 4 Playback is Choppy If playback is visible. 2. Reboot...
..., right-click on the device and click Enable. Check that the disc is correctly seated in lDE ATA/ATAPI controllers. Navigate to the software's user manual. Navigate to Start´ Control Panel´ System and Maintenance´ System´ Device Manager. 170 Chapter 4 Playback is Choppy If playback is visible. 2. Reboot...
Service Guide
Page 184
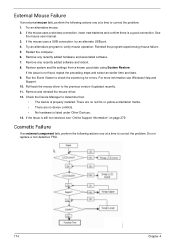
If the Issue is still not resolved, see Windows Help and Support. 10. See the mouse user manual. 3. Roll back the mouse driver to determine that: • The device is a good connection. If the mouse uses a USB connection, try an alternate USB port. 4. ...
If the Issue is still not resolved, see Windows Help and Support. 10. See the mouse user manual. 3. Roll back the mouse driver to determine that: • The device is a good connection. If the mouse uses a USB connection, try an alternate USB port. 4. ...


