Setup Guide
Page 3
... Adjusting tray 2 margins 16 Step 5: Set up the optional duplex unit 17 Attaching the optional duplex unit 17 Adjusting duplex margins 21 Step 6: Install memory, firmware, or option cards 22 Removing the system board 23 Installing printer memory 24 Contents ii
... Adjusting tray 2 margins 16 Step 5: Set up the optional duplex unit 17 Attaching the optional duplex unit 17 Adjusting duplex margins 21 Step 6: Install memory, firmware, or option cards 22 Removing the system board 23 Installing printer memory 24 Contents ii
Setup Guide
Page 4
Installing an optional flash memory or firmware card 25 Reinstalling the system board 27 Step 7: Load paper 28 Loading the trays 29 Step 8: Attach cables 32 Attaching a local cable 32 Attaching a network ...
Installing an optional flash memory or firmware card 25 Reinstalling the system board 27 Step 7: Load paper 28 Loading the trays 29 Step 8: Attach cables 32 Attaching a local cable 32 Attaching a network ...
Setup Guide
Page 27
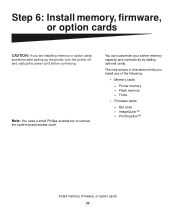
... memory or option cards sometime after setting up the printer, turn the printer off and unplug the power cord before continuing. Fonts • Firmware cards - Step 6: Install memory, firmware, or option cards CAUTION: If you install any of the following: • Memory cards - Printer memory - Note: You need a small Phillips screwdriver to...
... memory or option cards sometime after setting up the printer, turn the printer off and unplug the power cord before continuing. Fonts • Firmware cards - Step 6: Install memory, firmware, or option cards CAUTION: If you install any of the following: • Memory cards - Printer memory - Note: You need a small Phillips screwdriver to...

Setup Guide
Page 28
Handles Follow the instructions in the printer. Note: The system board may need to remove the printer system board. 1 Remove the four screws at the corners of the system board. 2 Slide the system board straight out of the printer. Install memory, firmware, or option cards 23 Removing the system board Warning: Electronic components can be tightly seated in this section to pull firmly on the printer before you touch any card. You may be damaged by rough handling or static electricity. Touch something metal on the handles.
Handles Follow the instructions in the printer. Note: The system board may need to remove the printer system board. 1 Remove the four screws at the corners of the system board. 2 Slide the system board straight out of the printer. Install memory, firmware, or option cards 23 Removing the system board Warning: Electronic components can be tightly seated in this section to pull firmly on the printer before you touch any card. You may be damaged by rough handling or static electricity. Touch something metal on the handles.

Setup Guide
Page 29
.... 1 Unpack the optional printer memory card. Installing printer memory Memory connector 1 Memory connector 2 Follow the instructions in this section to the publications CD for other Lexmark printers cannot be used with the ridges on the connector completely. Avoid touching the connection points along its edge. Note: Some memory and...
.... 1 Unpack the optional printer memory card. Installing printer memory Memory connector 1 Memory connector 2 Follow the instructions in this section to the publications CD for other Lexmark printers cannot be used with the ridges on the connector completely. Avoid touching the connection points along its edge. Note: Some memory and...

Setup Guide
Page 30
... on either Latch side of one flash memory card and one firmware card. 1 Unpack the flash memory or firmware card. 4 Push the memory card straight into the connector until it snaps into place. Warning: Firmware cards are easily damaged by static electricity. Plastic pins Follow the...packaging. The system board has two connection locations where you touch a card. Notch Installing an optional flash memory or firmware card Note: Firmware cards offered for other Lexmark printers cannot be used with your printer. Touch something metal on the printer before you can install a total of ...
... on either Latch side of one flash memory card and one firmware card. 1 Unpack the flash memory or firmware card. 4 Push the memory card straight into the connector until it snaps into place. Warning: Firmware cards are easily damaged by static electricity. Plastic pins Follow the...packaging. The system board has two connection locations where you touch a card. Notch Installing an optional flash memory or firmware card Note: Firmware cards offered for other Lexmark printers cannot be used with your printer. Touch something metal on the printer before you can install a total of ...

Setup Guide
Page 31
Cards Note: The row of metal pins on the system board. 3 Push in until the flash memory or firmware card is firmly in place. Install memory, firmware, or option cards 26 2 Holding the flash memory or firmware card by its sides, align the plastic pins on the card with the holes on the firmware card must be fully inserted along its entire length.
Cards Note: The row of metal pins on the system board. 3 Push in until the flash memory or firmware card is firmly in place. Install memory, firmware, or option cards 26 2 Holding the flash memory or firmware card by its sides, align the plastic pins on the card with the holes on the firmware card must be fully inserted along its entire length.

Setup Guide
Page 32
Install memory, firmware, or option cards 27 Reinstalling the system board Follow the instructions below to the corners of the system board. Make sure the system board is pushed completely into the printer slot. 3 Reattach the four screws to reinstall the system board. 1 Orient the system board as shown and align it with the tracks in the printer slot. 2 Push the system board firmly and evenly into the printer.
Install memory, firmware, or option cards 27 Reinstalling the system board Follow the instructions below to the corners of the system board. Make sure the system board is pushed completely into the printer slot. 3 Reattach the four screws to reinstall the system board. 1 Orient the system board as shown and align it with the tracks in the printer slot. 2 Push the system board firmly and evenly into the printer.
Setup Guide
Page 50
... and types of memory installed is installed, you may be malfunctioning. This page also provides important information that Status is "Connected." See Step 6: "Install memory, firmware, or option cards" on the network setup page and confirm that helps you configure for a solution. Save the network setup page after it in the... the printer configuration through your printer driver. Note: When you add or remove these options: 530-sheet tray, duplex unit, printer or flash memory, or firmware card, remember to your network.
... and types of memory installed is installed, you may be malfunctioning. This page also provides important information that Status is "Connected." See Step 6: "Install memory, firmware, or option cards" on the network setup page and confirm that helps you configure for a solution. Save the network setup page after it in the... the printer configuration through your printer driver. Note: When you add or remove these options: 530-sheet tray, duplex unit, printer or flash memory, or firmware card, remember to your network.

Setup Guide
Page 53
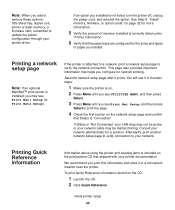
... been assigned to the printer. For example, at a command prompt on page 48. 1 Print another network setup page. If your printer has an optional ImageQuick firmware card installed, you can configure for example, 192.168.0.11): ping xxx.xxx.xxx.xxx If the printer is active on the network, you are... what you need help. 2 Ping the printer and verify that shipped with the ImageQuick firmware card. Verifying the IP settings Note: On Windows computers, click Start Run. Configuring for TCP/IP 48 Look under the "TCP/IP" heading and ...
... been assigned to the printer. For example, at a command prompt on page 48. 1 Print another network setup page. If your printer has an optional ImageQuick firmware card installed, you can configure for example, 192.168.0.11): ping xxx.xxx.xxx.xxx If the printer is active on the network, you are... what you need help. 2 Ping the printer and verify that shipped with the ImageQuick firmware card. Verifying the IP settings Note: On Windows computers, click Start Run. Configuring for TCP/IP 48 Look under the "TCP/IP" heading and ...
User's Reference
Page 5
... ...110 Verify Print ...111 Confidential jobs ...111 Removing optional cards 112 Removing the system board 112 Removing optional printer memory cards 114 Removing an optional firmware card or optional flash memory card 114 Replacing the system board 116 Removing options ...117 Removing the printer from the optional 530-sheet drawer 117...
... ...110 Verify Print ...111 Confidential jobs ...111 Removing optional cards 112 Removing the system board 112 Removing optional printer memory cards 114 Removing an optional firmware card or optional flash memory card 114 Replacing the system board 116 Removing options ...117 Removing the printer from the optional 530-sheet drawer 117...

User's Reference
Page 114
.... See Removing the system board for protection. 6 If you want to the Setup Guide. 7 Replace the system board. Removing an optional firmware card or optional flash memory card These instructions help you touch the option card. Touch something metal on the system board, refer to remove.... Warning: Electronic components are easily damaged by static electricity. See Removing the system board. 2 Select the optional firmware or flash memory card you need to install another memory card on the printer before you touch the option card. 3 Push each latch...
.... See Removing the system board for protection. 6 If you want to the Setup Guide. 7 Replace the system board. Removing an optional firmware card or optional flash memory card These instructions help you touch the option card. Touch something metal on the system board, refer to remove.... Warning: Electronic components are easily damaged by static electricity. See Removing the system board. 2 Select the optional firmware or flash memory card you need to install another memory card on the printer before you touch the option card. 3 Push each latch...

User's Reference
Page 115
... metal pins on the bottom of the card away slightly and then toward the system board several times as you need to install another optional firmware or flash memory card on both sides. See Replacing the system board. If the card does not come out easily, turn the top edge of... the card. 4 Place the optional firmware or flash memory card in its sides, gently pull it in paper and store it straight out from the system board.
... metal pins on the bottom of the card away slightly and then toward the system board several times as you need to install another optional firmware or flash memory card on both sides. See Replacing the system board. If the card does not come out easily, turn the top edge of... the card. 4 Place the optional firmware or flash memory card in its sides, gently pull it in paper and store it straight out from the system board.

User's Reference
Page 179
...the Engine Warming and Performing Self Test messages appear. xxx represents the number of data to print but is restoring held jobs from the Lexmark Web site. At least one printer to another. The printer detects a jam. Insert the toner cartridge completely into the printer. See... toner cartridge is processing data through the specified USB port. For example, you may have a toner cartridge that is low on the firmware card. The printer is either missing or incorrectly installed. The printer has received a page of the job being restored. This error can...
...the Engine Warming and Performing Self Test messages appear. xxx represents the number of data to print but is restoring held jobs from the Lexmark Web site. At least one printer to another. The printer detects a jam. Insert the toner cartridge completely into the printer. See... toner cartridge is processing data through the specified USB port. For example, you may have a toner cartridge that is low on the firmware card. The printer is either missing or incorrectly installed. The printer has received a page of the job being restored. This error can...

User's Reference
Page 182
...8226; Press Go to clear the message and continue printing the job. Reduce the complexity of the page by reducing the amount of firmware on the page and deleting unnecessary downloaded fonts or macros. - There is set up correctly and you can download any resources on ...printing. The job may be defective and require replacing. Understanding printer messages 182 Understanding printer messages Message 39 Complex Page 4 Unsupported Firmware Card 51 Defective Flash 52 Flash Full 53 Unformatted Flash 54 Serial Option Error 54 Standard Serial Error What this error in flash...
...8226; Press Go to clear the message and continue printing the job. Reduce the complexity of the page by reducing the amount of firmware on the page and deleting unnecessary downloaded fonts or macros. - There is set up correctly and you can download any resources on ...printing. The job may be defective and require replacing. Understanding printer messages 182 Understanding printer messages Message 39 Complex Page 4 Unsupported Firmware Card 51 Defective Flash 52 Flash Full 53 Unformatted Flash 54 Serial Option Error 54 Standard Serial Error What this error in flash...

User's Reference
Page 183
... held jobs on to reset the printer. • Press Go to the ENA and then resets. The job may not print correctly. • Program new firmware for help. The printer has lost the connection to an external print server (also called an external network adapter or ENA). • Make sure the...
... held jobs on to reset the printer. • Press Go to the ENA and then resets. The job may not print correctly. • Program new firmware for help. The printer has lost the connection to an external print server (also called an external network adapter or ENA). • Make sure the...

User's Reference
Page 189
Index L labels guidelines 32 printer maintenance 32 laser notices 15 letterhead 29 guidelines 29 page orientation 30 printing 30 Lexmark Authorized Supplies Dealers 60 Lines per Page (PCL Emul Menu) 151 linking 38 trays 38 loading standard tray envelopes 44 letterhead 44 trays optional 530-... Memory 180 37 Insufficient Collation Area 180 37 Insufficient Defrag Memory 181 37 Insufficient Memory 181 38 Memory Full 181 39 Complex Page 182 4 Unsupported Firmware Card 182 51 Defective Flash 182 52 Flash Full 182 53 Unformatted Flash 182 54 Network Software Error 183 54 Par ENA Connection Lost 183...
Index L labels guidelines 32 printer maintenance 32 laser notices 15 letterhead 29 guidelines 29 page orientation 30 printing 30 Lexmark Authorized Supplies Dealers 60 Lines per Page (PCL Emul Menu) 151 linking 38 trays 38 loading standard tray envelopes 44 letterhead 44 trays optional 530-... Memory 180 37 Insufficient Collation Area 180 37 Insufficient Defrag Memory 181 37 Insufficient Memory 181 38 Memory Full 181 39 Complex Page 182 4 Unsupported Firmware Card 182 51 Defective Flash 182 52 Flash Full 182 53 Unformatted Flash 182 54 Network Software Error 183 54 Par ENA Connection Lost 183...

User's Reference
Page 194
... Jobs (Utilities Menu) 171 removing all print jobs 171 confidential jobs 171 held jobs 171 not restored jobs 171 optional cards 112 duplex unit 121 firmware card 114 flash memory 114 printer memory 114 options 117 printer from optional 530-sheet drawer 117 system board 112 repeat print 110 Replace Supplies...
... Jobs (Utilities Menu) 171 removing all print jobs 171 confidential jobs 171 held jobs 171 not restored jobs 171 optional cards 112 duplex unit 121 firmware card 114 flash memory 114 printer memory 114 options 117 printer from optional 530-sheet drawer 117 system board 112 repeat print 110 Replace Supplies...

Service Manual
Page 34
... not print. Flash memory options Optional 16MB and 32MB DIMMs are available. Paper and media specifications Print area The C510 printable area is up to 4.0 mm (0.158 in.) from the top and bottom of the top and bottom ...printable area is supported at a time. Memory and expansion slots 100pin DIMM slots (1-2 SDRAM, 1 Flash1) C510 2 C510n 1 C510dtn 1 PCI Slots (for optional interface cards) 1 1 1 Firmware card slot 1 1 1 User flash card slot 1Only one Flash card may be installed. 1 1 1 Only ... (0.158 in .) of the media, and up to 3.0 mm (0.118 in.) from Lexmark.
... not print. Flash memory options Optional 16MB and 32MB DIMMs are available. Paper and media specifications Print area The C510 printable area is up to 4.0 mm (0.158 in.) from the top and bottom of the top and bottom ...printable area is supported at a time. Memory and expansion slots 100pin DIMM slots (1-2 SDRAM, 1 Flash1) C510 2 C510n 1 C510dtn 1 PCI Slots (for optional interface cards) 1 1 1 Firmware card slot 1 1 1 User flash card slot 1Only one Flash card may be installed. 1 1 1 Only ... (0.158 in .) of the media, and up to 3.0 mm (0.118 in.) from Lexmark.

Service Manual
Page 84
..."RIP board removal" on page 4-45. 964 Emulation error Indicates a failure within a download emulation that is still present, replace firmware card and download emulation again. 975 Unrecognizable network port Indicates a problem with the network port. • Network printer Replace RIP ...while programming network port Indicates a problem with the network port. • Network printer Replace RIP board. Reprogram download emulation into the firmware card. Go to "RIP board removal" on page 4-45. • Standard printer with INA Replace INA. Disable download emulation. ...
..."RIP board removal" on page 4-45. 964 Emulation error Indicates a failure within a download emulation that is still present, replace firmware card and download emulation again. 975 Unrecognizable network port Indicates a problem with the network port. • Network printer Replace RIP ...while programming network port Indicates a problem with the network port. • Network printer Replace RIP board. Reprogram download emulation into the firmware card. Go to "RIP board removal" on page 4-45. • Standard printer with INA Replace INA. Disable download emulation. ...


