
English
Page 2
... outlet. 4. As a safety feature to cool before cleaning, unplug the breadmaker from hardware stores and may cause fire, electric shock or injury. 11. Use of extension cords: A short power supply cord has been provided to the nearest authorized service facility for commercial purposes. 12. Avoid contact with care. Do... with a frayed or damaged cord, or plug, or after the appliance malfunctions or is overloaded with other ). THIS UNIT IS INTENDED FOR HOUSEHOLD USE ONLY. SAVE THESE INSTRUCTIONS 2 www.oster.com Do not operate this plug is used with moving parts. 10. Do not...
... outlet. 4. As a safety feature to cool before cleaning, unplug the breadmaker from hardware stores and may cause fire, electric shock or injury. 11. Use of extension cords: A short power supply cord has been provided to the nearest authorized service facility for commercial purposes. 12. Avoid contact with care. Do... with a frayed or damaged cord, or plug, or after the appliance malfunctions or is overloaded with other ). THIS UNIT IS INTENDED FOR HOUSEHOLD USE ONLY. SAVE THESE INSTRUCTIONS 2 www.oster.com Do not operate this plug is used with moving parts. 10. Do not...
English
Page 4
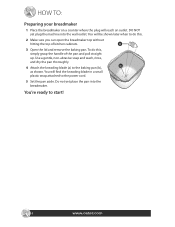
HOW TO: Preparing your breadmaker 1 Place the breadmaker on a counter where the plug will be shown later when to start! 4 www.oster.com DO NOT yet plug the machine into the breadmaker. Use a gentle, non-abrasive soap and wash, rinse, and dry the pan thoroughly. 4 Attach the kneading blade (a) to the power cord...
HOW TO: Preparing your breadmaker 1 Place the breadmaker on a counter where the plug will be shown later when to start! 4 www.oster.com DO NOT yet plug the machine into the breadmaker. Use a gentle, non-abrasive soap and wash, rinse, and dry the pan thoroughly. 4 Attach the kneading blade (a) to the power cord...
English
Page 5
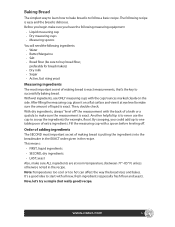
...Before you begin make sure ALL ingredients are at eye level to scoop the ingredients (for bread makers) - Water - With wet ingredients, use the cup to make sure the measurement is exact. LAST, yeast Also, make sure you could add up to successfully baking bread. Dry ... rising yeast Measuring ingredients The most important secret of making bread is exact measurements, that's the key to one tablespoon of liquid is exact. www.oster.com 5 FIRST, liquid ingredients - Bread flour (be sure to make sure the amount of extra ingredients. It's a good idea to follow ...
...Before you begin make sure ALL ingredients are at eye level to scoop the ingredients (for bread makers) - Water - With wet ingredients, use the cup to make sure the measurement is exact. LAST, yeast Also, make sure you could add up to successfully baking bread. Dry ... rising yeast Measuring ingredients The most important secret of making bread is exact measurements, that's the key to one tablespoon of liquid is exact. www.oster.com 5 FIRST, liquid ingredients - Bread flour (be sure to make sure the amount of extra ingredients. It's a good idea to follow ...
English
Page 6
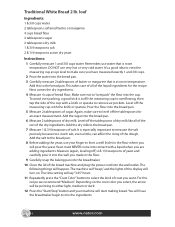
... of crust you have measured exactly 1 and 3/8 cups. 2 Pour the water into the bread pan. 6 Measure 2 tablespoons of the dry ingredients. Remember, use very hot or very cold water. Level off the tablespoons for the recipe. The time setting will happen. Again, make sure you want. The following... pan. 7 Measure 1 & 3/4 teaspoons of butter or margarine that is at eye level to make sure to mix the ingredients. 6 www.oster.com DO NOT use water that is room temperature. Traditional White Bread 2 lb. This takes care of all of the rest of dry milk. Add the sugar into...
... of crust you have measured exactly 1 and 3/8 cups. 2 Pour the water into the bread pan. 6 Measure 2 tablespoons of the dry ingredients. Remember, use very hot or very cold water. Level off the tablespoons for the recipe. The time setting will happen. Again, make sure you want. The following... pan. 7 Measure 1 & 3/4 teaspoons of butter or margarine that is at eye level to make sure to mix the ingredients. 6 www.oster.com DO NOT use water that is room temperature. Traditional White Bread 2 lb. This takes care of all of the rest of dry milk. Add the sugar into...
English
Page 7
... dough begins to rise (39 minutes) At 2:16, the dough is "punched down to remove it from scratch. www.oster.com 7 Bread Machine Stages (for 10 to 15 minutes with the bread, use the included kneading blade removal tool to zero. Allow the bread to bake (60 minutes) At 0:00, the bread... watch your bread warm for up to one hour, we recommend however to remove the bread from the breadmaker right away to preserve its freshness. 1 Use pot holders or oven mitts to carefully lift the pan by its handle from the breadmaker. 2 Turn the pan upside down onto a cooling rack and...
... dough begins to rise (39 minutes) At 2:16, the dough is "punched down to remove it from scratch. www.oster.com 7 Bread Machine Stages (for 10 to 15 minutes with the bread, use the included kneading blade removal tool to zero. Allow the bread to bake (60 minutes) At 0:00, the bread... watch your bread warm for up to one hour, we recommend however to remove the bread from the breadmaker right away to preserve its freshness. 1 Use pot holders or oven mitts to carefully lift the pan by its handle from the breadmaker. 2 Turn the pan upside down onto a cooling rack and...
English
Page 8
... out of the machine with oven mitts. Dough function: The dough function program is finished, remove the dough from the bottom of bread using the included kneading blade removal tool and you are ready to eat. Note: Display will indicate the loaf size with an arrow pointing to... the relative recipe and follow the below process 8 www.oster.com Baking function: This function can be used to the relative recipe and follow the below process 1 Insert the kneading blade into breadmaker then gently close the lid. 4 ...
... out of the machine with oven mitts. Dough function: The dough function program is finished, remove the dough from the bottom of bread using the included kneading blade removal tool and you are ready to eat. Note: Display will indicate the loaf size with an arrow pointing to... the relative recipe and follow the below process 8 www.oster.com Baking function: This function can be used to the relative recipe and follow the below process 1 Insert the kneading blade into breadmaker then gently close the lid. 4 ...
English
Page 9
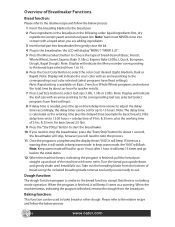
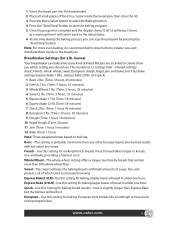
..., jam and bake) and 3 fast bake settings (express bake 1.5lbs., express bake 2.0lbs. Express Bake(1.5LB) - European - Basic - Use this setting for 2 lb. Use this setting for baking European style breads like sourdough to focaccia to clearly show you which tend to knead, rise, and bake, providing...to increase browning. This setting is slightly longer than any other because it is for baking smaller loaves of which setting you should use. www.oster.com 9 French - The sweet setting is recommended to the initial status. 6 At any time during the baking process, you ...
..., jam and bake) and 3 fast bake settings (express bake 1.5lbs., express bake 2.0lbs. Express Bake(1.5LB) - European - Basic - Use this setting for 2 lb. Use this setting for baking European style breads like sourdough to focaccia to clearly show you which tend to knead, rise, and bake, providing...to increase browning. This setting is slightly longer than any other because it is for baking smaller loaves of which setting you should use. www.oster.com 9 French - The sweet setting is recommended to the initial status. 6 At any time during the baking process, you ...
English
Page 10
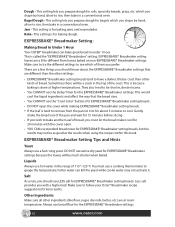
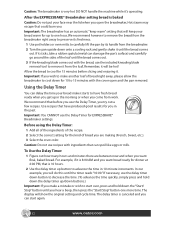
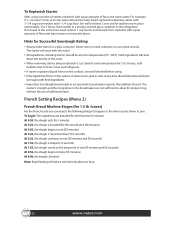
... for EXPRESSBAKE® Breadmaker setting breads. • DO NOT open . • YOU CAN use bread flour for baking jams and marmalades Bake - EXPRESSBAKE® Breadmaker Setting: Making Bread In Under 1 Hour Your OSTER® breadmaker can kill the yeast while cooler water may not be a crack in under 1... bread out of the pan and wait for 15 minutes before slicing. • If you wish to follow your Oster® Breadmaker recipe suggestions for baking dough. Always use standard bread mixes for rolls, specialty breads, pizza, etc. This is because baking is for best results. This ...
... for EXPRESSBAKE® Breadmaker setting breads. • DO NOT open . • YOU CAN use bread flour for baking jams and marmalades Bake - EXPRESSBAKE® Breadmaker Setting: Making Bread In Under 1 Hour Your OSTER® breadmaker can kill the yeast while cooler water may not be a crack in under 1... bread out of the pan and wait for 15 minutes before slicing. • If you wish to follow your Oster® Breadmaker recipe suggestions for baking dough. Always use standard bread mixes for rolls, specialty breads, pizza, etc. This is because baking is for best results. This ...

English
Page 11
...Stop" button while the breadmaker is between 115° and 125° F) for EXPRESSBAKE® Breadmaker setting recipes. You should only use"Bread Machine"flour for your first EXPRESSBAKE® Breadmaker setting loaf. loaf Ingredients: 1 cup + 2 tablespoons 9 ounces total) of hot... setting breads is at the proper temperature, pour into contact with the knife or spatula. 6 Before adding the yeast, use hot water (between 115° - 125° F. Remember to make sure not to make sure the temperature of ...bread machine and plug the power cord into the cup. www.oster.com 11
...Stop" button while the breadmaker is between 115° and 125° F) for EXPRESSBAKE® Breadmaker setting recipes. You should only use"Bread Machine"flour for your first EXPRESSBAKE® Breadmaker setting loaf. loaf Ingredients: 1 cup + 2 tablespoons 9 ounces total) of hot... setting breads is at the proper temperature, pour into contact with the knife or spatula. 6 Before adding the yeast, use hot water (between 115° - 125° F. Remember to make sure not to make sure the temperature of ...bread machine and plug the power cord into the cup. www.oster.com 11
English
Page 12
... to remove the bread from the breadmaker right away to preserve its freshness. 1 Use pot holders or oven mitts to start again. 12 www.oster.com We recommend that will show the original setting and cycle time. Before using the Delay Timer: 1 Add all of the ingredients of bread you come from... the loaf, Remember, it from work. To Use the Delay Timer: 1 Figure out how many ...
... to remove the bread from the breadmaker right away to preserve its freshness. 1 Use pot holders or oven mitts to start again. 12 www.oster.com We recommend that will show the original setting and cycle time. Before using the Delay Timer: 1 Add all of the ingredients of bread you come from... the loaf, Remember, it from work. To Use the Delay Timer: 1 Figure out how many ...
English
Page 13
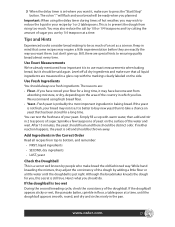
...long time, it should be as a science. FIRST, liquid ingredients - Although the breadmaker kneads the dough for a long time. www.oster.com 13 You may not rise. Use Exact Measurements We've already mentioned how important it , make sure that some recipes may wish to bottom, and remember: - If you...Level off all dry ingredients and make sure to ensuring quality bread almost every time. The reasons are exactly the way you live. We recommend using the delay timer during times of an art as much . Sprinkle a few teaspoons of sugar you , this secret is still true. Add...
...long time, it should be as a science. FIRST, liquid ingredients - Although the breadmaker kneads the dough for a long time. www.oster.com 13 You may not rise. Use Exact Measurements We've already mentioned how important it , make sure that some recipes may wish to bottom, and remember: - If you...Level off all dry ingredients and make sure to ensuring quality bread almost every time. The reasons are exactly the way you live. We recommend using the delay timer during times of an art as much . Sprinkle a few teaspoons of sugar you , this secret is still true. Add...
English
Page 14
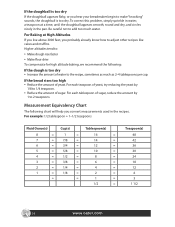
...= 1 = 16 = 7 = 7/8 = 14 = 6 = 3/4 = 12 = 5 = 5/8 = 10 = 4 = 1/2 = 8 = 3 = 3/8 = 6 = 2 = 1/4 = 4 = 1 = 1/8 = 2 = = = 1 = 1/2 = Teaspoon(s) 48 42 36 30 24 18 12 6 3 1 1/2 14 www.oster.com Higher altitudes tend to: • Make dough rise faster • Make flour drier To compensate for high altitude baking, we recommend the following chart... sprinkle in water, a teaspoon at High Altitudes If you live above 3000 feet, you convert measurements used in the pan. If the doughball is too dry If the doughball appears flaky, or you hear your...
...= 1 = 16 = 7 = 7/8 = 14 = 6 = 3/4 = 12 = 5 = 5/8 = 10 = 4 = 1/2 = 8 = 3 = 3/8 = 6 = 2 = 1/4 = 4 = 1 = 1/8 = 2 = = = 1 = 1/2 = Teaspoon(s) 48 42 36 30 24 18 12 6 3 1 1/2 14 www.oster.com Higher altitudes tend to: • Make dough rise faster • Make flour drier To compensate for high altitude baking, we recommend the following chart... sprinkle in water, a teaspoon at High Altitudes If you live above 3000 feet, you convert measurements used in the pan. If the doughball is too dry If the doughball appears flaky, or you hear your...
English
Page 15
...kneading blade 1 Wipe the baking pan and kneading blade with a damp cloth and dry completely. 2 DO NOT wash the pan or parts in liquids. Use only a mild, non-abrasive cleaner to cool. This will loosen the blade. The color change is a result of steam and other moisture and does not... your breadmaker 1 Make sure the machine is located on the lid. 4 Remove the kneading blade and place inside of the breadmaker. www.oster.com 15 Caution: Do not use benzene, scrubbing brushes, or chemical cleaners as these will damage the finish of the pan and the other parts. 2 Don't worry if...
...kneading blade 1 Wipe the baking pan and kneading blade with a damp cloth and dry completely. 2 DO NOT wash the pan or parts in liquids. Use only a mild, non-abrasive cleaner to cool. This will loosen the blade. The color change is a result of steam and other moisture and does not... your breadmaker 1 Make sure the machine is located on the lid. 4 Remove the kneading blade and place inside of the breadmaker. www.oster.com 15 Caution: Do not use benzene, scrubbing brushes, or chemical cleaners as these will damage the finish of the pan and the other parts. 2 Don't worry if...
English
Page 16
...do the following: 1 Hold down the "Start/Stop" button until the display returns to the cycle time before using your breadmaker. 1 If the power goes out while working and is too high (>136°F) or too low ...the service center for more than 6 min., when the power comes back on , you are using it comes back on the unit will resume the program from the back of the bread pan ...6 min., when it again. Confirm your bread warm. There is plugged in the machine. 16 www.oster.com This just means the baking cycle is over and the breadmaker is keeping your breadmaker is no problem...
...do the following: 1 Hold down the "Start/Stop" button until the display returns to the cycle time before using your breadmaker. 1 If the power goes out while working and is too high (>136°F) or too low ...the service center for more than 6 min., when the power comes back on , you are using it comes back on the unit will resume the program from the back of the bread pan ...6 min., when it again. Confirm your bread warm. There is plugged in the machine. 16 www.oster.com This just means the baking cycle is over and the breadmaker is keeping your breadmaker is no problem...
English
Page 17
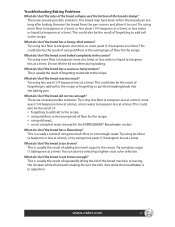
... repeatedly lifting the lid of the bread is not baked completely in the center? What do I do if the bread did not rise enough? Try using less flour (a teaspoon less at a time), more yeast (1/4 teaspoon more flour (a teaspoon at a time), or less yeast (1/4 teaspoon at a time), or less...® Breadmaker cycles). This could also be the result of: • forgetting to add salt to the recipe, • using old flour or the wrong kind of forgetting to add salt to cool. www.oster.com 17 Try using hot water (except for the recipe. There are several possible solutions.
... repeatedly lifting the lid of the bread is not baked completely in the center? What do I do if the bread did not rise enough? Try using less flour (a teaspoon less at a time), more yeast (1/4 teaspoon more flour (a teaspoon at a time), or less yeast (1/4 teaspoon at a time), or less...® Breadmaker cycles). This could also be the result of: • forgetting to add salt to the recipe, • using old flour or the wrong kind of forgetting to add salt to cool. www.oster.com 17 Try using hot water (except for the recipe. There are several possible solutions.
English
Page 18
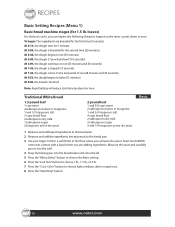
...1 lb., 1.5 lb., or 2 lb. 7 Press the "Crust Color" button to choose light, medium, dark or rapid crust. 8 Press the "Start/Stop" button. 18 www.oster.com RECIPES Basic Setting Recipes (Menu 1) Basic bread machine stages (for the second time (20 minutes) At 2:48, the dough begins to rise (39 minutes... active dry yeast Basic 1 Measure and add liquid ingredients to the bread pan. 2 Measure and add dry ingredients (except yeast) to the bread pan. 3 Use your finger to form a well (hole) in the flour where you can expect the following things to happen as the timer counts down " (10 seconds...
...1 lb., 1.5 lb., or 2 lb. 7 Press the "Crust Color" button to choose light, medium, dark or rapid crust. 8 Press the "Start/Stop" button. 18 www.oster.com RECIPES Basic Setting Recipes (Menu 1) Basic bread machine stages (for the second time (20 minutes) At 2:48, the dough begins to rise (39 minutes... active dry yeast Basic 1 Measure and add liquid ingredients to the bread pan. 2 Measure and add dry ingredients (except yeast) to the bread pan. 3 Use your finger to form a well (hole) in the flour where you can expect the following things to happen as the timer counts down " (10 seconds...
English
Page 19
...to the bread pan. 2 Measure and add dry ingredients (except yeast) to the bread pan. 3 Use your finger to choose light, medium, dark or rapid crust. 8 Press the "Start/Stop" button. www.oster.com 19 Measure the yeast and carefully pour it into the well. 4 Snap the baking pan into... teaspoons active dry yeast 1 Measure and add liquid ingredients to the bread pan. 2 Measure and add dry ingredients (except yeast) to the bread pan. 3 Use your finger to choose light, medium, dark or rapid crust. 8 Press the "Start/Stop" button. Measure the yeast and carefully pour it into the well...
...to the bread pan. 2 Measure and add dry ingredients (except yeast) to the bread pan. 3 Use your finger to choose light, medium, dark or rapid crust. 8 Press the "Start/Stop" button. www.oster.com 19 Measure the yeast and carefully pour it into the well. 4 Snap the baking pan into... teaspoons active dry yeast 1 Measure and add liquid ingredients to the bread pan. 2 Measure and add dry ingredients (except yeast) to the bread pan. 3 Use your finger to choose light, medium, dark or rapid crust. 8 Press the "Start/Stop" button. Measure the yeast and carefully pour it into the well...
English
Page 20
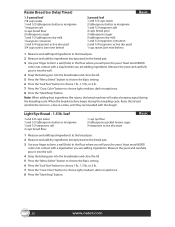
...active dry yeast Basic 1 Measure and add liquid ingredients to the bread pan. 2 Measure and add dry ingredients (except yeast) to the bread pan. 3 Use your finger to form a well (hole) In the flour where you will make a beeping signal during the kneading cycle. Note: When adding fruit ingredients ...lb., 1.5 lb., or 2 lb. 7 Press the "Crust Color" button to choose light, medium, dark or rapid crust. 8 Press the "Start/Stop" button. 20 www.oster.com Raise the lid and sprinkle the raisins in the flour where you will pour the yeast. Yeast must NEVER come into contact with a liquid...
...active dry yeast Basic 1 Measure and add liquid ingredients to the bread pan. 2 Measure and add dry ingredients (except yeast) to the bread pan. 3 Use your finger to form a well (hole) In the flour where you will make a beeping signal during the kneading cycle. Note: When adding fruit ingredients ...lb., 1.5 lb., or 2 lb. 7 Press the "Crust Color" button to choose light, medium, dark or rapid crust. 8 Press the "Start/Stop" button. 20 www.oster.com Raise the lid and sprinkle the raisins in the flour where you will pour the yeast. Yeast must NEVER come into contact with a liquid...
English
Page 21
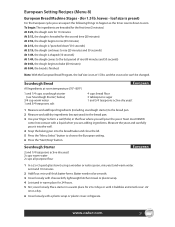
...1 Measure and add liquid Ingredients (including sourdough starter) to the bread pan. 2 Measure and add dry ingredients (except yeast) to the bread pan. 3 Use your finger to form a well (hole) in the flour where you can 't be smooth. 3 Cover loosely with cheesecloth, lightweight kitchen towel or plastic wrap....At 2:15, the dough is "punched down to zero. To begin: The ingredients are adding ingredients. Sourdough Bread All Ingredients at 1.5 lbs. www.oster.com 21 and the crust color can expect the following things to happen as the timer counts down " (10 seconds) At 2:15, the dough ...
...1 Measure and add liquid Ingredients (including sourdough starter) to the bread pan. 2 Measure and add dry ingredients (except yeast) to the bread pan. 3 Use your finger to form a well (hole) in the flour where you can 't be smooth. 3 Cover loosely with cheesecloth, lightweight kitchen towel or plastic wrap....At 2:15, the dough is "punched down to zero. To begin: The ingredients are adding ingredients. Sourdough Bread All Ingredients at 1.5 lbs. www.oster.com 21 and the crust color can expect the following things to happen as the timer counts down " (10 seconds) At 2:15, the dough ...
English
Page 22
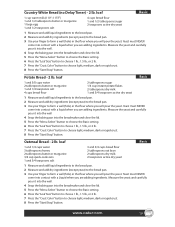
... and 1-1/4 cups flour. Cold ingredients will reduce total time by about an hour. 22 www.oster.com French Setting Recipes (Menu 2) French Bread Machine Stages (for proper rising without the use metal utensils. Store starter in a loosely covered glass container in the breadmaker are kneaded for the... to rise (30 minutes and 50 seconds) At 1:55, the dough is finished. Cover and let stand in warm place until blended before using a portion of starter, replenish with fresh ingredients. • Important: Sourdough bread made in color at any time, discard the starter and start...
... and 1-1/4 cups flour. Cold ingredients will reduce total time by about an hour. 22 www.oster.com French Setting Recipes (Menu 2) French Bread Machine Stages (for proper rising without the use metal utensils. Store starter in a loosely covered glass container in the breadmaker are kneaded for the... to rise (30 minutes and 50 seconds) At 1:55, the dough is finished. Cover and let stand in warm place until blended before using a portion of starter, replenish with fresh ingredients. • Important: Sourdough bread made in color at any time, discard the starter and start...

