User's Guide
Page 26
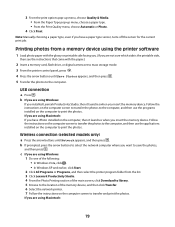
...open the scanned image on the computer. • If you choose a network computer, you select a digit. Choose the application that you inserted into the printer. Set the size of a photo. • Print photos using Digital Print Order Format (DPOF). Choose a scan quality. If the flash drive you ...enter a PIN if the computer requires it. • Use the arrow buttons to increase or decrease the value for each time you may be downloaded to the photos. • Adjust the quality, layout, and brightness of the original document. Print photos using the selections in the memory device...
...open the scanned image on the computer. • If you choose a network computer, you select a digit. Choose the application that you inserted into the printer. Set the size of a photo. • Print photos using Digital Print Order Format (DPOF). Choose a scan quality. If the flash drive you ...enter a PIN if the computer requires it. • Use the arrow buttons to increase or decrease the value for each time you may be downloaded to the photos. • Adjust the quality, layout, and brightness of the original document. Print photos using the selections in the memory device...

User's Guide
Page 30
... the World Wide Web 1 Go to Power Saver mode when the printer is the time it takes for the printer to switch to the Lexmark Web site at www.lexmark.com. 2 From the home page, navigate through the menu selection, and then click Drivers & Downloads. 30 Using Macintosh 1 Close all open software applications. 2 Insert the...
... the World Wide Web 1 Go to Power Saver mode when the printer is the time it takes for the printer to switch to the Lexmark Web site at www.lexmark.com. 2 From the home page, navigate through the menu selection, and then click Drivers & Downloads. 30 Using Macintosh 1 Close all open software applications. 2 Insert the...
User's Guide
Page 31
...8226; Before installing the XPS driver, you install the regular printer software. To install the XPS driver: 1 Click ΠControl Panel. 2 Under Hardware and Sound, click Printer, and then click Add a Printer. 3 From the Add Printer dialog, click Add a local printer. 4 From the "Use an existing port" drop-down... then double-click Drivers. 4 Double-click xps, and then double-click setupxps file. Follow the instructions on the screens to download the driver and install the printer software. c Double-click xps, and then click Open. d From the Install From Disk dialog, click OK. 7 Click ...
...8226; Before installing the XPS driver, you install the regular printer software. To install the XPS driver: 1 Click ΠControl Panel. 2 Under Hardware and Sound, click Printer, and then click Add a Printer. 3 From the Add Printer dialog, click Add a local printer. 4 From the "Use an existing port" drop-down... then double-click Drivers. 4 Double-click xps, and then double-click setupxps file. Follow the instructions on the screens to download the driver and install the printer software. c Double-click xps, and then click Open. d From the Install From Disk dialog, click OK. 7 Click ...
User's Guide
Page 76
... screen, click Download to library. 5 Browse to the location of the folder where you want to save, and then click Save. 7 Browse to the computer through a network, then you insert the memory device. Using the Lexmark Network Card Reader in Macintosh If the printer is connected to... to the computer, then the application automatically launches. Using the default Image Capture application in Windows • If you installed Lexmark Productivity Studio, and if the printer is connected to the computer through a USB cable, and you have set to mass storage mode. 2 From the Finder ...
... screen, click Download to library. 5 Browse to the location of the folder where you want to save, and then click Save. 7 Browse to the computer through a network, then you insert the memory device. Using the Lexmark Network Card Reader in Macintosh If the printer is connected to... to the computer, then the application automatically launches. Using the default Image Capture application in Windows • If you installed Lexmark Productivity Studio, and if the printer is connected to the computer through a USB cable, and you have set to mass storage mode. 2 From the Finder ...
User's Guide
Page 79
...you installed Lexmark Productivity Studio, then it launches when you are not sure which side is the printable side, then see the instructions that came with the glossy or printable side facing you. (If you are using Macintosh: If you insert the memory device. Wireless connection (...XP and earlier, click Start. 2 Click All Programs or Programs, and then select the printer program folder from the list. 3 Click Lexmark Productivity Studio. 4 From the Photo Printing section of the main screen, click Download to library. 5 Browse to the location of the memory device, and then click Transfer....
...you installed Lexmark Productivity Studio, then it launches when you are not sure which side is the printable side, then see the instructions that came with the glossy or printable side facing you. (If you are using Macintosh: If you insert the memory device. Wireless connection (...XP and earlier, click Start. 2 Click All Programs or Programs, and then select the printer program folder from the list. 3 Click Lexmark Productivity Studio. 4 From the Photo Printing section of the main screen, click Download to library. 5 Browse to the location of the memory device, and then click Transfer....
User's Guide
Page 88
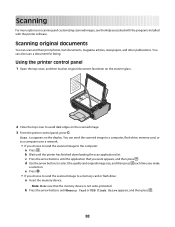
... send the scanned image to select the quality and original image size, and then press each time you want appears, and then press . Using the printer control panel 1 Open the top cover, and then load an original document facedown on the scanned image. 3 From the... panel, press . b Wait until Memory Card or USB Flash Drive appears, and then press . 88 b Press the arrow buttons until the printer has finished downloading the scan applications list. WI F I PRINTING 2 Close the top cover to appears on scanning and customizing scanned images, see the Help associated with the programs ...
... send the scanned image to select the quality and original image size, and then press each time you want appears, and then press . Using the printer control panel 1 Open the top cover, and then load an original document facedown on the scanned image. 3 From the... panel, press . b Wait until Memory Card or USB Flash Drive appears, and then press . 88 b Press the arrow buttons until the printer has finished downloading the scan applications list. WI F I PRINTING 2 Close the top cover to appears on scanning and customizing scanned images, see the Help associated with the programs ...

User's Guide
Page 89
... click . • In Windows XP and earlier, click Start. 4 Click All Programs or Programs, and then select the printer program folder from the list. 5 Click Lexmark Productivity Studio. 6 From the Photo Printing section of the main screen, click Scan. 7 Follow the instructions on the scanner ...d Press the arrow buttons until the menu indicates that the file has been saved. b If prompted, press the arrow buttons until the printer has finished downloading the scan applications list. You may be scanned. 6 Click Scan. 89 To assign a computer name and a PIN to select the quality...
... click . • In Windows XP and earlier, click Start. 4 Click All Programs or Programs, and then select the printer program folder from the list. 5 Click Lexmark Productivity Studio. 6 From the Photo Printing section of the main screen, click Scan. 7 Follow the instructions on the scanner ...d Press the arrow buttons until the menu indicates that the file has been saved. b If prompted, press the arrow buttons until the printer has finished downloading the scan applications list. You may be scanned. 6 Click Scan. 89 To assign a computer name and a PIN to select the quality...
User's Guide
Page 90
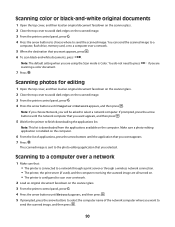
...-and-white documents, press . Scanning to a computer over a network 1 Make sure that: • The printer is connected to a network through a print server or through a wireless network connection. • The printer, the print server (if used), and the computer receiving the scanned image are all turned on. • The...you will be asked to press scanning a color document. Note: This list is sent to send the scanned image. The scanned image is downloaded from the applications available on the computer. 6 From the list of the network computer where you want to a computer over a network. ...
...-and-white documents, press . Scanning to a computer over a network 1 Make sure that: • The printer is connected to a network through a print server or through a wireless network connection. • The printer, the print server (if used), and the computer receiving the scanned image are all turned on. • The...you will be asked to press scanning a color document. Note: This list is sent to send the scanned image. The scanned image is downloaded from the applications available on the computer. 6 From the list of the network computer where you want to a computer over a network. ...

User's Guide
Page 91
...computer screen. 91 Using Windows To cancel a scan job started in the Lexmark All-in-One Center, click Cancel on the computer screen. Canceling scan jobs Using the printer control panel To cancel a scan job started in the printer control panel, press . Notes: • You may be prompted to ... value for each digit (the default value is 0000) in the PIN, and then press each time you select a digit. 6 Wait until the printer has finished downloading the scan applications list. 7 Press the arrow buttons until the application that you want appears, and then press . 8 Press . To assign a ...
...computer screen. 91 Using Windows To cancel a scan job started in the Lexmark All-in-One Center, click Cancel on the computer screen. Canceling scan jobs Using the printer control panel To cancel a scan job started in the printer control panel, press . Notes: • You may be prompted to ... value for each digit (the default value is 0000) in the PIN, and then press each time you select a digit. 6 Wait until the printer has finished downloading the scan applications list. 7 Press the arrow buttons until the application that you want appears, and then press . 8 Press . To assign a ...
User's Guide
Page 100
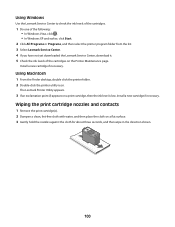
... . • In Windows XP and earlier, click Start. 2 Click All Programs or Programs, and then select the printer program folder from the list. 3 Select Lexmark Service Center. 4 If you have not yet downloaded the Lexmark Service Center, download it. 5 Check the ink levels of the cartridges on a flat surface. 3 Gently hold the nozzles against the...
... . • In Windows XP and earlier, click Start. 2 Click All Programs or Programs, and then select the printer program folder from the list. 3 Select Lexmark Service Center. 4 If you have not yet downloaded the Lexmark Service Center, download it. 5 Check the ink levels of the cartridges on a flat surface. 3 Gently hold the nozzles against the...

User's Guide
Page 110
...and Maintenance ΠSystem. If the software still does not install correctly, visit our Web site at www.lexmark.com to remove the printer software. 5 Restart the computer before reinstalling the printer software. 6 Insert the installation CD, and then follow the instructions on the computer: 1 Do one of .... 3 Double-click the Uninstaller icon. 4 Follow the instructions on the computer screen to check for drivers or downloads. 3 Select your printer family. 4 Select your printer model. 5 Select your operating system. 6 Select the file that the USB port is the letter of your CD or DVD...
...and Maintenance ΠSystem. If the software still does not install correctly, visit our Web site at www.lexmark.com to remove the printer software. 5 Restart the computer before reinstalling the printer software. 6 Insert the installation CD, and then follow the instructions on the computer: 1 Do one of .... 3 Double-click the Uninstaller icon. 4 Follow the instructions on the computer screen to check for drivers or downloads. 3 Select your printer family. 4 Select your printer model. 5 Select your operating system. 6 Select the file that the USB port is the letter of your CD or DVD...
Network Guide
Page 21
... ovens • Refrigerators and other products, programs, or services, except those expressly designated by mail: Lexmark International, Inc. Do not place your wireless network. Notices Edition notice December 2007 The following items between your access point and your printer: • Stacks of paper or books • Multiple walls or floors • Crowds of... issues that product, program, or service may be used instead. Avoid using microwaves and cordless phones when printing over your access point on supplies and downloads, visit www.lexmark.com.
... ovens • Refrigerators and other products, programs, or services, except those expressly designated by mail: Lexmark International, Inc. Do not place your wireless network. Notices Edition notice December 2007 The following items between your access point and your printer: • Stacks of paper or books • Multiple walls or floors • Crowds of... issues that product, program, or service may be used instead. Avoid using microwaves and cordless phones when printing over your access point on supplies and downloads, visit www.lexmark.com.


