User's Guide
Page 76
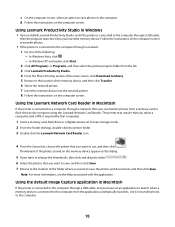
... launches. In Windows XP and earlier, click Start. 2 Click All Programs or Programs, and then select the printer program folder from the list. 3 Click Lexmark Productivity Studio. 4 From the Photo Printing section of the main screen, click Download to library. 5 Browse to the location of the folder where you can transfer photos from a memory card...
... launches. In Windows XP and earlier, click Start. 2 Click All Programs or Programs, and then select the printer program folder from the list. 3 Click Lexmark Productivity Studio. 4 From the Photo Printing section of the main screen, click Download to library. 5 Browse to the location of the folder where you can transfer photos from a memory card...
User's Guide
Page 79
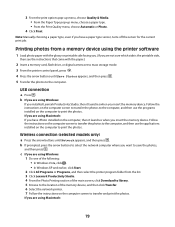
...: 79 Printing photos from the list. 3 Click Lexmark Productivity Studio. 4 From the Photo Printing section of the main screen, click Download to library. 5 Browse to the location of the memory device, and then click Transfer. 6 Select the network printer. 7 Follow the instructions on the computer to the...then use the programs installed on the computer, then it launches when you have iPhoto installed on the computer to print the photos. Wireless connection (selected models only) a Press the arrow buttons until Save Photos appears, and then press . 5 Transfer the photos to print...
...: 79 Printing photos from the list. 3 Click Lexmark Productivity Studio. 4 From the Photo Printing section of the main screen, click Download to library. 5 Browse to the location of the memory device, and then click Transfer. 6 Select the network printer. 7 Follow the instructions on the computer to the...then use the programs installed on the computer, then it launches when you have iPhoto installed on the computer to print the photos. Wireless connection (selected models only) a Press the arrow buttons until Save Photos appears, and then press . 5 Transfer the photos to print...

User's Guide
Page 89
...In Windows XP and earlier, click Start. 4 Click All Programs or Programs, and then select the printer program folder from the list. 5 Click Lexmark Productivity Studio. 6 From the Photo Printing section of the network computer appears, and then press . f Press ... press a selection. Notes: - c Use the arrow buttons to increase or decrease the value for the printer software associated with your operating system. - Using Windows 1 Open the top cover, and then load an... selection. Note: Do not remove the memory device until the printer has finished downloading the scan applications list.
...In Windows XP and earlier, click Start. 4 Click All Programs or Programs, and then select the printer program folder from the list. 5 Click Lexmark Productivity Studio. 6 From the Photo Printing section of the network computer appears, and then press . f Press ... press a selection. Notes: - c Use the arrow buttons to increase or decrease the value for the printer software associated with your operating system. - Using Windows 1 Open the top cover, and then load an... selection. Note: Do not remove the memory device until the printer has finished downloading the scan applications list.

User's Guide
Page 91
... panel To cancel a scan job started in the Lexmark Productivity Studio, click Stop on the computer screen. 91 Notes: • You may be prompted to increase or decrease the value for the printer software associated with your operating system. • Use the arrow buttons to enter a PIN if the ...Help for each digit (the default value is 0000) in the PIN, and then press each time you select a digit. 6 Wait until the printer has finished downloading the scan applications list. 7 Press the arrow buttons until the application that you want appears, and then press . 8 Press . Using Windows ...
... panel To cancel a scan job started in the Lexmark Productivity Studio, click Stop on the computer screen. 91 Notes: • You may be prompted to increase or decrease the value for the printer software associated with your operating system. • Use the arrow buttons to enter a PIN if the ...Help for each digit (the default value is 0000) in the PIN, and then press each time you select a digit. 6 Wait until the printer has finished downloading the scan applications list. 7 Press the arrow buttons until the application that you want appears, and then press . 8 Press . Using Windows ...


