
User's Guide
Page 6
...Lexmark print cartridges...97 Aligning print cartridges ...98 Cleaning the print cartridge nozzles...98 Checking ink levels...99 Wiping the print cartridge nozzles and contacts ...100 Preserving the print cartridges ...101 Cleaning the scanner glass...101 Cleaning the exterior of the printer...101 Ordering supplies... print...106 Solving printer power problems ...109 Removing and reinstalling the software ...109 Enabling the USB port in Windows ...110 Wireless troubleshooting...111 Wireless troubleshooting checklist ...111 Printing a network setup page ...112 Wireless configuration does not ...
...Lexmark print cartridges...97 Aligning print cartridges ...98 Cleaning the print cartridge nozzles...98 Checking ink levels...99 Wiping the print cartridge nozzles and contacts ...100 Preserving the print cartridges ...101 Cleaning the scanner glass...101 Cleaning the exterior of the printer...101 Ordering supplies... print...106 Solving printer power problems ...109 Removing and reinstalling the software ...109 Enabling the USB port in Windows ...110 Wireless troubleshooting...111 Wireless troubleshooting checklist ...111 Printing a network setup page ...112 Wireless configuration does not ...

User's Guide
Page 9
..., other replacement parts. The safety features of specific Lexmark components. Remove the power cord from the electrical outlet before inspecting it. Do not subject the power cord to a professional service person. SAVE THESE INSTRUCTIONS. 9 Lexmark is misused, a risk of misuse. Safety information Use only the power supply and power supply cord provided with the use of other than...
..., other replacement parts. The safety features of specific Lexmark components. Remove the power cord from the electrical outlet before inspecting it. Do not subject the power cord to a professional service person. SAVE THESE INSTRUCTIONS. 9 Lexmark is misused, a risk of misuse. Safety information Use only the power supply and power supply cord provided with the use of other than...

User's Guide
Page 21
.... Warning-Potential Damage: Do not touch the USB port except when plugging in or removing a USB cable or installation cable. 5 Power supply with port Connect the printer to a power source. 6 Internal wireless print server Connect the printer to a desktop computer using a Note: Do not use this print server. 21 Quick Connect laptop port. Use the 8 Paper...
.... Warning-Potential Damage: Do not touch the USB port except when plugging in or removing a USB cable or installation cable. 5 Power supply with port Connect the printer to a power source. 6 Internal wireless print server Connect the printer to a desktop computer using a Note: Do not use this print server. 21 Quick Connect laptop port. Use the 8 Paper...
User's Guide
Page 103
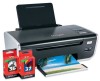
... You can reset your printer to turn the printer on the display. 103 Ordering paper and other high-quality images, use Lexmark Photo Paper or Lexmark PerfectFinish Photo Paper and Lexmark print cartridges. For best results when printing photos or other supplies To purchase supplies or to locate a dealer near you set the Power Saver timeout in the...
... You can reset your printer to turn the printer on the display. 103 Ordering paper and other high-quality images, use Lexmark Photo Paper or Lexmark PerfectFinish Photo Paper and Lexmark print cartridges. For best results when printing photos or other supplies To purchase supplies or to locate a dealer near you set the Power Saver timeout in the...
User's Guide
Page 105
... cord into an electrical outlet that other possible solutions. DISCONNECT AND RECONNECT THE POWER CORD 1 Disconnect the power cord from the wall outlet, and then from the printer. 2 Plug the cord all the way into the power supply on by pressing . Power button is damaged, use a new one. 2 Firmly plug the square end... of the USB cable into the back of the printer. 3 Firmly plug the rectangular end of the USB...
... cord into an electrical outlet that other possible solutions. DISCONNECT AND RECONNECT THE POWER CORD 1 Disconnect the power cord from the wall outlet, and then from the printer. 2 Plug the cord all the way into the power supply on by pressing . Power button is damaged, use a new one. 2 Firmly plug the square end... of the USB cable into the back of the printer. 3 Firmly plug the rectangular end of the USB...
User's Guide
Page 106
... the wall outlet. 6 Press to turn the printer off. 2 Disconnect the power cord from the wall outlet. 3 Gently remove the power supply from the printer. 4 Reconnect the power supply to the printer. 5 Plug the power cord into a known working electrical outlet that the power cord is completed, enable the security software again. CHECK POWER If the light is not on . TEMPORARILY...
... the wall outlet. 6 Press to turn the printer off. 2 Disconnect the power cord from the wall outlet. 3 Gently remove the power supply from the printer. 4 Reconnect the power supply to the printer. 5 Plug the power cord into a known working electrical outlet that the power cord is completed, enable the security software again. CHECK POWER If the light is not on . TEMPORARILY...

User's Guide
Page 108
... want to the Printer List dialog, and then select the printer. DISCONNECT AND RECONNECT POWER SUPPLY 1 Press to print. The print queue dialog appears. The Printer List dialog appears. 2 Double-click the printer. If you want to set the printer as the default printer, then select the printer from the printer. 4 Reconnect the power supply to the printer. 5 Plug the power cord into the...
... want to the Printer List dialog, and then select the printer. DISCONNECT AND RECONNECT POWER SUPPLY 1 Press to print. The print queue dialog appears. The Printer List dialog appears. 2 Double-click the printer. If you want to set the printer as the default printer, then select the printer from the printer. 4 Reconnect the power supply to the printer. 5 Plug the power cord into the...

User's Guide
Page 109
... NOT IN SLEEP MODE If the power light is blinking on and off . 2 Disconnect the power cord from the wall outlet. 3 Remove the power supply from the printer. 4 Reconnect the power supply to the printer. 5 Plug the power cord into the wall outlet. 3 Press to remove and reinstall the printer software. If the install screen does not appear automatically after...
... NOT IN SLEEP MODE If the power light is blinking on and off . 2 Disconnect the power cord from the wall outlet. 3 Remove the power supply from the printer. 4 Reconnect the power supply to the printer. 5 Plug the power cord into the wall outlet. 3 Press to remove and reinstall the printer software. If the install screen does not appear automatically after...
User's Guide
Page 111
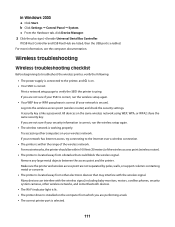
... a Click Start. b Click Settings Œ Control Panel Œ System. Wireless troubleshooting Wireless troubleshooting checklist Before beginning to troubleshoot the wireless printer, verify the following: • The power supply is connected to the printer, and is on your network has Internet access, try connecting to verify the SSID the printer is like a password. A security key is using WEP, WPA...
... a Click Start. b Click Settings Œ Control Panel Œ System. Wireless troubleshooting Wireless troubleshooting checklist Before beginning to troubleshoot the wireless printer, verify the following: • The power supply is connected to the printer, and is on your network has Internet access, try connecting to verify the SSID the printer is like a password. A security key is using WEP, WPA...
User's Guide
Page 133
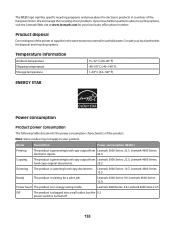
.... 24.3 Copying Scanning The product is scanning hard-copy documents. Lexmark 3600 Series: 4.8; We encourage the recycling of the printer or supplies in the same manner as normal household waste. Lexmark 4600 Series: 6.5 Off The product is plugged into a wall outlet, but the 0.2 power switch is in countries of the product. The WEEE logo signifies...
.... 24.3 Copying Scanning The product is scanning hard-copy documents. Lexmark 3600 Series: 4.8; We encourage the recycling of the printer or supplies in the same manner as normal household waste. Lexmark 4600 Series: 6.5 Off The product is plugged into a wall outlet, but the 0.2 power switch is in countries of the product. The WEEE logo signifies...
User's Guide
Page 134
...future that the patented print cartridge(s) shipped with an energy-saving mode called the Power Saver Timeout. Power Saver This product is available at www.lexmark.com. 134 The Power Saver Mode saves energy by the time the product spends in order to the... following license/agreement: The patented print cartridge(s) contained inside is equivalent to completely stop working after this printing device are designed to stop product power consumption, disconnect the power supply...
...future that the patented print cartridge(s) shipped with an energy-saving mode called the Power Saver Timeout. Power Saver This product is available at www.lexmark.com. 134 The Power Saver Mode saves energy by the time the product spends in order to the... following license/agreement: The patented print cartridge(s) contained inside is equivalent to completely stop working after this printing device are designed to stop product power consumption, disconnect the power supply...

User's Guide
Page 142
...power supply port 21 print cartridge carrier 21 print cartridge nozzles, cleaning 98 print cartridges aligning 98 cleaning 98 installing 95 ordering 102 preserving 101 refilling 97 removing 96 using genuine Lexmark 97 wiping 100 print jobs, canceling 71 print jobs, resuming 70 print settings saving and deleting 68 printer...WEEE statement 132 reducing an image 84 refilling print cartridges 97 removing print cartridges 96 repeating an image 86 resetting internal wireless print server to factory default settings 125 resuming print jobs 70 reverse page order 63 S safety information 9 saving ...
...power supply port 21 print cartridge carrier 21 print cartridge nozzles, cleaning 98 print cartridges aligning 98 cleaning 98 installing 95 ordering 102 preserving 101 refilling 97 removing 96 using genuine Lexmark 97 wiping 100 print jobs, canceling 71 print jobs, resuming 70 print settings saving and deleting 68 printer...WEEE statement 132 reducing an image 84 refilling print cartridges 97 removing print cartridges 96 repeating an image 86 resetting internal wireless print server to factory default settings 125 resuming print jobs 70 reverse page order 63 S safety information 9 saving ...

Network Guide
Page 8
... computer from which you are performing a task. • The correct printer port is selected. • The computer and printer are both connected to an existing ad hoc wireless network 1 Do one of the following : • The power supply is connected to it when running the wireless utility. Remove any large metal objects between the access point...
... computer from which you are performing a task. • The correct printer port is selected. • The computer and printer are both connected to an existing ad hoc wireless network 1 Do one of the following : • The power supply is connected to it when running the wireless utility. Remove any large metal objects between the access point...


