Quick Reference Guide
Page 13
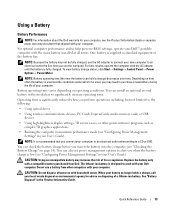
... second battery in the battery bay. Quick Reference Guide 13 Depending on how often the battery is used , you connect your computer. Using a Battery Battery Performance NOTE: For information about the Dell warranty for advice on disposing of a lithium-ion battery. Battery operating...Configuring Power Management Settings" in your computer, see "Checking the Battery Charge" on operating conditions. You can hold a charge) decreases over time. Replace the battery only with a compatible battery purchased from other power-intensive programs such as standard equipment in ...
... second battery in the battery bay. Quick Reference Guide 13 Depending on how often the battery is used , you connect your computer. Using a Battery Battery Performance NOTE: For information about the Dell warranty for advice on disposing of a lithium-ion battery. Battery operating...Configuring Power Management Settings" in your computer, see "Checking the Battery Charge" on operating conditions. You can hold a charge) decreases over time. Replace the battery only with a compatible battery purchased from other power-intensive programs such as standard equipment in ...
Quick Reference Guide
Page 15
...: Before performing these procedures, turn off , the AC adapter charges a completely discharged battery to 80 percent in about resolving problems with your Dell™ computer. Replace the battery only with your computer. The battery is longer with the computer turned on the battery charge gauge for as long as you connect the computer to start charging...
...: Before performing these procedures, turn off , the AC adapter charges a completely discharged battery to 80 percent in about resolving problems with your Dell™ computer. Replace the battery only with your computer. The battery is longer with the computer turned on the battery charge gauge for as long as you connect the computer to start charging...
Quick Reference Guide
Page 16
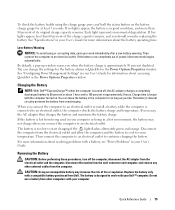
... the computer is connected to avoid possible connector damage.For information about replacing the second battery, which is turned off. 3 Slide and lift the battery out of the battery bay. 1 2 1 battery-bay latch release 2 battery To replace the battery, place the battery in your docking device for an extended period of time. NOTICE: You must remove all external cables...
... the computer is connected to avoid possible connector damage.For information about replacing the second battery, which is turned off. 3 Slide and lift the battery out of the battery bay. 1 2 1 battery-bay latch release 2 battery To replace the battery, place the battery in your docking device for an extended period of time. NOTICE: You must remove all external cables...
User's Guide
Page 4
... Hibernate Mode 45 Configuring Power Management Settings 46 Accessing Power Options Properties 46 Charging the Battery 47 Replacing the Battery 47 Storing a Battery 48 Battery Errors 48 5 Using the Keyboard 49 Numeric Keypad 49 Key Combinations 50 System Functions 50 Battery 50 Display Functions 50 Power Management 50 Microsoft® Windows® Logo Key Functions 51...
... Hibernate Mode 45 Configuring Power Management Settings 46 Accessing Power Options Properties 46 Charging the Battery 47 Replacing the Battery 47 Storing a Battery 48 Battery Errors 48 5 Using the Keyboard 49 Numeric Keypad 49 Key Combinations 50 System Functions 50 Battery 50 Display Functions 50 Power Management 50 Microsoft® Windows® Logo Key Functions 51...
User's Guide
Page 10
...Restoring Your Operating System 144 Using Microsoft® Windows® System Restore 145 Using the Operating System Media 146 15 Adding and Replacing Parts 149 Before You Begin 149 Recommended Tools 149 Turning Off Your Computer 149 Before Working Inside Your Computer 150 Hinge Cover 152... Keyboard 153 Internal Card With Bluetooth® Wireless Technology 154 Coin-Cell Battery 156 Memory 157 Wireless Local Area Network (WLAN) Card 163 Mobile Broadband Card 166 Subscriber Identity Module (SIM) Card 169 Hard ...
...Restoring Your Operating System 144 Using Microsoft® Windows® System Restore 145 Using the Operating System Media 146 15 Adding and Replacing Parts 149 Before You Begin 149 Recommended Tools 149 Turning Off Your Computer 149 Before Working Inside Your Computer 150 Hinge Cover 152... Keyboard 153 Internal Card With Bluetooth® Wireless Technology 154 Coin-Cell Battery 156 Memory 157 Wireless Local Area Network (WLAN) Card 163 Mobile Broadband Card 166 Subscriber Identity Module (SIM) Card 169 Hard ...
User's Guide
Page 32
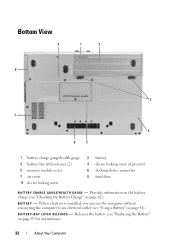
... the computer to an electrical outlet (see "Replacing the Battery" on page 47 for instructions). 32 About Your Computer Releases the battery (see "Using a Battery" on page 42). Provides information on the battery charge (see "Checking the Battery Charge" on page 41). B A T T E RY - B A Y L A T C H R E L E A S E S - Bottom View 9 1 2 8 3 7 4 6 5 1 battery charge gauge/health gauge 3 battery-bay latch releases (2) 5 memory module cover 7 air...
... the computer to an electrical outlet (see "Replacing the Battery" on page 47 for instructions). 32 About Your Computer Releases the battery (see "Using a Battery" on page 42). Provides information on the battery charge (see "Checking the Battery Charge" on page 41). B A T T E RY - B A Y L A T C H R E L E A S E S - Bottom View 9 1 2 8 3 7 4 6 5 1 battery charge gauge/health gauge 3 battery-bay latch releases (2) 5 memory module cover 7 air...
User's Guide
Page 42
...to configure power management settings. Do not use to display the QuickSet Battery Meter. Damaged batteries may increase the risk of fire or chemical burn. Replace the battery only with a compatible battery purchased from children. CAUTION: Do not dispose of fire or explosion.... For more information about accessing Windows Power Options Properties or Dell QuickSet, which you insert the battery into the computer. •...
...to configure power management settings. Do not use to display the QuickSet Battery Meter. Damaged batteries may increase the risk of fire or chemical burn. Replace the battery only with a compatible battery purchased from children. CAUTION: Do not dispose of fire or explosion.... For more information about accessing Windows Power Options Properties or Dell QuickSet, which you insert the battery into the computer. •...
User's Guide
Page 43
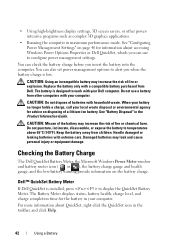
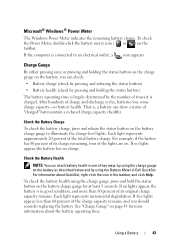
...seconds. To check the battery health using the Battery Meter in the taskbar, and click Help. Using a Battery 43 If the computer is in good condition, and more information about QuickSet, right-click the icon in Dell QuickSet. For example, if the battery has 80 percent of its...® Windows® Power Meter The Windows Power Meter indicates the remaining battery charge. To check the Power Meter, double-click the battery meter icon ( or ) on the battery, you should consider replacing the battery. Charge Gauge By either pressing once or pressing and holding the status button...
...seconds. To check the battery health using the Battery Meter in the taskbar, and click Help. Using a Battery 43 If the computer is in good condition, and more information about QuickSet, right-click the icon in Dell QuickSet. For example, if the battery has 80 percent of its...® Windows® Power Meter The Windows Power Meter indicates the remaining battery charge. To check the Power Meter, double-click the battery meter icon ( or ) on the battery, you should consider replacing the battery. Charge Gauge By either pressing once or pressing and holding the status button...
User's Guide
Page 47
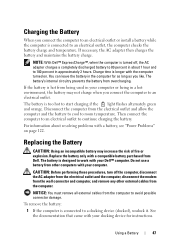
... an electrical outlet or install a battery while the computer is hot from Dell. The battery's internal circuitry prevents the battery from the computer. Replacing the Battery CAUTION: Using an incompatible battery may not charge when you connect the computer to start charging if the light flashes alternately green and orange. Replace the battery only with a battery, see "Power Problems" on...
... an electrical outlet or install a battery while the computer is hot from Dell. The battery's internal circuitry prevents the battery from the computer. Replacing the Battery CAUTION: Using an incompatible battery may not charge when you connect the computer to start charging if the light flashes alternately green and orange. Replace the battery only with a battery, see "Power Problems" on...
User's Guide
Page 48
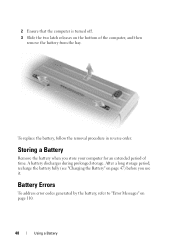
...replace the battery, follow the removal procedure in reverse order. A battery discharges during prolonged storage. Storing a Battery Remove the battery when you use it. Battery Errors To address error codes generated by the battery, refer to "Error Messages" on page 47) before you store your computer for an extended period of the computer, and then remove the battery... from the bay. 2 Ensure that the computer is turned off. 3 Slide the two latch releases on the bottom of time. After a long storage period, recharge the battery fully (see "Charging the Battery" on ...
...replace the battery, follow the removal procedure in reverse order. A battery discharges during prolonged storage. Storing a Battery Remove the battery when you use it. Battery Errors To address error codes generated by the battery, refer to "Error Messages" on page 47) before you store your computer for an extended period of the computer, and then remove the battery... from the bay. 2 Ensure that the computer is turned off. 3 Slide the two latch releases on the bottom of time. After a long storage period, recharge the battery fully (see "Charging the Battery" on ...
User's Guide
Page 96
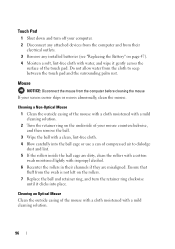
.... 4 Blow carefully into place. Do not allow water from the swab is not left on the rollers. 7 Replace the ball and retainer ring, and turn off your computer. 2 Disconnect any installed batteries (see "Replacing the Battery" on the underside of your screen cursor skips or moves abnormally, clean the mouse. Cleaning an Optical Mouse...
.... 4 Blow carefully into place. Do not allow water from the swab is not left on the rollers. 7 Replace the ball and retainer ring, and turn off your computer. 2 Disconnect any installed batteries (see "Replacing the Battery" on the underside of your screen cursor skips or moves abnormally, clean the mouse. Cleaning an Optical Mouse...
User's Guide
Page 114
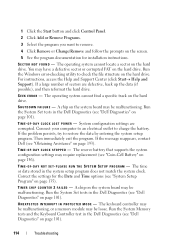
... FA ILURE - O F - TI M E R CH IP C O U N T E R 2 F A I N P R O T E C T E D M O D E - The keyboard controller may be malfunctioning, or a memory module may require replacement (see "Obtaining Assistance" on page 193). Connect your computer to an electrical outlet to restore the data by entering the system setup program. If the...track on the hard drive. The operating system cannot locate a sector on the hard drive. If the message reappears, contact Dell (see "Coin-Cell Battery" on page 156). 1 Click the Start button and click Control Panel. 2 Click Add or Remove Programs. 3 Select the...
... FA ILURE - O F - TI M E R CH IP C O U N T E R 2 F A I N P R O T E C T E D M O D E - The keyboard controller may be malfunctioning, or a memory module may require replacement (see "Obtaining Assistance" on page 193). Connect your computer to an electrical outlet to restore the data by entering the system setup program. If the...track on the hard drive. The operating system cannot locate a sector on the hard drive. If the message reappears, contact Dell (see "Coin-Cell Battery" on page 156). 1 Click the Start button and click Control Panel. 2 Click Add or Remove Programs. 3 Select the...
User's Guide
Page 115
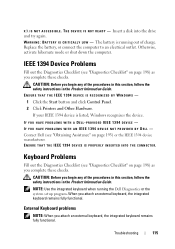
...A L L Y L O W - Replace the battery, or connect the computer to an electrical outlet. CAUTION: Before you begin any of the procedures in this section, follow the safety instructions in the Product Information Guide. IF YOU HAVE PROBLEMS WITH AN IEEE 1394 DEVICE NOT PROVIDED BY DELL - CAUTION: Before you begin any of ...IEEE 1394 device manufacturer. IF YOU HAVE PROBLEMS WITH A DELL-PROVIDED IEEE 1394 DEVICE - If your IEEE 1394 device is running the Dell Diagnostics or the system setup program. The battery is listed, Windows recognizes the device. When you complete...
...A L L Y L O W - Replace the battery, or connect the computer to an electrical outlet. CAUTION: Before you begin any of the procedures in this section, follow the safety instructions in the Product Information Guide. IF YOU HAVE PROBLEMS WITH AN IEEE 1394 DEVICE NOT PROVIDED BY DELL - CAUTION: Before you begin any of ...IEEE 1394 device manufacturer. IF YOU HAVE PROBLEMS WITH A DELL-PROVIDED IEEE 1394 DEVICE - If your IEEE 1394 device is running the Dell Diagnostics or the system setup program. The battery is listed, Windows recognizes the device. When you complete...

User's Guide
Page 151
... installed (see "Media Bay" on page 173). 7 Disconnect your computer and all attached devices from their electrical outlets. 8 Remove the battery (see "Replacing the Battery" on page 47). 9 Press the power button to ground the system board. 10 Remove any installed PC Cards from the PC Card slot (see "Removing a ...
... installed (see "Media Bay" on page 173). 7 Disconnect your computer and all attached devices from their electrical outlets. 8 Remove the battery (see "Replacing the Battery" on page 47). 9 Press the power button to ground the system board. 10 Remove any installed PC Cards from the PC Card slot (see "Removing a ...
User's Guide
Page 154
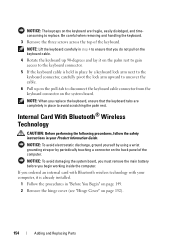
...instructions in "Before You Begin" on page 149. 2 Remove the hinge cover (see "Hinge Cover" on page 152). 154 Adding and Replacing Parts If you replace the keyboard, ensure that you begin working inside the computer. NOTE: When you ordered an internal card with Bluetooth wireless technology with your ... the palm rest. NOTICE: To avoid damaging the system board, you must remove the main battery before you do not pull on the keyboard cable. 4 Rotate the keyboard up on the pull-tab to replace. NOTE: Lift the keyboard carefully in step 4 to ensure that the keyboard tabs are fragile...
...instructions in "Before You Begin" on page 149. 2 Remove the hinge cover (see "Hinge Cover" on page 152). 154 Adding and Replacing Parts If you replace the keyboard, ensure that you begin working inside the computer. NOTE: When you ordered an internal card with Bluetooth wireless technology with your ... the palm rest. NOTICE: To avoid damaging the system board, you must remove the main battery before you do not pull on the keyboard cable. 4 Rotate the keyboard up on the pull-tab to replace. NOTE: Lift the keyboard carefully in step 4 to ensure that the keyboard tabs are fragile...
User's Guide
Page 156
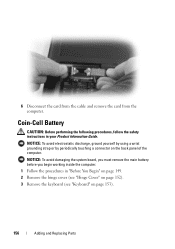
... 3 Remove the keyboard (see "Keyboard" on the back panel of the computer. NOTICE: To avoid damaging the system board, you must remove the main battery before you begin working inside the computer. 1 Follow the procedures in your Product Information Guide. NOTICE: To avoid electrostatic discharge, ground yourself by using a wrist... grounding strap or by periodically touching a connector on page 153). 156 Adding and Replacing Parts 6 Disconnect the card from the cable and remove the card from the computer.
... 3 Remove the keyboard (see "Keyboard" on the back panel of the computer. NOTICE: To avoid damaging the system board, you must remove the main battery before you begin working inside the computer. 1 Follow the procedures in your Product Information Guide. NOTICE: To avoid electrostatic discharge, ground yourself by using a wrist... grounding strap or by periodically touching a connector on page 153). 156 Adding and Replacing Parts 6 Disconnect the card from the cable and remove the card from the computer.
User's Guide
Page 157
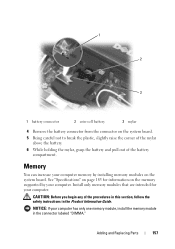
... begin any of the battery compartment. 1 2 3 1 battery connector 2 coin-cell battery 3 mylar 4 Remove the battery connector from the connector on the system board. See "Specifications" on page 183 for your computer has only one memory module, install the memory module in the Product Information Guide. NOTICE: If your computer. Adding and Replacing Parts 157 Memory...
... begin any of the battery compartment. 1 2 3 1 battery connector 2 coin-cell battery 3 mylar 4 Remove the battery connector from the connector on the system board. See "Specifications" on page 183 for your computer has only one memory module, install the memory module in the Product Information Guide. NOTICE: If your computer. Adding and Replacing Parts 157 Memory...
User's Guide
Page 163
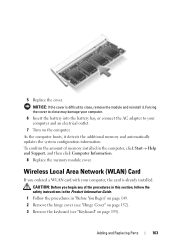
...Follow the procedures in the computer, click Start→ Help and Support, and then click Computer Information. 8 Replace the memory module cover. Adding and Replacing Parts 163 Forcing the cover to close , remove the module and reinstall it detects the additional memory and automatically... updates the system configuration information. CAUTION: Before you ordered a WLAN card with your computer. 6 Insert the battery into the battery bay, or...
...Follow the procedures in the computer, click Start→ Help and Support, and then click Computer Information. 8 Replace the memory module cover. Adding and Replacing Parts 163 Forcing the cover to close , remove the module and reinstall it detects the additional memory and automatically... updates the system configuration information. CAUTION: Before you ordered a WLAN card with your computer. 6 Insert the battery into the battery bay, or...

User's Guide
Page 170
1 Remove the battery (see "Replacing the Battery" on , in standby mode, or in hibernate mode. 170 Adding and Replacing Parts To prevent ESD, hold the card in the Product Information Guide. NOTICE: To prevent data loss, turn off your hand before removing the hard ...
1 Remove the battery (see "Replacing the Battery" on , in standby mode, or in hibernate mode. 170 Adding and Replacing Parts To prevent ESD, hold the card in the Product Information Guide. NOTICE: To prevent data loss, turn off your hand before removing the hard ...
User's Guide
Page 179
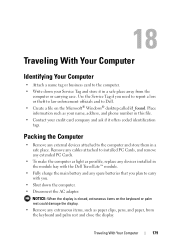
... • Remove any external devices attached to the computer and store them in the module bay with the Dell TravelLite™ module. • Fully charge the main battery and any spare batteries that you plan to carry with you need to report a loss or theft to law enforcement officials and ...to installed PC Cards, and remove any extended PC Cards. • To make the computer as light as possible, replace any extraneous items, such ...
... • Remove any external devices attached to the computer and store them in the module bay with the Dell TravelLite™ module. • Fully charge the main battery and any spare batteries that you plan to carry with you need to report a loss or theft to law enforcement officials and ...to installed PC Cards, and remove any extended PC Cards. • To make the computer as light as possible, replace any extraneous items, such ...


