
Quick Reference Guide
Page 6
...; Windows® License These labels are located on your computer. • Use the Service Tag to identify your computer when you use support.dell.com or contact support. • Enter the Express Service Code to troubleshoot and solve problems • Service Tag and Express Service Code •...; Microsoft Windows License Label Find It Here User's Guide Microsoft Windows Help and Support Center 1 Click Start or → Help and Support→ Dell User and System Guides→ System Guides. 2 Click the User's Guide for your call when contacting support.
...; Windows® License These labels are located on your computer. • Use the Service Tag to identify your computer when you use support.dell.com or contact support. • Enter the Express Service Code to troubleshoot and solve problems • Service Tag and Express Service Code •...; Microsoft Windows License Label Find It Here User's Guide Microsoft Windows Help and Support Center 1 Click Start or → Help and Support→ Dell User and System Guides→ System Guides. 2 Click the User's Guide for your call when contacting support.
Quick Reference Guide
Page 7
...an automated upgrade and notification system installed on my computer configuration, product specifications, and white papers • Downloads - Access the Dell Support Utility from technicians, online courses, and frequently asked questions, hot topics, and general health of your computing environment, software ... icon in your selections. • Software upgrades and troubleshooting hints - support.dell.com NOTE: Select your region or business segment to personalize my desktop Windows Help and Support Center 1 Click Start or → Help and Support. 2 Type a word or phrase that ...
...an automated upgrade and notification system installed on my computer configuration, product specifications, and white papers • Downloads - Access the Dell Support Utility from technicians, online courses, and frequently asked questions, hot topics, and general health of your computing environment, software ... icon in your selections. • Software upgrades and troubleshooting hints - support.dell.com NOTE: Select your region or business segment to personalize my desktop Windows Help and Support Center 1 Click Start or → Help and Support. 2 Type a word or phrase that ...
Quick Reference Guide
Page 13
... See "Battery Disposal" in the battery bay. For best results, operate the computer with household waste. To view battery charge status, click Start→ Settings→ Control Panel→ Power Options→ Power Meter. NOTE: It is significantly reduced when you may need to a CD... how often the battery is used and the conditions under which it is designed to significantly increase operating time. Do not use a battery from Dell. You can hold a charge) decreases over time. The lithium-ion battery is used, you perform operations including, but not limited to help...
... See "Battery Disposal" in the battery bay. For best results, operate the computer with household waste. To view battery charge status, click Start→ Settings→ Control Panel→ Power Options→ Power Meter. NOTE: It is significantly reduced when you may need to a CD... how often the battery is used and the conditions under which it is designed to significantly increase operating time. Do not use a battery from Dell. You can hold a charge) decreases over time. The lithium-ion battery is used, you perform operations including, but not limited to help...
Quick Reference Guide
Page 15
...electrical outlet. If five lights appear, less than 80 percent of power, hibernate mode begins automatically. Then connect the computer to start charging if the light flashes alternately green and orange. By default, a pop-up window warns you when the battery charge is..."Specifications" in approximately 2 hours. If the battery runs completely out of its original charge capacity remains. Charging the Battery NOTE: With Dell™ ExpressCharge™, when the computer is approximately 90 percent depleted. The battery's internal circuitry prevents the battery from the computer. If...
...electrical outlet. If five lights appear, less than 80 percent of power, hibernate mode begins automatically. Then connect the computer to start charging if the light flashes alternately green and orange. By default, a pop-up window warns you when the battery charge is..."Specifications" in approximately 2 hours. If the battery runs completely out of its original charge capacity remains. Charging the Battery NOTE: With Dell™ ExpressCharge™, when the computer is approximately 90 percent depleted. The battery's internal circuitry prevents the battery from the computer. If...
Quick Reference Guide
Page 17
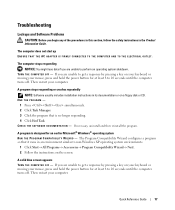
...Guide. The Program Compatibility Wizard configures a program so that is designed for at least 8 to non-Windows XP operating system environments. 1 Click Start→ All Programs→ Accessories→ Program Compatibility Wizard→ Next. 2 Follow the instructions on a floppy disk or CD. The computer does ...not start up ENSURE THAT THE AC ADAPTER IS FIRMLY CONNECTED TO THE COMPUTER AND TO THE ELECTRICAL OUTLET. If you begin any of the procedures...
...Guide. The Program Compatibility Wizard configures a program so that is designed for at least 8 to non-Windows XP operating system environments. 1 Click Start→ All Programs→ Accessories→ Program Compatibility Wizard→ Next. 2 Follow the instructions on a floppy disk or CD. The computer does ...not start up ENSURE THAT THE AC ADAPTER IS FIRMLY CONNECTED TO THE COMPUTER AND TO THE ELECTRICAL OUTLET. If you begin any of the procedures...

Quick Reference Guide
Page 18
...drive or from either your computer might be infected with spyware. Enter system setup (see "System Setup Program" in the Product Information Guide. Start the Dell Diagnostics from the Drivers and Utilities media. 18 Quick Reference Guide BACK UP YOUR FILES IMMEDIATELY. RUN THE...you print these procedures before you experience a problem with your computer. NOTICE: The Dell Diagnostics works only on page 18. SAVE AND CLOSE ANY OPEN FILES OR PROGRAMS AND SHUT DOWN YOUR COMPUTER THROUGH THE Start MENU. For more information, go to a software problem. Use an anti-virus program...
...drive or from either your computer might be infected with spyware. Enter system setup (see "System Setup Program" in the Product Information Guide. Start the Dell Diagnostics from the Drivers and Utilities media. 18 Quick Reference Guide BACK UP YOUR FILES IMMEDIATELY. RUN THE...you print these procedures before you experience a problem with your computer. NOTICE: The Dell Diagnostics works only on page 18. SAVE AND CLOSE ANY OPEN FILES OR PROGRAMS AND SHUT DOWN YOUR COMPUTER THROUGH THE Start MENU. For more information, go to a software problem. Use an anti-virus program...
Quick Reference Guide
Page 19
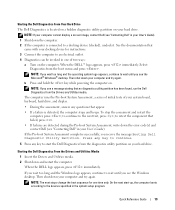
...Press and hold the key while powering the computer on the computer. to the devices specified in one time only. On the next start the Dell Diagnostics from the boot menu and press . See the documentation that failed, press . • If failures are detected during the...questions that no diagnostics utility partition has been found, run the Dell Diagnostics from the Drivers and Utilities media. Press any key to a docking device (docked), undock it. Starting the Dell Diagnostics From Your Hard Drive The Dell Diagnostics is located on a hidden diagnostic utility partition on your...
...Press and hold the key while powering the computer on the computer. to the devices specified in one time only. On the next start the Dell Diagnostics from the boot menu and press . See the documentation that failed, press . • If failures are detected during the...questions that no diagnostics utility partition has been found, run the Dell Diagnostics from the Drivers and Utilities media. Press any key to a docking device (docked), undock it. Starting the Dell Diagnostics From Your Hard Drive The Dell Diagnostics is located on a hidden diagnostic utility partition on your...

Quick Reference Guide
Page 20
..., highlight CD/DVD/CD-RW Drive and press . 4 Select the Boot from CD-ROM option from the menu that appears and press . 5 Type 1 to start the menu and press to run a test from the numbered list. Lists the most common symptoms encountered and allows you to answer questions periodically. Run...for your Service Tag. 3 If you are listed, select the version appropriate for the option you want to proceed. 6 Select Run the 32 Bit Dell Diagnostics from the Custom Test or Symptom Tree option, click the applicable tab described in your part. Tests a specific device. If you contact...
..., highlight CD/DVD/CD-RW Drive and press . 4 Select the Boot from CD-ROM option from the menu that appears and press . 5 Type 1 to start the menu and press to run a test from the numbered list. Lists the most common symptoms encountered and allows you to answer questions periodically. Run...for your Service Tag. 3 If you are listed, select the version appropriate for the option you want to proceed. 6 Select Run the 32 Bit Dell Diagnostics from the Custom Test or Symptom Tree option, click the applicable tab described in your part. Tests a specific device. If you contact...
Quick Reference Guide
Page 23
...operating system, 8 computer crashes, 17 slow performance, 18 stops responding, 17 D Dell Diagnostics about, 18 starting from the Drivers and Utilities media, 19 starting from the hard drive, 19 using, 18 Dell support site, 7 diagnostics Dell, 18 documentation End User License Agreement, 5 ergonomics, 5 online, 7 Product Information...Windows Help and Support Center, 7 P problems blue screen, 17 computer crashes, 17 computer does not start up, 17 computer stops responding, 17 Dell Diagnostics, 18 lockups, 17 program crashes, 17 program stops responding, 17 programs and Windows compatibility, 17...
...operating system, 8 computer crashes, 17 slow performance, 18 stops responding, 17 D Dell Diagnostics about, 18 starting from the Drivers and Utilities media, 19 starting from the hard drive, 19 using, 18 Dell support site, 7 diagnostics Dell, 18 documentation End User License Agreement, 5 ergonomics, 5 online, 7 Product Information...Windows Help and Support Center, 7 P problems blue screen, 17 computer crashes, 17 computer does not start up, 17 computer stops responding, 17 Dell Diagnostics, 18 lockups, 17 program crashes, 17 program stops responding, 17 programs and Windows compatibility, 17...
User's Guide
Page 7
... Diagnostic Lights 99 Diagnostic Light Codes During POST 99 Dell™ Technical Update Service 101 Dell Diagnostics 101 When to Use the Dell Diagnostics 102 Starting the Dell Diagnostics From Your Hard Drive 102 Starting the Dell Diagnostics from the Drivers and Utilities Media 103 Dell Diagnostics Main Menu 104 Dell Support Utility 105 Accessing the Dell Support Utility 105 7
... Diagnostic Lights 99 Diagnostic Light Codes During POST 99 Dell™ Technical Update Service 101 Dell Diagnostics 101 When to Use the Dell Diagnostics 102 Starting the Dell Diagnostics From Your Hard Drive 102 Starting the Dell Diagnostics from the Drivers and Utilities Media 103 Dell Diagnostics Main Menu 104 Dell Support Utility 105 Accessing the Dell Support Utility 105 7
User's Guide
Page 8
... Icon 106 Double-Clicking the Dell Support Icon 106 Drive Problems 106 Media drive problems 107 If you cannot eject the CD, CD-RW, DVD, or DVD+RW drive tray 107 ... 110 IEEE 1394 Device Problems 115 Keyboard Problems 115 External Keyboard problems 115 Unexpected characters 117 Lockups and Software Problems 117 The computer does not start up 117 The computer stops responding 117 A program stops responding or crashes repeatedly 117 A program is designed for an earlier Microsoft® Windows® operating...
... Icon 106 Double-Clicking the Dell Support Icon 106 Drive Problems 106 Media drive problems 107 If you cannot eject the CD, CD-RW, DVD, or DVD+RW drive tray 107 ... 110 IEEE 1394 Device Problems 115 Keyboard Problems 115 External Keyboard problems 115 Unexpected characters 117 Lockups and Software Problems 117 The computer does not start up 117 The computer stops responding 117 A program stops responding or crashes repeatedly 117 A program is designed for an earlier Microsoft® Windows® operating...
User's Guide
Page 18
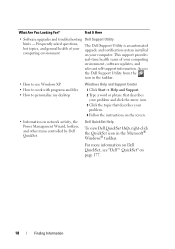
... To view Dell QuickSet Help, right-click the QuickSet icon in the taskbar. • How to use Windows XP • How to work with programs and files • How to personalize my desktop Windows Help and Support Center 1 Click Start→ Help and Support. 2 Type a word or ...phrase that describes your problem and click the arrow icon. 3 Click the topic that describes your computer. For more information on Dell QuickSet, see "Dell™ QuickSet" on your problem. 4 Follow the ...
... To view Dell QuickSet Help, right-click the QuickSet icon in the taskbar. • How to use Windows XP • How to work with programs and files • How to personalize my desktop Windows Help and Support Center 1 Click Start→ Help and Support. 2 Type a word or ...phrase that describes your problem and click the arrow icon. 3 Click the topic that describes your computer. For more information on Dell QuickSet, see "Dell™ QuickSet" on your problem. 4 Follow the ...
User's Guide
Page 36
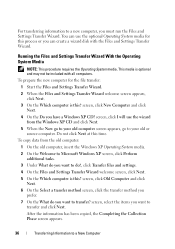
... method you prefer. 7 On the What do you want to a New Computer screen, click I will use the optional Operating System media for the file transfer: 1 Start the Files and Settings Transfer Wizard. 2 When the Files and Settings Transfer Wizard welcome screen appears, click Next. 3 On the Which computer is this? screen...
... method you prefer. 7 On the What do you want to a New Computer screen, click I will use the optional Operating System media for the file transfer: 1 Start the Files and Settings Transfer Wizard. 2 When the Files and Settings Transfer Wizard welcome screen appears, click Next. 3 On the Which computer is this? screen...

User's Guide
Page 37
... applies them to the old computer. To copy data from the old computer: 1 On the old computer, insert the wizard disk. 2 Click the Start→ Run. 8 Click Finish. screen, select the method you have been applied, the Finished screen appears. 3 Click Finished and restart the new... computer. screen, click I want to create a Wizard Disk in the following steps: 1 Click Start→ Files and Settings Transfer Wizard. 2 When the Files and Settings Transfer Wizard welcome screen appears, click Next. 3 On the Which computer is ...
... applies them to the old computer. To copy data from the old computer: 1 On the old computer, insert the wizard disk. 2 Click the Start→ Run. 8 Click Finish. screen, select the method you have been applied, the Finished screen appears. 3 Click Finished and restart the new... computer. screen, click I want to create a Wizard Disk in the following steps: 1 Click Start→ Files and Settings Transfer Wizard. 2 When the Files and Settings Transfer Wizard welcome screen appears, click Next. 3 On the Which computer is ...
User's Guide
Page 45
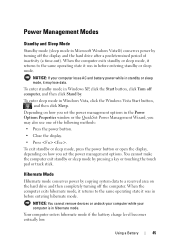
... power management options. Your computer enters hibernate mode if the battery charge level becomes critically low. To enter sleep mode in Windows XP, click the Start button, click Turn off computer, and then click Stand by turning off the computer. When the computer exits hibernate mode, it returns to the same... Sleep Mode Standby mode (sleep mode in Microsoft Windows Vista®) conserves power by . To enter standby mode in Windows Vista, click the Windows Vista Start button, , and then click Sleep.
... power management options. Your computer enters hibernate mode if the battery charge level becomes critically low. To enter sleep mode in Windows XP, click the Start button, click Turn off computer, and then click Stand by turning off the computer. When the computer exits hibernate mode, it returns to the same... Sleep Mode Standby mode (sleep mode in Microsoft Windows Vista®) conserves power by . To enter standby mode in Windows Vista, click the Windows Vista Start button, , and then click Sleep.
User's Guide
Page 46
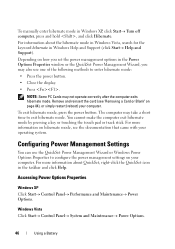
...Options Properties to enter hibernate mode: • Press the power button. • Close the display. • Press . Windows Vista Click Start→ Control Panel→ System and Maintenance→ Power Options. 46 Using a Battery To manually enter hibernate mode in Windows Help and Support (...click Start→ Help and Support). For more information on hibernate mode, see "Removing a Card or Blank" on your computer. You cannot make...
...Options Properties to enter hibernate mode: • Press the power button. • Close the display. • Press . Windows Vista Click Start→ Control Panel→ System and Maintenance→ Power Options. 46 Using a Battery To manually enter hibernate mode in Windows Help and Support (...click Start→ Help and Support). For more information on hibernate mode, see "Removing a Card or Blank" on your computer. You cannot make...
User's Guide
Page 47
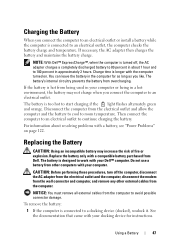
... and computer, and remove any other external cables from other computers with a battery, see "Power Problems" on . NOTE: With Dell™ ExpressCharge™, when the computer is designed to room temperature. The battery's internal circuitry prevents the battery from the electrical outlet...too hot to continue charging the battery. Disconnect the computer from overcharging. Then connect the computer to an electrical outlet to start charging if the light flashes alternately green and orange. See the documentation that came with a compatible battery purchased from the computer...
... and computer, and remove any other external cables from other computers with a battery, see "Power Problems" on . NOTE: With Dell™ ExpressCharge™, when the computer is designed to room temperature. The battery's internal circuitry prevents the battery from the electrical outlet...too hot to continue charging the battery. Disconnect the computer from overcharging. Then connect the computer to an electrical outlet to start charging if the light flashes alternately green and orange. See the documentation that came with a compatible battery purchased from the computer...
User's Guide
Page 51
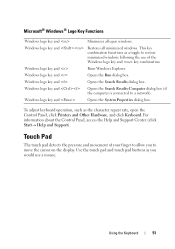
... all minimized windows. Windows logo key and Opens the Run dialog box. For information about the Control Panel, access the Help and Support Center (click Start→ Help and Support). Touch Pad The touch pad detects the pressure and movement of your finger to allow you would use of the Windows...
... all minimized windows. Windows logo key and Opens the Run dialog box. For information about the Control Panel, access the Help and Support Center (click Start→ Help and Support). Touch Pad The touch pad detects the pressure and movement of your finger to allow you would use of the Windows...
User's Guide
Page 53
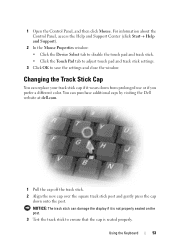
NOTICE: The track stick can purchase additional caps by visiting the Dell website at dell.com. 1 Pull the cap off the track stick. 2 Align the new cap over the square track stick post and gently press the cap down from ... you prefer a different color. 1 Open the Control Panel, and then click Mouse. For information about the Control Panel, access the Help and Support Center (click Start→ Help and Support). 2 In the Mouse Properties window: • Click the Device Select tab to disable the touch pad and track stick. • Click...
NOTICE: The track stick can purchase additional caps by visiting the Dell website at dell.com. 1 Pull the cap off the track stick. 2 Align the new cap over the square track stick post and gently press the cap down from ... you prefer a different color. 1 Open the Control Panel, and then click Mouse. For information about the Control Panel, access the Help and Support Center (click Start→ Help and Support). 2 In the Mouse Properties window: • Click the Device Select tab to disable the touch pad and track stick. • Click...
User's Guide
Page 57
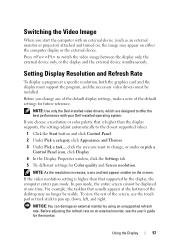
... of the default settings for future reference. Before adjusting the refresh rate on the screen. Using the Display 57 Before you start the computer with your Dell-installed operating system. For example, the taskbar that supported by using an unsupported refresh rate. Switching the Video Image When you...Rate To display a program at the bottom of the screen, use the touch pad or track stick to the closest supported values. 1 Click the Start button and click Control Panel. 2 Under Pick a category, click Appearance and Themes. 3 Under Pick a task..., click the area you choose a...
... of the default settings for future reference. Before adjusting the refresh rate on the screen. Using the Display 57 Before you start the computer with your Dell-installed operating system. For example, the taskbar that supported by using an unsupported refresh rate. Switching the Video Image When you...Rate To display a program at the bottom of the screen, use the touch pad or track stick to the closest supported values. 1 Click the Start button and click Control Panel. 2 Under Pick a category, click Appearance and Themes. 3 Under Pick a task..., click the area you choose a...


