Quick Reference Guide
Page 19
...If you wait too long and the operating system logo appears, continue to wait until you see "Contacting Dell" in one time only. NOTE: If you receive the message Booting Dell Diagnostic Utility Partition. to an electrical outlet. 4 Diagnostics can be invoked in your docking device for one... key to a docking device (docked), undock it. Quick Reference Guide 19 On the next start the Dell Diagnostics from the boot menu and press . NOTE: The next steps change the boot sequence for instructions. 3 Connect the computer to retest the component that came with your User's Guide)....
...If you wait too long and the operating system logo appears, continue to wait until you see "Contacting Dell" in one time only. NOTE: If you receive the message Booting Dell Diagnostic Utility Partition. to an electrical outlet. 4 Diagnostics can be invoked in your docking device for one... key to a docking device (docked), undock it. Quick Reference Guide 19 On the next start the Dell Diagnostics from the boot menu and press . NOTE: The next steps change the boot sequence for instructions. 3 Connect the computer to retest the component that came with your User's Guide)....

Quick Reference Guide
Page 20
... list appears, highlight CD/DVD/CD-RW Drive and press . 4 Select the Boot from CD-ROM option from the menu that appears and press . 5 Type 1 to start the menu and press to proceed. 6 Select Run the 32 Bit Dell Diagnostics from the Custom Test or Symptom Tree option, click the applicable tab...
... list appears, highlight CD/DVD/CD-RW Drive and press . 4 Select the Boot from CD-ROM option from the menu that appears and press . 5 Type 1 to start the menu and press to proceed. 6 Select Run the 32 Bit Dell Diagnostics from the Custom Test or Symptom Tree option, click the applicable tab...
User's Guide
Page 9
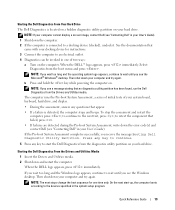
... Technology 131 13 System Setup Program 135 Overview 135 Viewing the System Setup Screens 136 System Setup Screens 136 Commonly Used Options 136 Changing the Boot Sequence 136 Changing Printer Modes 138 Changing COM Ports 138 14 Reinstalling Software 139 Drivers 139 What Is a Driver 139 Identifying Drivers 139 Reinstalling Drivers...
... Technology 131 13 System Setup Program 135 Overview 135 Viewing the System Setup Screens 136 System Setup Screens 136 Commonly Used Options 136 Changing the Boot Sequence 136 Changing Printer Modes 138 Changing COM Ports 138 14 Reinstalling Software 139 Drivers 139 What Is a Driver 139 Identifying Drivers 139 Reinstalling Drivers...
User's Guide
Page 65
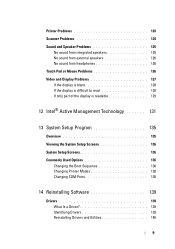
... 63. NOTE: Restart your wireless router to the broadband modem. After 2 minutes, proceed to the step 13. 13 Start your computer and wait until the boot process completes. 14 See the documentation that no network or USB cables, other end of your router's broadcast name is Service Set Identifier (SSID) or...
... 63. NOTE: Restart your wireless router to the broadband modem. After 2 minutes, proceed to the step 13. 13 Start your computer and wait until the boot process completes. 14 See the documentation that no network or USB cables, other end of your router's broadcast name is Service Set Identifier (SSID) or...

User's Guide
Page 91
... but it on. NOTE: The TPM feature may not be unable to assist in the recovery of these backups being incomplete, lost, or damaged, Dell will be supported in all countries. b Select Security→ TPM Security and press . If the hard drive password, the external hard-drive password... was in when you do not enter the correct password in three attempts, the computer tries to start from another bootable device if the Boot First Device option in the Broadcom Secure Foundation Getting Started Guide. Two different passwords provide greater security. TPM is enabled through a system setup...
... but it on. NOTE: The TPM feature may not be unable to assist in the recovery of these backups being incomplete, lost, or damaged, Dell will be supported in all countries. b Select Security→ TPM Security and press . If the hard drive password, the external hard-drive password... was in when you do not enter the correct password in three attempts, the computer tries to start from another bootable device if the Boot First Device option in the Broadcom Secure Foundation Getting Started Guide. Two different passwords provide greater security. TPM is enabled through a system setup...
User's Guide
Page 92
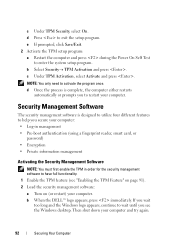
..., select On. c Under TPM Activation, select Activate and press . b When the DELL™ logo appears, press immediately. If you wait too long and the Windows logo appears, continue to wait until you secure your computer: • Log-in management • Pre-boot authentication (using a fingerprint reader, smart card, or password) • Encryption...
..., select On. c Under TPM Activation, select Activate and press . b When the DELL™ logo appears, press immediately. If you wait too long and the Windows logo appears, continue to wait until you secure your computer: • Log-in management • Pre-boot authentication (using a fingerprint reader, smart card, or password) • Encryption...

User's Guide
Page 102
... device for technical assistance. See the documentation that you print these procedures before you contact Dell for instructions. Start the Dell Diagnostics from your hard drive or from the boot menu and press . Select Diagnostics from the Drivers and Utilities media. Enter the System ... the operating system logo appears, continue to test displays in "Lockups and Software Problems" on . 102 Troubleshooting When to Use the Dell Diagnostics If you experience a problem with your computer, perform the checks in system setup and is active. NOTE: Before attempting option...
... device for technical assistance. See the documentation that you print these procedures before you contact Dell for instructions. Start the Dell Diagnostics from your hard drive or from the boot menu and press . Select Diagnostics from the Drivers and Utilities media. Enter the System ... the operating system logo appears, continue to test displays in "Lockups and Software Problems" on . 102 Troubleshooting When to Use the Dell Diagnostics If you experience a problem with your computer, perform the checks in system setup and is active. NOTE: Before attempting option...
User's Guide
Page 103
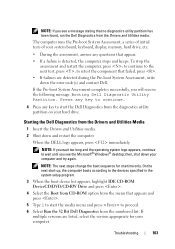
... select the version appropriate for one time only. If multiple versions are detected during the Pre-boot System Assessment, write down and restart the computer. Starting the Dell Diagnostics from the diagnostics utility partition on your computer and try again. NOTE: If you see... to continue. 4 Press any questions that no diagnostics utility partition has been found, run the Dell Diagnostics from the numbered list. NOTE: If you will receive the following message: Booting Dell Diagnostic Utility Partition. to retest the component that appears and press . 5 Type 1 to start...
... select the version appropriate for one time only. If multiple versions are detected during the Pre-boot System Assessment, write down and restart the computer. Starting the Dell Diagnostics from the diagnostics utility partition on your computer and try again. NOTE: If you see... to continue. 4 Press any questions that no diagnostics utility partition has been found, run the Dell Diagnostics from the numbered list. NOTE: If you will receive the following message: Booting Dell Diagnostic Utility Partition. to retest the component that appears and press . 5 Type 1 to start...

User's Guide
Page 111
...Dell Diagnostics (see "Hard drive problems" on page 101). The computer cannot identify the PC Card. Reinstall the memory modules and, if necessary, replace them (see "Installing a PC Card or ExpressCard" on page 108), and boot... Reinsert the card or try another PC Card (see "Memory Problems" on page 106). The operating system is unable to fit on page 108), and boot the computer from the computer. D I S K D R I V E C O N F I G U R A T I Z E H A S C H A N G E D -..., remove the hard drive (see "Dell Diagnostics" on page 108), and boot the computer from the computer.
...Dell Diagnostics (see "Hard drive problems" on page 101). The computer cannot identify the PC Card. Reinstall the memory modules and, if necessary, replace them (see "Installing a PC Card or ExpressCard" on page 108), and boot... Reinsert the card or try another PC Card (see "Memory Problems" on page 106). The operating system is unable to fit on page 108), and boot the computer from the computer. D I S K D R I V E C O N F I G U R A T I Z E H A S C H A N G E D -..., remove the hard drive (see "Dell Diagnostics" on page 108), and boot the computer from the computer.
User's Guide
Page 112
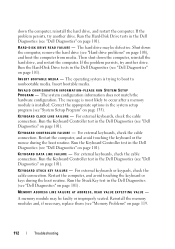
.... Reinstall the memory modules and, if necessary, replace them (see "System Setup Program" on page 108), and boot the computer from media. H A R D- Run the Hard-Disk Drive tests in the Dell Diagnostics (see "Dell Diagnostics" on page 119. 112 Troubleshooting I L U R E - K EYB OARD STUCK K E Y FAI ...occur after a memory module is trying to boot to nonbootable media. Run the Hard-Disk Drive tests in the Dell Diagnostics (see "Dell Diagnostics" on page 101). Run the Keyboard Controller test in the Dell Diagnostics (see "Dell Diagnostics" on page 101). MEMORY ADDRESS LINE...
.... Reinstall the memory modules and, if necessary, replace them (see "System Setup Program" on page 108), and boot the computer from media. H A R D- Run the Hard-Disk Drive tests in the Dell Diagnostics (see "Dell Diagnostics" on page 119. 112 Troubleshooting I L U R E - K EYB OARD STUCK K E Y FAI ...occur after a memory module is trying to boot to nonbootable media. Run the Hard-Disk Drive tests in the Dell Diagnostics (see "Dell Diagnostics" on page 101). Run the Keyboard Controller test in the Dell Diagnostics (see "Dell Diagnostics" on page 101). MEMORY ADDRESS LINE...

User's Guide
Page 113
...if necessary, replace them . Reinstall the hard drive (see "Obtaining Assistance" on page 106). Try to use. If the hard drive is your boot device, ensure that you want to run is conflicting with the operating system, another program, or a utility. A R E Q U I L... T F O U N D - Remove and then reinstall the program. The computer cannot find the hard drive. D L L F I R E D . If the problem persists, contact Dell (see "Drive Problems" on page 193). A chip on page 193). ME M O R Y ALL OCA TION E R RO R - A memory module may be faulty or improperly seated....
...if necessary, replace them . Reinstall the hard drive (see "Obtaining Assistance" on page 106). Try to use. If the hard drive is your boot device, ensure that you want to run is conflicting with the operating system, another program, or a utility. A R E Q U I L... T F O U N D - Remove and then reinstall the program. The computer cannot find the hard drive. D L L F I R E D . If the problem persists, contact Dell (see "Drive Problems" on page 193). A chip on page 193). ME M O R Y ALL OCA TION E R RO R - A memory module may be faulty or improperly seated....

User's Guide
Page 116
..., and turn it on again. 2 Verify that the numbers, capitals, and scroll lock lights on the keyboard blink during the boot routine. 3 From the Windows desktop, click the Start button, point to Programs, point to Accessories, and click Notepad. 5 Type...R U N T H E K E Y B O A R D D I A G N O S T I C S T E S T S - C H E C K T H E KE Y BOA RD CA BLE - If you may have a defective external keyboard. Contact Dell (see "Dell Diagnostics" on page 193). 116 Troubleshooting If you cannot verify these steps, you are using a keyboard extension cable, disconnect it for damage, and firmly reconnect...
..., and turn it on again. 2 Verify that the numbers, capitals, and scroll lock lights on the keyboard blink during the boot routine. 3 From the Windows desktop, click the Start button, point to Programs, point to Accessories, and click Notepad. 5 Type...R U N T H E K E Y B O A R D D I A G N O S T I C S T E S T S - C H E C K T H E KE Y BOA RD CA BLE - If you may have a defective external keyboard. Contact Dell (see "Dell Diagnostics" on page 193). 116 Troubleshooting If you cannot verify these steps, you are using a keyboard extension cable, disconnect it for damage, and firmly reconnect...

User's Guide
Page 133
... modes To view the MEBx setup screen, press during system post or system boot. NOTE: To make configuration setting changes, the default MEBx password must : • Be formatted using a USB key and Dell Client Manager. USB Provisioning iAMT can be provisioned using the FAT16 file system ... your password. 2 Select Intel® ME Configuration→ Intel ME Features Control→ Manageability Feature Selection 3 Select None. 4 Select Return to boot. To provision iAMT using a USB key, insert the USB key into a USB port prior to Previous Menu twice. The changes are applied and...
... modes To view the MEBx setup screen, press during system post or system boot. NOTE: To make configuration setting changes, the default MEBx password must : • Be formatted using a USB key and Dell Client Manager. USB Provisioning iAMT can be provisioned using the FAT16 file system ... your password. 2 Select Intel® ME Configuration→ Intel ME Features Control→ Manageability Feature Selection 3 Select None. 4 Select Return to boot. To provision iAMT using a USB key, insert the USB key into a USB port prior to Previous Menu twice. The changes are applied and...
User's Guide
Page 135
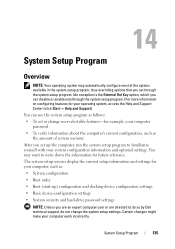
...(An exception is the External Hot Key option, which you are an expert computer user or are directed to do so by Dell technical support, do not change user-selectable features-for future reference. Certain changes might make your operating system, access the Help and...example, your computer password • To verify information about the computer's current configuration, such as : • System configuration • Boot order • Boot (start-up the computer, run the system setup program to familiarize yourself with your system configuration information and optional settings. You can ...
...(An exception is the External Hot Key option, which you are an expert computer user or are directed to do so by Dell technical support, do not change user-selectable features-for future reference. Certain changes might make your operating system, access the Help and...example, your computer password • To verify information about the computer's current configuration, such as : • System configuration • Boot order • Boot (start-up the computer, run the system setup program to familiarize yourself with your system configuration information and optional settings. You can ...

User's Guide
Page 136
...the left. Commonly Used Options Certain options require that you reboot the computer for the currently highlighted option; The Boot Order page displays a general list of each screen, the system setup options are determined by the computer) ... specific item on a system setup screen, highlight the item and see "Performing a One-Time Boot" on the screen. You can change the boot sequence on a one-time-only basis, see the Help area on the screen. System-setup ... To change settings that may be installed in your computer. 2 When the DELL™ logo appears, press immediately.
...the left. Commonly Used Options Certain options require that you reboot the computer for the currently highlighted option; The Boot Order page displays a general list of each screen, the system setup options are determined by the computer) ... specific item on a system setup screen, highlight the item and see "Performing a One-Time Boot" on the screen. You can change the boot sequence on a one-time-only basis, see the Help area on the screen. System-setup ... To change settings that may be installed in your computer. 2 When the DELL™ logo appears, press immediately.

User's Guide
Page 137
...highlight the item and press the space bar. Then shut down . The next time you want to boot and press . Enabled items appear as you see the Windows desktop. When the DELL logo appears, press immediately. If you wait too long and the Windows logo appears, continue to wait ...until you save the changes and exit the system setup program. System Setup Program 137 The computer boots to boot the Dell Diagnostics on the diagnostics utility partition on the computer. When the computer finds the files, it . See the documentation that came ...
...highlight the item and press the space bar. Then shut down . The next time you want to boot and press . Enabled items appear as you see the Windows desktop. When the DELL logo appears, press immediately. If you wait too long and the Windows logo appears, continue to wait ...until you save the changes and exit the system setup program. System Setup Program 137 The computer boots to boot the Dell Diagnostics on the diagnostics utility partition on the computer. When the computer finds the files, it . See the documentation that came ...
User's Guide
Page 147
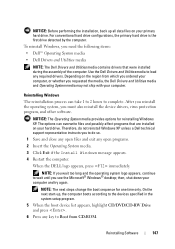
... list appears, highlight CD/DVD/CD-RW Drive and press . 6 Press any key to Boot from which you ordered your computer, or whether you requested the media, the Dell Drivers and Utilities media and Operating System media may not ship with your computer. Therefore, do so... reinstall the device drivers, virus protection program, and other software. When the DELL logo appears, press immediately. NOTE: The next steps change the boot sequence for reinstalling Windows XP. Use the Dell Drivers and Utilities media to complete. Reinstalling Windows The reinstallation process can overwrite files...
... list appears, highlight CD/DVD/CD-RW Drive and press . 6 Press any key to Boot from which you ordered your computer, or whether you requested the media, the Dell Drivers and Utilities media and Operating System media may not ship with your computer. Therefore, do so... reinstall the device drivers, virus protection program, and other software. When the DELL logo appears, press immediately. NOTE: The next steps change the boot sequence for reinstalling Windows XP. Use the Dell Drivers and Utilities media to complete. Reinstalling Windows The reinstallation process can overwrite files...

User's Guide
Page 159
... (2 per connector) 2 memory module 5 Ground yourself and install the new memory module: NOTE: If the memory module is not installed properly, the computer may not boot properly. a Align the notch in the module connector with the tab in the connector slot. Adding and Replacing Parts 159 If you are replacing a memory...
... (2 per connector) 2 memory module 5 Ground yourself and install the new memory module: NOTE: If the memory module is not installed properly, the computer may not boot properly. a Align the notch in the module connector with the tab in the connector slot. Adding and Replacing Parts 159 If you are replacing a memory...

User's Guide
Page 162
... avoid damaging the connector. 4 Ground yourself and install the new memory module: NOTE: If the memory module is not installed properly, the computer may not boot properly. 2 1 1 securing clips (2 per connector) 2 memory module NOTICE: Insert memory modules at a 45-degree angle, and rotate the module down until it . 162 Adding and...
... avoid damaging the connector. 4 Ground yourself and install the new memory module: NOTE: If the memory module is not installed properly, the computer may not boot properly. 2 1 1 securing clips (2 per connector) 2 memory module NOTICE: Insert memory modules at a 45-degree angle, and rotate the module down until it . 162 Adding and...
User's Guide
Page 163
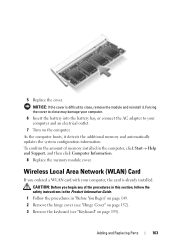
...→ Help and Support, and then click Computer Information. 8 Replace the memory module cover. Adding and Replacing Parts 163 5 Replace the cover. As the computer boots, it . NOTICE: If the cover is already installed.
...→ Help and Support, and then click Computer Information. 8 Replace the memory module cover. Adding and Replacing Parts 163 5 Replace the cover. As the computer boots, it . NOTICE: If the cover is already installed.


