Dell™ Technology Guide
Page 35
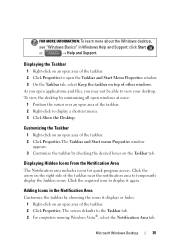
... access. FOR MORE INFORMATION: To learn more about the Windows desktop, see "Windows Basics" in the Notification Area Customize the taskbar by checking the desired boxes on the Taskbar tab.
... access. FOR MORE INFORMATION: To learn more about the Windows desktop, see "Windows Basics" in the Notification Area Customize the taskbar by checking the desired boxes on the Taskbar tab.
Dell™ Technology Guide
Page 44
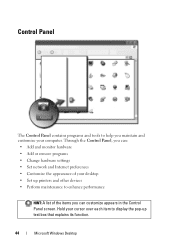
... Internet preferences • Customize the appearance of your desktop • Set up printers and other devices • Perform maintenance to display the pop-up text box that explains its function. 44 Microsoft Windows Desktop Through the Control Panel, you maintain and customize your computer. Control Panel The Control Panel contains programs...
... Internet preferences • Customize the appearance of your desktop • Set up printers and other devices • Perform maintenance to display the pop-up text box that explains its function. 44 Microsoft Windows Desktop Through the Control Panel, you maintain and customize your computer. Control Panel The Control Panel contains programs...
Dell™ Technology Guide
Page 45
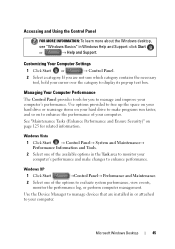
... (Enhance Performance and Ensure Security)" on to manage and improve your computer. If you to enhance the performance of the options to free up text box.
... (Enhance Performance and Ensure Security)" on to manage and improve your computer. If you to enhance the performance of the options to free up text box.
Dell™ Technology Guide
Page 52
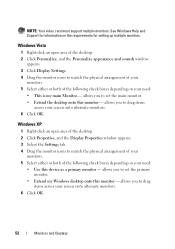
... monitor icons to drag items across your need : • This is my main Monitor - Windows XP 1 Right-click an open area of the following check boxes depending on your screen onto alternate monitors. 6 Click OK. 52 Monitors and Displays allows you to match the physical arrangement of your monitors. 5 Select either... onto this device as a primary monitor - NOTE: Your video card must support multiple monitors. Windows Vista 1 Right-click an open area of the following check boxes depending on the requirements for setting up multiple monitors.
... monitor icons to drag items across your need : • This is my main Monitor - Windows XP 1 Right-click an open area of the following check boxes depending on your screen onto alternate monitors. 6 Click OK. 52 Monitors and Displays allows you to match the physical arrangement of your monitors. 5 Select either... onto this device as a primary monitor - NOTE: Your video card must support multiple monitors. Windows Vista 1 Right-click an open area of the following check boxes depending on the requirements for setting up multiple monitors.
Dell™ Technology Guide
Page 60
... a new name, click the General tab, and click OK. • To enable a service, select the check box next to the service on the Services tab, and click OK. • To disable a service, clear the check box next to the service on the rollers. 7 Replace the ball and retainer ring, and turn the...
... a new name, click the General tab, and click OK. • To enable a service, select the check box next to the service on the Services tab, and click OK. • To disable a service, clear the check box next to the service on the rollers. 7 Replace the ball and retainer ring, and turn the...
Dell™ Technology Guide
Page 61
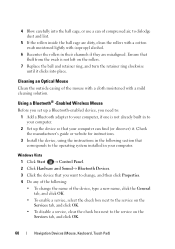
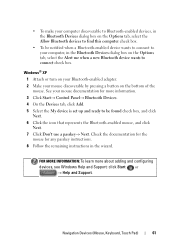
... Panel→ Bluetooth Devices. 4 On the Devices tab, click Add. 5 Select the My device is set up and ready to connect check box. Windows® XP 1 Attach or turn on your Bluetooth-enabled adapter. 2 Make your mouse documentation for any passkey instructions. 8 Follow the ...remaining instructions in the Bluetooth Devices dialog box on the bottom of the mouse. Navigation Devices (Mouse, Keyboard, Touch Pad) 61 See your mouse discoverable by pressing a button on the ...
... Panel→ Bluetooth Devices. 4 On the Devices tab, click Add. 5 Select the My device is set up and ready to connect check box. Windows® XP 1 Attach or turn on your Bluetooth-enabled adapter. 2 Make your mouse documentation for any passkey instructions. 8 Follow the ...remaining instructions in the Bluetooth Devices dialog box on the bottom of the mouse. Navigation Devices (Mouse, Keyboard, Touch Pad) 61 See your mouse discoverable by pressing a button on the ...
Dell™ Technology Guide
Page 63
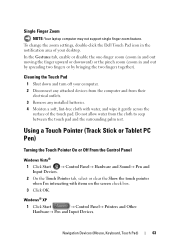
..., and wipe it gently across the surface of your computer. 2 Disconnect any installed batteries. 4 Moisten a soft, lint-free cloth with items on the screen check box. 3 Click OK. In the Gestures tab, enable or disable the one-finger zoom (zoom in and out moving the finger upward or downward) or the...® XP 1 Click Start → Control Panel→ Printers and Other Hardware→ Pen and Input Devices. To change the zoom settings, double-click the Dell Touch Pad icon in and out by spreading two fingers or by bringing the two fingers together).
..., and wipe it gently across the surface of your computer. 2 Disconnect any installed batteries. 4 Moisten a soft, lint-free cloth with items on the screen check box. 3 Click OK. In the Gestures tab, enable or disable the one-finger zoom (zoom in and out moving the finger upward or downward) or the...® XP 1 Click Start → Control Panel→ Printers and Other Hardware→ Pen and Input Devices. To change the zoom settings, double-click the Dell Touch Pad icon in and out by spreading two fingers or by bringing the two fingers together).
Dell™ Technology Guide
Page 64
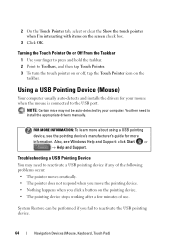
...: To learn more information. 2 On the Touch Pointer tab, select or clear the Show the touch pointer when I'm interacting with items on the screen check box. 3 Click OK.
...: To learn more information. 2 On the Touch Pointer tab, select or clear the Show the touch pointer when I'm interacting with items on the screen check box. 3 Click OK.
Dell™ Technology Guide
Page 70
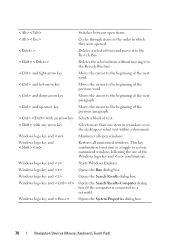
... functions as a toggle to the beginning of the Windows logo key and combination. Windows logo key and Opens the Search Results dialog box. Switches between open windows. and up-arrow key Moves the cursor to restore minimized windows following the use of the previous paragraph. and... down-arrow key Moves the cursor to the Recycle Bin first. Windows logo key and Opens the System Properties dialog box. 70 Navigation Devices (Mouse, Keyboard, Touch Pad) Windows logo key and Restores all open items. Cycles through items in the order in...
... functions as a toggle to the beginning of the Windows logo key and combination. Windows logo key and Opens the Search Results dialog box. Switches between open windows. and up-arrow key Moves the cursor to restore minimized windows following the use of the previous paragraph. and... down-arrow key Moves the cursor to the Recycle Bin first. Windows logo key and Opens the System Properties dialog box. 70 Navigation Devices (Mouse, Keyboard, Touch Pad) Windows logo key and Restores all open items. Cycles through items in the order in...
Dell™ Technology Guide
Page 90
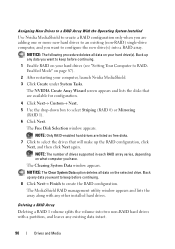
... data on the selected drive. NOTE: Only RAID-enabled hard drives are available for configuration. 4 Click Next→ Custom→ Next. 5 Use the drop-down box to select Striping (RAID 0) or Mirroring (RAID 1). 6 Click Next. Back up any data you want to configure the new drive(s) into two non-RAID hard...
... data on the selected drive. NOTE: Only RAID-enabled hard drives are available for configuration. 4 Click Next→ Custom→ Next. 5 Use the drop-down box to select Striping (RAID 0) or Mirroring (RAID 1). 6 Click Next. Back up any data you want to configure the new drive(s) into two non-RAID hard...
Dell™ Technology Guide
Page 92
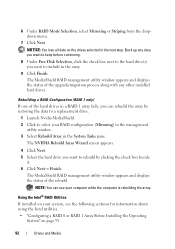
NOTE: You can rebuild the array by clicking the check box beside it. 6 Click Next→ Finish. NOTICE: You lose all data on your computer while the computer is rebuilding the array. Rebuilding a RAID Configuration (RAID 1 ...) in the management utility window. 3 Select Rebuild Array in a RAID 1 array fails, you want to keep before continuing. 8 Under Free Disk Selection, click the check box next to include in the next step.
NOTE: You can rebuild the array by clicking the check box beside it. 6 Click Next→ Finish. NOTICE: You lose all data on your computer while the computer is rebuilding the array. Rebuilding a RAID Configuration (RAID 1 ...) in the management utility window. 3 Select Rebuild Array in a RAID 1 array fails, you want to keep before continuing. 8 Under Free Disk Selection, click the check box next to include in the next step.

Dell™ Technology Guide
Page 96
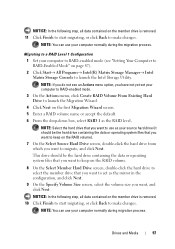
and down box, and then click Next. The stripe size should be closest to the size of Rebuild are rebuilt within the operating system. 5 Use the up- If ... want to launch the Migration Wizard. 4 Click Next on the Migration Wizard screen. 5 Enter a RAID volume name or accept the default. 6 From the drop-down box, select RAID 0 as the RAID level. 7 Select the appropriate stripe size from which you do not know the average file size, choose 128 KB as...
and down box, and then click Next. The stripe size should be closest to the size of Rebuild are rebuilt within the operating system. 5 Use the up- If ... want to launch the Migration Wizard. 4 Click Next on the Migration Wizard screen. 5 Enter a RAID volume name or accept the default. 6 From the drop-down box, select RAID 0 as the RAID level. 7 Select the appropriate stripe size from which you do not know the average file size, choose 128 KB as...
Dell™ Technology Guide
Page 97
... "Setting Your Computer to RAID-Enabled Mode" on the first Migration Wizard screen. 5 Enter a RAID volume name or accept the default. 6 From the drop-down box, select RAID 1 as the RAID level. NOTE: Select the hard drive that you want to use as the mirror in the configuration, and click Next...
... "Setting Your Computer to RAID-Enabled Mode" on the first Migration Wizard screen. 5 Enter a RAID volume name or accept the default. 6 From the drop-down box, select RAID 1 as the RAID level. NOTE: Select the hard drive that you want to use as the mirror in the configuration, and click Next...
Dell™ Technology Guide
Page 100
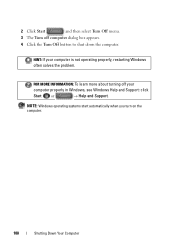
HINT: If your computer properly in Windows, see Windows Help and Support: click Start or → Help and Support. NOTE: Windows operating systems start automatically when you turn on the computer. 100 Shutting Down Your Computer FOR MORE INFORMATION: To learn more about turning off computer dialog box appears. 4 Click the Turn Off button to shut down the computer. 2 Click Start and then select Turn Off menu. 3 The Turn off your computer is not operating properly, restarting Windows often solves the problem.
HINT: If your computer properly in Windows, see Windows Help and Support: click Start or → Help and Support. NOTE: Windows operating systems start automatically when you turn on the computer. 100 Shutting Down Your Computer FOR MORE INFORMATION: To learn more about turning off computer dialog box appears. 4 Click the Turn Off button to shut down the computer. 2 Click Start and then select Turn Off menu. 3 The Turn off your computer is not operating properly, restarting Windows often solves the problem.
Dell™ Technology Guide
Page 106
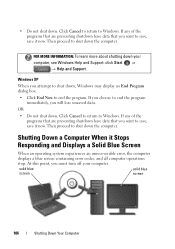
... computer. If any of the programs that are preventing shutdown have data that you attempt to shut down, Windows may display an End Program dialog box. • Click End Now to shut down . Shutting Down a Computer When it now. At this point, you will lose unsaved data. If you want to...
... computer. If any of the programs that are preventing shutdown have data that you attempt to shut down, Windows may display an End Program dialog box. • Click End Now to shut down . Shutting Down a Computer When it now. At this point, you will lose unsaved data. If you want to...
Dell™ Technology Guide
Page 107
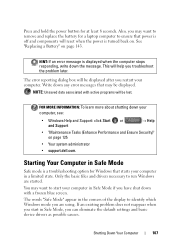
... reporting dialog box will reset when the power is off and components will be lost. The words "Safe Mode" appear in Safe Mode if you can eliminate the default settings and basic device drivers as possible causes. See "Replacing a Battery" on page 125 • Your system administrator • support.dell.com. HINT...
... reporting dialog box will reset when the power is off and components will be lost. The words "Safe Mode" appear in Safe Mode if you can eliminate the default settings and basic device drivers as possible causes. See "Replacing a Battery" on page 125 • Your system administrator • support.dell.com. HINT...
Dell™ Technology Guide
Page 112
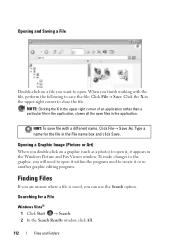
... Start → Search. 2 In the Search Results window, click All. 112 Files and Folders When you will need to open files in the File name box and click Save. Click the X in the upper-right corner to create it appears in another graphic editing program.
... Start → Search. 2 In the Search Results window, click All. 112 Files and Folders When you will need to open files in the File name box and click Save. Click the X in the upper-right corner to create it appears in another graphic editing program.

Dell™ Technology Guide
Page 113
... to print, and select File→Print. 2 Specify the print settings and click OK. 3 Type the filename or part of the filename in the Search box. 5 Press or click the magnifying glass To search for the file and press the key. Windows® XP 1 Click Start → Search. 2 Under Search ...Companion, select the type of a word in the Search box. 4 Type a word or part of item you want to delete. 2 Press the Delete key. Printing Files 1 Open the file you want to rename. 2 Click ...
... to print, and select File→Print. 2 Specify the print settings and click OK. 3 Type the filename or part of the filename in the Search box. 5 Press or click the magnifying glass To search for the file and press the key. Windows® XP 1 Click Start → Search. 2 Under Search ...Companion, select the type of a word in the Search box. 4 Type a word or part of item you want to delete. 2 Press the Delete key. Printing Files 1 Open the file you want to rename. 2 Click ...
Dell™ Technology Guide
Page 114
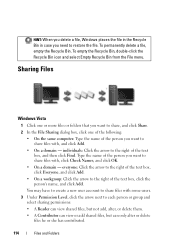
... Everyone, and click Add. • On a workgroup: Click the arrow to the right of the text box, click the person's name, and click Add. individuals: Click the arrow to the right of the text box, and then click Find. To permanently delete a file, empty the Recycle Bin. HINT: When you delete a file... a domain - Sharing Files Windows Vista 1 Click one or more files or folders that you want to share, and click Share. 2 In the File Sharing dialog box, click one of the following: • On the same computer: Type the name of the person you want to share files with , and click Add...
... Everyone, and click Add. • On a workgroup: Click the arrow to the right of the text box, click the person's name, and click Add. individuals: Click the arrow to the right of the text box, and then click Find. To permanently delete a file, empty the Recycle Bin. HINT: When you delete a file... a domain - Sharing Files Windows Vista 1 Click one or more files or folders that you want to share, and click Share. 2 In the File Sharing dialog box, click one of the following: • On the same computer: Type the name of the person you want to share files with , and click Add...
Dell™ Technology Guide
Page 115
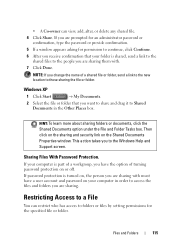
... the Shared Documents Properties window. HINT: To learn more about sharing folders or documents, click the Shared Documents option under the File and Folder Tasks box. This action takes you change the name of turning password protection on your folder is turned on, the person you want to share and drag... those sharing the file or folder. Windows XP 1 Click Start → My Documents. 2 Select the file or folder that your computer in the Other Places box. Files and Folders 115
... the Shared Documents Properties window. HINT: To learn more about sharing folders or documents, click the Shared Documents option under the File and Folder Tasks box. This action takes you change the name of turning password protection on your folder is turned on, the person you want to share and drag... those sharing the file or folder. Windows XP 1 Click Start → My Documents. 2 Select the file or folder that your computer in the Other Places box. Files and Folders 115


