Dell™ Technology Guide
Page 6
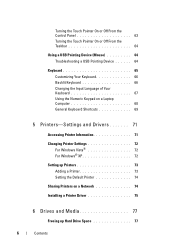
... Pointer On or Off From the Control Panel 63 Turning the Touch Pointer On or Off From the Taskbar 64 Using a USB Pointing Device (Mouse 64 Troubleshooting a USB Pointing Device 64 Keyboard 65 Customizing Your ...
... Pointer On or Off From the Control Panel 63 Turning the Touch Pointer On or Off From the Taskbar 64 Using a USB Pointing Device (Mouse 64 Troubleshooting a USB Pointing Device 64 Keyboard 65 Customizing Your ...
Dell™ Technology Guide
Page 18
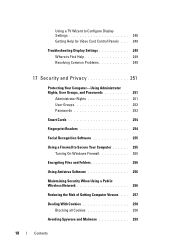
... Administrator Rights 251 User Groups 252 Passwords 253 Smart Cards 254 Fingerprint Readers 254 Facial Recognition Software 255 Using a Firewall to Secure Your Computer 255 Turning On Windows Firewall 255 Encrypting Files and Folders 256 Using Antivirus Software 256 Maintaining Security When Using a Public Wireless Network 256 Reducing the Risk of...
... Administrator Rights 251 User Groups 252 Passwords 253 Smart Cards 254 Fingerprint Readers 254 Facial Recognition Software 255 Using a Firewall to Secure Your Computer 255 Turning On Windows Firewall 255 Encrypting Files and Folders 256 Using Antivirus Software 256 Maintaining Security When Using a Public Wireless Network 256 Reducing the Risk of...
Dell™ Technology Guide
Page 59
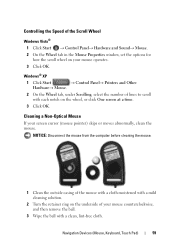
...-free cloth. NOTICE: Disconnect the mouse from the computer before cleaning the mouse. 1 Clean the outside casing of lines to scroll with a mild cleaning solution. 2 Turn the retainer ring on your screen cursor (mouse pointer) skips or moves abnormally, clean the mouse. Windows® XP 1 Click Start → Control Panel→...
...-free cloth. NOTICE: Disconnect the mouse from the computer before cleaning the mouse. 1 Clean the outside casing of lines to scroll with a mild cleaning solution. 2 Turn the retainer ring on your screen cursor (mouse pointer) skips or moves abnormally, clean the mouse. Windows® XP 1 Click Start → Control Panel→...
Dell™ Technology Guide
Page 60
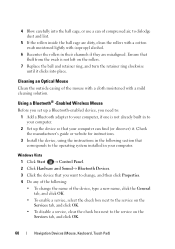
... the mouse with a cloth moistened with isopropyl alcohol. 6 Recenter the rollers in to the service on the rollers. 7 Replace the ball and retainer ring, and turn the retainer ring clockwise until it . Ensure that your computer can of the device, type a new name, click the General tab, and click OK. •...
... the mouse with a cloth moistened with isopropyl alcohol. 6 Recenter the rollers in to the service on the rollers. 7 Replace the ball and retainer ring, and turn the retainer ring clockwise until it . Ensure that your computer can of the device, type a new name, click the General tab, and click OK. •...
Dell™ Technology Guide
Page 61
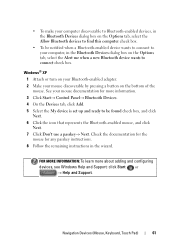
... click Next. 6 Click the icon that represents the Bluetooth-enabled mouse, and click Next. 7 Click Don't use a passkey→ Next. Windows® XP 1 Attach or turn on your Bluetooth-enabled adapter. 2 Make your mouse discoverable by pressing a button on the bottom of the mouse. Check the documentation for the mouse for...
... click Next. 6 Click the icon that represents the Bluetooth-enabled mouse, and click Next. 7 Click Don't use a passkey→ Next. Windows® XP 1 Attach or turn on your Bluetooth-enabled adapter. 2 Make your mouse discoverable by pressing a button on the bottom of the mouse. Check the documentation for the mouse for...
Dell™ Technology Guide
Page 63
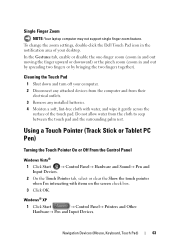
... touch pad. Navigation Devices (Mouse, Keyboard, Touch Pad) 63 Cleaning the Touch Pad 1 Shut down and turn off your desktop. Using a Touch Pointer (Track Stick or Tablet PC Pen) Turning the Touch Pointer On or Off From the Control Panel Windows Vista® 1 Click Start → Control ...Click Start → Control Panel→ Printers and Other Hardware→ Pen and Input Devices. To change the zoom settings, double-click the Dell Touch Pad icon in and out by spreading two fingers or by bringing the two fingers together). Do not allow water from their electrical outlets...
... touch pad. Navigation Devices (Mouse, Keyboard, Touch Pad) 63 Cleaning the Touch Pad 1 Shut down and turn off your desktop. Using a Touch Pointer (Track Stick or Tablet PC Pen) Turning the Touch Pointer On or Off From the Control Panel Windows Vista® 1 Click Start → Control ...Click Start → Control Panel→ Printers and Other Hardware→ Pen and Input Devices. To change the zoom settings, double-click the Dell Touch Pad icon in and out by spreading two fingers or by bringing the two fingers together). Do not allow water from their electrical outlets...
Dell™ Technology Guide
Page 64
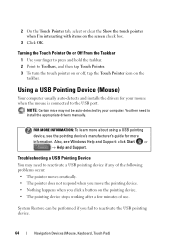
... fail to reactivate the USB pointing device. 64 Navigation Devices (Mouse, Keyboard, Touch Pad) You then need to Toolbars, and then tap Touch Pointer. 3 To turn the touch pointer on or off, tap the Touch Pointer icon on the screen check box. 3 Click OK. NOTE: Certain mice may need to the... Device You may not be performed if you click a button on the pointing device. • The pointing device stops working after a few minutes of use. Turning the Touch Pointer On or Off From the Taskbar 1 Use your computer. 2 On the Touch Pointer tab, select or clear the Show the touch pointer...
... fail to reactivate the USB pointing device. 64 Navigation Devices (Mouse, Keyboard, Touch Pad) You then need to Toolbars, and then tap Touch Pointer. 3 To turn the touch pointer on or off, tap the Touch Pointer icon on the screen check box. 3 Click OK. NOTE: Certain mice may need to the... Device You may not be performed if you click a button on the pointing device. • The pointing device stops working after a few minutes of use. Turning the Touch Pointer On or Off From the Taskbar 1 Use your computer. 2 On the Touch Pointer tab, select or clear the Show the touch pointer...
Dell™ Technology Guide
Page 82
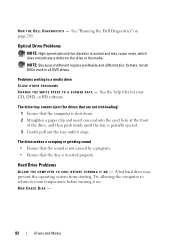
... CD, DVD, or BD software. Try allowing the computer to return to a media drive CLOSE OTHER PROGRAMS C H A N G E T H E W R I T E S P E E D T O A S L O W E R R A T E - RUN CHECK DISK - 82 Drives and Media R U N THE DELL D I A G N O S T I T O N - See "Running the Dell Diagnostics" on . Problems writing to room temperature before turning it stops.
... CD, DVD, or BD software. Try allowing the computer to return to a media drive CLOSE OTHER PROGRAMS C H A N G E T H E W R I T E S P E E D T O A S L O W E R R A T E - RUN CHECK DISK - 82 Drives and Media R U N THE DELL D I A G N O S T I T O N - See "Running the Dell Diagnostics" on . Problems writing to room temperature before turning it stops.

Dell™ Technology Guide
Page 95
... desired and click Next. 9 Click Finish to create the volume, or click Back to make changes. 10 Follow the Microsoft Windows procedures for your computer). 1 Turn on or restart your computer to RAID-enabled mode (see the appropriate "Drives" section for creating a partition on the new RAID volume. Drives and Media...
... desired and click Next. 9 Click Finish to create the volume, or click Back to make changes. 10 Follow the Microsoft Windows procedures for your computer). 1 Turn on or restart your computer to RAID-enabled mode (see the appropriate "Drives" section for creating a partition on the new RAID volume. Drives and Media...
Dell™ Technology Guide
Page 99
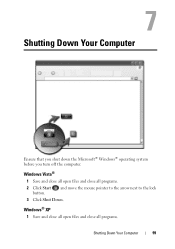
and move the mouse pointer to the arrow next to the lock 3 Click Shut Down. Windows® XP 1 Save and close all open files and close all programs. 2 Click Start button. Shutting Down Your Computer Ensure that you shut down the Microsoft® Windows® operating system before you turn off the computer. Windows Vista® 1 Save and close all open files and close all programs. Shutting Down Your Computer 99
and move the mouse pointer to the arrow next to the lock 3 Click Shut Down. Windows® XP 1 Save and close all open files and close all programs. 2 Click Start button. Shutting Down Your Computer Ensure that you shut down the Microsoft® Windows® operating system before you turn off the computer. Windows Vista® 1 Save and close all open files and close all programs. Shutting Down Your Computer 99
Dell™ Technology Guide
Page 100
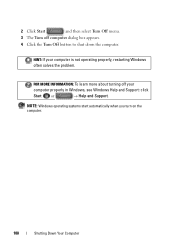
2 Click Start and then select Turn Off menu. 3 The Turn off your computer is not operating properly, restarting Windows often solves the problem. NOTE: Windows operating systems start automatically when you turn on the computer. 100 Shutting Down Your Computer FOR MORE INFORMATION: To learn more about turning off computer dialog box appears. 4 Click the Turn Off button to shut down the computer. HINT: If your computer properly in Windows, see Windows Help and Support: click Start or → Help and Support.
2 Click Start and then select Turn Off menu. 3 The Turn off your computer is not operating properly, restarting Windows often solves the problem. NOTE: Windows operating systems start automatically when you turn on the computer. 100 Shutting Down Your Computer FOR MORE INFORMATION: To learn more about turning off computer dialog box appears. 4 Click the Turn Off button to shut down the computer. HINT: If your computer properly in Windows, see Windows Help and Support: click Start or → Help and Support.
Dell™ Technology Guide
Page 101
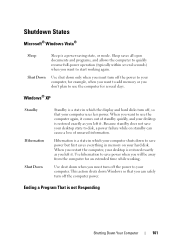
...computer for an extended time while working again. Ending a Program That is a power-saving state, or mode. This action shuts down when you must turn off the power to your computer, for example, when you want to add memory or you can cause a loss of standby quickly, and your ...desktop is a state in memory on standby can safely turn off the computer power. Shutdown States Microsoft® Windows Vista® Sleep Shut Down Sleep is not Responding Shutting Down Your Computer 101 Hibernation is...
...computer for an extended time while working again. Ending a Program That is a power-saving state, or mode. This action shuts down when you must turn off the power to your computer, for example, when you want to add memory or you can cause a loss of standby quickly, and your ...desktop is a state in memory on standby can safely turn off the computer power. Shutdown States Microsoft® Windows Vista® Sleep Shut Down Sleep is not Responding Shutting Down Your Computer 101 Hibernation is...
Dell™ Technology Guide
Page 105
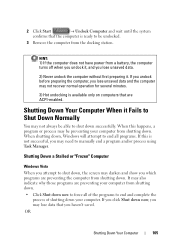
... Start → Undock Computer and wait until the system confirms that the computer is ready to be undocked. 3 Remove the computer from a battery, the computer turns off when you undock it, and you lose unsaved data. 2) Never undock the computer without first preparing it Fails to end and complete the process...
... Start → Undock Computer and wait until the system confirms that the computer is ready to be undocked. 3 Remove the computer from a battery, the computer turns off when you undock it, and you lose unsaved data. 2) Never undock the computer without first preparing it Fails to end and complete the process...
Dell™ Technology Guide
Page 106
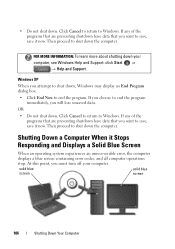
...; Do not shut down the computer. Then proceed to shut down . If any of the programs that are preventing shutdown have data that you must turn off your computer, see Windows Help and Support: click Start or → Help and Support. Windows XP When you will lose unsaved data. solid blue...
...; Do not shut down the computer. Then proceed to shut down . If any of the programs that are preventing shutdown have data that you must turn off your computer, see Windows Help and Support: click Start or → Help and Support. Windows XP When you will lose unsaved data. solid blue...
Dell™ Technology Guide
Page 107
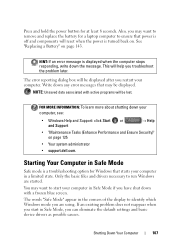
... an error message is off and components will help you troubleshoot the problem later. Starting Your Computer in Safe Mode Safe mode is turned back on. Also, you may be displayed after you can eliminate the default settings and basic device drivers as possible causes. The words... in a limited state. Shutting Down Your Computer 107 See "Replacing a Battery" on page 125 • Your system administrator • support.dell.com. If an existing problem does not reappear when you start your computer. Write down any error messages that power is displayed when the computer...
... an error message is off and components will help you troubleshoot the problem later. Starting Your Computer in Safe Mode Safe mode is turned back on. Also, you may be displayed after you can eliminate the default settings and basic device drivers as possible causes. The words... in a limited state. Shutting Down Your Computer 107 See "Replacing a Battery" on page 125 • Your system administrator • support.dell.com. If an existing problem does not reappear when you start your computer. Write down any error messages that power is displayed when the computer...
Dell™ Technology Guide
Page 115
.... 6 After you receive confirmation that you to the Windows Help and Support screen. NOTE: If you have a user account and password on your computer is turned on, the person you are sharing with . 7 Click Done. If password protection is part of a workgroup, you change the name of...
.... 6 After you receive confirmation that you to the Windows Help and Support screen. NOTE: If you have a user account and password on your computer is turned on, the person you are sharing with . 7 Click Done. If password protection is part of a workgroup, you change the name of...
Dell™ Technology Guide
Page 126
Cleaning Your Computer Before You Start Read the safety instructions available in the Dell™ safety information that come with the compressed-air product. Cleaning the Computer To clean your optical media, try cleaning the media. 126 Maintenance Tasks (.... Tools are available through your computer's operating system to clean the lens in an optical drive, and follow the instructions that shipped with your computer. Turn off and unplug the computer from the electrical outlet. Do not allow water to drip inside the computer or keyboard. Never touch the lens in...
Cleaning Your Computer Before You Start Read the safety instructions available in the Dell™ safety information that come with the compressed-air product. Cleaning the Computer To clean your optical media, try cleaning the media. 126 Maintenance Tasks (.... Tools are available through your computer's operating system to clean the lens in an optical drive, and follow the instructions that shipped with your computer. Turn off and unplug the computer from the electrical outlet. Do not allow water to drip inside the computer or keyboard. Never touch the lens in...
Dell™ Technology Guide
Page 136
...: • Click Start and move the pointer to the arrow icon by the Lock button. OR • Depending on the hard drive and then completely turning off the computer. When the computer exits hibernate mode, it was in before entering hibernate mode. 136 Power (Power Settings, Power Protection Devices, and Batteries...
...: • Click Start and move the pointer to the arrow icon by the Lock button. OR • Depending on the hard drive and then completely turning off the computer. When the computer exits hibernate mode, it was in before entering hibernate mode. 136 Power (Power Settings, Power Protection Devices, and Batteries...
Dell™ Technology Guide
Page 138
Power Management Modes Standby Mode Standby conserves power by . To enter standby: • Click Start→ Turn off computer→ Stand by turning off the display and the hard drive after a predetermined period of the following methods: • Press the power button. • Close the display for a notebook ...
Power Management Modes Standby Mode Standby conserves power by . To enter standby: • Click Start→ Turn off computer→ Stand by turning off the display and the hard drive after a predetermined period of the following methods: • Press the power button. • Close the display for a notebook ...
Dell™ Technology Guide
Page 139
... the card, or simply restart (reboot) your computer is in before entering hibernate. To manually enter hibernate: • Click Start → Turn off the computer. Power (Power Settings, Power Protection Devices, and Batteries) 139 When the computer exits hibernate, it was in hibernate mode. ...short time to the same operating state it returns to exit hibernate. OR • Depending on the hard drive and then completely turning off computer. Your computer enters hibernate if the battery charge level becomes critically low. Then press and hold the key, and click ...
... the card, or simply restart (reboot) your computer is in before entering hibernate. To manually enter hibernate: • Click Start → Turn off the computer. Power (Power Settings, Power Protection Devices, and Batteries) 139 When the computer exits hibernate, it was in hibernate mode. ...short time to the same operating state it returns to exit hibernate. OR • Depending on the hard drive and then completely turning off computer. Your computer enters hibernate if the battery charge level becomes critically low. Then press and hold the key, and click ...


