Owner's Manual
Page 6
7 Using the Camera 69 Accessing the Camera's Help File 69 Manually Adjusting the Camera Settings 70 Creating a Picture or a Video 70 8 Using ExpressCards 71 ExpressCard Blanks 71 Installing an ExpressCard 72 Removing an ExpressCard or Blank 72 9 Using the Memory Card Reader 73 Memory Card Blanks 73 Installing a Memory Card 73 Removing a Memory Card or Blank 74 10 Setting Up and Using Networks 75 Connecting a Network or Broadband Modem Cable 75 Setting Up a Network in the Microsoft Windows Vista® Operating System 76 Wireless Local Area Network (WLAN 76...
7 Using the Camera 69 Accessing the Camera's Help File 69 Manually Adjusting the Camera Settings 70 Creating a Picture or a Video 70 8 Using ExpressCards 71 ExpressCard Blanks 71 Installing an ExpressCard 72 Removing an ExpressCard or Blank 72 9 Using the Memory Card Reader 73 Memory Card Blanks 73 Installing a Memory Card 73 Removing a Memory Card or Blank 74 10 Setting Up and Using Networks 75 Connecting a Network or Broadband Modem Cable 75 Setting Up a Network in the Microsoft Windows Vista® Operating System 76 Wireless Local Area Network (WLAN 76...
Owner's Manual
Page 10
... 129 Turning Off Your Computer 129 Before Working Inside Your Computer 130 Hard Drive 131 Removing the Hard Drive 132 Replacing the Hard Drive 133 Returning a Hard Drive to Dell 133 Center Control Cover and Hinge Covers 134 Removing the Center Control Cover and Hinge Covers 134 Replacing the Center Control Cover and Hinge Covers 136 Keyboard 136 Removing the Keyboard 137 Replacing the Keyboard 138 Memory 138 Removing the Memory Module 138 Replacing the Memory Module 140 Subscriber Identity Module 142 Wireless Mini-Cards 142 Removing a WLAN Card 143 Replacing a WLAN Card...
... 129 Turning Off Your Computer 129 Before Working Inside Your Computer 130 Hard Drive 131 Removing the Hard Drive 132 Replacing the Hard Drive 133 Returning a Hard Drive to Dell 133 Center Control Cover and Hinge Covers 134 Removing the Center Control Cover and Hinge Covers 134 Replacing the Center Control Cover and Hinge Covers 136 Keyboard 136 Removing the Keyboard 137 Replacing the Keyboard 138 Memory 138 Removing the Memory Module 138 Replacing the Memory Module 140 Subscriber Identity Module 142 Wireless Mini-Cards 142 Removing a WLAN Card 143 Replacing a WLAN Card...
Owner's Manual
Page 11
Flash Cache Module 147 Removing the FCM 147 Replacing the FCM 148 Internal Card With Bluetooth® Wireless Technology 149 Removing the Card 149 Replacing the Card 150 14 Traveling With Your Computer 151 Identifying Your Computer 151 Packing the Computer 151 Travel Tips 152 Traveling by Air 152 15 Getting Help 153 Obtaining Assistance 153 Technical Support and Customer Service . . . . . 154 DellConnect 154 Online...
Flash Cache Module 147 Removing the FCM 147 Replacing the FCM 148 Internal Card With Bluetooth® Wireless Technology 149 Removing the Card 149 Replacing the Card 150 14 Traveling With Your Computer 151 Identifying Your Computer 151 Packing the Computer 151 Travel Tips 152 Traveling by Air 152 15 Getting Help 153 Obtaining Assistance 153 Technical Support and Customer Service . . . . . 154 DellConnect 154 Online...

Owner's Manual
Page 33
... more information about the optical drive see "Using ExpressCards" on : Enables wireless devices. 3 Wi-Fi Catcher™ Network Locator About Your Computer 33 When enabled through Dell QuickSet, this switch can also use the headphone port at the front of the system to connect to rapidly turn off : Disables wireless devices. 2 on page 71. O P T I C A L D R I T C H - USB CONNECTOR Connects USB devices, such as WLAN cards and internal cards with a plastic blank installed in your computer to the...
... more information about the optical drive see "Using ExpressCards" on : Enables wireless devices. 3 Wi-Fi Catcher™ Network Locator About Your Computer 33 When enabled through Dell QuickSet, this switch can also use the headphone port at the front of the system to connect to rapidly turn off : Disables wireless devices. 2 on page 71. O P T I C A L D R I T C H - USB CONNECTOR Connects USB devices, such as WLAN cards and internal cards with a plastic blank installed in your computer to the...
Owner's Manual
Page 70
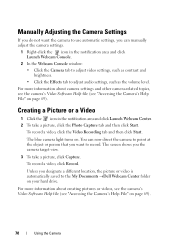
... then click Start. Manually Adjusting the Camera Settings If you do not want to the My Documents →Dell Webcam Center folder on your hard drive. Creating a Picture or a Video 1 Click the icon in the notification area and click Launch Webcam Console. 2 In the Webcam Console window: • Click the Camera tab to adjust video settings, such as contrast and brightness. • Click the Effects tab to adjust audio settings, such as...
... then click Start. Manually Adjusting the Camera Settings If you do not want to the My Documents →Dell Webcam Center folder on your hard drive. Creating a Picture or a Video 1 Click the icon in the notification area and click Launch Webcam Console. 2 In the Webcam Console window: • Click the Camera tab to adjust video settings, such as contrast and brightness. • Click the Effects tab to adjust audio settings, such as...
Owner's Manual
Page 82
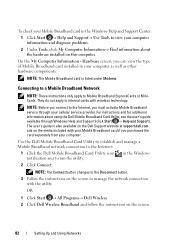
... support.dell.com and on the screen. 82 Setting Up and Using Networks For instructions and for additional information about the hardware installed on the screen to internal cards with wireless technology. On the My Computer Information - They do not apply to manage the network connection with your Mobile Broadband card if you can view the type of Mobile Broadband card installed in the Windows 2 Click Connect. in your computer. OR 1 Click Start...
... support.dell.com and on the screen. 82 Setting Up and Using Networks For instructions and for additional information about the hardware installed on the screen to internal cards with wireless technology. On the My Computer Information - They do not apply to manage the network connection with your Mobile Broadband card if you can view the type of Mobile Broadband card installed in the Windows 2 Click Connect. in your computer. OR 1 Click Start...
Owner's Manual
Page 93
... pre-installed with an error code and a description of the problem. NOTE: The Service Tag for tests run from the system setup program, memory, and various internal tests, and it appears and follow the instructions on your hardware configuration for running the test. For any problem encountered during a test, a message appears with Dell Support Center. Displays error conditions encountered, error codes, and the problem description. The device list may not display the...
... pre-installed with an error code and a description of the problem. NOTE: The Service Tag for tests run from the system setup program, memory, and various internal tests, and it appears and follow the instructions on your hardware configuration for running the test. For any problem encountered during a test, a message appears with Dell Support Center. Displays error conditions encountered, error codes, and the problem description. The device list may not display the...
Owner's Manual
Page 94
... under Drivers & Downloads, Upgrades and System Information The top of the Dell Support 3 window. 94 Troubleshooting In addition, using your Service Tag, Dell can download Dell Support Center from the Services page at the top of the Dell Support Center home page displays your computer. This utility provides self-support information, software updates, and health scans for your computer's model number along with its Service Tag, Express Service code, and warranty expiration details. Click the Dell Support Center...
... under Drivers & Downloads, Upgrades and System Information The top of the Dell Support 3 window. 94 Troubleshooting In addition, using your Service Tag, Dell can download Dell Support Center from the Services page at the top of the Dell Support Center home page displays your computer. This utility provides self-support information, software updates, and health scans for your computer's model number along with its Service Tag, Express Service code, and warranty expiration details. Click the Dell Support Center...
Owner's Manual
Page 96
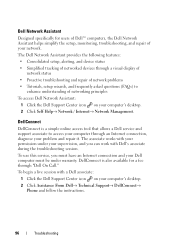
... an Internet connection and your computer's desktop. 2 Click Self Help→ Network / Internet→ Network Management. To use this service, you can work with a Dell associate: 1 Click the Dell Support Center icon on your Dell computer must be under warranty. DellConnect is a simple online access tool that allows a Dell service and support associate to access your computer through a visual display of network status • Proactive troubleshooting and repair of network problems • Tutorials, setup wizards...
... an Internet connection and your computer's desktop. 2 Click Self Help→ Network / Internet→ Network Management. To use this service, you can work with a Dell associate: 1 Click the Dell Support Center icon on your Dell computer must be under warranty. DellConnect is a simple online access tool that allows a Dell service and support associate to access your computer through a visual display of network status • Proactive troubleshooting and repair of network problems • Tutorials, setup wizards...

Owner's Manual
Page 111
... blinking, the computer has power. CHECK THE POWER LIGHT - When the power light is not a Dellbranded card, see "Using the Sleep Power State" on the computer. Power Problems Fill out the "Diagnostics Checklist" on page 157 as you can also download the Dell Mobile Broadband Card Utility user's guide from support.dell.com. Contact your cellular service provider to launch the Dell Mobile Broadband Card Utility. Troubleshooting 111 Mobile Broadband (Wireless Wide Area Network [WWAN]) NOTE: The Dell...
... blinking, the computer has power. CHECK THE POWER LIGHT - When the power light is not a Dellbranded card, see "Using the Sleep Power State" on the computer. Power Problems Fill out the "Diagnostics Checklist" on page 157 as you can also download the Dell Mobile Broadband Card Utility user's guide from support.dell.com. Contact your cellular service provider to launch the Dell Mobile Broadband Card Utility. Troubleshooting 111 Mobile Broadband (Wireless Wide Area Network [WWAN]) NOTE: The Dell...
Owner's Manual
Page 117
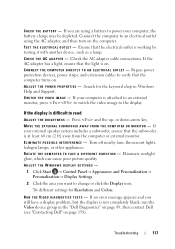
... using a battery to power your computer is attached to an external monitor, press to switch the video image to the display. If you still have a display problem, but the display is at least 60 cm (2 ft) away from the computer or external monitor. Ensure that the light is working by testing it with another device, such as a lamp. Check the AC adapter cable connections. or down-arrow key. Turn off nearby fans...
... using a battery to power your computer is attached to an external monitor, press to switch the video image to the display. If you still have a display problem, but the display is at least 60 cm (2 ft) away from the computer or external monitor. Ensure that the light is working by testing it with another device, such as a lamp. Check the AC adapter cable connections. or down-arrow key. Turn off nearby fans...
Owner's Manual
Page 119
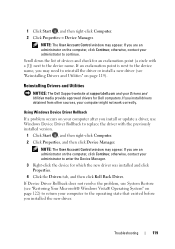
... the driver or install a new driver (see "Reinstalling Drivers and Utilities" on page 122) to return your computer after you install or update a driver, use System Restore (see "Restoring Your Microsoft® Windows Vista® Operating System" on page 119). Troubleshooting 119 1 Click Start , and then right-click Computer. 2 Click Properties→ Device Manager. NOTE: The User Account Control window may appear. otherwise, contact your computer might not work correctly. Scroll down the list of devices...
... the driver or install a new driver (see "Reinstalling Drivers and Utilities" on page 122) to return your computer after you install or update a driver, use System Restore (see "Restoring Your Microsoft® Windows Vista® Operating System" on page 119). Troubleshooting 119 1 Click Start , and then right-click Computer. 2 Click Properties→ Device Manager. NOTE: The User Account Control window may appear. otherwise, contact your computer might not work correctly. Scroll down the list of devices...
Owner's Manual
Page 121
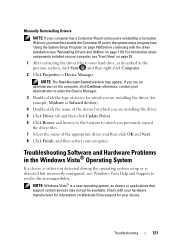
... an administrator on the computer, click Continue; Troubleshooting Software and Hardware Problems in the Windows Vista® Operating System If a device is either not detected during the operating system setup or is a new operating system, so drivers or applications that support certain devices may appear. NOTE: The User Account Control window may not yet be available. Check with the driver installation (see "Reinstalling Drivers and Utilities" on page 119). For information about...
... an administrator on the computer, click Continue; Troubleshooting Software and Hardware Problems in the Windows Vista® Operating System If a device is either not detected during the operating system setup or is a new operating system, so drivers or applications that support certain devices may appear. NOTE: The User Account Control window may not yet be available. Check with the driver installation (see "Reinstalling Drivers and Utilities" on page 119). For information about...
Owner's Manual
Page 123
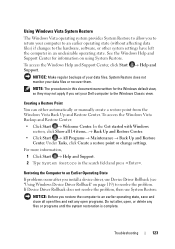
See the Windows Help and Support Center for the Windows default view, so they may not apply if you install a device driver, use System Restore. Under Tasks, click Create a restore point or change settings. Using Windows Vista System Restore The Windows Vista operating system provides System Restore to allow you to return your computer to an earlier operating state (without affecting data files) if changes to the hardware, software, or other system settings have left the computer...
See the Windows Help and Support Center for the Windows default view, so they may not apply if you install a device driver, use System Restore. Under Tasks, click Create a restore point or change settings. Using Windows Vista System Restore The Windows Vista operating system provides System Restore to allow you to return your computer to an earlier operating state (without affecting data files) if changes to the hardware, software, or other system settings have left the computer...
Owner's Manual
Page 138
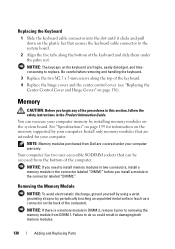
... board. NOTICE: If you need to replace. Replacing the Keyboard 1 Slide the keyboard cable connector into the slot until it prior to do so could result in damaging both memory modules. 138 Adding and Replacing Parts You can be accessed from DIMM 1. NOTICE: If there is a memory module in the connector labeled "DIMM1" before you begin any of the keyboard. 4 Replace the hinge covers and the center control cover (see "Replacing...
... board. NOTICE: If you need to replace. Replacing the Keyboard 1 Slide the keyboard cable connector into the slot until it prior to do so could result in damaging both memory modules. 138 Adding and Replacing Parts You can be accessed from DIMM 1. NOTICE: If there is a memory module in the connector labeled "DIMM1" before you begin any of the keyboard. 4 Replace the hinge covers and the center control cover (see "Replacing...
Owner's Manual
Page 169
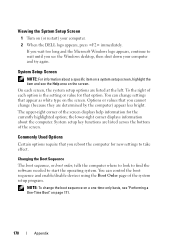
...; Boot order • Boot (start-up the computer, run system setup to do so by Dell technical support, do not change user-selectable features such as follows: • To set through system setup. Appendix 169 You can disable or enable only through system setup. An exception is the External Hot Key option, which you set or change the system setup settings. You may automatically configure most of system memory After you set up ) configuration • Basic device configuration settings...
...; Boot order • Boot (start-up the computer, run system setup to do so by Dell technical support, do not change user-selectable features such as follows: • To set through system setup. Appendix 169 You can disable or enable only through system setup. An exception is the External Hot Key option, which you set or change the system setup settings. You may automatically configure most of system memory After you set up ) configuration • Basic device configuration settings...
Owner's Manual
Page 170
...-Time Boot" on the screen. Options or values that appear as white type on page 171. 170 Appendix You can control the boot sequence and enable/disable devices using the Boot Order page of the screen. To the right of the screen displays help information for new settings to start the operating system. Changing the Boot Sequence The boot sequence, or boot order, tells the computer where to look to find the software needed to take...
...-Time Boot" on the screen. Options or values that appear as white type on page 171. 170 Appendix You can control the boot sequence and enable/disable devices using the Boot Order page of the screen. To the right of the screen displays help information for new settings to start the operating system. Changing the Boot Sequence The boot sequence, or boot order, tells the computer where to look to find the software needed to take...
Owner's Manual
Page 191
... U UAC - universal serial bus - video memory - USB - Pairs of cable used when the electrical power fails or drops to video functions. A video standard for video cards and controllers that consists of colors that provides the video capabilities-in most telephone networks and some computer networks. Memory that supports resolutions up to protect against electromagnetic interference, rather than system memory. The amount of video memory installed primarily influences the number of memory chips dedicated to...
... U UAC - universal serial bus - video memory - USB - Pairs of cable used when the electrical power fails or drops to video functions. A video standard for video cards and controllers that consists of colors that provides the video capabilities-in most telephone networks and some computer networks. Memory that supports resolutions up to protect against electromagnetic interference, rather than system memory. The amount of video memory installed primarily influences the number of memory chips dedicated to...
Owner's Manual
Page 195
See sound B battery charge gauge, 45 charging, 47 checking the charge, 44 performance, 43 power meter, 45 removing, 48 storing, 49 blanks ExpressCards, 71, 73 removing, 72, 74 Bluetooth wireless technology card device status light, 29 installing, 149 Blu-ray Disc, 56, 97 boot sequence, 170 brightness adjusting, 41 C carnet, 152 CD blank, 55 CD-RW drive problems, 97 drive problems, 97 Check Disk, 98 cleaning display, 172 keyboard, 172 media, 173 mouse, 173 touch pad, 173 computer crashes, 107...
See sound B battery charge gauge, 45 charging, 47 checking the charge, 44 performance, 43 power meter, 45 removing, 48 storing, 49 blanks ExpressCards, 71, 73 removing, 72, 74 Bluetooth wireless technology card device status light, 29 installing, 149 Blu-ray Disc, 56, 97 boot sequence, 170 brightness adjusting, 41 C carnet, 152 CD blank, 55 CD-RW drive problems, 97 drive problems, 97 Check Disk, 98 cleaning display, 172 keyboard, 172 media, 173 mouse, 173 touch pad, 173 computer crashes, 107...
Owner's Manual
Page 200
... setup program commonly used options, 170 screens, 170 viewing, 170 T telephone numbers, 158 touch pad, 39 cleaning, 173 customizing, 40 touch pad buttons description, 27 track stick/touch pad buttons description, 27 transferring information to a new computer, 21 traveling with the computer by air, 152 identification tag, 151 packing, 151 tips, 152 troubleshooting Dell Diagnostics, 89 Hardware Troubleshooter, 121 restore computer to previous operating state, 122-123 TV connecting, 59 U uninterruptible power...
... setup program commonly used options, 170 screens, 170 viewing, 170 T telephone numbers, 158 touch pad, 39 cleaning, 173 customizing, 40 touch pad buttons description, 27 track stick/touch pad buttons description, 27 transferring information to a new computer, 21 traveling with the computer by air, 152 identification tag, 151 packing, 151 tips, 152 troubleshooting Dell Diagnostics, 89 Hardware Troubleshooter, 121 restore computer to previous operating state, 122-123 TV connecting, 59 U uninterruptible power...


