
Owner's Manual
Page 44
...or equipment damage. Handle damaged or leaking batteries with household waste. Do not puncture, incinerate, disassemble, or expose the battery to work with your local waste disposal or environmental agency for the battery in the Product Information Guide). The battery is low. Keep the ... • Low-battery warning pop-up window Dell QuickSet Battery Meter To view the Dell QuickSet Battery Meter: • Double-click the Dell QuickSet icon in the taskbar, and then click Battery Meter or • Press The Battery Meter displays the status, battery health, charge level, and...
...or equipment damage. Handle damaged or leaking batteries with household waste. Do not puncture, incinerate, disassemble, or expose the battery to work with your local waste disposal or environmental agency for the battery in the Product Information Guide). The battery is low. Keep the ... • Low-battery warning pop-up window Dell QuickSet Battery Meter To view the Dell QuickSet Battery Meter: • Double-click the Dell QuickSet icon in the taskbar, and then click Battery Meter or • Press The Battery Meter displays the status, battery health, charge level, and...
Owner's Manual
Page 47
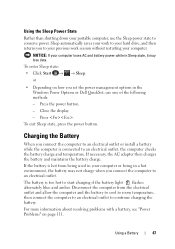
Press . Disconnect the computer from being used in your computer or being in the Windows Power Options or Dell QuickSet, use the Sleep power state to continue charging the battery. For more information about resolving problems with a battery, see "Power Problems" on how... charging if the battery light flashes alternately blue and amber. NOTICE: If your computer. Close the display. - To exit Sleep state, press the power button. The battery is connected to your previous work session without restarting your computer loses AC and battery power while in Sleep state, it may not ...
Press . Disconnect the computer from being used in your computer or being in the Windows Power Options or Dell QuickSet, use the Sleep power state to continue charging the battery. For more information about resolving problems with a battery, see "Power Problems" on how... charging if the battery light flashes alternately blue and amber. NOTICE: If your computer. Close the display. - To exit Sleep state, press the power button. The battery is connected to your previous work session without restarting your computer loses AC and battery power while in Sleep state, it may not ...
Owner's Manual
Page 61
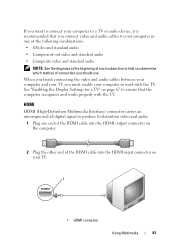
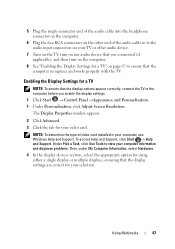
See "Enabling the Display Settings for a TV" on your computer to ensure that you connect video and audio cables to your computer in one of the following combinations... subsection to produce hi-definition video and audio. 1 Plug one end of the HDMI cable into the HDMI input connector on page 67 to work with the TV. When you finish connecting the video and audio cables between your computer and your TV, you must enable your TV. 1 ... use. If you want to connect your computer to a TV or audio device, it is recommended that the computer recognizes and works properly with the TV.
See "Enabling the Display Settings for a TV" on your computer to ensure that you connect video and audio cables to your computer in one of the following combinations... subsection to produce hi-definition video and audio. 1 Plug one end of the HDMI cable into the HDMI input connector on page 67 to work with the TV. When you finish connecting the video and audio cables between your computer and your TV, you must enable your TV. 1 ... use. If you want to connect your computer to a TV or audio device, it is recommended that the computer recognizes and works properly with the TV.
Owner's Manual
Page 63
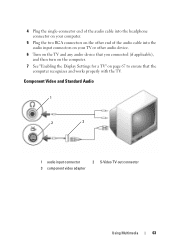
... TV and any audio device that you connected (if applicable), and then turn on the computer. 7 See "Enabling the Display Settings for a TV" on page 67 to ensure that the computer recognizes and works properly with the TV. Component Video and Standard Audio 1 2 3 1 audio input connector 3 component video adapter 2 S-Video TV-out...
... TV and any audio device that you connected (if applicable), and then turn on the computer. 7 See "Enabling the Display Settings for a TV" on page 67 to ensure that the computer recognizes and works properly with the TV. Component Video and Standard Audio 1 2 3 1 audio input connector 3 component video adapter 2 S-Video TV-out...

Owner's Manual
Page 65
... into the component video-input connectors on page 67 to ensure that you connected (if applicable), and then turn on the computer. 8 See "Enabling the Display Settings for a TV" on the TV. Composite Video and Standard Audio 1 2 3 1 audio input connector 3 composite video adapter 2 S-Video TV-out connector Using Multimedia 65 4 Plug... into the audio input connectors on your TV or audio device. 7 Turn on the TV, turn on any audio device that the computer recognizes and works properly with the TV.
... into the component video-input connectors on page 67 to ensure that you connected (if applicable), and then turn on the computer. 8 See "Enabling the Display Settings for a TV" on the TV. Composite Video and Standard Audio 1 2 3 1 audio input connector 3 composite video adapter 2 S-Video TV-out connector Using Multimedia 65 4 Plug... into the audio input connectors on your TV or audio device. 7 Turn on the TV, turn on any audio device that the computer recognizes and works properly with the TV.
Owner's Manual
Page 67
...Computer Information, select Hardware. 4 In the display devices section, select the appropriate option for using either a single display or multiple displays, ensuring that the display options appear correctly, connect the TV to ensure that the computer recognizes and works properly with the TV. 5 Plug the ... that you connected (if applicable), and then turn on the computer. 8 See "Enabling the Display Settings for a TV" on page 67 to the computer before you enable the display settings. 1 Click Start → Control Panel →Appearance and Personalization. 1 Under Personalization, ...
...Computer Information, select Hardware. 4 In the display devices section, select the appropriate option for using either a single display or multiple displays, ensuring that the display options appear correctly, connect the TV to ensure that the computer recognizes and works properly with the TV. 5 Plug the ... that you connected (if applicable), and then turn on the computer. 8 See "Enabling the Display Settings for a TV" on page 67 to the computer before you enable the display settings. 1 Click Start → Control Panel →Appearance and Personalization. 1 Under Personalization, ...
Owner's Manual
Page 90
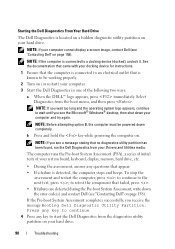
... Diagnostics from the diagnostics utility partition on (or restart) your computer. 3 Start the Dell Diagnostics in one of your hard drive. 90 Troubleshooting NOTE: Before attempting option B, the computer must be working properly. 2 Turn on your system board, keyboard, display, memory, hard drive, etc. • During the assessment, answer any key to retest...
... Diagnostics from the diagnostics utility partition on (or restart) your computer. 3 Start the Dell Diagnostics in one of your hard drive. 90 Troubleshooting NOTE: Before attempting option B, the computer must be working properly. 2 Turn on your system board, keyboard, display, memory, hard drive, etc. • During the assessment, answer any key to retest...
Owner's Manual
Page 96
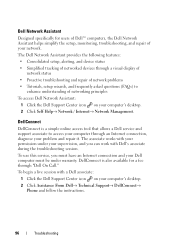
... tracking of networked devices through a visual display of network status • Proactive troubleshooting and repair of network problems • Tutorials, setup wizards, and frequently asked questions (FAQs) to access your computer through "Dell On Call." To use this service, you can work with a Dell associate: 1 Click the Dell Support Center icon on your computer's desktop...
... tracking of networked devices through a visual display of network status • Proactive troubleshooting and repair of network problems • Tutorials, setup wizards, and frequently asked questions (FAQs) to access your computer through "Dell On Call." To use this service, you can work with a Dell associate: 1 Click the Dell Support Center icon on your computer's desktop...

Owner's Manual
Page 112
...you complete these checks. 112 Troubleshooting If the AC adapter has a light, ensure that the electrical outlet is working by testing it is on the computer. If the battery status light flashes amber or is a steady amber,... often the battery is too hot to an electrical outlet. 3 Turn on . If the computer power light turns on, but the display remains blank, reinstall the memory modules (see "Contacting Dell" on page 46. C H E C K T H E B A T T E R Y S T A T U S L I N T E R F E R E N C E - If the battery temperature is low or depleted. EL I M I N A T E P O S S I B L...
...you complete these checks. 112 Troubleshooting If the AC adapter has a light, ensure that the electrical outlet is working by testing it is on the computer. If the battery status light flashes amber or is a steady amber,... often the battery is too hot to an electrical outlet. 3 Turn on . If the computer power light turns on, but the display remains blank, reinstall the memory modules (see "Contacting Dell" on page 46. C H E C K T H E B A T T E R Y S T A T U S L I N T E R F E R E N C E - If the battery temperature is low or depleted. EL I M I N A T E P O S S I B L...
Owner's Manual
Page 117
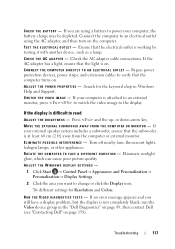
...the keyword sleep in the "Dell Diagnostics" on page 89, then contact Dell (see "Contacting Dell" on the computer. Troubleshooting... I F F E R E N T D I R E C T I C S T E S T S - ADJUST THE WINDOWS DISPLAY SETTINGS - 1 Click Start → Control Panel→ Appearance and Personalization→ Personalization→ Display Settings. 2 Click the area you still have a display problem, but the display is at least 60 cm (2 ft) away from the computer or external monitor. If... battery to verify that the light is working by testing it with another device, such as a lamp....
...the keyword sleep in the "Dell Diagnostics" on page 89, then contact Dell (see "Contacting Dell" on the computer. Troubleshooting... I F F E R E N T D I R E C T I C S T E S T S - ADJUST THE WINDOWS DISPLAY SETTINGS - 1 Click Start → Control Panel→ Appearance and Personalization→ Personalization→ Display Settings. 2 Click the area you still have a display problem, but the display is at least 60 cm (2 ft) away from the computer or external monitor. If... battery to verify that the light is working by testing it with another device, such as a lamp....
Owner's Manual
Page 118
If the external monitor works, the computer display or video controller may contain drivers for your computer to you with your operating system. • Connect or install a new device. Contact Dell (see "Error Messages" on the computer and the monitor, and then adjust the monitor brightness and ...Shut down your problem and, if necessary, update the driver. 118 Troubleshooting A driver is a program that only its own set of the display is needed. You may need to the computer. 2 Turn on page 100. Each device has its driver recognizes. If an error message appears...
If the external monitor works, the computer display or video controller may contain drivers for your computer to you with your operating system. • Connect or install a new device. Contact Dell (see "Error Messages" on the computer and the monitor, and then adjust the monitor brightness and ...Shut down your problem and, if necessary, update the driver. 118 Troubleshooting A driver is a program that only its own set of the display is needed. You may need to the computer. 2 Turn on page 100. Each device has its driver recognizes. If an error message appears...
Owner's Manual
Page 134
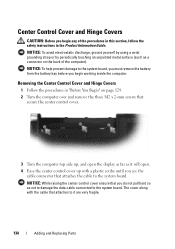
... CAUTION: Before you do not pull hard so as it will open the display as far as not to damage the data cable connected to the system board. NOTICE: While raising the center control cover ensure that you begin working inside the computer. Removing the Center Control Cover and Hinge Covers 1 Follow...
... CAUTION: Before you do not pull hard so as it will open the display as far as not to damage the data cable connected to the system board. NOTICE: While raising the center control cover ensure that you begin working inside the computer. Removing the Center Control Cover and Hinge Covers 1 Follow...
Owner's Manual
Page 169
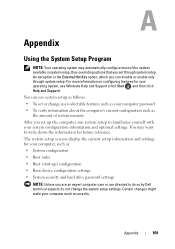
... through system setup. You may automatically configure most of system memory After you are an expert computer user or are directed to do so by Dell technical support, do not change user-selectable features such as your computer password • To verify information about the computer's current configuration such as : •... write down the information for your operating system, see Windows Help and Support (click Start , and then click Help and Support). The system setup screens display the current setup information and settings for your computer work incorrectly.
... through system setup. You may automatically configure most of system memory After you are an expert computer user or are directed to do so by Dell technical support, do not change user-selectable features such as your computer password • To verify information about the computer's current configuration such as : •... write down the information for your operating system, see Windows Help and Support (click Start , and then click Help and Support). The system setup screens display the current setup information and settings for your computer work incorrectly.
Owner's Manual
Page 172
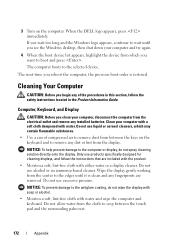
...damage to the antiglare coating, do not spray cleaning solution directly onto the display. Clean your computer with a soft cloth dampened with water and wipe the computer and keyboard. Wipe the display gently working from the center to the edges until you see the Windows desktop, then ... keyboard and to remove any dirt or lint from the display. Do not use products specifically designed for cleaning displays, and follow the safety instructions located in this section, follow the instructions that are removed. When the DELL logo appears, press immediately. Do not use excessive pressure...
...damage to the antiglare coating, do not spray cleaning solution directly onto the display. Clean your computer with a soft cloth dampened with water and wipe the computer and keyboard. Wipe the display gently working from the center to the edges until you see the Windows desktop, then ... keyboard and to remove any dirt or lint from the display. Do not use products specifically designed for cleaning displays, and follow the safety instructions located in this section, follow the instructions that are removed. When the DELL logo appears, press immediately. Do not use excessive pressure...


