
User Manual
Page 1
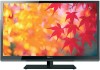
... on the back and side of steps for setting up your new TV, see page 11. Refer to these numbers in the spaces below. Record these numbers whenever you communicate with your Toshiba dealer about this TV. Note: To display a High Definition picture, the TV must be receiving a High Defi... broadcast, a High Definition digital cable program, or a High Definition digital satellite program). Integrated High Definition LCD Television 42SL417U 46SL417U 55SL417U For an overview of your TV. www.support.toshiba.com Model number: Serial number: TD/M VX1A00205000
... on the back and side of steps for setting up your new TV, see page 11. Refer to these numbers in the spaces below. Record these numbers whenever you communicate with your Toshiba dealer about this TV. Note: To display a High Definition picture, the TV must be receiving a High Defi... broadcast, a High Definition digital cable program, or a High Definition digital satellite program). Integrated High Definition LCD Television 42SL417U 46SL417U 55SL417U For an overview of your TV. www.support.toshiba.com Model number: Serial number: TD/M VX1A00205000
User Manual
Page 7
... is operating at an on the screen if a fixed, non-moving image is subject to [Home] mode settings, select [AutoView] picture mode, and set forth for normal home use of other antenna or transmitter. ENERGY STAR® User Information ENERGY STAR User Information... period of control or signaling information or the use . Important notes about your body. therefore, Toshiba is not intended to transmit, or operational failure. Environmental Protection Agency. Picture Settings, Auto Brightness Sensor) may not work with minimum distance 20cm between the radiator & your LCD...
... is operating at an on the screen if a fixed, non-moving image is subject to [Home] mode settings, select [AutoView] picture mode, and set forth for normal home use of other antenna or transmitter. ENERGY STAR® User Information ENERGY STAR User Information... period of control or signaling information or the use . Important notes about your body. therefore, Toshiba is not intended to transmit, or operational failure. Environmental Protection Agency. Picture Settings, Auto Brightness Sensor) may not work with minimum distance 20cm between the radiator & your LCD...
User Manual
Page 9
... 44 Chapter 7: Picture and sound controls 45 Selecting the picture size 45 Scrolling the picture 47 Using the Auto Aspect feature 47 Using the 4:3 Stretch 47 Freezing the picture 47 Adjusting the picture 48 Selecting the picture mode 48 Adjusting the picture quality 48 Using the advanced picture settings features 49 Edge ... Adjustment Pro 50 ColorMaster 51 Base Color Adjustment 51 Color temperature 51 Resetting to the factory default 51 Setting the Expert Picture Settings 51 Test Pattern 51 RGB Filter 51 White Balance 51 Resetting to the factory default 52 Locking the...
... 44 Chapter 7: Picture and sound controls 45 Selecting the picture size 45 Scrolling the picture 47 Using the Auto Aspect feature 47 Using the 4:3 Stretch 47 Freezing the picture 47 Adjusting the picture 48 Selecting the picture mode 48 Adjusting the picture quality 48 Using the advanced picture settings features 49 Edge ... Adjustment Pro 50 ColorMaster 51 Base Color Adjustment 51 Color temperature 51 Resetting to the factory default 51 Setting the Expert Picture Settings 51 Test Pattern 51 RGB Filter 51 White Balance 51 Resetting to the factory default 52 Locking the...
User Manual
Page 11
...electronic device(s) to your other device(s). 6 AFTER connecting all cables and devices, plug in the power cords for a separate digital converter set up your TV and begin using the TV's features. 10 For help, refer to run on using its many exciting features. 1 ...Chapter 3: Using the remote control" (- p. 12). 4 Connect your TV (- p. 2-6). 2 Do not plug in any power cords until AFTER you automatically adjust picture settings based on the remote control, installing the batteries, and preparing to operate your TV. 3 BEFORE connecting cables or devices to an AV amplifier via HDMI...
...electronic device(s) to your other device(s). 6 AFTER connecting all cables and devices, plug in the power cords for a separate digital converter set up your TV and begin using the TV's features. 10 For help, refer to run on using its many exciting features. 1 ...Chapter 3: Using the remote control" (- p. 12). 4 Connect your TV (- p. 2-6). 2 Do not plug in any power cords until AFTER you automatically adjust picture settings based on the remote control, installing the batteries, and preparing to operate your TV. 3 BEFORE connecting cables or devices to an AV amplifier via HDMI...
User Manual
Page 20
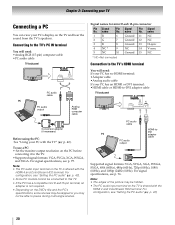
...sub15-pin terminal, an adapter is shared with the HDMI 4 and ColorStream HD2 terminal. For signal specifications, see "Setting the PC audio" (- Note: • The edges of the picture may be hidden. • The PC audio input terminal on the TV is not required. • Depending on .... p. 42). • Some PC models cannot be able to pause during multi-angle scenes. For configuration, see p. 75. For signal specifications, see "Setting the PC audio" (- p. 42). 20 Connecting to the TV's PC IN terminal You will need : •Analog RGB (15-pin) computer cable &#...
...sub15-pin terminal, an adapter is shared with the HDMI 4 and ColorStream HD2 terminal. For signal specifications, see "Setting the PC audio" (- Note: • The edges of the picture may be hidden. • The PC audio input terminal on the TV is not required. • Depending on .... p. 42). • Some PC models cannot be able to pause during multi-angle scenes. For configuration, see p. 75. For signal specifications, see "Setting the PC audio" (- p. 42). 20 Connecting to the TV's PC IN terminal You will need : •Analog RGB (15-pin) computer cable &#...
User Manual
Page 23
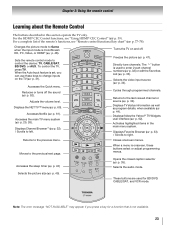
...set, you press a key for BD/DVD, CABLE/SAT, and VCR mode. Reduces or turns off . p. 61). Displays Channel Browser™ (-p. 32). / Scrolls to right. Directly tune channels. p. 33). Cycles through programmed channels. p. 33). / Scrolls to left. When a menu is not available. 23 p. 43) Opens the closed caption selector (- Selects the picture.... Chapter 3: Using the remote control Learning about the Remote Control The buttons described in the main menu system. Sets the remote control mode to the previous menu. p. 31). p. 32) or edit the Favorites List (- Closes...
...set, you press a key for BD/DVD, CABLE/SAT, and VCR mode. Reduces or turns off . p. 61). Displays Channel Browser™ (-p. 32). / Scrolls to right. Directly tune channels. p. 33). Cycles through programmed channels. p. 33). / Scrolls to left. When a menu is not available. 23 p. 43) Opens the closed caption selector (- Selects the picture.... Chapter 3: Using the remote control Learning about the Remote Control The buttons described in the main menu system. Sets the remote control mode to the previous menu. p. 31). p. 32) or edit the Favorites List (- Closes...

User Manual
Page 26
... Contrast 48 Brightness 48 Color 48 Tint 48 Sharpness 48 Advanced Picture Settings 49 Expert Picture Settings 51 TheaterLock 52 MTS 52 Balance 53 Bass 53 Treble 53 Advanced Sound Settings 54 Dynamic Volume (Audyssey 53 Dynamic Volume®) Dynamic Range Control 53 1st Layer Settings 2nd Layer APPLICATIONS PREFERENCES 3rd Layer Widgets NET TV Media...
... Contrast 48 Brightness 48 Color 48 Tint 48 Sharpness 48 Advanced Picture Settings 49 Expert Picture Settings 51 TheaterLock 52 MTS 52 Balance 53 Bass 53 Treble 53 Advanced Sound Settings 54 Dynamic Volume (Audyssey 53 Dynamic Volume®) Dynamic Range Control 53 1st Layer Settings 2nd Layer APPLICATIONS PREFERENCES 3rd Layer Widgets NET TV Media...
User Manual
Page 27
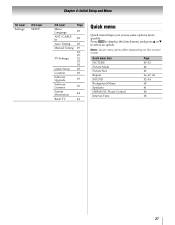
... Layer SETUP 3rd Layer Menu Language ANT/CABLE In Auto Tuning Manual Tuning TV Settings Quick Setup Location Software Upgrade Software Licenses System Information Reset TV Page 28 28 28 29 28, 29, 32, 35, 38 28 28 60 60 ... helps you access some options more quickly. Press QUICK to display the Quick menu and press B or b to select an option. Quick menu Item PICTURE Picture Mode Picture Size Repeat SOUND Background Music Speakers HDMI-CEC Player Control Interval Time Page 45-52 48 45 66, 67, 68 52-54 68 41 40...
... Layer SETUP 3rd Layer Menu Language ANT/CABLE In Auto Tuning Manual Tuning TV Settings Quick Setup Location Software Upgrade Software Licenses System Information Reset TV Page 28 28 28 29 28, 29, 32, 35, 38 28 28 60 60 ... helps you access some options more quickly. Press QUICK to display the Quick menu and press B or b to select an option. Quick menu Item PICTURE Picture Mode Picture Size Repeat SOUND Background Music Speakers HDMI-CEC Player Control Interval Time Page 45-52 48 45 66, 67, 68 52-54 68 41 40...
User Manual
Page 28
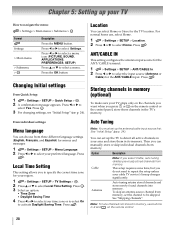
... and stores newly found channels into memory. Note: To tune channels not stored in memory, use , select Home. 1 > Settings > SETUP > Location. 2 Press C or c to select Local Time Setting. Press C or c to select a menu icon (PICTURE, SOUND, APPLICATIONS, PREFERENCES, SETUP) Press B or b to activate Daylight Saving Time. Storing channels in memory (optional) To make...
... and stores newly found channels into memory. Note: To tune channels not stored in memory, use , select Home. 1 > Settings > SETUP > Location. 2 Press C or c to select Local Time Setting. Press C or c to select a menu icon (PICTURE, SOUND, APPLICATIONS, PREFERENCES, SETUP) Press B or b to activate Daylight Saving Time. Storing channels in memory (optional) To make...
User Manual
Page 40
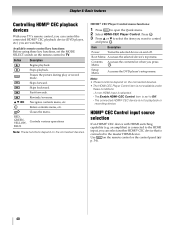
... selected. - Button Description Begins playback. Note: • These functions depend on the connected devices. • The HDMI-CEC Player Control item is set the MODE SELECT switch on the remote control or the control panel (p. 34). 40 an amplifier) is connected to the master HDMI device. Use INPUT... on the remote control to TV. Pauses the picture during play or record mode. Press . Root Menu Accesses the selected device's top menu. The Enable HDMI-CEC Control item is not available ...
... selected. - Button Description Begins playback. Note: • These functions depend on the connected devices. • The HDMI-CEC Player Control item is set the MODE SELECT switch on the remote control or the control panel (p. 34). 40 an amplifier) is connected to the master HDMI device. Use INPUT... on the remote control to TV. Pauses the picture during play or record mode. Press . Root Menu Accesses the selected device's top menu. The Enable HDMI-CEC Control item is not available ...
User Manual
Page 42
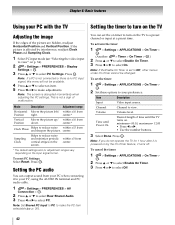
...or b to select Enable On Timer. 3 Press C or c to select PC. Mode Description Adjustment range Horizontal Moves the picture left/ within ±10 from Position right. To activate the timer: 1 > Settings > APPLICATIONS > On Timer > . minimum= 00:10, maximum= 12:00 • Press C or c. •... Use the number buttons. 3 Select Done. center.* Vertical Position Moves the picture up/ within ±10 from down. To reset PC Settings: Select Reset. OK 2 Press B or b to select Rear Shared Audio. 3 Press C or c to select Off. 42...
...or b to select Enable On Timer. 3 Press C or c to select PC. Mode Description Adjustment range Horizontal Moves the picture left/ within ±10 from Position right. To activate the timer: 1 > Settings > APPLICATIONS > On Timer > . minimum= 00:10, maximum= 12:00 • Press C or c. •... Use the number buttons. 3 Select Done. center.* Vertical Position Moves the picture up/ within ±10 from down. To reset PC Settings: Select Reset. OK 2 Press B or b to select Rear Shared Audio. 3 Press C or c to select Off. 42...
User Manual
Page 47
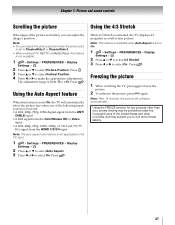
.... When 4:3 Stretch is not available. 1 > Settings > PREFERENCES > Display Settings > . Note: After 15 minutes, the picture will automatically select the picture size when one of the following input sources is set to On. 1 > Settings > PREFERENCES > Display Settings > . Using the FREEZE function for any purpose ...1/2/3/4 input Note: The auto aspect ratio feature is set to On, the TV will unfreeze automatically. Chapter 7: Picture and sound controls Scrolling the picture Using the 4:3 Stretch If the edges of the picture are hidden, you to civil and criminal liability....
.... When 4:3 Stretch is not available. 1 > Settings > PREFERENCES > Display Settings > . Note: After 15 minutes, the picture will automatically select the picture size when one of the following input sources is set to On. 1 > Settings > PREFERENCES > Display Settings > . Using the FREEZE function for any purpose ...1/2/3/4 input Note: The auto aspect ratio feature is set to On, the TV will unfreeze automatically. Chapter 7: Picture and sound controls Scrolling the picture Using the 4:3 Stretch If the edges of the picture are hidden, you to civil and criminal liability....
User Manual
Page 48
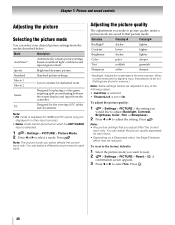
...C or c to On. PC Designed for the viewing of the entire screen. Note: • Any picture settings that picture mode. You can adjust the picture quality separately for each input. OK 48 Movie 1 Movie 2 Lower contrast for playing a video game requiring...and no signal is input, this selection is set to 0. (Settings are saved to reset. 2 > Settings > PICTURE > Reset > OK . You can select your desired picture settings from the controller. Mode Description AutoView® Automatically adjusts picture settings based on ambient light conditions and input signal ...
...C or c to On. PC Designed for the viewing of the entire screen. Note: • Any picture settings that picture mode. You can adjust the picture quality separately for each input. OK 48 Movie 1 Movie 2 Lower contrast for playing a video game requiring...and no signal is input, this selection is set to 0. (Settings are saved to reset. 2 > Settings > PICTURE > Reset > OK . You can select your desired picture settings from the controller. Mode Description AutoView® Automatically adjusts picture settings based on ambient light conditions and input signal ...
User Manual
Page 49
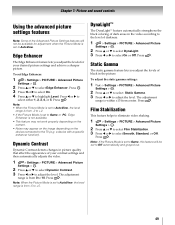
... Off. a device with a specific enhancer function). Note: When the Picture Mode is set to AutoView. Press . Chapter 7: Picture and sound controls Using the advanced picture settings features Note: Some of the Advanced Picture Settings features will be available for your contrast settings and then automatically adjusts the video. 1 > Settings > PICTURE > Advanced Picture Settings > . Press . Press . OK 2 Press B or b to select DynaLight. 3 Press...
... Off. a device with a specific enhancer function). Note: When the Picture Mode is set to AutoView. Press . Chapter 7: Picture and sound controls Using the advanced picture settings features Note: Some of the Advanced Picture Settings features will be available for your contrast settings and then automatically adjusts the video. 1 > Settings > PICTURE > Advanced Picture Settings > . Press . Press . OK 2 Press B or b to select DynaLight. 3 Press...

User Manual
Page 50
...virtually eliminating motion blur without adding flicker or reducing image brightness. 1 > Settings > PICTURE > Advanced Picture Settings > . Press . Press . Note: If the Picture Mode is set to 100. Note: • If the Picture Mode is set to select On or Off. OK 3 Press B or b to ...This feature adjusts the backlight so that it can change to select Auto Brightness Sensor Settings. Press . OK 2 Press B or b to match the ambient light conditions. 1 > Settings > PICTURE > Advanced Picture Settings > . OK 2 Press B or b to the factory defaults, select Reset ...
...virtually eliminating motion blur without adding flicker or reducing image brightness. 1 > Settings > PICTURE > Advanced Picture Settings > . Press . Press . Note: If the Picture Mode is set to 100. Note: • If the Picture Mode is set to select On or Off. OK 3 Press B or b to ...This feature adjusts the backlight so that it can change to select Auto Brightness Sensor Settings. Press . OK 2 Press B or b to match the ambient light conditions. 1 > Settings > PICTURE > Advanced Picture Settings > . OK 2 Press B or b to the factory defaults, select Reset ...
User Manual
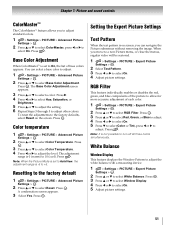
Page 51
...select Color Temperature. Resetting to select Reset. OK 2 Press B or b to the factory default 1 > Settings > PICTURE > Advanced Picture Settings > . OK 2 Press B or b to select On. 5 Adjust picture settings. 51 Press . Press OK . Press . Press . OK 3 Press B or b to select Window ...blue components of base colors appears. Press . Note: When the Picture Mode is set to adjust. 1 > Settings > PICTURE > Advanced Picture Settings > . OK Setting the Expert Picture Settings Test Pattern When the test pattern is not possible to adjust. ...
...select Color Temperature. Resetting to select Reset. OK 2 Press B or b to the factory default 1 > Settings > PICTURE > Advanced Picture Settings > . OK 2 Press B or b to select On. 5 Adjust picture settings. 51 Press . Press OK . Press . Press . OK 3 Press B or b to select Window ...blue components of base colors appears. Press . Note: When the Picture Mode is set to adjust. 1 > Settings > PICTURE > Advanced Picture Settings > . OK Setting the Expert Picture Settings Test Pattern When the test pattern is not possible to adjust. ...
User Manual
Page 52
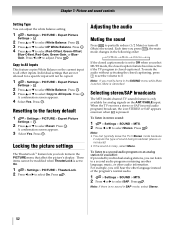
... To mute the audio without activating the closed captioning, press VOL to set the volume to select White Balance. Press . OK Resetting to select Reset. OK 2 Press B or b to the factory default 1 > Settings > PICTURE > Expert Picture Settings > . Press . Each time you modify items in SAP mode,... (stereo or monaural). • If the sound is cancelled. These items cannot be copied. 1 > Settings > PICTURE > Expert Picture Settings > . OK A confirmation screen appears. 4 Select Yes. Selecting stereo/SAP broadcasts The MTS (multi-channel TV sound) feature is...
... To mute the audio without activating the closed captioning, press VOL to set the volume to select White Balance. Press . OK Resetting to select Reset. OK 2 Press B or b to the factory default 1 > Settings > PICTURE > Expert Picture Settings > . Press . Each time you modify items in SAP mode,... (stereo or monaural). • If the sound is cancelled. These items cannot be copied. 1 > Settings > PICTURE > Expert Picture Settings > . OK A confirmation screen appears. 4 Select Yes. Selecting stereo/SAP broadcasts The MTS (multi-channel TV sound) feature is...
User Manual
Page 53
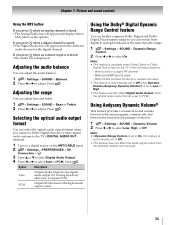
Chapter 7: Picture and sound controls Using the MTS button If you press when an analog channel is used . • This feature is automatically set to Off when Dynamic Volume (Audyssey Dynamic Volume®) is set to Low or High. • This feature will appear and offer ...Audyssey Dynamic Volume® This feature provides a consistent sound volume between television programs, commercials, and between the loud and soft passages of movies. 1 > Settings > SOUND > Dynamic Volume. 2 Press C or c to select Auto or PCM. If you connect a Dolby Digital decoder or other digital audio ...
Chapter 7: Picture and sound controls Using the MTS button If you press when an analog channel is used . • This feature is automatically set to Off when Dynamic Volume (Audyssey Dynamic Volume®) is set to Low or High. • This feature will appear and offer ...Audyssey Dynamic Volume® This feature provides a consistent sound volume between television programs, commercials, and between the loud and soft passages of movies. 1 > Settings > SOUND > Dynamic Volume. 2 Press C or c to select Auto or PCM. If you connect a Dolby Digital decoder or other digital audio ...
User Manual
Page 54
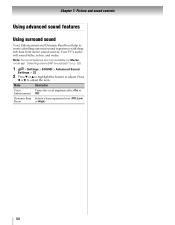
... vocal emphasis effect On or Off. Selects a bass expansion level (Off, Low, or High). 54 "Selecting stereo/SAP broadcasts" on p. 52). 1 > Settings > SOUND > Advanced Sound Settings > . Press C or c to adjust. Chapter 7: Picture and sound controls Using advanced sound features Using surround sound Voice Enhancement and Dynamic Bass Boost help to create a thrilling surround...
... vocal emphasis effect On or Off. Selects a bass expansion level (Off, Low, or High). 54 "Selecting stereo/SAP broadcasts" on p. 52). 1 > Settings > SOUND > Advanced Sound Settings > . Press C or c to adjust. Chapter 7: Picture and sound controls Using advanced sound features Using surround sound Voice Enhancement and Dynamic Bass Boost help to create a thrilling surround...
User Manual
Page 67
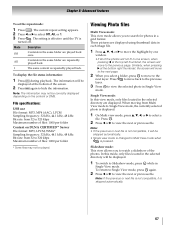
Chapter 8: Advanced features To set the repeat mode: 1 Press QUICK . Mode Description Off Contents in the same folder are displayed. ... View mode when is displayed. 1 On Multi view mode, press B, b, C, or c to view the next or previous file. The current repeat setting appears. 2 Press C or c to the next layer. The information will move to the next page. 2 When you select a folder, press OK...: This view mode allows you to watch a slideshow of the photos will be played. The setting is effective until the TV is skipped automatically. 67 These pictures are played back once.
Chapter 8: Advanced features To set the repeat mode: 1 Press QUICK . Mode Description Off Contents in the same folder are displayed. ... View mode when is displayed. 1 On Multi view mode, press B, b, C, or c to view the next or previous file. The current repeat setting appears. 2 Press C or c to the next layer. The information will move to the next page. 2 When you select a folder, press OK...: This view mode allows you to watch a slideshow of the photos will be played. The setting is effective until the TV is skipped automatically. 67 These pictures are played back once.


