
The Bose® Lifestyle® amplifier - Owner's guide
Page 10
...four sets of speakers. The Personal music center allows you to as one -room system). Figure 7 shows an example display for more than one room of Bose® powered speakers placed in individual rooms. These rooms are referred to control up the Personal music center for the ... that have a multi-room interface are controlled by the ROOM or HOUSE button 8 January 4, 2002 AM262840_00_V.pdf Setting Up Your Lifestyle® Stereo Amplifier Figure 7 Sample display for a tworoom system Operating speakers in other rooms with room A being the primary room (the one used for a one The...
...four sets of speakers. The Personal music center allows you to as one -room system). Figure 7 shows an example display for more than one room of Bose® powered speakers placed in individual rooms. These rooms are referred to control up the Personal music center for the ... that have a multi-room interface are controlled by the ROOM or HOUSE button 8 January 4, 2002 AM262840_00_V.pdf Setting Up Your Lifestyle® Stereo Amplifier Figure 7 Sample display for a tworoom system Operating speakers in other rooms with room A being the primary room (the one used for a one The...

The Bose® Lifestyle® amplifier - Owner's guide
Page 12
...4. Make sure switches 5, 7, and 8 are down -arrow button and select System Setup using Zone 2, shut off the system and turn it on -screen display. 2. This will now see a menu entitled System Setup (1 of 3). this ensures that the house code settings (switches 1, 2, 3, and 4) match those ...in more ...". ON Figure 9a Setting Zone 2 Protocol Setting Zone 2 Protocol For the SA-1 amplifier to your Lifestyle® system owner's guide for more information on System Setup (3 of 3) Zone 2 Protocol: Legacy 10 January 4, 2002 AM262840_00_V.pdf The last item...
...4. Make sure switches 5, 7, and 8 are down -arrow button and select System Setup using Zone 2, shut off the system and turn it on -screen display. 2. This will now see a menu entitled System Setup (1 of 3). this ensures that the house code settings (switches 1, 2, 3, and 4) match those ...in more ...". ON Figure 9a Setting Zone 2 Protocol Setting Zone 2 Protocol For the SA-1 amplifier to your Lifestyle® system owner's guide for more information on System Setup (3 of 3) Zone 2 Protocol: Legacy 10 January 4, 2002 AM262840_00_V.pdf The last item...

Owner's guide
Page 3
...deluxe remote control between Connections for Lifestyle' powered speakers 10 listening areas 27 Connections for the Bose Wave' radio 12 Programming the CD player .. 28 Connecting the Lifestyle' music center's antennas and power 13 Maintaining Your Lifestyle Music System 29 Specialradio settings for ...31 Turntable 17 Technical Information 32 Headphones 17 Index Basic Operation The music center display 18 Bose Corporation 18 inside back cover The music center controls 18 • The Lifestyle' remote control Listening to the radio 19 20 Tuning 20 Listening to a ...
...deluxe remote control between Connections for Lifestyle' powered speakers 10 listening areas 27 Connections for the Bose Wave' radio 12 Programming the CD player .. 28 Connecting the Lifestyle' music center's antennas and power 13 Maintaining Your Lifestyle Music System 29 Specialradio settings for ...31 Turntable 17 Technical Information 32 Headphones 17 Index Basic Operation The music center display 18 Bose Corporation 18 inside back cover The music center controls 18 • The Lifestyle' remote control Listening to the radio 19 20 Tuning 20 Listening to a ...
Owner's guide
Page 15
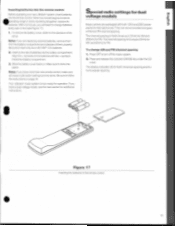
...Besure toinsertonlyAA orIECR6P 1.5Vbattenes. 2. Align the + symbols on . Your Lifestyles music system is 10 kHz for AM and 200 kHz for operation. The channel spacing in the remote control. 15 The display indicates US for North American spacing and EU for international use , you... channel spacing 1. Press and release the consoles ERASE key under the CD cover. InsertingbatteriesInto theremote control Before operating your new Lifestyle system, insert batteries into the battery compartment. Specialradio settings for dual voltage models Music centers are thesame. I Figure 17 ...
...Besure toinsertonlyAA orIECR6P 1.5Vbattenes. 2. Align the + symbols on . Your Lifestyles music system is 10 kHz for AM and 200 kHz for operation. The channel spacing in the remote control. 15 The display indicates US for North American spacing and EU for international use , you... channel spacing 1. Press and release the consoles ERASE key under the CD cover. InsertingbatteriesInto theremote control Before operating your new Lifestyle system, insert batteries into the battery compartment. Specialradio settings for dual voltage models Music centers are thesame. I Figure 17 ...
Owner's guide
Page 18
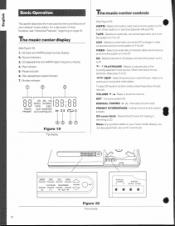
...1. CD track and AIVVFM preset number display. 2. Pause indicator. 6. VIDEO - Begins or pauses play of other component and turns the system on if it is off. When held down for two seconds, stops play of your Lifestyle' music system. OFF - Note:Mysymbols ...visibleonyourmusic centerdisplay, but not discussedhere, arenot for loading or removing a CD. T. MANUAL TUNING V A - PRESET STORE/ERASE -Addandremoveradio station presets. CD elapsed time and AM/FM station frequency display. 4. Selects the built...
...1. CD track and AIVVFM preset number display. 2. Pause indicator. 6. VIDEO - Begins or pauses play of other component and turns the system on if it is off. When held down for two seconds, stops play of your Lifestyle' music system. OFF - Note:Mysymbols ...visibleonyourmusic centerdisplay, but not discussedhere, arenot for loading or removing a CD. T. MANUAL TUNING V A - PRESET STORE/ERASE -Addandremoveradio station presets. CD elapsed time and AM/FM station frequency display. 4. Selects the built...

Owner's guide
Page 21
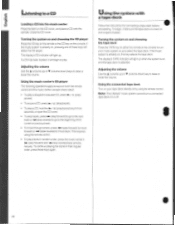
... cancel the preset-erasing process. If you are about to erase. 3. Close theCDcover. The display will stop flashing and display the preset number. 5. Setting a station preset Your Lifestyle' music center can store up to store the displayed station in the displayed preset location, youmay: • Chcose a different preset number for this station, press the STORE...
... cancel the preset-erasing process. If you are about to erase. 3. Close theCDcover. The display will stop flashing and display the preset number. 5. Setting a station preset Your Lifestyle' music center can store up to store the displayed station in the displayed preset location, youmay: • Chcose a different preset number for this station, press the STORE...
Owner's guide
Page 22
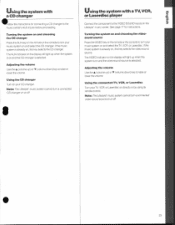
...player. If a CD has been loaded, it will light up ) or ♦ (volume down ) keys to move back. This requires using its remote control. The display's TAPE indicator will begin , make sure the tape deck is turned on and a tape is already on , this key selects the tape deck. If the... reverse) keys simultaneously. Using the connected tape deck Turn on your music system on the CD cover, and place a CD onto the spindle. Note: The Lifestyle' music system cannot turn your tape deck directly or by using the remote control. • To play /pause). • To stop a CD, hold the &#...
...player. If a CD has been loaded, it will light up ) or ♦ (volume down ) keys to move back. This requires using its remote control. The display's TAPE indicator will begin , make sure the tape deck is turned on and a tape is already on , this key selects the tape deck. If the... reverse) keys simultaneously. Using the connected tape deck Turn on your music system on the CD cover, and place a CD onto the spindle. Note: The Lifestyle' music system cannot turn your tape deck directly or by using the remote control. • To play /pause). • To stop a CD, hold the &#...
Owner's guide
Page 23
...turn your TV, VCR. Adjusting the volume Use the A (volume up ) or ♦ (volume down ) key to raise or lower the volume. Note: The Lifestyle' music system cannot turn a connected vide-osoundsource onoroft 23 If the music system is selected. Using the connected TV, VCR, or Laserdisc Turn your music.... Adjusting the volume Use the A (volume up ) or ♦ (volume down ) key to raise or lower the volume. The AUX indicator on the display will light up when the system is on and the CD changer is already on, this key selects the video-sound source. The VIDEO indicator...
...turn your TV, VCR. Adjusting the volume Use the A (volume up ) or ♦ (volume down ) key to raise or lower the volume. Note: The Lifestyle' music system cannot turn a connected vide-osoundsource onoroft 23 If the music system is selected. Using the connected TV, VCR, or Laserdisc Turn your music.... Adjusting the volume Use the A (volume up ) or ♦ (volume down ) key to raise or lower the volume. The AUX indicator on the display will light up when the system is on and the CD changer is already on, this key selects the video-sound source. The VIDEO indicator...

Owner's guide
Page 24
... AUTO OFF key again, up to prevent interferencewithother Lifestyle' music systems • Your Lifestyle remote control's commands will probably not conflict with the "Basic Operation" section before exploring these more advanced features. The display will remain off in the opposite direction. Press ...theOFFkey on the console. 5. Advanced Features Please familiarize yourself with those of another nearby Lifestyle music system. Open the CD cover. 6. Locate ...
... AUTO OFF key again, up to prevent interferencewithother Lifestyle' music systems • Your Lifestyle remote control's commands will probably not conflict with the "Basic Operation" section before exploring these more advanced features. The display will remain off in the opposite direction. Press ...theOFFkey on the console. 5. Advanced Features Please familiarize yourself with those of another nearby Lifestyle music system. Open the CD cover. 6. Locate ...
Owner's guide
Page 27
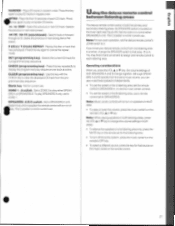
...; To turn on or ute. Use this key again to SPEAKERS A or B. Plays CD tracks in one listening area to clear the displayed CD track from one listening area only, press the MUTE key on the remote set thedeluxeremotecontras ZONEswitch to2 If you press the VOL •...play sequence. Not for that source on thelower right(seeFigure 25). ZONE 1 -2 switch - Set to ZONE 2 to play sequence one remote control to display the programmed play either SPEAKERS A or SPEAKERS B. SPEAKERS A-B-C switch - BDetermines which speaker the remote control will turn off the entire system, press the...
...; To turn on or ute. Use this key again to SPEAKERS A or B. Plays CD tracks in one listening area to clear the displayed CD track from one listening area only, press the MUTE key on the remote set thedeluxeremotecontras ZONEswitch to2 If you press the VOL •...play sequence. Not for that source on thelower right(seeFigure 25). ZONE 1 -2 switch - Set to ZONE 2 to play sequence one remote control to display the programmed play either SPEAKERS A or SPEAKERS B. SPEAKERS A-B-C switch - BDetermines which speaker the remote control will turn off the entire system, press the...

Owner's guide
Page 28
... 28 Programming the CDplayer Toprogram while the CDplays 1. You To program a track sequence may also check a programmed sequence while the disc is displayed. Example: Toprograma sequenceoftracks3, 1, 7, and 10. When you hear a track you program a sequence of the 10-second period. To cancel...is playing. Press INTRO to program a track sequence: before playing a CD 1. Turn the music system on the display butitisnotprogrammedinto the sequence. The display shows the track number and its first programmed selection. Thedisplayreads Track-3 P-0l• toindicate that track 3is the ...
... 28 Programming the CDplayer Toprogram while the CDplays 1. You To program a track sequence may also check a programmed sequence while the disc is displayed. Example: Toprograma sequenceoftracks3, 1, 7, and 10. When you hear a track you program a sequence of the 10-second period. To cancel...is playing. Press INTRO to program a track sequence: before playing a CD 1. Turn the music system on the display butitisnotprogrammedinto the sequence. The display shows the track number and its first programmed selection. Thedisplayreads Track-3 P-0l• toindicate that track 3is the ...
Owner's guide
Page 30
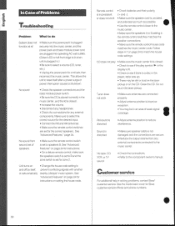
...set for zone 2. No sound from any external components. Follow steps 4-7 on • Change the house code setting to the component owner's manual. display is • Check to select a source (CD, tuner, CD does not play symbol ► in the etc.). • Unplug the power.... See "Advanced Features* on the CD. prevent conflicting signals with another or acts erratically nearby Lifestyle' music system. Customer service For additional help in solving problems. contact Bose' customer service. distorted damaged and the connections are plugged into the music center, and the power...
...set for zone 2. No sound from any external components. Follow steps 4-7 on • Change the house code setting to the component owner's manual. display is • Check to select a source (CD, tuner, CD does not play symbol ► in the etc.). • Unplug the power.... See "Advanced Features* on the CD. prevent conflicting signals with another or acts erratically nearby Lifestyle' music system. Customer service For additional help in solving problems. contact Bose' customer service. distorted damaged and the connections are plugged into the music center, and the power...
Owner's guide
Page 33
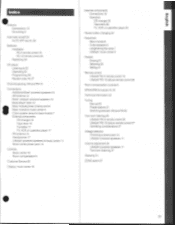
...-10 deluxe remote control 26 Channel spacing, AM and FM 15 Room compensation controls 9 Connections Additional Bose' powered speakers 10 AM antenna 14 Bose' Lifestyle' powered speakers 10 •BoseWave' radio 12 Bass module power (mains) cord 8 Bass module to music center 8... 25 Lifestyle' RC-5 remote control 25 Lifestyle' RC-10 deluxe remote control 27 Operating considerations 27 Voltage selection Choosing a power pack 14 Lifestyle' powered speakers 11 Volume adjustment 20 Lifestyle' powered speakers 11 Two-room listening 27 Warranty 31 Customer Service 30 ZONE switch 27 Display, music...
...-10 deluxe remote control 26 Channel spacing, AM and FM 15 Room compensation controls 9 Connections Additional Bose' powered speakers 10 AM antenna 14 Bose' Lifestyle' powered speakers 10 •BoseWave' radio 12 Bass module power (mains) cord 8 Bass module to music center 8... 25 Lifestyle' RC-5 remote control 25 Lifestyle' RC-10 deluxe remote control 27 Operating considerations 27 Voltage selection Choosing a power pack 14 Lifestyle' powered speakers 11 Volume adjustment 20 Lifestyle' powered speakers 11 Two-room listening 27 Warranty 31 Customer Service 30 ZONE switch 27 Display, music...


