
Getting Started
Page 3
... operating system or without a computer 11 Setting up the printer for wireless printing 15 Setting up the printer using a USB cable...17 Installing an optional internal wireless print server 17 Configuring the optional internal wireless print server 19 Installing the printer on additional network computers 19 Wireless networking...20 Networking overview...20 Learning about the printer 25 Understanding the parts of the printer 25 Using the control panel buttons and menus 26 Using the control panel...26 Using the Copy menu ...29 Using the Scan menu ...30 Using the Photo Card menu...
... operating system or without a computer 11 Setting up the printer for wireless printing 15 Setting up the printer using a USB cable...17 Installing an optional internal wireless print server 17 Configuring the optional internal wireless print server 19 Installing the printer on additional network computers 19 Wireless networking...20 Networking overview...20 Learning about the printer 25 Understanding the parts of the printer 25 Using the control panel buttons and menus 26 Using the control panel...26 Using the Copy menu ...29 Using the Scan menu ...30 Using the Photo Card menu...
Getting Started
Page 5
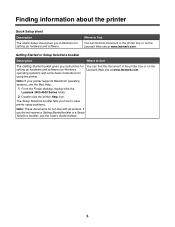
... Lexmark Web site at www.lexmark.com. Note: If your printer supports Macintosh operating systems, see the User's Guide instead. 5 Finding information about the printer Quick Setup sheet Description The Quick Setup sheet gives you instructions for setting up hardware and software (on Windows operating systems) and some basic instructions for setting up hardware and software. If you how to solve printer setup problems. Note: These documents do not ship with all printers. Where to find The Getting Started...
... Lexmark Web site at www.lexmark.com. Note: If your printer supports Macintosh operating systems, see the User's Guide instead. 5 Finding information about the printer Quick Setup sheet Description The Quick Setup sheet gives you instructions for setting up hardware and software (on Windows operating systems) and some basic instructions for setting up hardware and software. If you how to solve printer setup problems. Note: These documents do not ship with all printers. Where to find The Getting Started...
Getting Started
Page 6
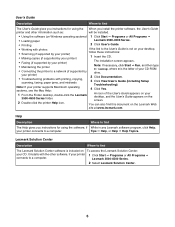
... this document on the screen. 2 Double-click the printer Help icon. Tips Œ Help, or Help Œ Help Topics. Lexmark 3500-4500 Series. 2 Select Lexmark Solution Center. 6 It installs with the other information such as: will be installed. • Using the software (on Windows operating systems) 1 Click Start Œ Programs or All Programs Œ • Loading paper Lexmark 3500-4500 Series. • Printing 2 Click User's Guide. • Working with printing, copying, scanning, faxing, paper jams, and misfeeds 3 Click View User's Guide (including Setup Troubleshooting...
... this document on the screen. 2 Double-click the printer Help icon. Tips Œ Help, or Help Œ Help Topics. Lexmark 3500-4500 Series. 2 Select Lexmark Solution Center. 6 It installs with the other information such as: will be installed. • Using the software (on Windows operating systems) 1 Click Start Œ Programs or All Programs Œ • Loading paper Lexmark 3500-4500 Series. • Printing 2 Click User's Guide. • Working with printing, copying, scanning, faxing, paper jams, and misfeeds 3 Click View User's Guide (including Setup Troubleshooting...
Getting Started
Page 16
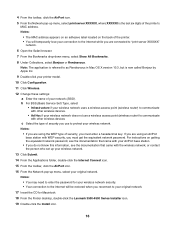
... AirPort base station with your wireless network. If you are connected to enter the password for Macintosh. 18 From the Finder desktop, double-click the Lexmark 3500-4500 Series Installer icon. 19 Double-click the Install icon. 16 For instructions on the back of the printer. • You will be restored when you use to as Rendezvous in Mac OS X version 10.3, but is the...
... AirPort base station with your wireless network. If you are connected to enter the password for Macintosh. 18 From the Finder desktop, double-click the Lexmark 3500-4500 Series Installer icon. 19 Double-click the Install icon. 16 For instructions on the back of the printer. • You will be restored when you use to as Rendezvous in Mac OS X version 10.3, but is the...
Getting Started
Page 34
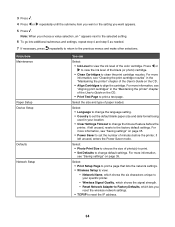
... address. 34 For more information, see "Cleaning the print cartridge nozzles" in the "Maintaining the printer" chapter of the User's Guide on page 35. • Power Saver to align the cartridge. Network Name, which shows the six characters unique to your location. • Clear Settings Timeout to print a test page. Reset Network Adapter to clean the print cartridge nozzles. From here Maintenance Paper Setup Device Setup Defaults Network Setup You can Select: • Ink Level to view the ink level of the black (or photo) cartridge...
... address. 34 For more information, see "Cleaning the print cartridge nozzles" in the "Maintaining the printer" chapter of the User's Guide on page 35. • Power Saver to align the cartridge. Network Name, which shows the six characters unique to your location. • Clear Settings Timeout to print a test page. Reset Network Adapter to clean the print cartridge nozzles. From here Maintenance Paper Setup Device Setup Defaults Network Setup You can Select: • Ink Level to view the ink level of the black (or photo) cartridge...
Getting Started
Page 37
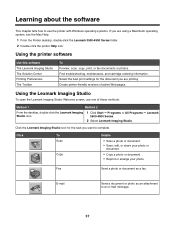
...Copy a photo or document. • Reprint or enlarge your photo. Using the printer software Use this software The Lexmark Imaging Studio The Solution Center Printing Preferences The Toolbar To Preview, scan, copy, print, or fax documents or photos. E-mail Send a document or photo as a fax. Create printer-friendly versions of these methods: Method 1 Method 2 From the desktop, double-click the Lexmark Imaging Studio icon. 1 Click Start Œ Programs or All Programs Œ Lexmark 3500-4500 Series. 2 Select Lexmark Imaging Studio. Find troubleshooting, maintenance, and cartridge...
...Copy a photo or document. • Reprint or enlarge your photo. Using the printer software Use this software The Lexmark Imaging Studio The Solution Center Printing Preferences The Toolbar To Preview, scan, copy, print, or fax documents or photos. E-mail Send a document or photo as a fax. Create printer-friendly versions of these methods: Method 1 Method 2 From the desktop, double-click the Lexmark Imaging Studio icon. 1 Click Start Œ Programs or All Programs Œ Lexmark 3500-4500 Series. 2 Select Lexmark Imaging Studio. Find troubleshooting, maintenance, and cartridge...
Getting Started
Page 57
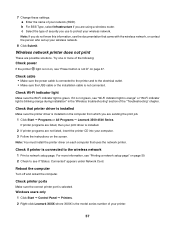
... "Power button is not connected. Check if printer is connected to the electrical outlet. • Make sure the USB cable or the installation cable is not lit" on page 47. Windows users only 1 Click Start Œ Control Panel Œ Printers. 2 Right-click Lexmark XXXX where XXXX is green. Try one or more information, see "Printing a network setup page" on each computer that came with the wireless network, or contact the person who set up your printer. 57 Check Wi...
... "Power button is not connected. Check if printer is connected to the electrical outlet. • Make sure the USB cable or the installation cable is not lit" on page 47. Windows users only 1 Click Start Œ Control Panel Œ Printers. 2 Right-click Lexmark XXXX where XXXX is green. Try one or more information, see "Printing a network setup page" on each computer that came with the wireless network, or contact the person who set up your printer. 57 Check Wi...
Getting Started
Page 65
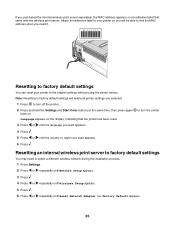
... Reset Network Adapter to Factory Default appears. 65 to turn off the printer. 2 Press and hold the Settings and Start Color buttons at the same time, then press again back on the display, indicating that came with the wireless print server. Resetting to factory default settings You can reset your printer so you will delete all printer settings you selected. 1 Press to the original settings without using the printer menus. Attach the adhesive label to your printer to turn...
... Reset Network Adapter to Factory Default appears. 65 to turn off the printer. 2 Press and hold the Settings and Start Color buttons at the same time, then press again back on the display, indicating that came with the wireless print server. Resetting to factory default settings You can reset your printer so you will delete all printer settings you selected. 1 Press to the original settings without using the printer menus. Attach the adhesive label to your printer to turn...
User's Guide
Page 3
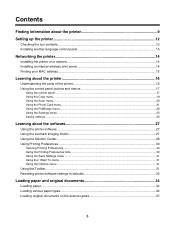
... Installing another language control panel 13 Networking the printer 14 Installing the printer on a network...14 Installing an internal wireless print server 14 Finding your MAC address...15 Learning about the printer 16 Understanding the parts of the printer 16 Using the control panel buttons and menus 17 Using the control panel...17 Using the Copy menu ...19 Using the Scan menu ...20 Using the Photo Card menu ...21 Using the PictBridge menu ...22 Using the Settings menu ...23 Saving settings ...25 Learning about the software 27 Using the printer software...27 Using the Lexmark Imaging...
... Installing another language control panel 13 Networking the printer 14 Installing the printer on a network...14 Installing an internal wireless print server 14 Finding your MAC address...15 Learning about the printer 16 Understanding the parts of the printer 16 Using the control panel buttons and menus 17 Using the control panel...17 Using the Copy menu ...19 Using the Scan menu ...20 Using the Photo Card menu ...21 Using the PictBridge menu ...22 Using the Settings menu ...23 Saving settings ...25 Learning about the software 27 Using the printer software...27 Using the Lexmark Imaging...

User's Guide
Page 9
... document on the Lexmark Web 2 Double-click the printer Help icon. using the When you install the printer software, the User's Guide printer and other information such as: will be installed. • Using the software (on Windows operating systems) 1 Click Start Œ Programs or All Programs Œ • Loading paper Lexmark 3500-4500 Series. • Printing 2 Click User's Guide. • Working with printing, copying, Troubleshooting). scanning, faxing, paper jams, and misfeeds 3 Click Yes. Finding information about the printer Quick Setup sheet Description The Quick...
... document on the Lexmark Web 2 Double-click the printer Help icon. using the When you install the printer software, the User's Guide printer and other information such as: will be installed. • Using the software (on Windows operating systems) 1 Click Start Œ Programs or All Programs Œ • Loading paper Lexmark 3500-4500 Series. • Printing 2 Click User's Guide. • Working with printing, copying, Troubleshooting). scanning, faxing, paper jams, and misfeeds 3 Click Yes. Finding information about the printer Quick Setup sheet Description The Quick...
User's Guide
Page 14
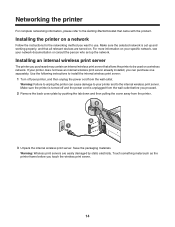
.... 2 Remove the back cover plate by static electricity. Installing an internal wireless print server The printer you can cause damage to your network documentation or consult the person who set up and working properly, and that came with the product. Use the following instructions to unplug the printer can purchase one separately. For more information on . Warning: Failure to install the internal wireless print server: 1 Turn off and the power cord...
.... 2 Remove the back cover plate by static electricity. Installing an internal wireless print server The printer you can cause damage to your network documentation or consult the person who set up and working properly, and that came with the product. Use the following instructions to unplug the printer can purchase one separately. For more information on . Warning: Failure to install the internal wireless print server: 1 Turn off and the power cord...
User's Guide
Page 24
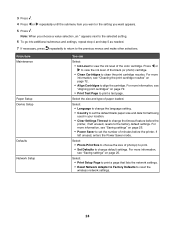
... Maintenance Paper Setup Device Setup Defaults Network Setup You can Select: • Ink Level to view the ink level of the black (or photo) cartridge. • Clean Cartridges to view the ink level of the color cartridge. Select: • Language to change the language setting. • Country to set the number of paper loaded. Select: • Photo Print Size to choose the size of photo(s) to print. • Set Defaults to change default settings. For more information, see "Cleaning the print cartridge nozzles" on page 72. • Print Test Page to reset the wireless network...
... Maintenance Paper Setup Device Setup Defaults Network Setup You can Select: • Ink Level to view the ink level of the black (or photo) cartridge. • Clean Cartridges to view the ink level of the color cartridge. Select: • Language to change the language setting. • Country to set the number of paper loaded. Select: • Photo Print Size to choose the size of photo(s) to print. • Set Defaults to change default settings. For more information, see "Cleaning the print cartridge nozzles" on page 72. • Print Test Page to reset the wireless network...

User's Guide
Page 27
Select the best print settings for the task you want to an e-mail message. 27 Learning about the software This chapter tells how to use one of active Web pages. Find troubleshooting, maintenance, and cartridge ordering information. Click the Lexmark Imaging Studio icon for the document you are printing. Using the Lexmark Imaging Studio To open the Lexmark Imaging Studio Welcome screen, use the printer with Windows operating systems. If you are using a Macintosh operating system, see the Mac Help: 1 From...
Select the best print settings for the task you want to an e-mail message. 27 Learning about the software This chapter tells how to use one of active Web pages. Find troubleshooting, maintenance, and cartridge ordering information. Click the Lexmark Imaging Studio icon for the document you are printing. Using the Lexmark Imaging Studio To open the Lexmark Imaging Studio Welcome screen, use the printer with Windows operating systems. If you are using a Macintosh operating system, see the Mac Help: 1 From...
User's Guide
Page 77
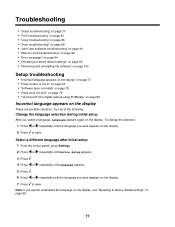
...; "Setup troubleshooting" on page 77 • "Print troubleshooting" on page 81 • "Copy troubleshooting" on page 86 • "Scan troubleshooting" on page 88 • "Jams and misfeeds troubleshooting" on page 90 • "Memory card troubleshooting" on page 92 • "Error messages" on page 94 • "Resetting to factory default settings" on page 99 • "Removing and reinstalling the software" on page 100 Setup troubleshooting • "Incorrect language appears on the display" on page 77 • "Power button is not lit" on page 78 • "Software does not install" on page...
...; "Setup troubleshooting" on page 77 • "Print troubleshooting" on page 81 • "Copy troubleshooting" on page 86 • "Scan troubleshooting" on page 88 • "Jams and misfeeds troubleshooting" on page 90 • "Memory card troubleshooting" on page 92 • "Error messages" on page 94 • "Resetting to factory default settings" on page 99 • "Removing and reinstalling the software" on page 100 Setup troubleshooting • "Incorrect language appears on the display" on page 77 • "Power button is not lit" on page 78 • "Software does not install" on page...
User's Guide
Page 81
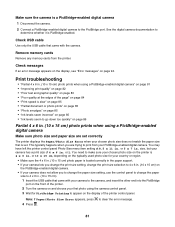
... PictBridge port. Make sure the camera is loaded correctly in the paper support. • If your camera lets you change the print size setting, change the print size selection to 4 x 6 in. (10 x 15 cm) on the PictBridge-enabled digital camera. • If your camera does not allow you are set . Check messages If an error message appears on the display, see "Error messages" on and choose your camera has a print size of the printer. 2 Turn...
... PictBridge port. Make sure the camera is loaded correctly in the paper support. • If your camera lets you change the print size setting, change the print size selection to 4 x 6 in. (10 x 15 cm) on the PictBridge-enabled digital camera. • If your camera does not allow you are set . Check messages If an error message appears on the display, see "Error messages" on and choose your camera has a print size of the printer. 2 Turn...
User's Guide
Page 86
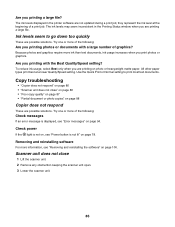
... the printer software are printing on page 78. Try one or more of the following : Check messages If an error message is not lit" on photo or heavyweight matte paper. Because photos and graphics require more information, see "Error messages" on page 88 Copier does not respond These are possible solutions. To reduce ink usage, select Best only when you printing photos or documents with the Best Quality/Speed setting? Copy troubleshooting • "Copier does...
... the printer software are printing on page 78. Try one or more of the following : Check messages If an error message is not lit" on photo or heavyweight matte paper. Because photos and graphics require more information, see "Error messages" on page 88 Copier does not respond These are possible solutions. To reduce ink usage, select Best only when you printing photos or documents with the Best Quality/Speed setting? Copy troubleshooting • "Copier does...
User's Guide
Page 88
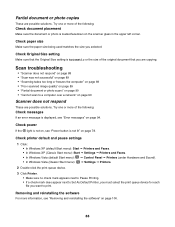
... "Poor scanned image quality" on page 89 • "Partial document or photo scans" on page 90 Scanner does not respond These are copying. Check printer default and pause settings 1 Click: • In Windows XP (default Start menu): Start Œ Printers and Faxes. • In Windows XP (Classic Start menu): Start Œ Settings Œ Printers and Faxes. • In Windows Vista (default Start menu): Œ Control Panel Œ Printers (under Hardware and Sound). • In Windows Vista (Classic Start menu): Œ Settings Œ Printers. 2 Double-click the print queue device. 3 Click...
... "Poor scanned image quality" on page 89 • "Partial document or photo scans" on page 90 Scanner does not respond These are copying. Check printer default and pause settings 1 Click: • In Windows XP (default Start menu): Start Œ Printers and Faxes. • In Windows XP (Classic Start menu): Start Œ Settings Œ Printers and Faxes. • In Windows Vista (default Start menu): Œ Control Panel Œ Printers (under Hardware and Sound). • In Windows Vista (Classic Start menu): Œ Settings Œ Printers. 2 Double-click the print queue device. 3 Click...
User's Guide
Page 105
... tab 30 aligning print cartridges 72 alignment error 94 B banner paper jams 92 banner paper, loading 37 black ink low 94 borderless copying using the control panel 58 box contents 12 buttons, control panel Back 18 Cancel 18 Copy Mode 18 Left arrow 18 Lighter / Darker 18 Menu 18 Photo Card 18 Power 17 Right arrow 18 Scan Mode 18 Select 18 Settings 18 Start Black 19 Start Color 19 buttons, Lexmark Imaging Studio Copy 27 E-mail 27 Fax 27 Photo Greeting Cards 27 Photo Packages 27 Poster 27 Scan 27 Slideshow...
... tab 30 aligning print cartridges 72 alignment error 94 B banner paper jams 92 banner paper, loading 37 black ink low 94 borderless copying using the control panel 58 box contents 12 buttons, control panel Back 18 Cancel 18 Copy Mode 18 Left arrow 18 Lighter / Darker 18 Menu 18 Photo Card 18 Power 17 Right arrow 18 Scan Mode 18 Select 18 Settings 18 Start Black 19 Start Color 19 buttons, Lexmark Imaging Studio Copy 27 E-mail 27 Fax 27 Photo Greeting Cards 27 Photo Packages 27 Poster 27 Scan 27 Slideshow...
User's Guide
Page 107
... Paper Setup tab 30 paper sizes, specifying 30 paper support 16 paper, loading 34 partial 4x6in. (10x15cm) photo prints when using PictBridge 81 partial document or photo copies 88 partial document or photo prints 85 partial document or photo scans 90 parts control panel 16 memory card slots 16 paper exit tray 16 paper feed guard 16 paper guide 16 paper support 16 PictBridge port 16 power supply port 17 print cartridge carrier 17 scanner glass 16 scanner unit 17 top cover 16 USB port 17 Wi-Fi indicator 16 Photo Card menu 21 photo cards, loading 36 Photo Greeting Cards button 27 photo ink low...
... Paper Setup tab 30 paper sizes, specifying 30 paper support 16 paper, loading 34 partial 4x6in. (10x15cm) photo prints when using PictBridge 81 partial document or photo copies 88 partial document or photo prints 85 partial document or photo scans 90 parts control panel 16 memory card slots 16 paper exit tray 16 paper feed guard 16 paper guide 16 paper support 16 PictBridge port 16 power supply port 17 print cartridge carrier 17 scanner glass 16 scanner unit 17 top cover 16 USB port 17 Wi-Fi indicator 16 Photo Card menu 21 photo cards, loading 36 Photo Greeting Cards button 27 photo ink low...
User's Guide
Page 108
... Settings menu 31 problem reading memory card error 99 proof sheet, using 49 publications, finding 9 Q Quality/Copies tab 30 R receiving a fax automatically 69 recycling Lexmark products 76 WEEE statement 102 reducing an image 60 removing print cartridges 70 repeating an image 60 reverse page order 41 right cartridge error 97 right cartridge incorrect 97 right cartridge missing 97 S safety information 2 saving paper size settings 22 paper type settings 22 photo size settings 22 Scan button 27 Scan menu 20 scan troubleshooting cannot scan to computer over network 90 partial document or photo...
... Settings menu 31 problem reading memory card error 99 proof sheet, using 49 publications, finding 9 Q Quality/Copies tab 30 R receiving a fax automatically 69 recycling Lexmark products 76 WEEE statement 102 reducing an image 60 removing print cartridges 70 repeating an image 60 reverse page order 41 right cartridge error 97 right cartridge incorrect 97 right cartridge missing 97 S safety information 2 saving paper size settings 22 paper type settings 22 photo size settings 22 Scan button 27 Scan menu 20 scan troubleshooting cannot scan to computer over network 90 partial document or photo...


