
Getting Started
Page 3
... up the printer using a USB cable...17 Installing an optional internal wireless print server 17 Configuring the optional internal wireless print server 19 Installing the printer on additional network computers 19 Wireless networking...20 Networking overview...20 Learning about the printer 25 Understanding the ...29 Using the Scan menu ...30 Using the Photo Card menu ...31 Using the PictBridge menu ...32 Using the Settings menu ...33 Saving settings ...35 Learning about the software 37 Using the printer software...37 Using the Lexmark Imaging Studio...37 Using the Solution Center...38 Using...
... up the printer using a USB cable...17 Installing an optional internal wireless print server 17 Configuring the optional internal wireless print server 19 Installing the printer on additional network computers 19 Wireless networking...20 Networking overview...20 Learning about the printer 25 Understanding the ...29 Using the Scan menu ...30 Using the Photo Card menu ...31 Using the PictBridge menu ...32 Using the Settings menu ...33 Saving settings ...35 Learning about the software 37 Using the printer software...37 Using the Lexmark Imaging Studio...37 Using the Solution Center...38 Using...
Getting Started
Page 4
...is blinking orange during installation 54 Wireless network printer does not print ...57 Wireless printer is no longer working...58 Photos do not transfer from a memory card across a wireless network 63 Changing wireless settings after installation 64 Finding your... MAC address...64 Resetting to factory default settings 65 Resetting an internal wireless print server to factory default settings 65 Uninstalling and reinstalling the software 66 Advanced wireless...
...is blinking orange during installation 54 Wireless network printer does not print ...57 Wireless printer is no longer working...58 Photos do not transfer from a memory card across a wireless network 63 Changing wireless settings after installation 64 Finding your... MAC address...64 Resetting to factory default settings 65 Resetting an internal wireless print server to factory default settings 65 Uninstalling and reinstalling the software 66 Advanced wireless...
Getting Started
Page 5
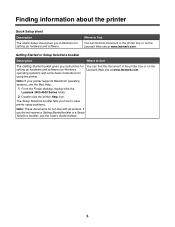
... did not receive a Getting Started booklet or a Setup Solutions booklet, see the Mac Help: 1 From the Finder desktop, double-click the Lexmark 3500-4500 Series folder. 2 Double-click the printer Help icon. Note: If your printer supports Macintosh operating systems, see the User's Guide instead.... 5 The Setup Solutions booklet tells you instructions for setting up hardware and software (on the Lexmark Web site at www.lexmark.com. Finding information about the printer Quick Setup sheet Description The Quick Setup sheet gives you how to solve ...
... did not receive a Getting Started booklet or a Setup Solutions booklet, see the Mac Help: 1 From the Finder desktop, double-click the Lexmark 3500-4500 Series folder. 2 Double-click the printer Help icon. Note: If your printer supports Macintosh operating systems, see the User's Guide instead.... 5 The Setup Solutions booklet tells you instructions for setting up hardware and software (on the Lexmark Web site at www.lexmark.com. Finding information about the printer Quick Setup sheet Description The Quick Setup sheet gives you how to solve ...
Getting Started
Page 6
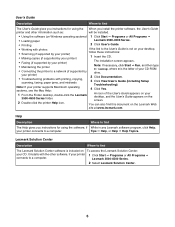
...It installs with the other information such as: will be installed. • Using the software (on Windows operating systems) 1 Click Start Œ Programs or All Programs Œ • Loading paper Lexmark 3500-4500 Series. • Printing 2 Click User's Guide. • Working with printing... connects to a computer. User's Guide Description Where to find The Lexmark Solution Center software is the letter of the User's Guide appears on your printer) 2 Click Documentation. • Troubleshooting problems with photos If the link to the User's Guide is not on your desktop...
...It installs with the other information such as: will be installed. • Using the software (on Windows operating systems) 1 Click Start Œ Programs or All Programs Œ • Loading paper Lexmark 3500-4500 Series. • Printing 2 Click User's Guide. • Working with printing... connects to a computer. User's Guide Description Where to find The Lexmark Solution Center software is the letter of the User's Guide appears on your printer) 2 Click Documentation. • Troubleshooting problems with photos If the link to the User's Guide is not on your desktop...
Getting Started
Page 10
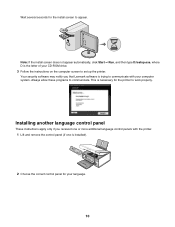
... communicate with your language. 10 Installing another language control panel These instructions apply only if you that Lexmark software is installed). 2 Choose the correct control panel for your computer system. Your security software may notify you received one or more additional language control panels with the printer. 1 Lift and remove the control panel (if...
... communicate with your language. 10 Installing another language control panel These instructions apply only if you that Lexmark software is installed). 2 Choose the correct control panel for your computer system. Your security software may notify you received one or more additional language control panels with the printer. 1 Lift and remove the control panel (if...
Getting Started
Page 37
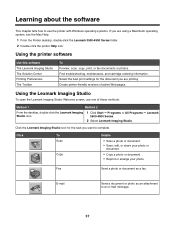
... document. • Save, edit, or share your photo or document. • Copy a photo or document. • Reprint or enlarge your photo. Find troubleshooting, maintenance, and cartridge ordering information. Learning about the software This chapter tells how to use one of active Web pages. Click the Lexmark Imaging Studio icon for the document you want to complete...
... document. • Save, edit, or share your photo or document. • Copy a photo or document. • Reprint or enlarge your photo. Find troubleshooting, maintenance, and cartridge ordering information. Learning about the software This chapter tells how to use one of active Web pages. Click the Lexmark Imaging Studio icon for the document you want to complete...
Getting Started
Page 40
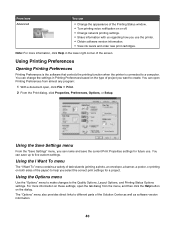
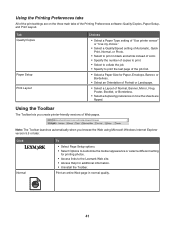
... Want To" menu contains a variety of task wizards (printing a photo, an envelope, a banner, a poster, or printing on both sides of the paper) to different parts of the Solution Center as well as software version information. 40 Using Printing Preferences Opening Printing Preferences Printing Preferences is... the software that controls the printing function when the printer is connected to the Quality Options, ...
... Want To" menu contains a variety of task wizards (printing a photo, an envelope, a banner, a poster, or printing on both sides of the paper) to different parts of the Solution Center as well as software version information. 40 Using Printing Preferences Opening Printing Preferences Printing Preferences is... the software that controls the printing function when the printer is connected to the Quality Options, ...
Getting Started
Page 41
...Select to collate the job. • Specify to print the last page of Automatic, Quick Print, Normal, or Photo. • Select to the Lexmark Web site. • Access Help for Paper, Envelope, Banner, or Borderless. • Select an Orientation of ...Portrait or Landscape. • Select a Layout of Normal, Banner, Mirror, N-up, Poster, Booklet, or Borderless. • Select a duplexing preference on how the sheets are on the three main tabs of the Printing Preferences software...
...Select to collate the job. • Specify to print the last page of Automatic, Quick Print, Normal, or Photo. • Select to the Lexmark Web site. • Access Help for Paper, Envelope, Banner, or Borderless. • Select an Orientation of ...Portrait or Landscape. • Select a Layout of Normal, Banner, Mirror, N-up, Poster, Booklet, or Borderless. • Select a duplexing preference on how the sheets are on the three main tabs of the Printing Preferences software...
Getting Started
Page 42
... the Lexmark 3500-4500 Series icon. 3 Click Printing Preferences. 4 Click the Save Settings menu. 5 From the Restore section, select Factory Settings (Defaults). Note: The number of a Web page. Note: Factory default settings cannot be deleted. 42 Black and White Print an entire Web page in draft quality. Resetting printer software settings to Photos.
... the Lexmark 3500-4500 Series icon. 3 Click Printing Preferences. 4 Click the Save Settings menu. 5 From the Restore section, select Factory Settings (Defaults). Note: The number of a Web page. Note: Factory default settings cannot be deleted. 42 Black and White Print an entire Web page in draft quality. Resetting printer software settings to Photos.
Getting Started
Page 47
Setup troubleshooting • "Incorrect language appears on the display" on page 47 • "Power button is not lit" on page 47 • "Software does not install" on page 48 • "Page does not print" on page 49 • "Cannot print from digital camera using PictBridge" on ... solutions. To change the selection: 1 Press or repeatedly until the language you cannot understand the language on the display, see "Resetting to save . Try one or more troubleshooting information on page 65. Power button is on the display. 2 Press to save . Note: If you want appears on by pressing ....
Setup troubleshooting • "Incorrect language appears on the display" on page 47 • "Power button is not lit" on page 47 • "Software does not install" on page 48 • "Page does not print" on page 49 • "Cannot print from digital camera using PictBridge" on ... solutions. To change the selection: 1 Press or repeatedly until the language you cannot understand the language on the display, see "Resetting to save . Try one or more troubleshooting information on page 65. Power button is on the display. 2 Press to save . Note: If you want appears on by pressing ....
Getting Started
Page 48
... on the printer. 3 Plug the cord into the USB port of the following: Check your USB connection Follow these steps if you are possible solutions. Software does not install These are not using . 4 If the light is marked with Service Pack 3 or later • Windows XP • Windows Vista.... Check your operating system The following operating systems are supported: • Windows 2000 with the USB symbol. Try one or more of the computer. The USB port is not on a wireless network: 1 Check the USB cable for any obvious damage. 2 Firmly plug the square end of the USB cable...
... on the printer. 3 Plug the cord into the USB port of the following: Check your USB connection Follow these steps if you are possible solutions. Software does not install These are not using . 4 If the light is marked with Service Pack 3 or later • Windows XP • Windows Vista.... Check your operating system The following operating systems are supported: • Windows 2000 with the USB symbol. Try one or more of the computer. The USB port is not on a wireless network: 1 Check the USB cable for any obvious damage. 2 Firmly plug the square end of the USB cable...
Getting Started
Page 49
... and tape have been removed. 1 2 3 Reinsert the cartridges. Reload paper Remove and then load paper. Try one or more information, see "Uninstalling and reinstalling the software" on the CD. For more of the following: Check messages If an error message is displayed, see "Power button... is not on, see "Error messages" in the "Troubleshooting" chapter of the User's Guide on page 66. Uninstall and reinstall software Uninstall the printer software, and then reinstall it. Check printer default and pause settings 1 Click: • In Windows XP (default Start menu): Start &#...
... and tape have been removed. 1 2 3 Reinsert the cartridges. Reload paper Remove and then load paper. Try one or more information, see "Uninstalling and reinstalling the software" on the CD. For more of the following: Check messages If an error message is displayed, see "Power button... is not on, see "Error messages" in the "Troubleshooting" chapter of the User's Guide on page 66. Uninstall and reinstall software Uninstall the printer software, and then reinstall it. Check printer default and pause settings 1 Click: • In Windows XP (default Start menu): Start &#...
Getting Started
Page 50
Try one or more of the following: Enable PictBridge printing from camera Enable PictBridge printing on . For more information, see "Uninstalling and reinstalling the software" on the CD. Check USB cable Use only the USB cable that came with the camera. Wireless troubleshooting Printing a ... until Network Setup appears. 50 Make sure the camera is PictBridge-enabled. Cannot print from the printer. Uninstall and reinstall software Uninstall the printer software, and then reinstall it. See the digital camera documentation to determine whether the camera is a PictBridge-enabled digital camera 1...
Try one or more of the following: Enable PictBridge printing from camera Enable PictBridge printing on . For more information, see "Uninstalling and reinstalling the software" on the CD. Check USB cable Use only the USB cable that came with the camera. Wireless troubleshooting Printing a ... until Network Setup appears. 50 Make sure the camera is PictBridge-enabled. Cannot print from the printer. Uninstall and reinstall software Uninstall the printer software, and then reinstall it. See the digital camera documentation to determine whether the camera is a PictBridge-enabled digital camera 1...
Getting Started
Page 51
...one or more information, see "Power button is on page 47. Network printer does not show up in the printer selection list during installation Check whether the printer is not lit" on the same wireless network as 192.168.0.100. a Enter the IP address of your wireless access point (wireless...wireless access point (wireless router). • The IP address appears as four sets of numbers separated by your operating system or wireless network software. d On the main page, click Wireless... or All Programs Œ Lexmark 3500-4500 Series. 51 3 Press . 4 Press or repeatedly until Print Setup...
...one or more information, see "Power button is on page 47. Network printer does not show up in the printer selection list during installation Check whether the printer is not lit" on the same wireless network as 192.168.0.100. a Enter the IP address of your wireless access point (wireless...wireless access point (wireless router). • The IP address appears as four sets of numbers separated by your operating system or wireless network software. d On the main page, click Wireless... or All Programs Œ Lexmark 3500-4500 Series. 51 3 Press . 4 Press or repeatedly until Print Setup...
Getting Started
Page 53
...one or more information, see "Printing a network setup page" on page 50. 53 For more of the computer. The USB port is generally 100-150 feet. You can find the signal strength of the printer. 4 Cancel the software installation. 5 Click Start ΠPrograms or All Programs ΠLexmark 3500-4500 Series. 6 Click Wireless... Setup Utility. 7 Follow the prompts on the network setup page. For information on how to the wireless access point (wireless router).
...one or more information, see "Printing a network setup page" on page 50. 53 For more of the computer. The USB port is generally 100-150 feet. You can find the signal strength of the printer. 4 Cancel the software installation. 5 Click Start ΠPrograms or All Programs ΠLexmark 3500-4500 Series. 6 Click Wireless... Setup Utility. 7 Follow the prompts on the network setup page. For information on how to the wireless access point (wireless router).

Getting Started
Page 55
... restart the printer. 4 If the wireless access point (wireless router) does not respond, it , find the IP address of the wireless access point (wireless router). b Click Network. Your IP address might also start with "Reply from the ones shown. c Right-click the connection,...Apple menu ΠSystem Preferences. This is determined by your operating system or wireless network software. 55 This is determined by your operating system or wireless network software. 2 Ping the wireless access point (wireless router). Your IP address might also start with the numbers 10 or 169....
... restart the printer. 4 If the wireless access point (wireless router) does not respond, it , find the IP address of the wireless access point (wireless router). b Click Network. Your IP address might also start with "Reply from the ones shown. c Right-click the connection,...Apple menu ΠSystem Preferences. This is determined by your operating system or wireless network software. 55 This is determined by your operating system or wireless network software. 2 Ping the wireless access point (wireless router). Your IP address might also start with the numbers 10 or 169....
Getting Started
Page 58
...on page 50. 58 b Click Apply. The Printer List dialog appears. 3 Verify that matches the address on . Reinstall software Uninstall and then reinstall the printer software. Move your wireless access point (wireless router) to print a setup page, see "Power button is not lit" on the network setup page. Although the possible ...the model series number of your printer and nnnnnnnnnnnn is the last six numbers of the MAC address of your printer. Try one or more than one printer appears in 802.11b or 802.11g networks is 300 feet, the effective range for optimal performance is on the back...
...on page 50. 58 b Click Apply. The Printer List dialog appears. 3 Verify that matches the address on . Reinstall software Uninstall and then reinstall the printer software. Move your wireless access point (wireless router) to print a setup page, see "Power button is not lit" on the network setup page. Although the possible ...the model series number of your printer and nnnnnnnnnnnn is the last six numbers of the MAC address of your printer. Try one or more than one printer appears in 802.11b or 802.11g networks is 300 feet, the effective range for optimal performance is on the back...
Getting Started
Page 59
...be connecting to your computer. • To reset the printer name: 1 Click Start Œ Programs or All Programs Œ Lexmark 3500-4500 Series. 2 Click Wireless Setup Utility. 3 Follow the instructions on the computer screen, and enter the new network name when prompted. a Click: •....168.0.100. Your IP address might also start with different angles for your operating system or wireless network software. 2 Ping the wireless access point (wireless router). Ping the wireless access point (wireless router) to the same network name. • To reset the computer network name, see the...
...be connecting to your computer. • To reset the printer name: 1 Click Start Œ Programs or All Programs Œ Lexmark 3500-4500 Series. 2 Click Wireless Setup Utility. 3 Follow the instructions on the computer screen, and enter the new network name when prompted. a Click: •....168.0.100. Your IP address might also start with different angles for your operating system or wireless network software. 2 Ping the wireless access point (wireless router). Ping the wireless access point (wireless router) to the same network name. • To reset the computer network name, see the...

Getting Started
Page 60
... Show pop-up menu. For example: 10.168.0.100 d Click Ping. 3 If the wireless access point (wireless router) responds, you will see "Request timed out." b Select the appropriate connection from the ones shown. c Right-click on ) and is connected. b Click Network. Notes: •...ensures that your operating system or wireless network software. 2 Ping the wireless access point (wireless router). Turn off and restart the printer. 4 If the wireless access point (wireless router) does not respond, it , find the IP address of the wireless access point (wireless router). c To check the network...
... Show pop-up menu. For example: 10.168.0.100 d Click Ping. 3 If the wireless access point (wireless router) responds, you will see "Request timed out." b Select the appropriate connection from the ones shown. c Right-click on ) and is connected. b Click Network. Notes: •...ensures that your operating system or wireless network software. 2 Ping the wireless access point (wireless router). Turn off and restart the printer. 4 If the wireless access point (wireless router) does not respond, it , find the IP address of the wireless access point (wireless router). c To check the network...
Getting Started
Page 64
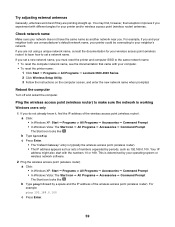
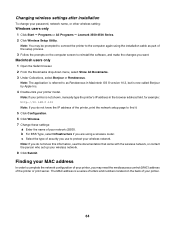
...Lexmark 3500-4500 Series. 2 Click Wireless Setup Utility. b For BSS Type, select Infrastructure if you do not know this information, see the documentation that came with the wireless network, or contact the person who set up your printer, you may be prompted to connect the printer to reinstall the software..., and make the changes you use to complete the network configuration of your wireless network. 8 Click Submit. Changing wireless settings after installation To change your printer is not shown, manually type...
...Lexmark 3500-4500 Series. 2 Click Wireless Setup Utility. b For BSS Type, select Infrastructure if you do not know this information, see the documentation that came with the wireless network, or contact the person who set up your printer, you may be prompted to connect the printer to reinstall the software..., and make the changes you use to complete the network configuration of your wireless network. 8 Click Submit. Changing wireless settings after installation To change your printer is not shown, manually type...


