
HP DesignJet 1000 Series Take-Up Reel UserÂ’s Guide - C6079-90001
Page 3
Contents Upgrading your Printer 4 Checking the Firmware Revision Number 4 Installing a New Firmware Module 5 Take-Up Reel Components 11 Installing the Take-Up Reel 13 Loading Paper on to the Take-Up Reel 21 Unloading Paper from the Take-Up Reel 29 Changing the Core Tube on the Take-Up Reel 32 Drying Time with the Take-Up Reel 36 Troubleshooting 38 Take-Up Reel Does Not Function 38 Paper Skewed on Take-Up Reel 38 Take-Up Reel Specifications 39 Regulatory Notices 41 Declaration of Conformity 43 3 HP DesignJet 1000 Series Take-Up Reel
Contents Upgrading your Printer 4 Checking the Firmware Revision Number 4 Installing a New Firmware Module 5 Take-Up Reel Components 11 Installing the Take-Up Reel 13 Loading Paper on to the Take-Up Reel 21 Unloading Paper from the Take-Up Reel 29 Changing the Core Tube on the Take-Up Reel 32 Drying Time with the Take-Up Reel 36 Troubleshooting 38 Take-Up Reel Does Not Function 38 Paper Skewed on Take-Up Reel 38 Take-Up Reel Specifications 39 Regulatory Notices 41 Declaration of Conformity 43 3 HP DesignJet 1000 Series Take-Up Reel

HP DesignJet 1000 Series Take-Up Reel UserÂ’s Guide - C6079-90001
Page 4
... Care Centres in each country are listed in your printer supports a take -up reel. s If your firmware revision number is supported and you can find out your firmware revision number from the printer's front panel by selecting the Printer Setup menu and then "Utilities", "Statistics", and "Code rev". HP DesignJet 1000 Series Take-Up Reel 4 Upgrading your...
... Care Centres in each country are listed in your printer supports a take -up reel. s If your firmware revision number is supported and you can find out your firmware revision number from the printer's front panel by selecting the Printer Setup menu and then "Utilities", "Statistics", and "Code rev". HP DesignJet 1000 Series Take-Up Reel 4 Upgrading your...
HP DesignJet 1000 Series Take-Up Reel UserÂ’s Guide - C6079-90001
Page 5
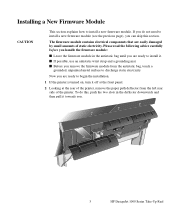
... that are ready to install a new firmware module (see the previous page), you remove the firmware module from the left rear side of the printer. Please read the following advice carefully before you handle the firmware module: s Leave the firmware module in the deflector downwards and then... small amounts of the printer, remove the paper path deflector from the antistatic bag, touch a grounded, unpainted metal surface to install a new firmware module. To do not need to begin the installation. 1 If the printer is turned on, turn it towards you. 2 1 5 HP DesignJet 1000 Series Take-Up...
... that are ready to install a new firmware module (see the previous page), you remove the firmware module from the left rear side of the printer. Please read the following advice carefully before you handle the firmware module: s Leave the firmware module in the deflector downwards and then... small amounts of the printer, remove the paper path deflector from the antistatic bag, touch a grounded, unpainted metal surface to install a new firmware module. To do not need to begin the installation. 1 If the printer is turned on, turn it towards you. 2 1 5 HP DesignJet 1000 Series Take-Up...

HP DesignJet 1000 Series Take-Up Reel UserÂ’s Guide - C6079-90001
Page 7
... the lower locking tab to the metal chassis of the printer, you . 7 HP DesignJet 1000 Series Take-Up Reel 5 Looking at the back of the printer. 7 Remove the module that is currently occupying the rightmost slot. Hold the firmware module by its edges. 8 Take the firmware module out of its edges with the non-metallic edges...
... the lower locking tab to the metal chassis of the printer, you . 7 HP DesignJet 1000 Series Take-Up Reel 5 Looking at the back of the printer. 7 Remove the module that is currently occupying the rightmost slot. Hold the firmware module by its edges. 8 Take the firmware module out of its edges with the non-metallic edges...

HP DesignJet 1000 Series Take-Up Reel UserÂ’s Guide - C6079-90001
Page 8
At the same time you feel it "click" into position. HP DesignJet 1000 Series Take-Up Reel 8 9 Carefully push the top edge of the firmware module into the slot. 10 Continue pushing the top edge of the firmware module until you will see that the top locking tab locks into position.
At the same time you feel it "click" into position. HP DesignJet 1000 Series Take-Up Reel 8 9 Carefully push the top edge of the firmware module into the slot. 10 Continue pushing the top edge of the firmware module until you will see that the top locking tab locks into position.

HP DesignJet 1000 Series Take-Up Reel UserÂ’s Guide - C6079-90001
Page 9
Again, you feel it "click" into position. 12 Remove the grounding wrist strap and then re-install the cover plate on the back of the firmware module into the slot until you will see that the bottom locking tab locks into position. 11 Carefully push the bottom edge of the printer, using the four screws. 2 1 9 HP DesignJet 1000 Series Take-Up Reel
Again, you feel it "click" into position. 12 Remove the grounding wrist strap and then re-install the cover plate on the back of the firmware module into the slot until you will see that the bottom locking tab locks into position. 11 Carefully push the bottom edge of the printer, using the four screws. 2 1 9 HP DesignJet 1000 Series Take-Up Reel
HP DesignJet 1000 Series Take-Up Reel UserÂ’s Guide - C6079-90001
Page 10
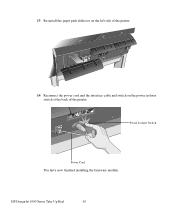
HP DesignJet 1000 Series Take-Up Reel 10 13 Re-install the paper path deflector on the left side of the printer. 2 1 14 Reconnect the power cord and the interface cable and switch on the power isolator switch at the back of the printer. 1 Power Isolator Switch Power Cord You have now finished installing the firmware module.
HP DesignJet 1000 Series Take-Up Reel 10 13 Re-install the paper path deflector on the left side of the printer. 2 1 14 Reconnect the power cord and the interface cable and switch on the power isolator switch at the back of the printer. 1 Power Isolator Switch Power Cord You have now finished installing the firmware module.

HP DesignJet 1000 Series Take-Up Reel UserÂ’s Guide - C6079-90001
Page 13
... cover is loaded, remove it . 4. Carefully lever the six retaining clips from the paper-bin support. through the holes at the bottom. 13 HP DesignJet 1000 Series Take-Up Reel Remove the bin assembly with a flat-blade screwdriver. 7. Carefully lever the six retaining clips from the 5. If a ...-brace assembly. Installing the Take-Up Reel 6. Using the front panel, select the Printer Setup menu, then "Device Setup", then "TUR installed", and change the value of this option from No to upgrade your printer's firmware (see Chapter 3 of paper is in use, remove it (see Upgrading your...
... cover is loaded, remove it . 4. Carefully lever the six retaining clips from the paper-bin support. through the holes at the bottom. 13 HP DesignJet 1000 Series Take-Up Reel Remove the bin assembly with a flat-blade screwdriver. 7. Carefully lever the six retaining clips from the 5. If a ...-brace assembly. Installing the Take-Up Reel 6. Using the front panel, select the Printer Setup menu, then "Device Setup", then "TUR installed", and change the value of this option from No to upgrade your printer's firmware (see Chapter 3 of paper is in use, remove it (see Upgrading your...

Service Manual
Page 14
... Error Code (including the last 8 numbers where applicable) and the firmware version. n The complete error number (See Note below ). n Which software application the customer is using (See Note below ). Troubleshooting Guide to Troubleshooting the Printer Introduction This chapter will guide you . 1-2 HP DesignJets 1050C and 1055CM Printers Service Manual System Error Codes contains a list of the...
... Error Code (including the last 8 numbers where applicable) and the firmware version. n The complete error number (See Note below ). n Which software application the customer is using (See Note below ). Troubleshooting Guide to Troubleshooting the Printer Introduction This chapter will guide you . 1-2 HP DesignJets 1050C and 1055CM Printers Service Manual System Error Codes contains a list of the...

Service Manual
Page 17
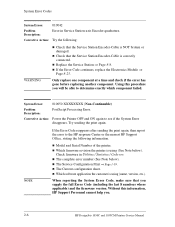
... connected to the Power Socket. 2 Check that the Firmware DIMM is installed correctly in the correct slot (the first slot from the right) at the back of the Printer. 3 Check that the Power Switch on the Front Panel is installed correctly. HP DesignJets 1050C and 1055CM Printers Service Manual 1-5 If reseating the DRAM DIMMs does not...
... connected to the Power Socket. 2 Check that the Firmware DIMM is installed correctly in the correct slot (the first slot from the right) at the back of the Printer. 3 Check that the Power Switch on the Front Panel is installed correctly. HP DesignJets 1050C and 1055CM Printers Service Manual 1-5 If reseating the DRAM DIMMs does not...

Service Manual
Page 32
and press the Enter key to "Service Config." n Printhead Info - This information is useful for example, the firmware version, amount of memory installed or the capacity of times a certain Printhead has been inserted in . This area also shows you if a...In this area you can find information regarding the Cartridges, for example, the number times the Printer has been powered ON, the number of the JetDirect Card. 1-20 HP DesignJets 1050C and 1055CM Printers Service Manual Test Prints HP-GL/2 config Service config Usage report Print Quality Top Back ↑ ↓ Enter Press ...
and press the Enter key to "Service Config." n Printhead Info - This information is useful for example, the firmware version, amount of memory installed or the capacity of times a certain Printhead has been inserted in . This area also shows you if a...In this area you can find information regarding the Cartridges, for example, the number times the Printer has been powered ON, the number of the JetDirect Card. 1-20 HP DesignJets 1050C and 1055CM Printers Service Manual Test Prints HP-GL/2 config Service config Usage report Print Quality Top Back ↑ ↓ Enter Press ...
Service Manual
Page 36
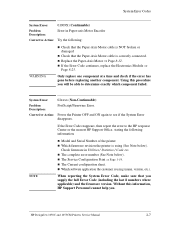
...you have the following pages contain a list of system error codes and their respective descriptions and recommended corrective actions. n Which firmware revision the printer is using (name, version, etc.). n The complete error number (See Note below ). Even though the customer can ...Service Manual or you to troubleshoot the problem. 2-2 HP DesignJets 1050C and 1055CM Printers Service Manual If the Error Code reappears, then the Printer requires an on -site visit should still be planned to continue working with the Printer. When reporting the error, have an error which ...
...you have the following pages contain a list of system error codes and their respective descriptions and recommended corrective actions. n Which firmware revision the printer is using (name, version, etc.). n The complete error number (See Note below ). Even though the customer can ...Service Manual or you to troubleshoot the problem. 2-2 HP DesignJets 1050C and 1055CM Printers Service Manual If the Error Code reappears, then the Printer requires an on -site visit should still be planned to continue working with the Printer. When reporting the error, have an error which ...

Service Manual
Page 37
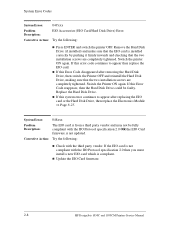
... the Carriage. Corrective Action: Try the following: n Switch the Power OFF from the back of the Printer and disconnect the Power cord. Reseat the Firmware DIMM, reconnect the power cord and power On the Printer. HP DesignJets 1050C and 1055CM Printers Service Manual 2-3 n If the Error Code appears again, switch the Power OFF from the back of...
... the Carriage. Corrective Action: Try the following: n Switch the Power OFF from the back of the Printer and disconnect the Power cord. Reseat the Firmware DIMM, reconnect the power cord and power On the Printer. HP DesignJets 1050C and 1055CM Printers Service Manual 2-3 n If the Error Code appears again, switch the Power OFF from the back of...
Service Manual
Page 40
...Corrective Action: Power the Printer OFF and ON again to the HP response Center or the nearest HP Support Office, stating the following : n Check that you . 2-6 HP DesignJets 1050C and 1055CM Printers Service Manual n Model and Serial Number of the printer. NOTE If the Error ...rev. n Replace the Service Station ⇒ Page 8-8. Using this information, HP Support Personnel cannot help you supply the full Error Code (including the last 8 numbers where applicable) and the firmware version. System Error: 010050 XXXXXXXX (Non-Continuable) Problem Description: PostScript Processing ...
...Corrective Action: Power the Printer OFF and ON again to the HP response Center or the nearest HP Support Office, stating the following : n Check that you . 2-6 HP DesignJets 1050C and 1055CM Printers Service Manual n Model and Serial Number of the printer. NOTE If the Error ...rev. n Replace the Service Station ⇒ Page 8-8. Using this information, HP Support Personnel cannot help you supply the full Error Code (including the last 8 numbers where applicable) and the firmware version. System Error: 010050 XXXXXXXX (Non-Continuable) Problem Description: PostScript Processing ...
Service Manual
Page 41
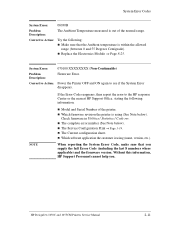
... where applicable) and the firmware version. n Replace the Paper-Axis Motor ⇒ Page 8-12. Without this procedure you . n Check that the Paper-Axis Motor cable is NOT broken or damaged. n Which software application the customer is using (name, version, etc.). HP DesignJets 1050C and 1055CM Printers Service Manual 2-7 Using this information, HP Support Personnel cannot help...
... where applicable) and the firmware version. n Replace the Paper-Axis Motor ⇒ Page 8-12. Without this procedure you . n Check that the Paper-Axis Motor cable is NOT broken or damaged. n Which software application the customer is using (name, version, etc.). HP DesignJets 1050C and 1055CM Printers Service Manual 2-7 Using this information, HP Support Personnel cannot help...
Service Manual
Page 42
...and reinstall the Hard Disk Drive, making sure that the two installation screws are completely tightened. n Update the EIO Card firmware. 2-8 HP DesignJets 1050C and 1055CM Printers Service Manual n If this Error Code reappears, then the Hard Disk Drive could be fully compliant with the IIO Protocol ... card which is installed correctly by pushing it firmly inwards and checking that the two installation screws are completely tightened. Switch the printer ON again. Replace the Hard Disk Drive. If this system error continues to appear then replace the EIO card. If this ...
...and reinstall the Hard Disk Drive, making sure that the two installation screws are completely tightened. n Update the EIO Card firmware. 2-8 HP DesignJets 1050C and 1055CM Printers Service Manual n If this Error Code reappears, then the Hard Disk Drive could be fully compliant with the IIO Protocol ... card which is installed correctly by pushing it firmly inwards and checking that the two installation screws are completely tightened. Switch the printer ON again. Replace the Hard Disk Drive. If this system error continues to appear then replace the EIO card. If this ...
Service Manual
Page 45
... Ambient temperature is within the allowed range (between 0 and 55 Degrees Centigrade). Without this information, HP Support Personnel cannot help you supply the full Error Code (including the last 8 numbers where applicable) and the firmware version. HP DesignJets 1050C and 1055CM Printers Service Manual 2-11 n Model and Serial Number of the normal range. n The complete error...
... Ambient temperature is within the allowed range (between 0 and 55 Degrees Centigrade). Without this information, HP Support Personnel cannot help you supply the full Error Code (including the last 8 numbers where applicable) and the firmware version. HP DesignJets 1050C and 1055CM Printers Service Manual 2-11 n Model and Serial Number of the normal range. n The complete error...

Service Manual
Page 50
... Electronics Module ⇒ Page 8-25. NOTE Make sure that there are no obstacles inside which component failed. 2-16 HP DesignJets 1050C and 1055CM Printers Service Manual WARNING Only replace one component at a time and check if the error has gone before replacing another component....Check that the Drop Detector Cable is correctly connected to determine exactly which are not consistent with the ones required by the firmware. Using this procedure you select "Tubes Replaced" when performing the Calibrations Backup. System Error Codes System Error: 0A0070 (Continuable)...
... Electronics Module ⇒ Page 8-25. NOTE Make sure that there are no obstacles inside which component failed. 2-16 HP DesignJets 1050C and 1055CM Printers Service Manual WARNING Only replace one component at a time and check if the error has gone before replacing another component....Check that the Drop Detector Cable is correctly connected to determine exactly which are not consistent with the ones required by the firmware. Using this procedure you select "Tubes Replaced" when performing the Calibrations Backup. System Error Codes System Error: 0A0070 (Continuable)...

Service Manual
Page 99
...Prime the Tubes when a new Tubes System has been installed. 2 Release Info ⇒ Page 4-32 This Service Utility provides information on the current Firmware version. 3 Set Asian PS Font ⇒ Page 4-33 The purpose of this Service Utility is to set the Asian Fonts after replacing the .... 5 Overdrive Cleaning ⇒ Page 4-37 The purpose of this Service Utility is to rotate the Overdrive in the Printers. HP DesignJets 1050C and 1055CM Printers Service Manual 4-25 Mode Baud Sel. ⇒ Page 4-42 This Service Utility allows you to have the Printhead checking facility ON or OFF. ...
...Prime the Tubes when a new Tubes System has been installed. 2 Release Info ⇒ Page 4-32 This Service Utility provides information on the current Firmware version. 3 Set Asian PS Font ⇒ Page 4-33 The purpose of this Service Utility is to set the Asian Fonts after replacing the .... 5 Overdrive Cleaning ⇒ Page 4-37 The purpose of this Service Utility is to rotate the Overdrive in the Printers. HP DesignJets 1050C and 1055CM Printers Service Manual 4-25 Mode Baud Sel. ⇒ Page 4-42 This Service Utility allows you to have the Printhead checking facility ON or OFF. ...

Service Manual
Page 106
... Tests and Utilities 2. Release Info" and press Enter. Release Info. Service Utilities 1. Printer Model Type 5. Overdrive Cleaning Top Back ↑ Make Selection ↓ Enter Press Enter 2 The Printer will display the Firmware information. Release Info 3. Rel: A.01.02 Date: Oct 27 1998 Time: 12:20:02 BChann: No 4-32 HP DesignJets 1050C and 1055CM Printers Service Manual
... Tests and Utilities 2. Release Info" and press Enter. Release Info. Service Utilities 1. Printer Model Type 5. Overdrive Cleaning Top Back ↑ Make Selection ↓ Enter Press Enter 2 The Printer will display the Firmware information. Release Info 3. Rel: A.01.02 Date: Oct 27 1998 Time: 12:20:02 BChann: No 4-32 HP DesignJets 1050C and 1055CM Printers Service Manual


