
Service Manual
Page 9
... Station Assembly 8-8 Drop Detector Assembly 8-10 Vacuum Fan 8-11 Paper-axis Motor Assembly 8-12 Left Hand Cover 8-13 Left Hand Trim Assembly 8-18 Ink Supply Station Assembly (ISS) 8-19 Air Pressurization System (APS) 8-20 Clutch Assembly and left hand miscellaneous parts 8-21 Tail Deflectors and Rear Platen 8-23 Left and Right Rear Covers 8-24 HP DesignJets 1050C and 1055CM Printers...
... Station Assembly 8-8 Drop Detector Assembly 8-10 Vacuum Fan 8-11 Paper-axis Motor Assembly 8-12 Left Hand Cover 8-13 Left Hand Trim Assembly 8-18 Ink Supply Station Assembly (ISS) 8-19 Air Pressurization System (APS) 8-20 Clutch Assembly and left hand miscellaneous parts 8-21 Tail Deflectors and Rear Platen 8-23 Left and Right Rear Covers 8-24 HP DesignJets 1050C and 1055CM Printers...

Service Manual
Page 10
... Assembly 8-62 Platen Assembly 8-63 Paper Entry Assembly 8-64 Roller Guide 8-66 Media Holder Strip 8-69 Drive Roller 8-70 Center Guide 8-71 Pinch-Wheel Assembly and Cam 8-73 Preventive Maintenance 9-1 Moisture on the Printer 9-2 Noisy Carriage Bushing 9-2 Belt Swelling 9-2 Cleaning the Printer 9-2 General Cleaning 9-2 Cleaning the Overdrive 9-3 Scheduled Maintenance 9-3 Level of Printer Usage 9-3 Scan-axis Maintenance 9-4 8 HP DesignJets 1050C and 1055CM Printers...
... Assembly 8-62 Platen Assembly 8-63 Paper Entry Assembly 8-64 Roller Guide 8-66 Media Holder Strip 8-69 Drive Roller 8-70 Center Guide 8-71 Pinch-Wheel Assembly and Cam 8-73 Preventive Maintenance 9-1 Moisture on the Printer 9-2 Noisy Carriage Bushing 9-2 Belt Swelling 9-2 Cleaning the Printer 9-2 General Cleaning 9-2 Cleaning the Overdrive 9-3 Scheduled Maintenance 9-3 Level of Printer Usage 9-3 Scan-axis Maintenance 9-4 8 HP DesignJets 1050C and 1055CM Printers...

Service Manual
Page 18
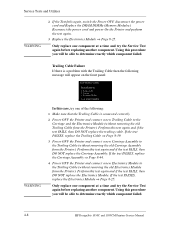
.... Cover Sensors are rejected (the status message on the Platen surface can fool the sensor by reflecting the light. Troubleshooting The Printer Continuously Rejects Printheads 1 Clean the flex contacts on the Printhead and in to Chapter 3) and try again. 2 If ALL ... deposits on the Front Panel does NOT show "OK" for the faulty sensor is damaged or faulty. Replace the Carriage Assembly ⇒ Page 8-44. 1-6 HP DesignJets 1050C and 1055CM Printers Service Manual Perform the Line Sensor calibration ⇒ Page 5-9. 4 The Line Sensor is connected correctly. 3 Replace the ...
.... Cover Sensors are rejected (the status message on the Platen surface can fool the sensor by reflecting the light. Troubleshooting The Printer Continuously Rejects Printheads 1 Clean the flex contacts on the Printhead and in to Chapter 3) and try again. 2 If ALL ... deposits on the Front Panel does NOT show "OK" for the faulty sensor is damaged or faulty. Replace the Carriage Assembly ⇒ Page 8-44. 1-6 HP DesignJets 1050C and 1055CM Printers Service Manual Perform the Line Sensor calibration ⇒ Page 5-9. 4 The Line Sensor is connected correctly. 3 Replace the ...

Service Manual
Page 20
...Carriage Assembly manually, checking for smooth and free movement. 2 Check that the Encoder Strip is clean. If there is stuck firmly to the Roll. Velocity Shutdown (2) 1 Open the Window and check for any visible obstacles restricting the movement of media inside the paper path, lift the Pinch wheels (using a damp cloth. 1-8 HP DesignJets 1050C... and 1055CM Printers Service Manual If necessary, clean Encoder Strip using the Media Load Handles) and clear the obstruction...
...Carriage Assembly manually, checking for smooth and free movement. 2 Check that the Encoder Strip is clean. If there is stuck firmly to the Roll. Velocity Shutdown (2) 1 Open the Window and check for any visible obstacles restricting the movement of media inside the paper path, lift the Pinch wheels (using a damp cloth. 1-8 HP DesignJets 1050C... and 1055CM Printers Service Manual If necessary, clean Encoder Strip using the Media Load Handles) and clear the obstruction...
Service Manual
Page 39
... component at a time and check if the error has gone before replacing another component. n Replace the Encoder Strip ⇒ Page 8-34. n Replace the Carriage Assembly ⇒ Page 8-44. HP DesignJets 1050C and 1055CM Printers Service Manual 2-5 n If the Error Code continues, replace the Electronics Module ⇒ Page 8-25. WARNING Only replace one component at a time and...
... component at a time and check if the error has gone before replacing another component. n Replace the Encoder Strip ⇒ Page 8-34. n Replace the Carriage Assembly ⇒ Page 8-44. HP DesignJets 1050C and 1055CM Printers Service Manual 2-5 n If the Error Code continues, replace the Electronics Module ⇒ Page 8-25. WARNING Only replace one component at a time and...
Service Manual
Page 43
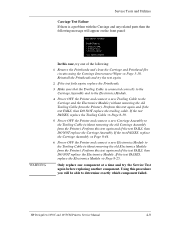
... failing Printhead then check if the customer is connected correctly. n Perform the Electronic Systems Test ⇒ Page 4-5. n Replace the Carriage Assembly ⇒ Page 8-44. WARNING Only replace one of the Printheads has an Internal Electrical Problem. Yellow Printhead Failed. System Error: ... 8-39. If a 3rd Party RIP is being used, check the Print Settings in the Carriage Assembly (Refer to see if the problem is solved without the RIP. HP DesignJets 1050C and 1055CM Printers Service Manual 2-9 n Make sure that the Trailing Cable is using a 3rd Party RIP. ...
... failing Printhead then check if the customer is connected correctly. n Perform the Electronic Systems Test ⇒ Page 4-5. n Replace the Carriage Assembly ⇒ Page 8-44. WARNING Only replace one of the Printheads has an Internal Electrical Problem. Yellow Printhead Failed. System Error: ... 8-39. If a 3rd Party RIP is being used, check the Print Settings in the Carriage Assembly (Refer to see if the problem is solved without the RIP. HP DesignJets 1050C and 1055CM Printers Service Manual 2-9 n Make sure that the Trailing Cable is using a 3rd Party RIP. ...
Service Manual
Page 44
...⇒ Page 8-25. Corrective Action: Try the following : n Remove ALL the Printheads and clean the flex contacts on the Carriage Assembly). n Perform the Line Sensor Calibration ⇒ Page 5-9. n If the Error Code continues, replace the Electronics Module ⇒ ... determine exactly which component failed. 2-10 HP DesignJets 1050C and 1055CM Printers Service Manual System Error: 06030A (Continuable) Problem Description: Error in the Carriage Assembly (Refer to determine exactly which component failed. n Replace the Carriage Assembly ⇒ Page 8-44. WARNING Only replace...
...⇒ Page 8-25. Corrective Action: Try the following : n Remove ALL the Printheads and clean the flex contacts on the Carriage Assembly). n Perform the Line Sensor Calibration ⇒ Page 5-9. n If the Error Code continues, replace the Electronics Module ⇒ ... determine exactly which component failed. 2-10 HP DesignJets 1050C and 1055CM Printers Service Manual System Error: 06030A (Continuable) Problem Description: Error in the Carriage Assembly (Refer to determine exactly which component failed. n Replace the Carriage Assembly ⇒ Page 8-44. WARNING Only replace...

Service Manual
Page 70
...cleaning the printhead, the failed message disappears but the printer changes the printing process to compensate for an ageing printhead Speed not affected Speed is a risk that the Carriage Assembly is faulty. 3-14 HP DesignJets 1050C and 1055CM Printers Service Manual Next time you select YES the print ...job will be wasted. Printer will try to select YES or NO. If all 4 Printheads have...
...cleaning the printhead, the failed message disappears but the printer changes the printing process to compensate for an ageing printhead Speed not affected Speed is a risk that the Carriage Assembly is faulty. 3-14 HP DesignJets 1050C and 1055CM Printers Service Manual Next time you select YES the print ...job will be wasted. Printer will try to select YES or NO. If all 4 Printheads have...
Service Manual
Page 71
...Setup Printhead is installed. HP DesignJets 1050C and 1055CM Printers Service Manual 3-15 Printhead life is anticipated to check the images being displayed good image quality can still be obtained, but have to be 700ml or twelve months (9,000 hours) in the Carriage stall when this status... is reached with a new one. No Printhead has been detected in that the Carriage Assembly is faulty. However results vary depending on the print quality setting used under normal operating conditions (using the Carriage Interconnect Wiper ⇒ Page 3-18. 3 Replace the Printhead. 4 Perform the...
...Setup Printhead is installed. HP DesignJets 1050C and 1055CM Printers Service Manual 3-15 Printhead life is anticipated to check the images being displayed good image quality can still be obtained, but have to be 700ml or twelve months (9,000 hours) in the Carriage stall when this status... is reached with a new one. No Printhead has been detected in that the Carriage Assembly is faulty. However results vary depending on the print quality setting used under normal operating conditions (using the Carriage Interconnect Wiper ⇒ Page 3-18. 3 Replace the Printhead. 4 Perform the...
Service Manual
Page 72
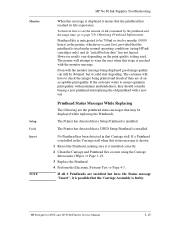
...Replace the Printhead. 4 Perform the Electronic Systems Test ⇒ Page 4-5. The printer does not recognize the printhead or printhead cleaner that the Carriage Assembly is faulty. HP No.80 Ink Supplies Troubleshooting Reseat NOTE Faulty NOTE Wrong Model CAUTION The printhead...printer will operate. 1 Reseat the Printhead in the carriage during the priming process, they will be corrected before the printer can continue. If all 4 Printheads have to remove it is not approved and must be replaced by a genuine HP No.80 Printhead. 3-16 HP DesignJets 1050C and 1055CM Printers...
...Replace the Printhead. 4 Perform the Electronic Systems Test ⇒ Page 4-5. The printer does not recognize the printhead or printhead cleaner that the Carriage Assembly is faulty. HP No.80 Ink Supplies Troubleshooting Reseat NOTE Faulty NOTE Wrong Model CAUTION The printhead...printer will operate. 1 Reseat the Printhead in the carriage during the priming process, they will be corrected before the printer can continue. If all 4 Printheads have to remove it is not approved and must be replaced by a genuine HP No.80 Printhead. 3-16 HP DesignJets 1050C and 1055CM Printers...
Service Manual
Page 73
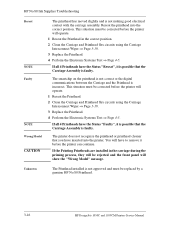
...contacts on both the printheads and the printhead carriage assembly using the latch. You Cannot Insert the Printhead Into the Printer 1 Ensure that you have the correct HP No.80 printhead cleaner. 2 Ensure that the printhead cleaner is the correct color for that slot. 3 Ensure that you ...the correct color for that slot. 3 Ensure that the printhead is the correct orientation. 4 Ensure that the Ink Cartridge is the correct orientation, with guidance from the printhead. HP DesignJets 1050C and 1055CM Printers Service Manual 3-17 You Cannot Insert the Ink Cartridge Into the Printer 1 Ensure...
...contacts on both the printheads and the printhead carriage assembly using the latch. You Cannot Insert the Printhead Into the Printer 1 Ensure that you have the correct HP No.80 printhead cleaner. 2 Ensure that the printhead cleaner is the correct color for that slot. 3 Ensure that you ...the correct color for that slot. 3 Ensure that the printhead is the correct orientation. 4 Ensure that the Ink Cartridge is the correct orientation, with guidance from the printhead. HP DesignJets 1050C and 1055CM Printers Service Manual 3-17 You Cannot Insert the Ink Cartridge Into the Printer 1 Ensure...

Service Manual
Page 74
... and an instruction sheet. This can damage the printhead and reduce print quality. 3-18 HP DesignJets 1050C and 1055CM Printers Service Manual Whenever you order the Carriage Assembly, the Carriage Interconnect Wiper will be used for cleaning the electrical interconnects of the carriage and the Printheads. NOTE Do not touch, wipe or attempt to the offending printhead, try...
... and an instruction sheet. This can damage the printhead and reduce print quality. 3-18 HP DesignJets 1050C and 1055CM Printers Service Manual Whenever you order the Carriage Assembly, the Carriage Interconnect Wiper will be used for cleaning the electrical interconnects of the carriage and the Printheads. NOTE Do not touch, wipe or attempt to the offending printhead, try...

Service Manual
Page 77
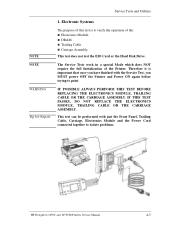
...HP DesignJets 1050C and 1055CM Printers Service Manual 4-3 Therefore it is important that once you have finished with the Service Tests, you MUST power OFF the Printer and Power ON again before trying to print. 1 Electronics System ⇒ Page 4-5 The purpose of this test is to verify the operation of the: n Service Replaceable Kit (SRK). n Carriage Assembly...is a list of all internal Service Tests available in a special Mode which does NOT require the full Initialization of the Printer. n DRAM. n Air Pressurization System (APS). 5 Scan Axis ⇒ Page 4-17 The purpose of this test ...
...HP DesignJets 1050C and 1055CM Printers Service Manual 4-3 Therefore it is important that once you have finished with the Service Tests, you MUST power OFF the Printer and Power ON again before trying to print. 1 Electronics System ⇒ Page 4-5 The purpose of this test is to verify the operation of the: n Service Replaceable Kit (SRK). n Carriage Assembly...is a list of all internal Service Tests available in a special Mode which does NOT require the full Initialization of the Printer. n DRAM. n Air Pressurization System (APS). 5 Scan Axis ⇒ Page 4-17 The purpose of this test ...
Service Manual
Page 79
... which does NOT require the full Initialization of this test is important that once you MUST power OFF the Printer and Power ON again before trying to isolate problems. HP DesignJets 1050C and 1055CM Printers Service Manual 4-5 n Carriage Assembly. This test does not test the EIO Card or the Hard Disk Drive. Therefore it is to verify...
... which does NOT require the full Initialization of this test is important that once you MUST power OFF the Printer and Power ON again before trying to isolate problems. HP DesignJets 1050C and 1055CM Printers Service Manual 4-5 n Carriage Assembly. This test does not test the EIO Card or the Hard Disk Drive. Therefore it is to verify...

Service Manual
Page 81
... disconnect the Power cord. Reseat the DRAM DIMMs (Memory Modules), reconnect the power cord and power On the Printer. HP DesignJets 1050C and 1055CM Printers Service Manual 4-7 Perform the Electronic Systems Test again. Electronics Failure If there is a problem with the components within the Electronics module then the following message ...: 6.0A77R DIMM1: EDO 32MB 60ns DIMM2: EDO 16 MB 60ns WARNING IF THIS TEST PASSES, DO NOT REPLACE THE ELECTRONICS MODULE, TRAILING CABLE OR THE CARRIAGE ASSEMBLY. 4 If the test fails.
... disconnect the Power cord. Reseat the DRAM DIMMs (Memory Modules), reconnect the power cord and power On the Printer. HP DesignJets 1050C and 1055CM Printers Service Manual 4-7 Perform the Electronic Systems Test again. Electronics Failure If there is a problem with the components within the Electronics module then the following message ...: 6.0A77R DIMM1: EDO 32MB 60ns DIMM2: EDO 16 MB 60ns WARNING IF THIS TEST PASSES, DO NOT REPLACE THE ELECTRONICS MODULE, TRAILING CABLE OR THE CARRIAGE ASSEMBLY. 4 If the test fails.
Service Manual
Page 82
... panel: ELECTRONIC SYSTEMS Possible Failure on: 1. Trailing Cable 2. If the test PASSES, replace the Trailing Cable ⇒ Page 8-39. 3 Power OFF the Printer and connect a new Carriage Assembly to determine exactly which component failed. 4-8 HP DesignJets 1050C and 1055CM Printers Service Manual Perform this procedure you will be able to the Trailing Cable (without removing the old...
... panel: ELECTRONIC SYSTEMS Possible Failure on: 1. Trailing Cable 2. If the test PASSES, replace the Trailing Cable ⇒ Page 8-39. 3 Power OFF the Printer and connect a new Carriage Assembly to determine exactly which component failed. 4-8 HP DesignJets 1050C and 1055CM Printers Service Manual Perform this procedure you will be able to the Trailing Cable (without removing the old...
Service Manual
Page 83
..., replace the Electronics Module ⇒ Page 8-25. HP DesignJets 1050C and 1055CM Printers Service Manual 4-9 If the test PASSES, replace the Trailing Cable ⇒ Page 8-39. 5 Power OFF the Printer and connect a new Carriage Assembly to the Carriage and the Electronics Module (without removing the old Electronics Module from the Printer). Using this case, try one component at a time...
..., replace the Electronics Module ⇒ Page 8-25. HP DesignJets 1050C and 1055CM Printers Service Manual 4-9 If the test PASSES, replace the Trailing Cable ⇒ Page 8-39. 5 Power OFF the Printer and connect a new Carriage Assembly to the Carriage and the Electronics Module (without removing the old Electronics Module from the Printer). Using this case, try one component at a time...
Service Manual
Page 119
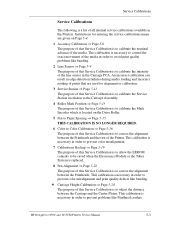
...The purpose of this Service Calibration is to correct the alignment between the Carriage and the Center Platen. HP DesignJets 1050C and 1055CM Printers Service Manual 5-3 This calibration is necessary in order to prevent color misalignment and print quality defects like banding. This calibration is necessary in...3 Service Station ⇒ Page 5-11 The purpose of this Service Calibration is to calibrate the Service Station in relation to the Carriage Assembly. 4 Roller Mark Position ⇒ Page 5-13 The purpose of this Service Calibration is to calibrate the Mark Encoder which is ...
...The purpose of this Service Calibration is to correct the alignment between the Carriage and the Center Platen. HP DesignJets 1050C and 1055CM Printers Service Manual 5-3 This calibration is necessary in order to prevent color misalignment and print quality defects like banding. This calibration is necessary in...3 Service Station ⇒ Page 5-11 The purpose of this Service Calibration is to calibrate the Service Station in relation to the Carriage Assembly. 4 Roller Mark Position ⇒ Page 5-13 The purpose of this Service Calibration is to calibrate the Mark Encoder which is ...

Service Manual
Page 123
ACCURACY Load paper for calibration 4 The Printer will start to the leading edge, and then reload the pattern with the arrows points to print the Accuracy Calibration Pattern and the following message ... must load media into the Printer. The HP DesignJets 1050C and 1055CM Printers Service Manual 5-7 Remove the pattern from HP High Gloss Photo Paper. Do NOT use any other type of media apart from the media and select "Measure Pattern" and press Enter. NOTE Service Calibrations 3 If media is completed, the following message appears on the Carriage Assembly.
ACCURACY Load paper for calibration 4 The Printer will start to the leading edge, and then reload the pattern with the arrows points to print the Accuracy Calibration Pattern and the following message ... must load media into the Printer. The HP DesignJets 1050C and 1055CM Printers Service Manual 5-7 Remove the pattern from HP High Gloss Photo Paper. Do NOT use any other type of media apart from the media and select "Measure Pattern" and press Enter. NOTE Service Calibrations 3 If media is completed, the following message appears on the Carriage Assembly.
Service Manual
Page 127
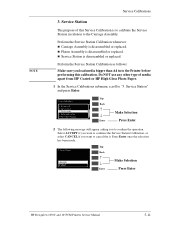
...Carriage Assembly is disassembled or replaced. Perform the Service Station Calibration as follows: Make sure you load media bigger than A4 in relation to the Printer before performing this Service Calibration is disassembled or replaced. NOTE Service Calibrations 3. Service station... 4. Service Station Accept Cancel Top Back ↑ Make Selection ↓ Enter Press Enter HP DesignJets 1050C... and 1055CM Printers Service Manual 5-11 n Platen Assembly is disassembled or replaced. Do NOT use any...
...Carriage Assembly is disassembled or replaced. Perform the Service Station Calibration as follows: Make sure you load media bigger than A4 in relation to the Printer before performing this Service Calibration is disassembled or replaced. NOTE Service Calibrations 3. Service station... 4. Service Station Accept Cancel Top Back ↑ Make Selection ↓ Enter Press Enter HP DesignJets 1050C... and 1055CM Printers Service Manual 5-11 n Platen Assembly is disassembled or replaced. Do NOT use any...


