
English Manual
Page 2
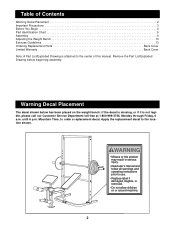
... or removed. • Do not allow children on the weight bench. until 6 p.m. Remove the Part List/Exploded Drawing before beginning assembly. Mountain Time, to the location shown. ! WARNING • Misuse of this manual. Table of Contents Warning Decal Placement 2 Important ...Precautions 3 Before You Begin 4 Part Identification Chart 5 Assembly 6 Adjusting the Weight Bench 10 Exercise Guidelines 13 Ordering Replacement Parts Back Cover Limited Warranty Back Cover Note: A Part List/Exploded...
... or removed. • Do not allow children on the weight bench. until 6 p.m. Remove the Part List/Exploded Drawing before beginning assembly. Mountain Time, to the location shown. ! WARNING • Misuse of this manual. Table of Contents Warning Decal Placement 2 Important ...Precautions 3 Before You Begin 4 Part Identification Chart 5 Assembly 6 Adjusting the Weight Bench 10 Exercise Guidelines 13 Ordering Replacement Parts Back Cover Limited Warranty Back Cover Note: A Part List/Exploded...
English Manual
Page 6
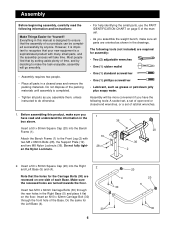
... for the Left Base (4). 2 30 6 4 30 20 20 5 30 Everything in this product, make sure you assemble the weight bench, make the task enjoyable, assembly will go smoothly. • Assembly requires two people. • Place all parts as grease or petroleum jelly plus soapy water. However, it flat on ...into the Bench Frame (1). Do not fully tighten the Nylon Locknuts. 19 28 20 36 2 2. Do not dispose of the packing materials until assembly is important to do otherwise. • For help identifying the small parts, use the PART IDENTIFICATION CHART on one side of the Base. Before...
... for the Left Base (4). 2 30 6 4 30 20 20 5 30 Everything in this product, make sure you assemble the weight bench, make the task enjoyable, assembly will go smoothly. • Assembly requires two people. • Place all parts as grease or petroleum jelly plus soapy water. However, it flat on ...into the Bench Frame (1). Do not fully tighten the Nylon Locknuts. 19 28 20 36 2 2. Do not dispose of the packing materials until assembly is important to do otherwise. • For help identifying the small parts, use the PART IDENTIFICATION CHART on one side of the Base. Before...


