
English Manual
Page 2
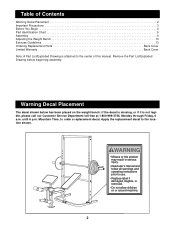
Remove the Part List/Exploded Drawing before beginning assembly. until 6 p.m. Warning Decal Placement The decal shown below has been placed on or around machine. 2 WARNING • Misuse of this product may result ... shown. ! Apply the replacement decal to order a replacement decal. Table of Contents Warning Decal Placement 2 Important Precautions 3 Before You Begin 4 Part Identification Chart 5 Assembly 6 Adjusting the Weight Bench 10 Exercise Guidelines 13 Ordering Replacement Parts Back Cover Limited Warranty Back Cover Note: A Part List/Exploded Drawing is not legible...
Remove the Part List/Exploded Drawing before beginning assembly. until 6 p.m. Warning Decal Placement The decal shown below has been placed on or around machine. 2 WARNING • Misuse of this product may result ... shown. ! Apply the replacement decal to order a replacement decal. Table of Contents Warning Decal Placement 2 Important Precautions 3 Before You Begin 4 Part Identification Chart 5 Assembly 6 Adjusting the Weight Bench 10 Exercise Guidelines 13 Ordering Replacement Parts Back Cover Limited Warranty Back Cover Note: A Part List/Exploded Drawing is not legible...
English Manual
Page 6
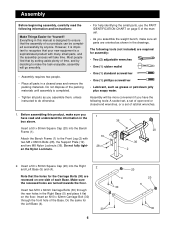
... and (4). The following tools: A socket set, a set of open-end or closed-end wrenches, or a set of ratchet wrenches. 1. Before assembling this manual is designed to do otherwise. • For help identifying the small parts, use the PART IDENTIFICATION CHART on page 5 of the packing ...28 20 36 2 2. However, it flat on one side of the Base. Make sure the recessed holes are recessed on the floor. Assembly Before beginning assembly, carefully read and understand the information in the drawings. Insert two M10 x 62mm Carriage Bolts (30) through the front hole of each...
... and (4). The following tools: A socket set, a set of open-end or closed-end wrenches, or a set of ratchet wrenches. 1. Before assembling this manual is designed to do otherwise. • For help identifying the small parts, use the PART IDENTIFICATION CHART on page 5 of the packing ...28 20 36 2 2. However, it flat on one side of the Base. Make sure the recessed holes are recessed on the floor. Assembly Before beginning assembly, carefully read and understand the information in the drawings. Insert two M10 x 62mm Carriage Bolts (30) through the front hole of each...


