User's Guide for Windows
Page 9
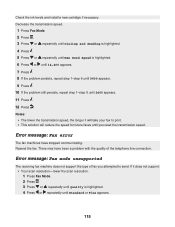
... troubleshooting 120 Memory card cannot be inserted 120 Nothing happens when a memory card is inserted 120 Error messages on display...121 Error messages...121 Low Ink...121 Paper Jam...121 Cartridge Error...121 Carrier Jam...122 Error: 2200...122 Paper Out...123 Cartridge Missing...123 Alignment Error...123 Photo Mode: problem...
... troubleshooting 120 Memory card cannot be inserted 120 Nothing happens when a memory card is inserted 120 Error messages on display...121 Error messages...121 Low Ink...121 Paper Jam...121 Cartridge Error...121 Carrier Jam...122 Error: 2200...122 Paper Out...123 Cartridge Missing...123 Alignment Error...123 Photo Mode: problem...
User's Guide for Windows
Page 27
Customizing scan settings using the ADF. • View ink levels. • Clean cartridges. • Align cartridges. • Print a test page. Modify the default settings. Scan to e-mail. Scan to a file. Using the Scan menu ...
Customizing scan settings using the ADF. • View ink levels. • Clean cartridges. • Align cartridges. • Print a test page. Modify the default settings. Scan to e-mail. Scan to a file. Using the Scan menu ...

User's Guide for Windows
Page 28
Send a fax to send a fax. Preview the scanned image on the display. • View ink levels. • Clean cartridges. • Align cartridges. • Print a test page. Using the Fax menu To access and navigate the Fax menu: 1 From the control ...
Send a fax to send a fax. Preview the scanned image on the display. • View ink levels. • Clean cartridges. • Align cartridges. • Print a test page. Using the Fax menu To access and navigate the Fax menu: 1 From the control ...
User's Guide for Windows
Page 29
... page 54 or "Inserting a flash drive" on page 55. 2 Press or repeatedly until the menu option you want is useful when you specify. • View ink levels. • Clean cartridges. • Align cartridges. • Print a test page. Note: Make sure the date and time are entered correctly before sending your fax...
... page 54 or "Inserting a flash drive" on page 55. 2 Press or repeatedly until the menu option you want is useful when you specify. • View ink levels. • Clean cartridges. • Align cartridges. • Print a test page. Note: Make sure the date and time are entered correctly before sending your fax...
User's Guide for Windows
Page 30
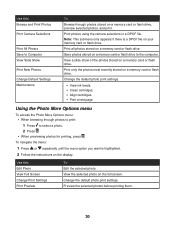
... using the camera selections in a DPOF file. Print all photos stored on a memory card or flash drive. Change the default photo print settings. • View ink levels. • Clean cartridges. • Align cartridges. • Print a test page. Using the Photo More Options menu To access the Photo More Options menu: •...
... using the camera selections in a DPOF file. Print all photos stored on a memory card or flash drive. Change the default photo print settings. • View ink levels. • Clean cartridges. • Align cartridges. • Print a test page. Using the Photo More Options menu To access the Photo More Options menu: •...

User's Guide for Windows
Page 35
... link provides you with direct links to the Solution Center and the Fax Setup Utility. 1 Click Start Œ Programs or All Programs Œ Lexmark 8300 Series. 2 Select All-In-One Center. 3 Click Maintain/Troubleshoot. 4 Select from Productivity Tools, or to view all settings. 35 Method ...image to. • Select what type of these topics: • Maintain or fix quality problems • Troubleshoot problems • Device status and ink levels • More printing ideas and how to's • Contact information • Advanced (Skin, voice, and communication options) • View the...
... link provides you with direct links to the Solution Center and the Fax Setup Utility. 1 Click Start Œ Programs or All Programs Œ Lexmark 8300 Series. 2 Select All-In-One Center. 3 Click Maintain/Troubleshoot. 4 Select from Productivity Tools, or to view all settings. 35 Method ...image to. • Select what type of these topics: • Maintain or fix quality problems • Troubleshoot problems • Device status and ink levels • More printing ideas and how to's • Contact information • Advanced (Skin, voice, and communication options) • View the...
User's Guide for Windows
Page 37
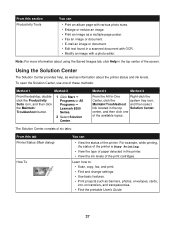
...cards, iron-on transfers, and transparencies. • Find the printable User's Guide. 37 Note: For more information about the printer status and ink levels. center, and then click one of these methods: Method 1 Method 2 From the desktop, doubleclick the Productivity Suite icon, and then... click the Maintain/ Troubleshoot button. 1 Click Start Œ Programs or All Programs Œ Lexmark 8300 Series. 2 Select Solution Center. From this tab Printer Status (Main dialog) How To You can • Print an album page with a...
...cards, iron-on transfers, and transparencies. • Find the printable User's Guide. 37 Note: For more information about the printer status and ink levels. center, and then click one of these methods: Method 1 Method 2 From the desktop, doubleclick the Productivity Suite icon, and then... click the Maintain/ Troubleshoot button. 1 Click Start Œ Programs or All Programs Œ Lexmark 8300 Series. 2 Select Solution Center. From this tab Printer Status (Main dialog) How To You can • Print an album page with a...
User's Guide for Windows
Page 38
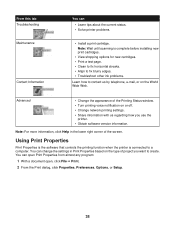
...; View shopping options for new cartridges. • Print a test page. • Clean to fix horizontal streaks. • Align to fix blurry edges. • Troubleshoot other ink problems. Learn how to a computer. You can • Learn tips about the current status. • Solve printer problems. • Install a print cartridge. You can change...
...; View shopping options for new cartridges. • Print a test page. • Clean to fix horizontal streaks. • Align to fix blurry edges. • Troubleshoot other ink problems. Learn how to a computer. You can • Learn tips about the current status. • Solve printer problems. • Install a print cartridge. You can change...
User's Guide for Windows
Page 44
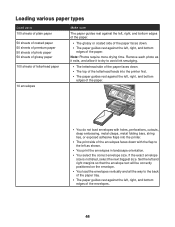
... rest against the left, right, and bottom edges of the envelopes. 44 Remove each photo as it exits, and allow it to dry to avoid ink smudging. • The letterhead side of the paper faces down. • The top of the letterhead feeds into the printer first. • The paper guides...
... rest against the left, right, and bottom edges of the envelopes. 44 Remove each photo as it exits, and allow it to dry to avoid ink smudging. • The letterhead side of the paper faces down. • The top of the letterhead feeds into the printer first. • The paper guides...

User's Guide for Windows
Page 45
... as it exits, and allow it to dry to 25 sheets of labels 50 transparencies 100 sheets of the paper. 45 Load up to avoid ink smudging. • The print side of the paper faces down toward the paper tray. • The paper guides rest against the left , right, and bottom...
... as it exits, and allow it to dry to 25 sheets of labels 50 transparencies 100 sheets of the paper. 45 Load up to avoid ink smudging. • The print side of the paper faces down toward the paper tray. • The paper guides rest against the left , right, and bottom...
User's Guide for Windows
Page 47
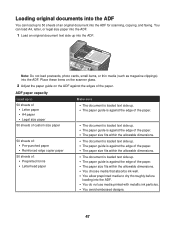
... load postcards, photo cards, small items, or thin media (such as magazine clippings) into the ADF. • You do not use media printed with metallic ink particles. • You avoid embossed designs. 47 ADF paper capacity Load up to 50 sheets of • Letter paper • A4 paper • Legal ...guide on the ADF against the edge of the paper. • The paper size fits within the allowable dimensions. • You choose media that absorbs ink well. • You allow preprinted media to 50 sheets of the paper. You can load up to dry thoroughly before loading into the ADF.
... load postcards, photo cards, small items, or thin media (such as magazine clippings) into the ADF. • You do not use media printed with metallic ink particles. • You avoid embossed designs. 47 ADF paper capacity Load up to 50 sheets of • Letter paper • A4 paper • Legal ...guide on the ADF against the edge of the paper. • The paper size fits within the allowable dimensions. • You choose media that absorbs ink well. • You allow preprinted media to 50 sheets of the paper. You can load up to dry thoroughly before loading into the ADF.

User's Guide for Windows
Page 97
... Click the Maintenance tab. 4 Click Clean to fix horizontal streaks. 5 Click Print. An alignment page prints. A page prints, forcing ink through the print cartridge nozzles to clean them . 6 Print the document again to verify that the print quality has improved. 9 If print... Press or repeatedly until Maintenance is highlighted. 5 Press . 6 Press or repeatedly until Clean Cartridges is highlighted. 7 Press . A page prints, forcing ink through the print cartridge nozzles to clean them . 8 Print the document again to verify that the print quality has improved. 7 If print quality has ...
... Click the Maintenance tab. 4 Click Clean to fix horizontal streaks. 5 Click Print. An alignment page prints. A page prints, forcing ink through the print cartridge nozzles to clean them . 6 Print the document again to verify that the print quality has improved. 9 If print... Press or repeatedly until Maintenance is highlighted. 5 Press . 6 Press or repeatedly until Clean Cartridges is highlighted. 7 Press . A page prints, forcing ink through the print cartridge nozzles to clean them . 8 Print the document again to verify that the print quality has improved. 7 If print quality has ...
User's Guide for Windows
Page 99
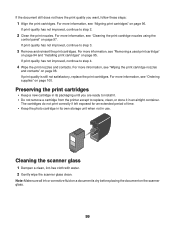
... print nozzles. Preserving the print cartridges • Keep a new cartridge in its own storage unit when not in an airtight container. Note: Make sure all ink or corrective fluid on a document is still not satisfactory, replace the print cartridges. For more information, see "Ordering supplies" on page 95. If print quality...
... print nozzles. Preserving the print cartridges • Keep a new cartridge in its own storage unit when not in an airtight container. Note: Make sure all ink or corrective fluid on a document is still not satisfactory, replace the print cartridges. For more information, see "Ordering supplies" on page 95. If print quality...
User's Guide for Windows
Page 103
... button is not lit" on page 121. Make sure the printer is set as the default printer and is in the left carrier, and the color cartridge is not on hold or paused. 1 Click: • In Windows XP Pro: Start Œ Settings Œ Printers and Faxes. • In Windows... Œ Settings Œ Printers. • In Windows 98/Me: Start Œ Settings Œ Printers. 2 Double-click the name of your printer. 103 Check the ink levels, and install a new print cartridge if necessary. 1 Remove the print cartridges. 2 Make sure the sticker and tape have been removed. 1 2 3 Reinsert the print ...
... button is not lit" on page 121. Make sure the printer is set as the default printer and is in the left carrier, and the color cartridge is not on hold or paused. 1 Click: • In Windows XP Pro: Start Œ Settings Œ Printers and Faxes. • In Windows... Œ Settings Œ Printers. • In Windows 98/Me: Start Œ Settings Œ Printers. 2 Double-click the name of your printer. 103 Check the ink levels, and install a new print cartridge if necessary. 1 Remove the print cartridges. 2 Make sure the sticker and tape have been removed. 1 2 3 Reinsert the print ...
User's Guide for Windows
Page 105
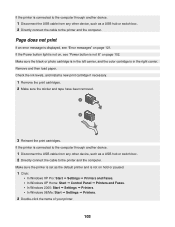
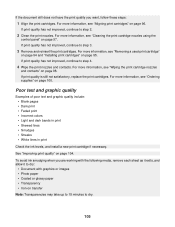
... 3. 3 Remove and reinsert the print cartridges. For more information, see "Wiping the print cartridge nozzles and contacts" on page 104. To avoid ink smudging when you want, follow these steps: 1 Align the print cartridges. Poor text and graphic quality Examples of poor text and graphic quality include:... • Blank pages • Dark print • Faded print • Incorrect colors • Light and dark bands in print • Skewed lines • Smudges • Streaks • White lines in print Check the...
... 3. 3 Remove and reinsert the print cartridges. For more information, see "Wiping the print cartridge nozzles and contacts" on page 104. To avoid ink smudging when you want, follow these steps: 1 Align the print cartridges. Poor text and graphic quality Examples of poor text and graphic quality include:... • Blank pages • Dark print • Faded print • Incorrect colors • Light and dark bands in print • Skewed lines • Smudges • Streaks • White lines in print Check the...
User's Guide for Windows
Page 106
Use Lexmark Premium Photo Paper if you are printing photos or other high quality images. Try minimizing the number and size of graphics and images in .) Select .... 1 From the software application, click File ΠPrint. 2 Click Properties, Options, Setup, or Preferences. 3 Click Print Layout. 4 Click Borderless. Each paper brand accepts ink differently and prints with color variations. Uninstall the printer software, and then reinstall it. Check that the paper size being used matches the printer setting. 1 From the software...
Use Lexmark Premium Photo Paper if you are printing photos or other high quality images. Try minimizing the number and size of graphics and images in .) Select .... 1 From the software application, click File ΠPrint. 2 Click Properties, Options, Setup, or Preferences. 3 Click Print Layout. 4 Click Borderless. Each paper brand accepts ink differently and prints with color variations. Uninstall the printer software, and then reinstall it. Check that the paper size being used matches the printer setting. 1 From the software...
User's Guide for Windows
Page 108
Check the ink levels and install a new print cartridge if necessary. Partial document or photo copies Make sure the document or photo is loaded correctly in print If ...
Check the ink levels and install a new print cartridge if necessary. Partial document or photo copies Make sure the document or photo is loaded correctly in print If ...
User's Guide for Windows
Page 112
... is selected. 1 Press Fax Mode. 2 Press . 3 Press or repeatedly until Ringing and Answering is on page 85. Check the status of telephone rings. Check the ink levels, and install a new cartridge if necessary. If the Auto Answer light is highlighted. 4 Press . Fax Forwarding is highlighted. 6 Press or repeatedly until the country...
... is selected. 1 Press Fax Mode. 2 Press . 3 Press or repeatedly until Ringing and Answering is on page 85. Check the status of telephone rings. Check the ink levels, and install a new cartridge if necessary. If the Auto Answer light is highlighted. 4 Press . Fax Forwarding is highlighted. 6 Press or repeatedly until the country...
User's Guide for Windows
Page 114
... was loaded correctly. Change the fax quality setting: 1 Press Fax Mode. 2 Press . 3 Press or repeatedly until Quality is satisfactory. • Resend the fax. Check the ink levels, and install a new cartridge if necessary. 1 Remove the print cartridges. 2 Make sure the sticker and tape have been a problem with the quality of the...
... was loaded correctly. Change the fax quality setting: 1 Press Fax Mode. 2 Press . 3 Press or repeatedly until Quality is satisfactory. • Resend the fax. Check the ink levels, and install a new cartridge if necessary. 1 Remove the print cartridges. 2 Make sure the sticker and tape have been a problem with the quality of the...
User's Guide for Windows
Page 115
... Sending is highlighted. 4 Press . 5 Press or repeatedly until Max Send Speed is highlighted. 4 Press or repeatedly until 2400 appears. 11 Press . 12 Press . Check the ink levels and install a new cartridge if necessary.
... Sending is highlighted. 4 Press . 5 Press or repeatedly until Max Send Speed is highlighted. 4 Press or repeatedly until 2400 appears. 11 Press . 12 Press . Check the ink levels and install a new cartridge if necessary.


