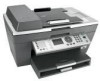
User's Guide for Windows
Page 38
Advanced • Change the appearance of the Printing Status window. • Turn printing voice notification on the type of the screen. You can change the settings in the lower right corner of project you use ...
Advanced • Change the appearance of the Printing Status window. • Turn printing voice notification on the type of the screen. You can change the settings in the lower right corner of project you use ...
User's Guide for Windows
Page 63
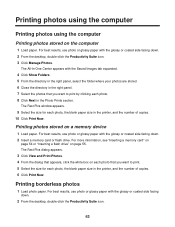
... drive" on each photo that you want to print. 5 Select the size for each photo. 8 Click Next in the Photo Prints section. The Fast Pics window appears. 9 Select the size for each photo, the blank paper size in the printer, and the number of copies. 6 Click Print Now.
... drive" on each photo that you want to print. 5 Select the size for each photo. 8 Click Next in the Photo Prints section. The Fast Pics window appears. 9 Select the size for each photo, the blank paper size in the printer, and the number of copies. 6 Click Print Now.
User's Guide for Windows
Page 72
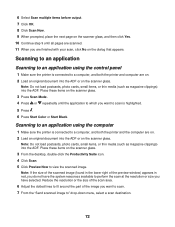
...the scanned image. Reduce the resolution or the size of the scan area. 6 Adjust the dotted lines to fit around the part of the preview window) appears in red, you do not have the system resources available to perform the scan at the resolution or size you want to scan. 7 ...scanner glass. 3 Press Scan Mode. 4 Press or repeatedly until all pages are scanned. 11 When you want to scan is highlighted. 5 Press . 6 Press Start Color or Start Black. Place these items on the scanner glass. Place these items on the scanner glass. 3 From the desktop, double-click the Productivity Suite...
...the scanned image. Reduce the resolution or the size of the scan area. 6 Adjust the dotted lines to fit around the part of the preview window) appears in red, you do not have the system resources available to perform the scan at the resolution or size you want to scan. 7 ...scanner glass. 3 Press Scan Mode. 4 Press or repeatedly until all pages are scanned. 11 When you want to scan is highlighted. 5 Press . 6 Press Start Color or Start Black. Place these items on the scanner glass. Place these items on the scanner glass. 3 From the desktop, double-click the Productivity Suite...
User's Guide for Windows
Page 102
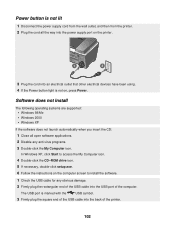
The USB port is not on, press Power. Software does not install The following operating systems are supported: • Windows 98/Me • Windows 2000 • Windows XP If the software does not launch automatically when you insert the CD: 1 Close all the way into the power supply port on the ... Power button light is marked with the USB symbol. 3 Firmly plug the square end of the USB cable into the back of the computer. In Windows XP, click Start to install the software. 1 Check the USB cable for any anti-virus programs. 3 Double-click the My Computer icon. Power button ...
The USB port is not on, press Power. Software does not install The following operating systems are supported: • Windows 98/Me • Windows 2000 • Windows XP If the software does not launch automatically when you insert the CD: 1 Close all the way into the power supply port on the ... Power button light is marked with the USB symbol. 3 Firmly plug the square end of the USB cable into the back of the computer. In Windows XP, click Start to install the software. 1 Check the USB cable for any anti-virus programs. 3 Double-click the My Computer icon. Power button ...
User's Guide for Windows
Page 103
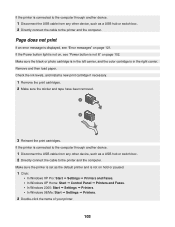
...or photo cartridge is in the left carrier, and the color cartridge is displayed, see "Power button is not lit" on hold or paused. 1 Click: • In Windows XP Pro: Start Œ Settings Œ Printers and Faxes. • In Windows XP Home: Start Œ Control Panel Œ ...Printers and Faxes. • In Windows 2000: Start Œ Settings Œ Printers. • In Windows 98/Me: Start Œ Settings Œ Printers....
...or photo cartridge is in the left carrier, and the color cartridge is displayed, see "Power button is not lit" on hold or paused. 1 Click: • In Windows XP Pro: Start Œ Settings Œ Printers and Faxes. • In Windows XP Home: Start Œ Control Panel Œ ...Printers and Faxes. • In Windows 2000: Start Œ Settings Œ Printers. • In Windows 98/Me: Start Œ Settings Œ Printers....
User's Guide for Windows
Page 109
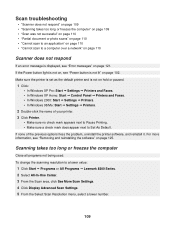
... on hold or paused. 1 Click: • In Windows XP Pro: Start Œ Settings Œ Printers and Faxes. • In Windows XP Home: Start Œ Control Panel Œ Printers and Faxes. • In Windows 2000: Start Œ Settings Œ Printers. • In Windows 98/Me: Start Œ Settings Œ Printers.... message is not on page 121. To change the scanning resolution to a lower value: 1 Click Start Œ Programs or All Programs Œ Lexmark 8300 Series. 2 Select All-In-One Center. 3 From the Scan area, click See More Scan Settings. 4 Click Display Advanced Scan Settings. 5...
... on hold or paused. 1 Click: • In Windows XP Pro: Start Œ Settings Œ Printers and Faxes. • In Windows XP Home: Start Œ Control Panel Œ Printers and Faxes. • In Windows 2000: Start Œ Settings Œ Printers. • In Windows 98/Me: Start Œ Settings Œ Printers.... message is not on page 121. To change the scanning resolution to a lower value: 1 Click Start Œ Programs or All Programs Œ Lexmark 8300 Series. 2 Select All-In-One Center. 3 From the Scan area, click See More Scan Settings. 4 Click Display Advanced Scan Settings. 5...


