
User's Guide
Page 9
... paper jams...147 Paper jam in the printer...147 Paper jam in the paper support...148 Paper or specialty media misfeeds...148 Printer does not feed paper, envelopes, or specialty media 149 Banner paper jams ...149 Paper continues to jam...150 Memory card troubleshooting...150 Memory card cannot be inserted...150 Nothing happens when memory card is inserted ...150 Copy troubleshooting...151 Copier does not respond ...151 Scanner unit does not close...151 Poor copy quality...151 Partial document or photo copies...152 Scan troubleshooting...153 Scanner...
... paper jams...147 Paper jam in the printer...147 Paper jam in the paper support...148 Paper or specialty media misfeeds...148 Printer does not feed paper, envelopes, or specialty media 149 Banner paper jams ...149 Paper continues to jam...150 Memory card troubleshooting...150 Memory card cannot be inserted...150 Nothing happens when memory card is inserted ...150 Copy troubleshooting...151 Copier does not respond ...151 Scanner unit does not close...151 Poor copy quality...151 Partial document or photo copies...152 Scan troubleshooting...153 Scanner...
User's Guide
Page 14
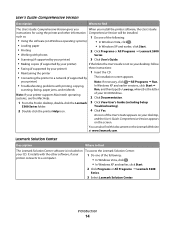
... operating systems) • In Windows Vista, click . • Loading paper • In Windows XP and earlier, click Start. • Printing 2 Click Programs or All Programs Œ Lexmark 5300 • Working with photos Series. • Scanning (if supported by your printer) 3 Click User's Guide. • Making copies (if supported by your CD-ROM drive. 2 Click Documentation. 1 From the Finder desktop, double-click the Lexmark 3 Click View User's Guide (including Setup 5300 Series folder. Introduction 14 such as: 1 Do one of your printer) • Troubleshooting problems...
... operating systems) • In Windows Vista, click . • Loading paper • In Windows XP and earlier, click Start. • Printing 2 Click Programs or All Programs Œ Lexmark 5300 • Working with photos Series. • Scanning (if supported by your printer) 3 Click User's Guide. • Making copies (if supported by your CD-ROM drive. 2 Click Documentation. 1 From the Finder desktop, double-click the Lexmark 3 Click View User's Guide (including Setup 5300 Series folder. Introduction 14 such as: 1 Do one of your printer) • Troubleshooting problems...

User's Guide
Page 36
...; In Copy mode: Change the size of a copy. • In Photo Card mode: Change the size of a photo. 7 Lighter / Darker Adjust the brightness of a copy, fax, or photo. 8 Display the Copy, Scan, Fax, or Photo Card menu, depending on which mode is on . 3 Scan Mode Access the scan default screen and scan documents. Setting up the printer 36 Note: The mode is selected when the button light is selected. Note: The mode is selected when the button light is on . 5 Photo Card Access the photo default screen and print photos. Note: The mode is selected when the button light is...
...; In Copy mode: Change the size of a copy. • In Photo Card mode: Change the size of a photo. 7 Lighter / Darker Adjust the brightness of a copy, fax, or photo. 8 Display the Copy, Scan, Fax, or Photo Card menu, depending on which mode is on . 3 Scan Mode Access the scan default screen and scan documents. Setting up the printer 36 Note: The mode is selected when the button light is selected. Note: The mode is selected when the button light is on . 5 Photo Card Access the photo default screen and print photos. Note: The mode is selected when the button light is...

User's Guide
Page 37
... on the display. • Feed or eject paper. 4 • Increase a number. • Enter a space between letters or numbers. • Scroll through menus, submenus, or settings on the display. 5 • Cancel a print, copy, scan, or fax job in progress. • Clear a fax number or end a fax transmission, and return to the fax default screen. • Exit a menu or submenu, and return to the default copy, scan, fax, or photo card screen. • Clear current settings or error messages, and return to default settings. Setting up the printer 37
... on the display. • Feed or eject paper. 4 • Increase a number. • Enter a space between letters or numbers. • Scroll through menus, submenus, or settings on the display. 5 • Cancel a print, copy, scan, or fax job in progress. • Clear a fax number or end a fax transmission, and return to the fax default screen. • Exit a menu or submenu, and return to the default copy, scan, fax, or photo card screen. • Clear current settings or error messages, and return to default settings. Setting up the printer 37

User's Guide
Page 43
... and Answering • Fax Printing/Reports • Speed Dial and Group Dial numbers The Solution Center is a complete guide to : - Use basic features. - Advanced • Change the appearance of the Printing Status window. • Turn printing voice notification on or off. • Change network printing settings. • Share information with the Maintenance tab open the Solution Center, use the printer. • Obtain software version information. • View ink levels and order new print cartridges. Click Fax History and Settings To Set printer fax settings for more...
... and Answering • Fax Printing/Reports • Speed Dial and Group Dial numbers The Solution Center is a complete guide to : - Use basic features. - Advanced • Change the appearance of the Printing Status window. • Turn printing voice notification on or off. • Change network printing settings. • Share information with the Maintenance tab open the Solution Center, use the printer. • Obtain software version information. • View ink levels and order new print cartridges. Click Fax History and Settings To Set printer fax settings for more...
User's Guide
Page 77
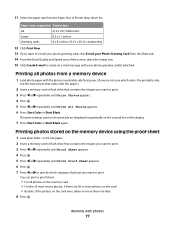
... card • By date, if the photos on the card were taken on the memory device using the proof sheet 1 Load plain letter- 11 Select the paper size from the Share tab. 14 From the Send Quality and Speed area of the screen, select the image size. 15 Click Create E-mail to create an e-mail message with your Photo Greeting Card from the Paper Size in Printer drop-down list. The print settings used on the print job...
... card • By date, if the photos on the card were taken on the memory device using the proof sheet 1 Load plain letter- 11 Select the paper size from the Share tab. 14 From the Send Quality and Speed area of the screen, select the image size. 15 Click Create E-mail to create an e-mail message with your Photo Greeting Card from the Paper Size in Printer drop-down list. The print settings used on the print job...
User's Guide
Page 127
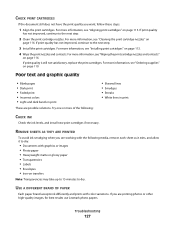
... is still not satisfactory, replace the print cartridges. REMOVE SHEETS AS THEY ARE PRINTED To avoid ink smudging when you are working with the following : • Skewed lines • Smudges • Streaks • White lines in print These are printing photos or other high-quality images, for best results use Lexmark photo papers. USE A DIFFERENT BRAND OF PAPER Each paper brand accepts ink differently and prints with graphics or images • Photo paper • Heavyweight matte or...
... is still not satisfactory, replace the print cartridges. REMOVE SHEETS AS THEY ARE PRINTED To avoid ink smudging when you are working with the following : • Skewed lines • Smudges • Streaks • White lines in print These are printing photos or other high-quality images, for best results use Lexmark photo papers. USE A DIFFERENT BRAND OF PAPER Each paper brand accepts ink differently and prints with graphics or images • Photo paper • Heavyweight matte or...
User's Guide
Page 131
... the print cartridge carrier. The printer prints a blank page when too many files are using . Troubleshooting 131 A blank or incorrect page prints REMOVE THE STICKER AND TAPE FROM THE PRINT CARTRIDGES Lift the scanner unit, and remove the print cartridges from the print nozzles located on . MAKE SURE THE CARTRIDGES ARE PROPERLY INSTALLED With the front of the following : ARE YOU PRINTING PHOTOS OR DOCUMENTS WITH A LARGE NUMBER OF GRAPHICS? Plug the long, flat end of the USB cable into this port. 2 Make...
... the print cartridge carrier. The printer prints a blank page when too many files are using . Troubleshooting 131 A blank or incorrect page prints REMOVE THE STICKER AND TAPE FROM THE PRINT CARTRIDGES Lift the scanner unit, and remove the print cartridges from the print nozzles located on . MAKE SURE THE CARTRIDGES ARE PROPERLY INSTALLED With the front of the following : ARE YOU PRINTING PHOTOS OR DOCUMENTS WITH A LARGE NUMBER OF GRAPHICS? Plug the long, flat end of the USB cable into this port. 2 Make...

User's Guide
Page 149
... "Loading paper" on page 148. REVIEW BANNER PRINTING CHECKLIST • Use only the number of the following: CLEAR BANNER PAPER JAMS 1 Press to turn off the printer. 2 Remove the jammed banner paper from the printer. Banner paper jams These are possible solutions. Troubleshooting 149 Windows XP users, click Start Œ Printers and Faxes. CHECK MEDIA LOADING • Verify that the specialty media is loaded correctly. CHECK PRINTER DEFAULT AND PAUSE SETTINGS 1 Windows Vista users, click Œ Control Panel Œ Printers (under Hardware and Sound). Try one...
... "Loading paper" on page 148. REVIEW BANNER PRINTING CHECKLIST • Use only the number of the following: CLEAR BANNER PAPER JAMS 1 Press to turn off the printer. 2 Remove the jammed banner paper from the printer. Banner paper jams These are possible solutions. Troubleshooting 149 Windows XP users, click Start Œ Printers and Faxes. CHECK MEDIA LOADING • Verify that the specialty media is loaded correctly. CHECK PRINTER DEFAULT AND PAUSE SETTINGS 1 Windows Vista users, click Œ Control Panel Œ Printers (under Hardware and Sound). Try one...

User's Guide
Page 167
... fax. SELECT THE AFTER DIAL SETTING 1 From the desktop, double-click the Productivity Studio icon. 2 From the left pane of the Welcome screen, click Setup and manage faxes. 3 Click Adjust speed dial list and other fax settings. 4 Click the Dialing and Sending tab. 5 From the "Sending options" area, select After Dial from the printer, or turned off the printer, before scanning the photo proof sheet. No images have been selected You have removed the memory card or flash drive...
... fax. SELECT THE AFTER DIAL SETTING 1 From the desktop, double-click the Productivity Studio icon. 2 From the left pane of the Welcome screen, click Setup and manage faxes. 3 Click Adjust speed dial list and other fax settings. 4 Click the Dialing and Sending tab. 5 From the "Sending options" area, select After Dial from the printer, or turned off the printer, before scanning the photo proof sheet. No images have been selected You have removed the memory card or flash drive...
User's Guide
Page 186
... sides of the paper, printing on 55 box contents 17 Brightness automatic adjustment 72, 74 Brightness / Contrast setting changing 74 broadcast fax, sending at a scheduled time 98 immediately 97 buttons, control panel Auto Answer 38 Back 37 Cancel 37 Copy Mode 36 Fax Mode 36 keypad 38 Left arrow 37 Lighter / Darker 36 Menu 36 Pause / Redial 38 Phone Book 38 Photo Card 36 Power 36 Resize 36 Right arrow 37 Scan Mode 36 Select 37 Start Black...
... sides of the paper, printing on 55 box contents 17 Brightness automatic adjustment 72, 74 Brightness / Contrast setting changing 74 broadcast fax, sending at a scheduled time 98 immediately 97 buttons, control panel Auto Answer 38 Back 37 Cancel 37 Copy Mode 36 Fax Mode 36 keypad 38 Left arrow 37 Lighter / Darker 36 Menu 36 Pause / Redial 38 Phone Book 38 Photo Card 36 Power 36 Resize 36 Right arrow 37 Scan Mode 36 Select 37 Start Black...

User's Guide
Page 187
... sheet 167 cover open 165 creating and viewing slideshow 81 creating fax cover page using the Fax Setup Utility 103 cropping photo 71 customizing settings copy 86 fax 105 Fax Setup Utility 103 scan 91 custom-size paper, loading 51 custom-size paper, printing 60 D defaults Fax menu 105 Photo Card menu 65 resetting factory defaults 62 resetting printer software to factory defaults 61 Scan menu 91 descreening 74 Despeckle change setting 73 digital camera printing photos using the computer 75 distinctive ring patterns 110 documents attaching to e-mail 94 e-mailing 94 faxing using the control panel...
... sheet 167 cover open 165 creating and viewing slideshow 81 creating fax cover page using the Fax Setup Utility 103 cropping photo 71 customizing settings copy 86 fax 105 Fax Setup Utility 103 scan 91 custom-size paper, loading 51 custom-size paper, printing 60 D defaults Fax menu 105 Photo Card menu 65 resetting factory defaults 62 resetting printer software to factory defaults 61 Scan menu 91 descreening 74 Despeckle change setting 73 digital camera printing photos using the computer 75 distinctive ring patterns 110 documents attaching to e-mail 94 e-mailing 94 faxing using the control panel...

User's Guide
Page 188
... memory 170 out of paper 170 paper jam 171 phone line busy 162 phone line error 163 photo ink low 165 photo size error 168 PictBridge communications error 168 please remove the camera card 168 printing failure 170 problem reading memory card 168 remote fax error 161 right cartridge error 166 right cartridge incorrect 166 right cartridge missing 166 some photos removed from card by host 168 unsupported file types found on memory card 171 error messages troubleshooting cover open error 165 Exposure changing setting 74 EXT port 24 exterior of the printer cleaning 118 external devices checking...
... memory 170 out of paper 170 paper jam 171 phone line busy 162 phone line error 163 photo ink low 165 photo size error 168 PictBridge communications error 168 please remove the camera card 168 printing failure 170 problem reading memory card 168 remote fax error 161 right cartridge error 166 right cartridge incorrect 166 right cartridge missing 166 some photos removed from card by host 168 unsupported file types found on memory card 171 error messages troubleshooting cover open error 165 Exposure changing setting 74 EXT port 24 exterior of the printer cleaning 118 external devices checking...
User's Guide
Page 190
...photo scans 155 parts control panel 23 EXT port 24 LINE port 24 memory card slots 23 paper exit tray 23 paper guide 23 paper support 23 PictBridge port 23 power supply port 25 print cartridge carrier 24 scanner glass 23 scanner unit 24 top cover 23 USB port 24 pausing print jobs 56 PDF creating from a scan 89 Phone Book (computer), using 102 Phone Book (control panel), using 101 phone line busy error message 162 phone line error 163 photo adjusting hue 73 adjusting saturation 73 applying color effect 74 blurring 72 cropping 71 enhancing 72 sharpening 72 Photo Card menu 65 photo cards, loading...
...photo scans 155 parts control panel 23 EXT port 24 LINE port 24 memory card slots 23 paper exit tray 23 paper guide 23 paper support 23 PictBridge port 23 power supply port 25 print cartridge carrier 24 scanner glass 23 scanner unit 24 top cover 23 USB port 24 pausing print jobs 56 PDF creating from a scan 89 Phone Book (computer), using 102 Phone Book (control panel), using 101 phone line busy error message 162 phone line error 163 photo adjusting hue 73 adjusting saturation 73 applying color effect 74 blurring 72 cropping 71 enhancing 72 sharpening 72 Photo Card menu 65 photo cards, loading...
User's Guide
Page 191
... print speed is slow 129 printed characters are improperly formed or not aligned 134 printer no communication 144 sharing 46 sharing in Windows 46 printer cannot communicate over peer-to-peer network 142 printer does not feed paper, envelopes, or specialty media 149 printer plugged in but does not print 142 printer receives blank fax 160 printer software installing 41 reinstalling 125 removing 125 updating 144 printer status checking 136 printing all photos from a memory device 77 banner 60 blocked fax list...
... print speed is slow 129 printed characters are improperly formed or not aligned 134 printer no communication 144 sharing 46 sharing in Windows 46 printer cannot communicate over peer-to-peer network 142 printer does not feed paper, envelopes, or specialty media 149 printer plugged in but does not print 142 printer receives blank fax 160 printer software installing 41 reinstalling 125 removing 125 updating 144 printer status checking 136 printing all photos from a memory device 77 banner 60 blocked fax list...
User's Guide
Page 192
... using the computer 68 from flash drive using the computer 68 from memory card to flash drive 69 transferring photos from memory device using control panel 68 transparencies loading 50 printing 60 transparencies or photos contain white lines 135 troubleshooting blank or incorrect page prints 131 cartridge missing error 169 characters on printout are missing or unexpected 131 checking port setting 46 checking printer status 136 checking quality/speed settings 139 colors on paper do not match colors on the screen 132 communication not available error 169 copied...
... using the computer 68 from flash drive using the computer 68 from memory card to flash drive 69 transferring photos from memory device using control panel 68 transparencies loading 50 printing 60 transparencies or photos contain white lines 135 troubleshooting blank or incorrect page prints 131 cartridge missing error 169 characters on printout are missing or unexpected 131 checking port setting 46 checking printer status 136 checking quality/speed settings 139 colors on paper do not match colors on the screen 132 communication not available error 169 copied...
User's Guide
Page 193
... listed as status 139 removing an external device 141 resolving font problems 138 test page does not print 140 transparencies or photos contain white lines 135 unsupported file types found on memory card 171 vertical straight lines are not smooth 135 white lines appear in graphics or black areas 136 wrong printer attached 144 Troubleshooting button 43 troubleshooting, copy copier does not respond 151 partial document or photo copies 152 poor copy quality 151 scanner unit does not close 151 troubleshooting, error messages alignment error 164 black cartridge replacement...
... listed as status 139 removing an external device 141 resolving font problems 138 test page does not print 140 transparencies or photos contain white lines 135 unsupported file types found on memory card 171 vertical straight lines are not smooth 135 white lines appear in graphics or black areas 136 wrong printer attached 144 Troubleshooting button 43 troubleshooting, copy copier does not respond 151 partial document or photo copies 152 poor copy quality 151 scanner unit does not close 151 troubleshooting, error messages alignment error 164 black cartridge replacement...
User's Guide (Mac)
Page 70
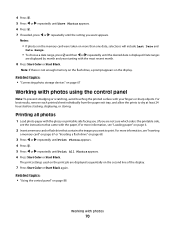
... until Print All Photos appears. 6 Press Start Color or Start Black. Printing all photos 1 Load photo paper with your fingers or sharp objects. The print settings used on the print job are displayed by month and year starting with photos 70 Related topics: • "Connecting photo storage devices" on page 88 Working with the most recent month. 8 Press Start Color or Start Black. Notes: • If photos on the memory card were taken on more information, see "Loading paper" on page 6. 2 Insert a memory card or flash drive...
... until Print All Photos appears. 6 Press Start Color or Start Black. Printing all photos 1 Load photo paper with your fingers or sharp objects. The print settings used on the print job are displayed by month and year starting with photos 70 Related topics: • "Connecting photo storage devices" on page 88 Working with the most recent month. 8 Press Start Color or Start Black. Notes: • If photos on the memory card were taken on more information, see "Loading paper" on page 6. 2 Insert a memory card or flash drive...
User's Guide (Mac)
Page 94
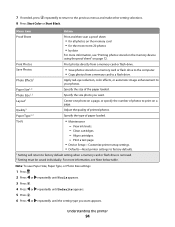
...the size of printed photos. Print a test page. • Device Setup-Customize printer setup settings. • Defaults-Reset printer settings to factory defaults. 1 Setting will return to your photos. Photo Size1, 2 Specify the size photo you want . Quality1 Adjust the quality of the paper loaded. Clean cartridges. - Photo Effects1 Apply red-eye reduction, color effects, or automatic image enhancement to factory default setting when a memory card or flash drive is removed. 2 Setting must be saved individually. Tools • Maintenance - Note: To save Paper Size, Paper Type...
...the size of printed photos. Print a test page. • Device Setup-Customize printer setup settings. • Defaults-Reset printer settings to factory defaults. 1 Setting will return to your photos. Photo Size1, 2 Specify the size photo you want . Quality1 Adjust the quality of the paper loaded. Clean cartridges. - Photo Effects1 Apply red-eye reduction, color effects, or automatic image enhancement to factory default setting when a memory card or flash drive is removed. 2 Setting must be saved individually. Tools • Maintenance - Note: To save Paper Size, Paper Type...
User's Guide (Mac)
Page 121
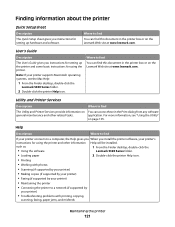
... folder. 2 Double-click the printer Help icon. Finding information about the printer Quick Setup sheet Description The Quick Setup sheet gives you instructions for setting up hardware and software. Where to a computer, the Help gives you When you install the printer software, your printer's instructions for using the printer. such as: 1 From the Finder desktop, double-click the • Using the software Lexmark 5300 Series folder. • Loading paper 2 Double-click the printer Help icon. • Printing • Working with printing, copying, scanning, faxing, paper jams...
... folder. 2 Double-click the printer Help icon. Finding information about the printer Quick Setup sheet Description The Quick Setup sheet gives you instructions for setting up hardware and software. Where to a computer, the Help gives you When you install the printer software, your printer's instructions for using the printer. such as: 1 From the Finder desktop, double-click the • Using the software Lexmark 5300 Series folder. • Loading paper 2 Double-click the printer Help icon. • Printing • Working with printing, copying, scanning, faxing, paper jams...


