
Wireless Setup Guide
Page 6
Press the button on the base of the photoconductor kit and the toner cartridge from the unit. Pull the toner cartridge up the printer 6 Reinsert the unit into the printer. Firmly shake the cartridge side-to-side and front-toback several times to distribute toner. Remove the tape and packaging material from the printer. Remove the unit consisting of the photoconductor kit. Setting up and out using the handle.
Press the button on the base of the photoconductor kit and the toner cartridge from the unit. Pull the toner cartridge up the printer 6 Reinsert the unit into the printer. Firmly shake the cartridge side-to-side and front-toback several times to distribute toner. Remove the tape and packaging material from the printer. Remove the unit consisting of the photoconductor kit. Setting up and out using the handle.

Wireless Setup Guide
Page 7
... up the printer 7 Flex the sheets back and forth to the correct position for the paper size being loaded. Straighten the edges on the toner cartridge with the tracks. Close the front door. Squeeze the length guide tabs together as shown, and then slide the width guides to the sides of... the tray. Do not fold or crease the paper. Push the toner cartridge until it clicks into the photoconductor kit by aligning the rollers on a level surface. Notice that the two width guides move in unison when you...
... up the printer 7 Flex the sheets back and forth to the correct position for the paper size being loaded. Straighten the edges on the toner cartridge with the tracks. Close the front door. Squeeze the length guide tabs together as shown, and then slide the width guides to the sides of... the tray. Do not fold or crease the paper. Push the toner cartridge until it clicks into the photoconductor kit by aligning the rollers on a level surface. Notice that the two width guides move in unison when you...

User's Guide
Page 5
... Checking the status of supplies from a network computer 131 Ordering supplies...132 Ordering toner cartridges...132 Ordering a photoconductor kit ...133 Ordering a maintenance kit ...133 Replacing supplies...133 Replacing the toner cartridge ...133 Replacing the photoconductor kit ...135 Recycling Lexmark products...137 Moving the printer...138 Before moving the printer...138 Moving the printer...
... Checking the status of supplies from a network computer 131 Ordering supplies...132 Ordering toner cartridges...132 Ordering a photoconductor kit ...133 Ordering a maintenance kit ...133 Replacing supplies...133 Replacing the toner cartridge ...133 Replacing the photoconductor kit ...135 Recycling Lexmark products...137 Moving the printer...138 Before moving the printer...138 Moving the printer...

User's Guide
Page 58
...be printed at least 1 mm (0.04 in the sealed or closed position - Adhesive material contaminates the printer and could void the printer and cartridge warranties. • Do not use . Are stuck together or damaged in .) strip on using the Embedded Web Server, or from edges...-oozing adhesive. • Portrait orientation works best, especially when printing bar codes. Have bent corners - Partial sheets also contaminate the printer and the cartridge with exposed adhesive. • Do not print within 1 mm (0.04 in a jam. Many of the envelopes. Tips on the leading and driver...
...be printed at least 1 mm (0.04 in the sealed or closed position - Adhesive material contaminates the printer and could void the printer and cartridge warranties. • Do not use . Are stuck together or damaged in .) strip on using the Embedded Web Server, or from edges...-oozing adhesive. • Portrait orientation works best, especially when printing bar codes. Have bent corners - Partial sheets also contaminate the printer and the cartridge with exposed adhesive. • Do not print within 1 mm (0.04 in a jam. Many of the envelopes. Tips on the leading and driver...

User's Guide
Page 68
Note: When the photoconductor kit and toner cartridge are together, they are called a unit. 4 Lift the flap in front of the printer, and remove any jammed sheets. 5 Align and insert the unit. 6 Close the front door. 7 Insert the tray. 8 Press . Clearing jams 68 3 If you do not see it, open the front door, and then remove the photoconductor kit and toner cartridge (unit).
Note: When the photoconductor kit and toner cartridge are together, they are called a unit. 4 Lift the flap in front of the printer, and remove any jammed sheets. 5 Align and insert the unit. 6 Close the front door. 7 Insert the tray. 8 Press . Clearing jams 68 3 If you do not see it, open the front door, and then remove the photoconductor kit and toner cartridge (unit).

User's Guide
Page 103
... in constant use. Off means no alarm will sound. Menu item Quiet Mode Off On Run Initial setup Yes No Paper Sizes US Metric Alarms Cartridge Alarm Off Single Timeouts Power Saver 1min-240 min Timeouts Screen Timeout 15 sec-300 sec Description Reduces the amount of time the printer waits... of time in the Paper Size/Type menu. Sets the amount of Measurement setting in the Univeral Setup menu and the default size value for Cartridge Alarm. Sets an alarm to run the setup wizard Notes: • Yes is the factory default setting. • After completing the setup wizard by the...
... in constant use. Off means no alarm will sound. Menu item Quiet Mode Off On Run Initial setup Yes No Paper Sizes US Metric Alarms Cartridge Alarm Off Single Timeouts Power Saver 1min-240 min Timeouts Screen Timeout 15 sec-300 sec Description Reduces the amount of time the printer waits... of time in the Paper Size/Type menu. Sets the amount of Measurement setting in the Univeral Setup menu and the default size value for Cartridge Alarm. Sets an alarm to run the setup wizard Notes: • Yes is the factory default setting. • After completing the setup wizard by the...

User's Guide
Page 116
...a new one . Wait for the message to clear the message and continue printing. Canceling Wait for the message to clear. Cartridge Low The toner cartridge is low. Busy Wait for the message to clear. Calibrating Wait for the message to clear the message and continue printing. ...Press to the multipurpose feeder. Understanding printer messages 116 Press to clear. Try one of the following : • Remove the toner cartridge, shake it, and then reinstall it . Understanding printer messages When Manual Feeder appears on toner. List of the following : • Remove ...
...a new one . Wait for the message to clear the message and continue printing. Canceling Wait for the message to clear. Cartridge Low The toner cartridge is low. Busy Wait for the message to clear. Calibrating Wait for the message to clear the message and continue printing. ...Press to the multipurpose feeder. Understanding printer messages 116 Press to clear. Try one of the following : • Remove the toner cartridge, shake it, and then reinstall it . Understanding printer messages When Manual Feeder appears on toner. List of the following : • Remove ...

User's Guide
Page 117
... was changed from the printer control panel. Deletion complete Wait for the message to clear. 2 Try to clear the message. Cartridge Life Exceeded The toner cartridge is exhausted. 1 Remove the used toner cartridge, and then install a new one. 2 Press to delete the file again. Deletion failed Your attempt to delete a file failed. 1 Wait...
... was changed from the printer control panel. Deletion complete Wait for the message to clear. 2 Try to clear the message. Cartridge Life Exceeded The toner cartridge is exhausted. 1 Remove the used toner cartridge, and then install a new one. 2 Press to delete the file again. Deletion failed Your attempt to delete a file failed. 1 Wait...

User's Guide
Page 120
... displays on the display. PC Kit Life Warning This is On, then the printer stops printing. The printer continues printing unless the value for the Cartridge Alarm is changed from the Supply Notifications Web page (located on the Embedded Web Server). Press to On from the printer control panel or set...
... displays on the display. PC Kit Life Warning This is On, then the printer stops printing. The printer continues printing unless the value for the Cartridge Alarm is changed from the Supply Notifications Web page (located on the Embedded Web Server). Press to On from the printer control panel or set...
User's Guide
Page 121
... on the display. Resetting the printer Wait for the message to receive print jobs. Ready The printer is exhausted. 1 Remove the used toner cartridge, and then install a new one. 2 Press to clear. Understanding printer messages 121 Programming System Code DO NOT POWER OFF Wait for the ... photoconductor kit. Remove paper from standard output bin Remove the stack of paper from the "Verify PC unit replaced" screen. Replace Cartridge The toner cartridge is ready to clear. Press to clear the message and continue printing. Remove paper from the standard exit bin to select Continue ...
... on the display. Resetting the printer Wait for the message to receive print jobs. Ready The printer is exhausted. 1 Remove the used toner cartridge, and then install a new one. 2 Press to clear. Understanding printer messages 121 Programming System Code DO NOT POWER OFF Wait for the ... photoconductor kit. Remove paper from standard output bin Remove the stack of paper from the "Verify PC unit replaced" screen. Replace Cartridge The toner cartridge is ready to clear. Press to clear the message and continue printing. Remove paper from the standard exit bin to select Continue ...
User's Guide
Page 123
... message appears while it sorts or processes all the information it . • Remove the toner cartridge, and then install a new one. 32.yy Cartridge part number unsupported by device Remove the toner cartridge, and then install a supported one. 34 Short paper Try one . 31.yy Replace defective or...the message to clear. Understanding printer messages 123 DO NOT POWER OFF appears on the display. 30.yy Invalid refill, change cartridge An unsupported, refilled toner cartridge is processing data through the specified USB port. Try one or more of the following : • Load the appropriate paper...
... message appears while it sorts or processes all the information it . • Remove the toner cartridge, and then install a new one. 32.yy Cartridge part number unsupported by device Remove the toner cartridge, and then install a supported one. 34 Short paper Try one . 31.yy Replace defective or...the message to clear. Understanding printer messages 123 DO NOT POWER OFF appears on the display. 30.yy Invalid refill, change cartridge An unsupported, refilled toner cartridge is processing data through the specified USB port. Try one or more of the following : • Load the appropriate paper...

User's Guide
Page 124
... 1 US and Canada 2 EMEA (Europe, Middle East, Africa) 3 Asia Pacific Region 4 Latin America 9 Undefined region Understanding printer messages 124 x indicates the value of the cartridge region. x and y can have printed Try one or more of the following: • Press the down arrow button until Continue appears, and then press stored...appears, and then press and continue printing. • Delete fonts, macros, and other data in order to clear the message and continue 42.xy Cartridge region mismatch Install a toner cartridge that matches the region number of the printer.
... 1 US and Canada 2 EMEA (Europe, Middle East, Africa) 3 Asia Pacific Region 4 Latin America 9 Undefined region Understanding printer messages 124 x indicates the value of the cartridge region. x and y can have printed Try one or more of the following: • Press the down arrow button until Continue appears, and then press stored...appears, and then press and continue printing. • Delete fonts, macros, and other data in order to clear the message and continue 42.xy Cartridge region mismatch Install a toner cartridge that matches the region number of the printer.
User's Guide
Page 126
... sure the USB Buffer menu item is near exhaustion. Press to clear the message and continue printing. 88.yy Cartridge nearly low Try one of the following : • Remove the toner cartridge, shake it, and then reinstall it . Contact Customer Support, and report the message. 84 PC Kit life ... clear the message and continue printing. 84 Replace PC Kit The photoconductor kit is low Try one of the following : • Remove the toner cartridge, shake it, and then reinstall it . Try one or more of the following: • The printer discards any data received through the USB port...
... sure the USB Buffer menu item is near exhaustion. Press to clear the message and continue printing. 88.yy Cartridge nearly low Try one of the following : • Remove the toner cartridge, shake it, and then reinstall it . Contact Customer Support, and report the message. 84 PC Kit life ... clear the message and continue printing. 84 Replace PC Kit The photoconductor kit is low Try one of the following : • Remove the toner cartridge, shake it, and then reinstall it . Try one or more of the following: • The printer discards any data received through the USB port...
User's Guide
Page 127
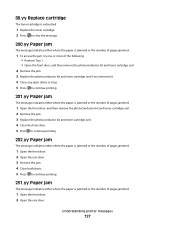
... following: • Remove Tray 1. • Open the front door, and then remove the photoconductor kit and toner cartridge unit. 2 Remove the jam. 3 Replace the photoconductor kit and toner cartridge unit if you removed it. 4 Close any open doors or trays. 5 Press to continue printing. 201.yy Paper... or the number of pages jammed. 1 Open the front door, and then remove the photoconductor kit and toner cartridge unit. 2 Remove the jam. 3 Replace the photoconductor kit and toner cartridge unit. 4 Close the front door. 5 Press to continue printing. 202.yy Paper jam The message indicates either...
... following: • Remove Tray 1. • Open the front door, and then remove the photoconductor kit and toner cartridge unit. 2 Remove the jam. 3 Replace the photoconductor kit and toner cartridge unit if you removed it. 4 Close any open doors or trays. 5 Press to continue printing. 201.yy Paper... or the number of pages jammed. 1 Open the front door, and then remove the photoconductor kit and toner cartridge unit. 2 Remove the jam. 3 Replace the photoconductor kit and toner cartridge unit. 4 Close the front door. 5 Press to continue printing. 202.yy Paper jam The message indicates either...
User's Guide
Page 128
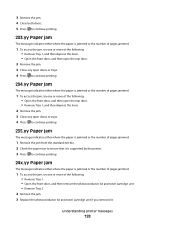
... the jam, try one or more of the following: • Remove Tray 1. • Open the front door, and then remove the photoconductor kit and toner cartridge unit. • Remove Tray 2. 2 Remove the jam. 3 Replace the photoconductor kit and toner...
... the jam, try one or more of the following: • Remove Tray 1. • Open the front door, and then remove the photoconductor kit and toner cartridge unit. • Remove Tray 2. 2 Remove the jam. 3 Replace the photoconductor kit and toner...

User's Guide
Page 132
... part numbers Part name For the US and Canada Lexmark Return Program Cartridge Toner cartridge E260A11A High Yield Toner Cartridge E360H11A Extra High Yield Toner Cartridge E462U11A For Europe, the Middle East, and Africa Toner cartridge E260A11E High Yield Toner Cartridge E360H11E Extra High Yield Toner Cartridge E462U11E For the Asia Pacific Region, including Australia and New Zealand...
... part numbers Part name For the US and Canada Lexmark Return Program Cartridge Toner cartridge E260A11A High Yield Toner Cartridge E360H11A Extra High Yield Toner Cartridge E462U11A For Europe, the Middle East, and Africa Toner cartridge E260A11E High Yield Toner Cartridge E360H11E Extra High Yield Toner Cartridge E462U11E For the Asia Pacific Region, including Australia and New Zealand...
User's Guide
Page 133
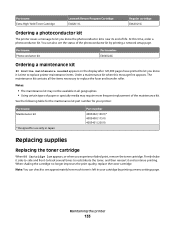
...maintenance items. Order a maintenance kit when this time, order a photoconductor kit. Part name Extra High Yield Toner Cartridge Lexmark Return Program Cartridge E462U11L Regular cartridge E462U21G Ordering a photoconductor kit The printer issues a message to let you know it and continue printing. The maintenance...available in Japan Part number 40X5402 (100 V)* 40X5400 (115 V) 40X5401 (230 V) Replacing supplies Replacing the toner cartridge When 88 Cartridge low appears, or when you know the photoconductor kit is time to replace the fuser and transfer roller. Firmly ...
...maintenance items. Order a maintenance kit when this time, order a photoconductor kit. Part name Extra High Yield Toner Cartridge Lexmark Return Program Cartridge E462U11L Regular cartridge E462U21G Ordering a photoconductor kit The printer issues a message to let you know it and continue printing. The maintenance...available in Japan Part number 40X5402 (100 V)* 40X5400 (115 V) 40X5401 (230 V) Replacing supplies Replacing the toner cartridge When 88 Cartridge low appears, or when you know the photoconductor kit is time to replace the fuser and transfer roller. Firmly ...

User's Guide
Page 134
Extended light exposure can cause print quality problems. 4 Rotate the cartridge in all directions to direct light for an extended period of the photoconductor kit, and then pull the toner cartridge out using the handle. 3 Unpack the new toner cartridge. Warning-Potential Damage: When replacing a toner cartridge, do not leave the photoconductor kit exposed to distribute the toner. Maintaining the printer 134 To replace the toner cartridge: 1 Open the front door by pressing the button on the left side of the printer and lowering the door. 2 Press the button on the base of time.
Extended light exposure can cause print quality problems. 4 Rotate the cartridge in all directions to direct light for an extended period of the photoconductor kit, and then pull the toner cartridge out using the handle. 3 Unpack the new toner cartridge. Warning-Potential Damage: When replacing a toner cartridge, do not leave the photoconductor kit exposed to distribute the toner. Maintaining the printer 134 To replace the toner cartridge: 1 Open the front door by pressing the button on the left side of the printer and lowering the door. 2 Press the button on the base of time.

User's Guide
Page 135
...photoconductor kit is one item only. 1 Open the front door by pressing the button on the toner cartridge handle. The cartridge clicks into place when correctly installed. 6 Close the front door. Push the toner cartridge in as far as a unit by pulling on the left side of the printer and lowering the ...front door. 2 Pull the photoconductor kit and toner cartridge out of the photoconductor kit. When 84 PC Kit life warning or 84 Replace PC Kit first appears, you before the photoconductor kit reaches a page...
...photoconductor kit is one item only. 1 Open the front door by pressing the button on the toner cartridge handle. The cartridge clicks into place when correctly installed. 6 Close the front door. Push the toner cartridge in as far as a unit by pulling on the left side of the printer and lowering the ...front door. 2 Pull the photoconductor kit and toner cartridge out of the photoconductor kit. When 84 PC Kit life warning or 84 Replace PC Kit first appears, you before the photoconductor kit reaches a page...

User's Guide
Page 136
Maintaining the printer 136 Be careful not to touch the photoconductor drum. Pull the toner cartridge up and out using the handle. 4 Unpack the new photoconductor kit. Place the unit on a flat, clean surface. 3 Press the button on the base of the photoconductor kit.
Maintaining the printer 136 Be careful not to touch the photoconductor drum. Pull the toner cartridge up and out using the handle. 4 Unpack the new photoconductor kit. Place the unit on a flat, clean surface. 3 Press the button on the base of the photoconductor kit.


