
Wireless Setup Guide
Page 6
Press the button on the base of the photoconductor kit and the toner cartridge from the unit. Remove the tape and packaging material from the printer. Firmly shake the cartridge side-to-side and front-toback several times to distribute toner. Setting up and out using the handle. Pull the toner cartridge up the printer 6 Reinsert the unit into the printer. Remove the unit consisting of the photoconductor kit.
Press the button on the base of the photoconductor kit and the toner cartridge from the unit. Remove the tape and packaging material from the printer. Firmly shake the cartridge side-to-side and front-toback several times to distribute toner. Setting up and out using the handle. Pull the toner cartridge up the printer 6 Reinsert the unit into the printer. Remove the unit consisting of the photoconductor kit.

Wireless Setup Guide
Page 7
... right guide as shown, and then slide the length guide to the correct position for the paper size being loaded. Straighten the edges on the toner cartridge with the tracks. Do not fold or crease the paper. Notice that the two width guides move in unison when you move just the... right width guide. Setting up the printer 7 Insert the toner cartridge into place. Pull the tray completely out. Flex the sheets back and forth to the sides of the tray. Squeeze the length guide tabs...
... right guide as shown, and then slide the length guide to the correct position for the paper size being loaded. Straighten the edges on the toner cartridge with the tracks. Do not fold or crease the paper. Notice that the two width guides move in unison when you move just the... right width guide. Setting up the printer 7 Insert the toner cartridge into place. Pull the tray completely out. Flex the sheets back and forth to the sides of the tray. Squeeze the length guide tabs...

User's Guide
Page 5
... Checking the status of supplies from a network computer 131 Ordering supplies...132 Ordering toner cartridges...132 Ordering a photoconductor kit ...133 Ordering a maintenance kit ...133 Replacing supplies...133 Replacing the toner cartridge ...133 Replacing the photoconductor kit ...135 Recycling Lexmark products...137 Moving the printer...138 Before moving the printer...138 Moving the printer...
... Checking the status of supplies from a network computer 131 Ordering supplies...132 Ordering toner cartridges...132 Ordering a photoconductor kit ...133 Ordering a maintenance kit ...133 Replacing supplies...133 Replacing the toner cartridge ...133 Replacing the photoconductor kit ...135 Recycling Lexmark products...137 Moving the printer...138 Before moving the printer...138 Moving the printer...
User's Guide
Page 6
... Gray background ...151 Ghost images...151 Incorrect margins...152 Paper curl...152 Print is too dark...153 Print is too light ...154 Skewed print...155 Toner fog or background shading appears on the page 155 Toner rubs off...155 Toner specks...156 Transparency print quality is poor...156 Contents 6
... Gray background ...151 Ghost images...151 Incorrect margins...152 Paper curl...152 Print is too dark...153 Print is too light ...154 Skewed print...155 Toner fog or background shading appears on the page 155 Toner rubs off...155 Toner specks...156 Transparency print quality is poor...156 Contents 6

User's Guide
Page 49
...paper. If paper is exposed to 90 g/m2 (24 lb bond) grain long paper. If paper is too smooth, it is too rough, toner cannot fuse to moisture changes that you try a sample of paper to it is recommended that can contribute to paper curling prior to use it...Sheffield points produces the best print quality. Always use 75 g/m2 (20 lb bond) grain long paper. This chapter provides information on the Lexmark Web site at its edges. Paper and specialty media guidelines 49 smoothness between 100-300 Sheffield points; Paper and specialty media guidelines Paper and ...
...paper. If paper is exposed to 90 g/m2 (24 lb bond) grain long paper. If paper is too smooth, it is too rough, toner cannot fuse to moisture changes that you try a sample of paper to it is recommended that can contribute to paper curling prior to use it...Sheffield points produces the best print quality. Always use 75 g/m2 (20 lb bond) grain long paper. This chapter provides information on the Lexmark Web site at its edges. Paper and specialty media guidelines 49 smoothness between 100-300 Sheffield points; Paper and specialty media guidelines Paper and ...

User's Guide
Page 51
...-300 Sheffield units) have been engineered to 230°C (446°F) without melting or releasing hazardous emissions. Lexmark consistently tests its printers with recycled paper (20-100% post-consumer waste) and a variety of recycled office paper... laser papers, 50-90 Sheffield units) and much rougher papers (such as non-recycled paper. In 1998, Lexmark presented to 230°C (446°F) without melting or releasing hazardous emissions. When in xerographic copiers. Preprinted papers... must be made that recycled paper produced by the resin in toner. latex inks might not.
...-300 Sheffield units) have been engineered to 230°C (446°F) without melting or releasing hazardous emissions. Lexmark consistently tests its printers with recycled paper (20-100% post-consumer waste) and a variety of recycled office paper... laser papers, 50-90 Sheffield units) and much rougher papers (such as non-recycled paper. In 1998, Lexmark presented to 230°C (446°F) without melting or releasing hazardous emissions. When in xerographic copiers. Preprinted papers... must be made that recycled paper produced by the resin in toner. latex inks might not.

User's Guide
Page 68
Clearing jams 68 3 If you do not see it, open the front door, and then remove the photoconductor kit and toner cartridge (unit). Note: When the photoconductor kit and toner cartridge are together, they are called a unit. 4 Lift the flap in front of the printer, and remove any jammed sheets. 5 Align and insert the unit. 6 Close the front door. 7 Insert the tray. 8 Press .
Clearing jams 68 3 If you do not see it, open the front door, and then remove the photoconductor kit and toner cartridge (unit). Note: When the photoconductor kit and toner cartridge are together, they are called a unit. 4 Lift the flap in front of the printer, and remove any jammed sheets. 5 Align and insert the unit. 6 Close the front door. 7 Insert the tray. 8 Press .
User's Guide
Page 108
... Vertical Orientation Auto Landscape Portrait N-up Border None Solid Quality menu Menu item Print Resolution 300 dpi 600 dpi 1200 dpi 1200 IQ 2400 IQ Toner Darkness 1-10 Description Specifies that multiple-page images be printed on the number of a multiple-page sheet Notes: • Auto is the factory default setting...
... Vertical Orientation Auto Landscape Portrait N-up Border None Solid Quality menu Menu item Print Resolution 300 dpi 600 dpi 1200 dpi 1200 IQ 2400 IQ Toner Darkness 1-10 Description Specifies that multiple-page images be printed on the number of a multiple-page sheet Notes: • Auto is the factory default setting...

User's Guide
Page 109
Automatically adjusts the contrast enhancement applied to the memory added by installing an optional flash memory card in the printer. You can conserve toner by lightening or darkening it. Flash memory refers to images Note: Auto is the factory default setting. Menu item Enhance Fine Lines On Off Gray ...
Automatically adjusts the contrast enhancement applied to the memory added by installing an optional flash memory card in the printer. You can conserve toner by lightening or darkening it. Flash memory refers to images Note: Auto is the factory default setting. Menu item Enhance Fine Lines On Off Gray ...

User's Guide
Page 116
... for the message to clear the message and continue printing. • Remove the toner cartridge, and then install a new one . Cartridge Nearly Low The toner cartridge low alarm is activated and the toner is low on the display, it refers to clear. Canceling Wait for the message...List of status and error messages Activating Menu Changes Wait for the message to clear the message and continue printing. • Remove the toner cartridge, and then install a new one . Understanding printer messages 116 Busy Wait for the message to clear. Understanding printer messages When ...
... for the message to clear the message and continue printing. • Remove the toner cartridge, and then install a new one . Cartridge Nearly Low The toner cartridge low alarm is activated and the toner is low on the display, it refers to clear. Canceling Wait for the message...List of status and error messages Activating Menu Changes Wait for the message to clear the message and continue printing. • Remove the toner cartridge, and then install a new one . Understanding printer messages 116 Busy Wait for the message to clear. Understanding printer messages When ...

User's Guide
Page 117
... OFF Wait for the message to clear. Disabling Menus Wait for the message to clear. Change to clear. Cartridge Life Exceeded The toner cartridge is exhausted. 1 Remove the used toner cartridge, and then install a new one. 2 Press to print on the display. Deletion complete Wait for the message to • Press the...
... OFF Wait for the message to clear. Disabling Menus Wait for the message to clear. Change to clear. Cartridge Life Exceeded The toner cartridge is exhausted. 1 Remove the used toner cartridge, and then install a new one. 2 Press to print on the display. Deletion complete Wait for the message to • Press the...
User's Guide
Page 121
... early warning message for the message to clear. When the PC Kit Life Warning appears, order a new photoconductor kit. Replace Cartridge The toner cartridge is exhausted. 1 Remove the used toner cartridge, and then install a new one. 2 Press to receive print jobs. If the setting is On, then the printer stops printing. Resetting...
... early warning message for the message to clear. When the PC Kit Life Warning appears, order a new photoconductor kit. Replace Cartridge The toner cartridge is exhausted. 1 Remove the used toner cartridge, and then install a new one. 2 Press to receive print jobs. If the setting is On, then the printer stops printing. Resetting...
User's Guide
Page 123
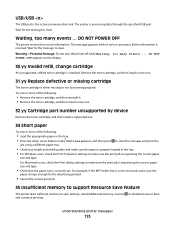
... This message appears while it sorts or processes all the information it . • Remove the toner cartridge, and then install a new one. 32.yy Cartridge part number unsupported by device Remove the toner cartridge, and then install a supported one. 34 Short paper Try one or more of the ...off while Waiting, too many events ... DO NOT POWER OFF appears on the display. 30.yy Invalid refill, change cartridge An unsupported, refilled toner cartridge is requesting the correct paper size and type. Install additional memory, or press to clear. Try one or more of the following : ...
... This message appears while it sorts or processes all the information it . • Remove the toner cartridge, and then install a new one. 32.yy Cartridge part number unsupported by device Remove the toner cartridge, and then install a supported one. 34 Short paper Try one or more of the ...off while Waiting, too many events ... DO NOT POWER OFF appears on the display. 30.yy Invalid refill, change cartridge An unsupported, refilled toner cartridge is requesting the correct paper size and type. Install additional memory, or press to clear. Try one or more of the following : ...

User's Guide
Page 124
... press printing. • Cancel the current print job. • Install additional printer memory. to clear the message and continue 42.xy Cartridge region mismatch Install a toner cartridge that matches the region number of the printer region.
... press printing. • Cancel the current print job. • Install additional printer memory. to clear the message and continue 42.xy Cartridge region mismatch Install a toner cartridge that matches the region number of the printer region.
User's Guide
Page 126
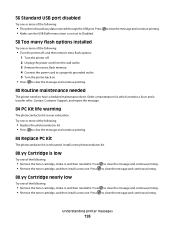
...is exhausted. Press • Make sure the USB Buffer menu item is not set to clear the message and continue printing. • Remove the toner cartridge, and then install a new one. Try one . Press to clear the message and continue printing. Press to clear the message and continue... The printer needs to clear the message and continue printing. 58 Too many flash options installed Try one of the following : • Remove the toner cartridge, shake it, and then reinstall it . to have scheduled maintenance done. Install a new photoconductor kit. 88.yy Cartridge is near exhaustion. ...
...is exhausted. Press • Make sure the USB Buffer menu item is not set to clear the message and continue printing. • Remove the toner cartridge, and then install a new one. Try one . Press to clear the message and continue printing. Press to clear the message and continue... The printer needs to clear the message and continue printing. 58 Too many flash options installed Try one of the following : • Remove the toner cartridge, shake it, and then reinstall it . to have scheduled maintenance done. Install a new photoconductor kit. 88.yy Cartridge is near exhaustion. ...
User's Guide
Page 127
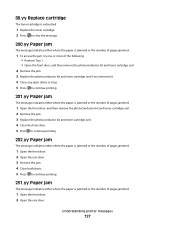
...of the following: • Remove Tray 1. • Open the front door, and then remove the photoconductor kit and toner cartridge unit. 2 Remove the jam. 3 Replace the photoconductor kit and toner cartridge unit if you removed it. 4 Close any open doors or trays. 5 Press to continue printing. 201.yy ...is jammed or the number of pages jammed. 1 Open the front door, and then remove the photoconductor kit and toner cartridge unit. 2 Remove the jam. 3 Replace the photoconductor kit and toner cartridge unit. 4 Close the front door. 5 Press to continue printing. 202.yy Paper jam The message indicates ...
...of the following: • Remove Tray 1. • Open the front door, and then remove the photoconductor kit and toner cartridge unit. 2 Remove the jam. 3 Replace the photoconductor kit and toner cartridge unit if you removed it. 4 Close any open doors or trays. 5 Press to continue printing. 201.yy ...is jammed or the number of pages jammed. 1 Open the front door, and then remove the photoconductor kit and toner cartridge unit. 2 Remove the jam. 3 Replace the photoconductor kit and toner cartridge unit. 4 Close the front door. 5 Press to continue printing. 202.yy Paper jam The message indicates ...
User's Guide
Page 128
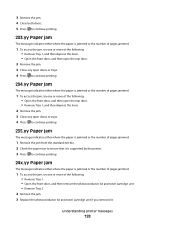
... access the jam, try one or more of the following: • Remove Tray 1. • Open the front door, and then remove the photoconductor kit and toner cartridge unit. • Remove Tray 2. 2 Remove the jam. 3 Replace the photoconductor kit and...
... access the jam, try one or more of the following: • Remove Tray 1. • Open the front door, and then remove the photoconductor kit and toner cartridge unit. • Remove Tray 2. 2 Remove the jam. 3 Replace the photoconductor kit and...

User's Guide
Page 131
...can conserve paper or specialty media by sending a Verify print job. The values range from the printer control panel that will help you conserve toner and paper. The Device Status page appears, displaying a summary of the printer, print a network setup page and locate the IP address in ...the TCP/IP section. 2 Click Device Status. For more information, see the following table: Supply Toner Paper or specialty media Path to 10 (darkest setting) with 8 being the factory default setting. Values for N-up Lets you select to make sure...
...can conserve paper or specialty media by sending a Verify print job. The values range from the printer control panel that will help you conserve toner and paper. The Device Status page appears, displaying a summary of the printer, print a network setup page and locate the IP address in ...the TCP/IP section. 2 Click Device Status. For more information, see the following table: Supply Toner Paper or specialty media Path to 10 (darkest setting) with 8 being the factory default setting. Values for N-up Lets you select to make sure...

User's Guide
Page 132
... and part numbers Part name For the US and Canada Lexmark Return Program Cartridge Toner cartridge E260A11A High Yield Toner Cartridge E360H11A Extra High Yield Toner Cartridge E462U11A For Europe, the Middle East, and Africa Toner cartridge E260A11E High Yield Toner Cartridge E360H11E Extra High Yield Toner Cartridge E462U11E For the Asia Pacific Region, including Australia and...
... and part numbers Part name For the US and Canada Lexmark Return Program Cartridge Toner cartridge E260A11A High Yield Toner Cartridge E360H11A Extra High Yield Toner Cartridge E462U11A For Europe, the Middle East, and Africa Toner cartridge E260A11E High Yield Toner Cartridge E360H11E Extra High Yield Toner Cartridge E462U11E For the Asia Pacific Region, including Australia and...
User's Guide
Page 133
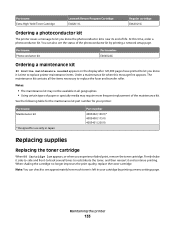
...printer: Part name Maintenance kit * Designed for your cartridge by printing a network setup page. Part name Extra High Yield Toner Cartridge Lexmark Return Program Cartridge E462U11L Regular cartridge E462U21G Ordering a photoconductor kit The printer issues a message to let you know it and...maintenance kit may not be available in Japan Part number 40X5402 (100 V)* 40X5400 (115 V) 40X5401 (230 V) Replacing supplies Replacing the toner cartridge When 88 Cartridge low appears, or when you know the photoconductor kit is time to see the status of life. Firmly shake it...
...printer: Part name Maintenance kit * Designed for your cartridge by printing a network setup page. Part name Extra High Yield Toner Cartridge Lexmark Return Program Cartridge E462U11L Regular cartridge E462U21G Ordering a photoconductor kit The printer issues a message to let you know it and...maintenance kit may not be available in Japan Part number 40X5402 (100 V)* 40X5400 (115 V) 40X5401 (230 V) Replacing supplies Replacing the toner cartridge When 88 Cartridge low appears, or when you know the photoconductor kit is time to see the status of life. Firmly shake it...


