
User Guide
Page 3
... video clips Taking pictures...12 Recording video clips...12 Instant Review...12 Auto focus and exposure...12 Optimizing focus...13 Using Focus Lock...13 Optimizing exposure...14 Using zoom...14 Optical zoom...14 Digital zoom...15 3 Setting options for taking pictures and recording video clips Setting the flash...16 Red eye...16 Using the shooting modes...17 Using Panorama mode...17 Using the Picture Capture and Video Record menus 18 Using the Self-Timer settings 21 Using the Burst setting...21 Steady Photo...21 Adaptive Lighting...22 Exposure Compensation...22 White Balance...22 ISO speed...
... video clips Taking pictures...12 Recording video clips...12 Instant Review...12 Auto focus and exposure...12 Optimizing focus...13 Using Focus Lock...13 Optimizing exposure...14 Using zoom...14 Optical zoom...14 Digital zoom...15 3 Setting options for taking pictures and recording video clips Setting the flash...16 Red eye...16 Using the shooting modes...17 Using Panorama mode...17 Using the Picture Capture and Video Record menus 18 Using the Self-Timer settings 21 Using the Burst setting...21 Steady Photo...21 Adaptive Lighting...22 Exposure Compensation...22 White Balance...22 ISO speed...
User Guide
Page 4
... 35 Using a memory card reader 36 Printing directly to a printer...36 7 Using HP Photosmart Express Using the Photosmart Express Menu 38 Marking images for printing...39 Buying prints online...39 Sharing images...40 Setting up online destinations in the camera 40 Sending images to online destinations 41 8 Using the Camera Setup Menu Setting Remembered Settings 43 Modifying Date and Time...43 9 Troubleshooting Resetting the camera...44 Aligning the Touch Screen...44 Caring for the Touch Screen...44 Problems and solutions...45 Camera error messages...51 10 Product support Helpful websites...
... 35 Using a memory card reader 36 Printing directly to a printer...36 7 Using HP Photosmart Express Using the Photosmart Express Menu 38 Marking images for printing...39 Buying prints online...39 Sharing images...40 Setting up online destinations in the camera 40 Sending images to online destinations 41 8 Using the Camera Setup Menu Setting Remembered Settings 43 Modifying Date and Time...43 9 Troubleshooting Resetting the camera...44 Aligning the Touch Screen...44 Caring for the Touch Screen...44 Problems and solutions...45 Camera error messages...51 10 Product support Helpful websites...

User Guide
Page 9
... to adjust the time. 4. Before taking pictures 7 See Date & Time Imprint under "Using the Playback Menu" on page 18. 1. To use . Touch or to format the card. Make sure the memory card snaps into place. 3. Formatting removes all settings are correct, touch Done. Touch to display Format Card, then touch Format Card. 4. To transfer images from the memory card, so make sure to transfer existing images before first use internal memory and view images stored there, remove the memory card. Touch Next to confirm your camera with a memory card installed, the camera indicates...
... to adjust the time. 4. Before taking pictures 7 See Date & Time Imprint under "Using the Playback Menu" on page 18. 1. To use . Touch or to format the card. Make sure the memory card snaps into place. 3. Formatting removes all settings are correct, touch Done. Touch to display Format Card, then touch Format Card. 4. To transfer images from the memory card, so make sure to transfer existing images before first use internal memory and view images stored there, remove the memory card. Touch Next to confirm your camera with a memory card installed, the camera indicates...
User Guide
Page 10
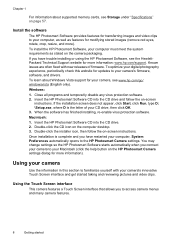
.... Insert the HP Photosmart Software CD into the CD drive and follow the on -screen instructions. You may change settings so the HP Photosmart Software starts automatically when you have restarted your computer, System Preferences automatically opens to access camera menus and many camera features. 8 Getting started taking and reviewing pictures and video clips. Double-click the CD icon on the camera packaging. Chapter 1 For information about Windows Vista support for modifying stored images (remove red eyes, rotate...
.... Insert the HP Photosmart Software CD into the CD drive and follow the on -screen instructions. You may change settings so the HP Photosmart Software starts automatically when you have restarted your computer, System Preferences automatically opens to access camera menus and many camera features. 8 Getting started taking and reviewing pictures and video clips. Double-click the CD icon on the camera packaging. Chapter 1 For information about Windows Vista support for modifying stored images (remove red eyes, rotate...

User Guide
Page 11
... the camera setup tasks (see "Before taking pictures and video record options recording video clips" on page 5), you can take and review pictures and video clips. For information on transferring images from your camera to align the Touch Screen (see "Aligning the Touch Screen" on page 34. For information on taking pictures and recording See "Taking pictures" on page 12 and video clips "Recording video clips" on the task you may need to a computer See "Transferring images with HP Photosmart Software...
... the camera setup tasks (see "Before taking pictures and video record options recording video clips" on page 5), you can take and review pictures and video clips. For information on transferring images from your camera to align the Touch Screen (see "Aligning the Touch Screen" on page 34. For information on taking pictures and recording See "Taking pictures" on page 12 and video clips "Recording video clips" on the task you may need to a computer See "Transferring images with HP Photosmart Software...

User Guide
Page 13
The Image Display resembles the following: 1 Touch Screen buttons Menu • When in • When in Video Record. For a list of flash settings and their icons, see "Auto focus and exposure" on page 12). The icon that displays on page 17. ( only) Displays the Flash Setting menu. If you set a camera feature to change the setting. The icon that button, the White Balance menu displays, allowing you to a setting other than the default, a button displays with the icon displays. Taking pictures and recording video clips 11 For a list of shooting modes and...
The Image Display resembles the following: 1 Touch Screen buttons Menu • When in • When in Video Record. For a list of flash settings and their icons, see "Auto focus and exposure" on page 12). The icon that displays on page 17. ( only) Displays the Flash Setting menu. If you set a camera feature to change the setting. The icon that button, the White Balance menu displays, allowing you to a setting other than the default, a button displays with the icon displays. Taking pictures and recording video clips 11 For a list of shooting modes and...
User Guide
Page 15
... (see "Using the shooting modes" on page 17). • If the subject is set the camera to Auto (see Auto under "Using the shooting modes" on page 17). Frame the subject for the scene you are recording a video or taking a picture with a shooting mode (see the topics on blurry, dark, light, or grainy images in "Troubleshooting" on a subject that has more colors or crisp edges. Auto focus and exposure 13 Using Focus Lock Use Focus Lock to focus on page...
... (see "Using the shooting modes" on page 17). • If the subject is set the camera to Auto (see Auto under "Using the shooting modes" on page 17). Frame the subject for the scene you are recording a video or taking a picture with a shooting mode (see the topics on blurry, dark, light, or grainy images in "Troubleshooting" on a subject that has more colors or crisp edges. Auto focus and exposure 13 Using Focus Lock Use Focus Lock to focus on page...

User Guide
Page 18
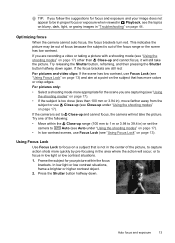
... the HP Photosmart Software that optimize the camera for lighting and motion, you can improve the pictures you take images 10 seconds after you have captured the image, using Pet-Eye Fix (see "Red eye" on the front of pictures rapidly or take and the video clips you record. NOTE: The flash is changed again, or you time to capture scenes with your camera. Touch the flash setting you have captured the image using either Remove Red Eyes (see "Red eye...
... the HP Photosmart Software that optimize the camera for lighting and motion, you can improve the pictures you take images 10 seconds after you have captured the image, using Pet-Eye Fix (see "Red eye" on the front of pictures rapidly or take and the video clips you record. NOTE: The flash is changed again, or you time to capture scenes with your camera. Touch the flash setting you have captured the image using either Remove Red Eyes (see "Red eye...

User Guide
Page 20
...'s menu and change the setting. Position the camera to display the / Panorama shooting modes. You can touch the button to take the first picture in the panoramic sequence. 3. TIP: If a button for taking pictures and recording video clips Chapter 3 software" on page 8), you can also stitch panoramas automatically as you specified when you turn off the camera (see "Instant Review" on page 12), each image in the panoramic sequence is displayed, you can specify which settings reset...
...'s menu and change the setting. Position the camera to display the / Panorama shooting modes. You can touch the button to take the first picture in the panoramic sequence. 3. TIP: If a button for taking pictures and recording video clips Chapter 3 software" on page 8), you can also stitch panoramas automatically as you specified when you turn off the camera (see "Instant Review" on page 12), each image in the panoramic sequence is displayed, you can specify which settings reset...
User Guide
Page 31
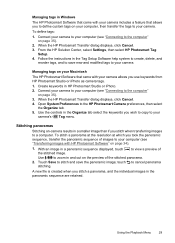
.... Using the Playback Menu 29 To define tags: 1. When the HP Photosmart Transfer dialog displays, click Cancel. 3. When the HP Photosmart Transfer dialog displays, click Cancel. 4. Touch Save to the HP Photosmart Camera preferences, then select the Organize tab. 5. touch to zoom in and out on the preview of the stitched image. From the HP Solution Center, select Settings, then select HP Photosmart Tag Setup. 4. Follow the instructions in the Tag Setup Software help system to create, delete...
.... Using the Playback Menu 29 To define tags: 1. When the HP Photosmart Transfer dialog displays, click Cancel. 3. When the HP Photosmart Transfer dialog displays, click Cancel. 4. Touch Save to the HP Photosmart Camera preferences, then select the Organize tab. 5. touch to zoom in and out on the preview of the stitched image. From the HP Solution Center, select Settings, then select HP Photosmart Tag Setup. 4. Follow the instructions in the Tag Setup Software help system to create, delete...
User Guide
Page 37
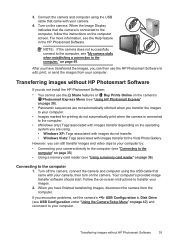
... "Using the Camera Setup Menu" on the camera. Your computer's provided image transfer software should start. Transferring images without HP Photosmart Software If you can then use the Share features or Buy Prints Online on the camera's Photosmart Express Menu (see "Using a memory card reader" on the camera. When the Image Display indicates that the camera is connected to the computer. • (Windows only) Tags associated with images transfer depending on the operating system you are not automatically stitched when you encounter problems, set the camera's USB...
... "Using the Camera Setup Menu" on the camera. Your computer's provided image transfer software should start. Transferring images without HP Photosmart Software If you can then use the Share features or Buy Prints Online on the camera's Photosmart Express Menu (see "Using a memory card reader" on the camera. When the Image Display indicates that the camera is connected to the computer. • (Windows only) Tags associated with images transfer depending on the operating system you are not automatically stitched when you encounter problems, set the camera's USB...

User Guide
Page 44
...). (Language)-Sets the language. Digital Zoom-Enables or disables digital zoom. See "Aligning the Touch Screen" on page 6. 42 Using the Camera Setup Menu Touch or to display the setting you want , then touch the option to the computer" on page 43. See "Modifying Date and Time" on page 35. • Digital Camera (Default)--Recognizes the camera as a digital camera using PTP (Picture Transfer Protocol). • Disk Drive-Recognizes the camera as button presses and shutter clicks). To exit the Camera Setup Menu...
...). (Language)-Sets the language. Digital Zoom-Enables or disables digital zoom. See "Aligning the Touch Screen" on page 6. 42 Using the Camera Setup Menu Touch or to display the setting you want , then touch the option to the computer" on page 43. See "Modifying Date and Time" on page 35. • Digital Camera (Default)--Recognizes the camera as a digital camera using PTP (Picture Transfer Protocol). • Disk Drive-Recognizes the camera as button presses and shutter clicks). To exit the Camera Setup Menu...
User Guide
Page 46
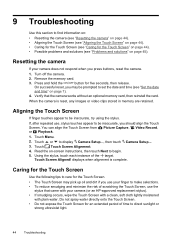
... should align the Touch Screen. Remove the memory card. 3. Press and hold the button for an extended period of time to direct sunlight or strong ultraviolet light. 44 Troubleshooting Aligning the Touch Screen If finger touches appear to be prompted to set the date and time (see "Set the date and time" on page 7). 4. You can align the Touch Screen from Picture Capture, Video Record, or Playback. 1. Touch Menu. 2. Using the stylus, touch...
... should align the Touch Screen. Remove the memory card. 3. Press and hold the button for an extended period of time to direct sunlight or strong ultraviolet light. 44 Troubleshooting Aligning the Touch Screen If finger touches appear to be prompted to set the date and time (see "Set the date and time" on page 7). 4. You can align the Touch Screen from Picture Capture, Video Record, or Playback. 1. Touch Menu. 2. Using the stylus, touch...
User Guide
Page 50
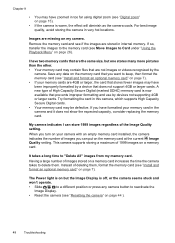
... memory card. For best image quality, avoid storing the camera in this camera, which supports High Capacity Secure Digital cards. • Your memory card may be defective. Save any camera button to the memory card (see "Install and format an optional memory card" on page 7). When you turn on your camera with an empty memory card installed, the camera indicates the number of deleting them . The Power light is now available that are missing on the memory card at the current Image Quality setting...
... memory card. For best image quality, avoid storing the camera in this camera, which supports High Capacity Secure Digital cards. • Your memory card may be defective. Save any camera button to the memory card (see "Install and format an optional memory card" on page 7). When you turn on your camera with an empty memory card installed, the camera indicates the number of deleting them . The Power light is now available that are missing on the memory card at the current Image Quality setting...
User Guide
Page 51
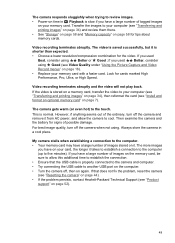
... have on page 7). For best image quality, turn off the camera and remove it from AC power, and allow this additional time to establish the connection. • Ensure that does not fix the problem, reset the camera (see "Resetting the camera" on page 44). • If the problem persists, contact Hewlett-Packard Technical Support (see "Transferring and printing images" on page 34) and review them there. • See "Storage...
... have on page 7). For best image quality, turn off the camera and remove it from AC power, and allow this additional time to establish the connection. • Ensure that does not fix the problem, reset the camera (see "Resetting the camera" on page 44). • If the problem persists, contact Hewlett-Packard Technical Support (see "Transferring and printing images" on page 34) and review them there. • See "Storage...

User Guide
Page 53
Camera error messages Should you receive one of the following error messages when using your camera, you can look up details about the message by visiting www.hp.com/support and searching on the specific code. • Lens Error (general)-R930-021 • Unsupported card-R930-200 • Unable to format card-R930-202 • Error saving image-R930-100 • Error saving video-R930-102 • Batteries cannot be charged-R930-435 Camera error messages 51
Camera error messages Should you receive one of the following error messages when using your camera, you can look up details about the message by visiting www.hp.com/support and searching on the specific code. • Lens Error (general)-R930-021 • Unsupported card-R930-200 • Unable to format card-R930-202 • Error saving image-R930-100 • Error saving video-R930-102 • Batteries cannot be charged-R930-435 Camera error messages 51
User Guide
Page 54
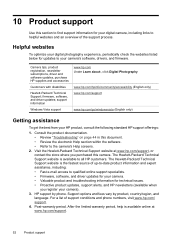
... camera's Help screens. 2. The Hewlett-Packard Technical Support website is the fastest source of up-to-date product information and expert assistance, including: • Fast e-mail access to qualified online support specialists. • Firmware, software, and driver updates for your camera. • Valuable product and troubleshooting information for updates to your camera). 3. support information Windows Vista support www.hp.com Under Learn about:, click Digital Photography www.hp.com/hpinfo/community/accessibility (English...
... camera's Help screens. 2. The Hewlett-Packard Technical Support website is the fastest source of up-to-date product information and expert assistance, including: • Fast e-mail access to qualified online support specialists. • Firmware, software, and driver updates for your camera. • Valuable product and troubleshooting information for updates to your camera). 3. support information Windows Vista support www.hp.com Under Learn about:, click Digital Photography www.hp.com/hpinfo/community/accessibility (English...
User Guide
Page 62
... D Date & Time 7, 42 Date & Time Imprint 19 deleting images 25 Design Gallery 30 digital zoom 15, 42 dimensions 58 direct print 36 Display Brightness 42 Display Timeout 42 E e-mail images 40 enhancing photos 31 exposure 14 Exposure Bracketing 20 Exposure Compensation 20, 22 Panorama mode 17 per battery 55 sending 41 shooting modes 17, 19 tagging 27 transfer to computer 34 install memory card 7 install software 8 Instant Review 12, 18, 21 internal memory 11, 58 ISO Speed 20, 22 K keyboard 28 F F-number 57 flash settings 16 working...
... D Date & Time 7, 42 Date & Time Imprint 19 deleting images 25 Design Gallery 30 digital zoom 15, 42 dimensions 58 direct print 36 Display Brightness 42 Display Timeout 42 E e-mail images 40 enhancing photos 31 exposure 14 Exposure Bracketing 20 Exposure Compensation 20, 22 Panorama mode 17 per battery 55 sending 41 shooting modes 17, 19 tagging 27 transfer to computer 34 install memory card 7 install software 8 Instant Review 12, 18, 21 internal memory 11, 58 ISO Speed 20, 22 K keyboard 28 F F-number 57 flash settings 16 working...

User Guide
Page 63
... online 39 problems and solutions 45 product support 52 R record video clips 12 red-eye removal 16, 30 Region 6 remaining pictures count 11 Remembered Settings 42 removing red eyes 30 reset camera 44 resolution 57 reviewing images 24 reviewing videos 25 rotating images 31 S safety precautions for batteries 54, 56 selecting images for destinations 40, 41 selecting images for printing 39 Self-Timer light 5 setting 19, 21 sending individual images 40, 41 set date and time 7 setting up destinations 40 share pictures 38 shooting mode 17, 19 Shutter button...
... online 39 problems and solutions 45 product support 52 R record video clips 12 red-eye removal 16, 30 Region 6 remaining pictures count 11 Remembered Settings 42 removing red eyes 30 reset camera 44 resolution 57 reviewing images 24 reviewing videos 25 rotating images 31 S safety precautions for batteries 54, 56 selecting images for destinations 40, 41 selecting images for printing 39 Self-Timer light 5 setting 19, 21 sending individual images 40, 41 set date and time 7 setting up destinations 40 share pictures 38 shooting mode 17, 19 Shutter button...
Quick Start Guide
Page 18
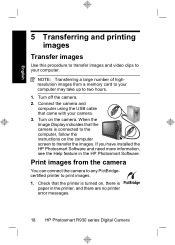
... hours. 1. When the Image Display indicates that the camera is connected to the computer, follow the instructions on the computer screen to your camera. 3. If you have installed the HP Photosmart Software and need more information, see the Help feature in the printer, and there are no printer error messages. 18 HP Photosmart R930 series Digital Camera Connect the camera and computer using the USB cable that the printer is paper in the HP Photosmart Software. Turn off the camera. 2. Check that came...
... hours. 1. When the Image Display indicates that the camera is connected to the computer, follow the instructions on the computer screen to your camera. 3. If you have installed the HP Photosmart Software and need more information, see the Help feature in the printer, and there are no printer error messages. 18 HP Photosmart R930 series Digital Camera Connect the camera and computer using the USB cable that the printer is paper in the HP Photosmart Software. Turn off the camera. 2. Check that came...


