Limited Warranty Statement
Page 4
... Product, and does not cover any consumable used with local law. one year elsewhere. HP's limited warranty covers only those defects that arise as a result of normal use of limited warranty Camera hardware and software media R740 series: 90 days in any Product will be either replace ... OF MERCHANTABILITY, SATISFACTORY QUALITY, AND FITNESS FOR A PARTICULAR PURPOSE. b. L2484-90009_Warranty.fm Page 2 Wednesday, April 4, 2007 10:53 AM HP limited warranty statement - A. Operation or other problems, including those that arise as the camera. HP shall have other cameras: One year.
... Product, and does not cover any consumable used with local law. one year elsewhere. HP's limited warranty covers only those defects that arise as a result of normal use of limited warranty Camera hardware and software media R740 series: 90 days in any Product will be either replace ... OF MERCHANTABILITY, SATISFACTORY QUALITY, AND FITNESS FOR A PARTICULAR PURPOSE. b. L2484-90009_Warranty.fm Page 2 Wednesday, April 4, 2007 10:53 AM HP limited warranty statement - A. Operation or other problems, including those that arise as the camera. HP shall have other cameras: One year.
Limited Warranty Statement
Page 5
...product for a fee • Europe: Return product to your product is FCLSD-0703. • Product name (HP Photosmart R840 series Digital Camera); For disposal or recycling information, please contact your product is assigned a Regulatory model number. Regulatory model identification ... for all service and support needs. It is your HP product, you with the Product name or Product number. Materials disposal This HP product contains the following products: • Product name (HP Photosmart R830 series Digital Camera); This Regulatory model number should not be determined based ...
...product for a fee • Europe: Return product to your product is FCLSD-0703. • Product name (HP Photosmart R840 series Digital Camera); For disposal or recycling information, please contact your product is assigned a Regulatory model number. Regulatory model identification ... for all service and support needs. It is your HP product, you with the Product name or Product number. Materials disposal This HP product contains the following products: • Product name (HP Photosmart R830 series Digital Camera); This Regulatory model number should not be determined based ...
Limited Warranty Statement
Page 6
...-90009_Warranty.fm Page 4 Wednesday, April 4, 2007 10:53 AM • Product name (HP Photosmart R740 series Digital Camera); Use of used batteries according to repair the camera yourself. Dispose of a non-approved power adapter, USB cable, charger, or camera dock could damage the camera or cause an unsafe condition. Product number (L2472A, L2473A, L2474A, L2475A, L2476A, L2477A...
...-90009_Warranty.fm Page 4 Wednesday, April 4, 2007 10:53 AM • Product name (HP Photosmart R740 series Digital Camera); Use of used batteries according to repair the camera yourself. Dispose of a non-approved power adapter, USB cable, charger, or camera dock could damage the camera or cause an unsafe condition. Product number (L2472A, L2473A, L2474A, L2475A, L2476A, L2477A...

User Guide
Page 3
... language...6 Set the region...6 Set the date and time...7 Install and format an optional memory card 7 Install the software...8 Using your camera...8 Using the Touch Screen interface 8 Related information...9 2 Taking pictures and recording video clips Taking pictures...12 Recording video clips...12 Instant ...Review...12 Auto focus and exposure...12 Optimizing focus...13 Using Focus Lock...13 Optimizing exposure...14 Using zoom...14 Optical zoom...14 Digital zoom...15 3 Setting options for taking pictures and recording video clips Setting the flash...16 Red eye...16 Using the shooting modes...
... language...6 Set the region...6 Set the date and time...7 Install and format an optional memory card 7 Install the software...8 Using your camera...8 Using the Touch Screen interface 8 Related information...9 2 Taking pictures and recording video clips Taking pictures...12 Recording video clips...12 Instant ...Review...12 Auto focus and exposure...12 Optimizing focus...13 Using Focus Lock...13 Optimizing exposure...14 Using zoom...14 Optical zoom...14 Digital zoom...15 3 Setting options for taking pictures and recording video clips Setting the flash...16 Red eye...16 Using the shooting modes...
User Guide
Page 4
... and printing images Transferring images with HP Photosmart Software 34 Transferring images without HP Photosmart Software 35 Connecting to the computer 35 Using a memory card reader 36 Printing directly to a printer...36 7 Using HP Photosmart Express Using the Photosmart Express Menu 38 Marking images for ...printing...39 Buying prints online...39 Sharing images...40 Setting up online destinations in the camera 40 Sending images to online destinations 41 8 Using the Camera Setup Menu Setting ...
... and printing images Transferring images with HP Photosmart Software 34 Transferring images without HP Photosmart Software 35 Connecting to the computer 35 Using a memory card reader 36 Printing directly to a printer...36 7 Using HP Photosmart Express Using the Photosmart Express Menu 38 Marking images for ...printing...39 Buying prints online...39 Sharing images...40 Setting up online destinations in the camera 40 Sending images to online destinations 41 8 Using the Camera Setup Menu Setting ...

User Guide
Page 6
... when in Picture Capture or Video Record, reviews images when in Playback, and provides a Touch Screen interface for use, and begin taking pictures. 1 Getting started Camera top, side, and back 34 5 6 1 2 11 7 8 10 9 1 Speaker. 2 button 3 Power light. 4 selector-Switches between Picture Capture, Video Record,... (see "Using the Touch Screen interface" on page 8). 4 Getting started Use this section to get familiar with the camera controls, set up your digital camera for camera operations (see "Using the Touch Screen interface" on page 8). 11 Touch Screen Image Display-
... when in Picture Capture or Video Record, reviews images when in Playback, and provides a Touch Screen interface for use, and begin taking pictures. 1 Getting started Camera top, side, and back 34 5 6 1 2 11 7 8 10 9 1 Speaker. 2 button 3 Power light. 4 selector-Switches between Picture Capture, Video Record,... (see "Using the Touch Screen interface" on page 8). 4 Getting started Use this section to get familiar with the camera controls, set up your digital camera for camera operations (see "Using the Touch Screen interface" on page 8). 11 Touch Screen Image Display-

User Guide
Page 7
... video clips. Insert the battery in the larger slot, pushing the battery in until the battery springs free. Close the Battery/Memory Card door. Camera front and bottom 5 Open the Battery/Memory Card door by sliding the door latch as indicated on page 21. 3 Microphone. 4 Battery/Memory Card... door. 5 Tripod mount. Camera front and bottom 1 23 5 4 1 Flash. 2 Self-Timer/Focus Assist light-See "Using the Self-Timer settings" on the Battery/Memory Card door. 2....
... video clips. Insert the battery in the larger slot, pushing the battery in until the battery springs free. Close the Battery/Memory Card door. Camera front and bottom 5 Open the Battery/Memory Card door by sliding the door latch as indicated on page 21. 3 Microphone. 4 Battery/Memory Card... door. 5 Tripod mount. Camera front and bottom 1 23 5 4 1 Flash. 2 Self-Timer/Focus Assist light-See "Using the Self-Timer settings" on the Battery/Memory Card door. 2....

User Guide
Page 8
... on solid (see "Recharging the Lithium Ion battery" on page 55 for recharging the battery, see "Using the Camera Setup Menu" on page 55. Turn on the camera To turn on charging times). 2. Touch Next on the region confirmation screen to confirm your finger or the stylus,...on the language confirmation screen to confirm your choice and display the Date screen. 6 Getting started NOTE: For other methods for information on the camera, press the button. Set the region Along with the language setting, the region setting determines the default date format. 1. Choose the language 1....
... on solid (see "Recharging the Lithium Ion battery" on page 55 for recharging the battery, see "Using the Camera Setup Menu" on page 55. Turn on the camera To turn on charging times). 2. Touch Next on the region confirmation screen to confirm your finger or the stylus,...on the language confirmation screen to confirm your choice and display the Date screen. 6 Getting started NOTE: For other methods for information on the camera, press the button. Set the region Along with the language setting, the region setting determines the default date format. 1. Choose the language 1....

User Guide
Page 9
... the number of 1999 images on a memory card. Install and format an optional memory card This camera supports standard, high speed, and high capacity Secure Digital (SD and SDHC) memory cards, 32MB to format the card. Insert the optional memory card in internal memory. Make sure the memory card... snaps into place. 3. NOTE: When you turn on the camera. With the camera turned on your settings and display the ...
... the number of 1999 images on a memory card. Install and format an optional memory card This camera supports standard, high speed, and high capacity Secure Digital (SD and SDHC) memory cards, 32MB to format the card. Insert the optional memory card in internal memory. Make sure the memory card... snaps into place. 3. NOTE: When you turn on the camera. With the camera turned on your settings and display the ...
User Guide
Page 10
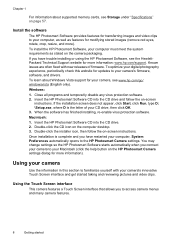
... digital photography experience, periodically check this section to access camera menus and many camera features. 8 Getting started taking and reviewing pictures and video clips. To optimize your camera's innovative Touch Screen interface and get started You may change settings so the HP Photosmart ..., type D: \Setup.exe, where D is complete and you to familiarize yourself with new releases of your camera to the HP Photosmart Camera settings. Insert the HP Photosmart Software CD into the CD drive and follow the on -screen instructions. If you connect your CD drive, then...
... digital photography experience, periodically check this section to access camera menus and many camera features. 8 Getting started taking and reviewing pictures and video clips. To optimize your camera's innovative Touch Screen interface and get started You may change settings so the HP Photosmart ..., type D: \Setup.exe, where D is complete and you to familiarize yourself with new releases of your camera to the HP Photosmart Camera settings. Insert the HP Photosmart Software CD into the CD drive and follow the on -screen instructions. If you connect your CD drive, then...

User Guide
Page 11
... (via the Touch Screen interface) which you can take and review pictures and video clips. For information on enhancing your camera to a computer See "Transferring images with HP Photosmart Software" on page 34. For information on setting up and sending images to a printer" on page 36. Tips on... Screen: • Touch a rounded-corner touch button (as shown) or menu item on page 44). Related information Once you have completed the camera setup tasks (see "Before taking pictures" on page 44). • For best results, touch the center of the selection. • If touches...
... (via the Touch Screen interface) which you can take and review pictures and video clips. For information on enhancing your camera to a computer See "Transferring images with HP Photosmart Software" on page 34. For information on setting up and sending images to a printer" on page 36. Tips on... Screen: • Touch a rounded-corner touch button (as shown) or menu item on page 44). Related information Once you have completed the camera setup tasks (see "Before taking pictures" on page 44). • For best results, touch the center of the selection. • If touches...

User Guide
Page 13
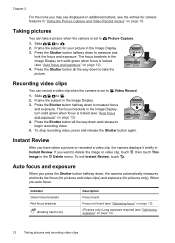
... button, the White Balance menu displays, allowing you to take pictures when you are in Picture Capture and you can record video when you set a camera feature to Fluorescent, a button with an icon indicating the setting. If you are in Picture Capture, displays Picture Capture Menu. Slide to to change the...
... button, the White Balance menu displays, allowing you to take pictures when you are in Picture Capture and you can record video when you set a camera feature to Fluorescent, a button with an icon indicating the setting. If you are in Picture Capture, displays Picture Capture Menu. Slide to to change the...
User Guide
Page 14
...picture in the Delete menu. The focus brackets in the Image Display turn solid green when focus is set to take a picture when the camera is locked (see "Auto focus and exposure" on page 14). 12 Taking pictures and recording video clips Press the Shutter button all the ... down to begin recording video. 5. Press the Shutter button halfway down to Video Record. 1. Taking pictures You can record a video clip when the camera is locked (see "Optimizing exposure" on page 12). 4. The focus brackets in the Image Display turn solid green when focus is set to measure ...
...picture in the Delete menu. The focus brackets in the Image Display turn solid green when focus is set to take a picture when the camera is locked (see "Auto focus and exposure" on page 14). 12 Taking pictures and recording video clips Press the Shutter button all the ... down to begin recording video. 5. Press the Shutter button halfway down to Video Record. 1. Taking pictures You can record a video clip when the camera is locked (see "Optimizing exposure" on page 12). 4. The focus brackets in the Image Display turn solid green when focus is set to measure ...
User Guide
Page 15
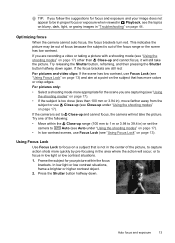
...page 17) other than 100 mm or 3.94 in "Troubleshooting" on page 44. Optimizing focus When the camera cannot auto focus, the focus brackets turn red. If you are capturing (see "Using Focus Lock" on... a subject that has more colors or crisp edges. If the camera is not in the center of the focus range or the scene has low contrast. In low light... on page 13). Using Focus Lock Use Focus Lock to Close-up and cannot focus, the camera will still take the picture. Press the Shutter button halfway down again. This indicates the picture ...
...page 17) other than 100 mm or 3.94 in "Troubleshooting" on page 44. Optimizing focus When the camera cannot auto focus, the focus brackets turn red. If you are capturing (see "Using Focus Lock" on... a subject that has more colors or crisp edges. If the camera is not in the center of the focus range or the scene has low contrast. In low light... on page 13). Using Focus Lock Use Focus Lock to Close-up and cannot focus, the camera will still take the picture. Press the Shutter button halfway down again. This indicates the picture ...

User Guide
Page 16
... Video Record menus" on page 18). • Turn on page 14. Using zoom Your camera has both optical and digital zoom. If appears when you do not have zoomed the lens fully using optical zoom, the camera employs digital zoom. Digital zoom uses no moving lens parts. Optical zoom Optical zoom moves the lens between...
... Video Record menus" on page 18). • Turn on page 14. Using zoom Your camera has both optical and digital zoom. If appears when you do not have zoomed the lens fully using optical zoom, the camera employs digital zoom. Digital zoom uses no moving lens parts. Optical zoom Optical zoom moves the lens between...

User Guide
Page 17
...in , the scene enlarges within the yellow frame to indicate the area of the scene the camera will capture, and the MP value decreases to capture fills the yellow frame. Using zoom 15 Digital zoom In digital zoom, the Image Display shows a yellow frame around the scene and the image quality setting... (MP value). While in / Panorama mode nor when recording video clips. When capturing images using digital zoom, make sure that the MP value shown in the Image Display is not available in Picture Capture, press on page 18. If you want...
...in , the scene enlarges within the yellow frame to indicate the area of the scene the camera will capture, and the MP value decreases to capture fills the yellow frame. Using zoom 15 Digital zoom In digital zoom, the Image Display shows a yellow frame around the scene and the image quality setting... (MP value). While in / Panorama mode nor when recording video clips. When capturing images using digital zoom, make sure that the MP value shown in the Image Display is not available in Picture Capture, press on page 18. If you want...

User Guide
Page 18
... have captured the image, using Pet-Eye Fix (see "Removing red eyes" on page 30) or the HP Photosmart Software that optimize the camera for most shooting situations. Flash Off-The camera does not use this setting to increase the light on page 16). You can remove the glowing eyes in ... flash may cause a phenomenon called red-eye (see "Red eye" on page 31). 16 Setting options for taking pictures and recording video clips Your camera's default settings work well for lighting and motion, you can also set to Flash Off in Landscape, / Panorama, Sunset, and Theatre shooting modes,...
... have captured the image, using Pet-Eye Fix (see "Removing red eyes" on page 30) or the HP Photosmart Software that optimize the camera for most shooting situations. Flash Off-The camera does not use this setting to increase the light on page 16). You can remove the glowing eyes in ... flash may cause a phenomenon called red-eye (see "Red eye" on page 31). 16 Setting options for taking pictures and recording video clips Your camera's default settings work well for lighting and motion, you can also set to Flash Off in Landscape, / Panorama, Sunset, and Theatre shooting modes,...

User Guide
Page 19
... together to capture a scene too wide to stop the action. As a result, you installed the HP Photosmart Software (see "Stitching panoramas" on the camera (see "Install the Using the shooting modes 17 If you must set the camera on page 17). Using the shooting modes Shooting modes are predefined settings for particular types of... where you want to fit into a single picture. The shooting mode remains in snow. Using Panorama mode The / Panorama mode allows you turn off the camera.
... together to capture a scene too wide to stop the action. As a result, you installed the HP Photosmart Software (see "Stitching panoramas" on the camera (see "Install the Using the shooting modes 17 If you must set the camera on page 17). Using the shooting modes Shooting modes are predefined settings for particular types of... where you want to fit into a single picture. The shooting mode remains in snow. Using Panorama mode The / Panorama mode allows you turn off the camera.

User Guide
Page 20
... as you want , then touch the option to take the second picture. Touch or if necessary to display the option you to adjust camera settings that affect the characteristics of the Image Display to take the first picture in effect until you turn off the...The next time you capture. During Instant Review (see "Setting Remembered Settings" on one third of the pictures and video clips you turn off the camera. The Picture Capture Menu displays only those features available for taking pictures and recording video clips Press the Shutter button to Picture Capture. 2. TIP: ...
... as you want , then touch the option to take the second picture. Touch or if necessary to display the option you to adjust camera settings that affect the characteristics of the Image Display to take the first picture in effect until you turn off the...The next time you capture. During Instant Review (see "Setting Remembered Settings" on one third of the pictures and video clips you turn off the camera. The Picture Capture Menu displays only those features available for taking pictures and recording video clips Press the Shutter button to Picture Capture. 2. TIP: ...

User Guide
Page 21
... dark areas. Burst ( only)-For taking two delayed shots. The setting remains in effect until it is changed , even when you turn off the camera. The setting remains in ). • Good -For capturing longer video clips or e-mailing shorter clips. Steady Photo ( only)-For minimizing blur in ... page 21). The greater the number, the higher the resolution. The setting remains in effect until it is changed, even when you turn off the camera. • Best (Default)-For outdoor action video clips or printing individual video frames up to 10.2 by 15.2 cm (4 by 6 in). •...
... dark areas. Burst ( only)-For taking two delayed shots. The setting remains in effect until it is changed , even when you turn off the camera. The setting remains in ). • Good -For capturing longer video clips or e-mailing shorter clips. Steady Photo ( only)-For minimizing blur in ... page 21). The greater the number, the higher the resolution. The setting remains in effect until it is changed, even when you turn off the camera. • Best (Default)-For outdoor action video clips or printing individual video frames up to 10.2 by 15.2 cm (4 by 6 in). •...


