Owner's Manual
Page 1
eTrex® owner's manual for use with models 10, 20, 30
eTrex® owner's manual for use with models 10, 20, 30
Owner's Manual
Page 2
...Garmin®, the Garmin logo, eTrex®, BlueChart®, and City Navigator® are trademarks of Garmin Ltd. ANT™, ANT+™, BaseCamp™, chirp™, HomePort™, and Thumb Stick™ are trademarks of Garmin. Windows® is a registered trademark of Microsoft Corporation in part, without the written consent of Garmin...® is a trademark of Garmin. © 2011 Garmin Ltd. These trademarks may not be used without obligation to www.garmin.com for current updates and supplemental information concerning the use of such changes or improvements. microSD...
...Garmin®, the Garmin logo, eTrex®, BlueChart®, and City Navigator® are trademarks of Garmin Ltd. ANT™, ANT+™, BaseCamp™, chirp™, HomePort™, and Thumb Stick™ are trademarks of Garmin. Windows® is a registered trademark of Microsoft Corporation in part, without the written consent of Garmin...® is a trademark of Garmin. © 2011 Garmin Ltd. These trademarks may not be used without obligation to www.garmin.com for current updates and supplemental information concerning the use of such changes or improvements. microSD...
Owner's Manual
Page 3
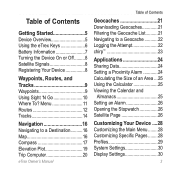
Table of an Area....25 Using the Calculator 25 Viewing the Calendar and Almanacs 25 ...Tracks 14 Navigation 16 Navigating to a Destination..........16 Map 16 Compass 17 Elevation Plot 19 Trip Computer 20 eTrex Owner's Manual Table of Contents Geocaches 21 Downloading Geocaches 21 Filtering the Geocache List..........21 Navigating to a ...Setting a Proximity Alarm 24 Calculating the Size of Contents Getting Started 5 Device Overview 5 Using the eTrex Keys 6 Battery Information 7 Turning the Device On or Off.........8 Satellite Signals 8 Registering Your Device 8 Waypoints, Routes, ...
Table of an Area....25 Using the Calculator 25 Viewing the Calendar and Almanacs 25 ...Tracks 14 Navigation 16 Navigating to a Destination..........16 Map 16 Compass 17 Elevation Plot 19 Trip Computer 20 eTrex Owner's Manual Table of Contents Geocaches 21 Downloading Geocaches 21 Filtering the Geocache List..........21 Navigating to a ...Setting a Proximity Alarm 24 Calculating the Size of Contents Getting Started 5 Device Overview 5 Using the eTrex Keys 6 Battery Information 7 Turning the Device On or Off.........8 Satellite Signals 8 Registering Your Device 8 Waypoints, Routes, ...
Owner's Manual
Page 5
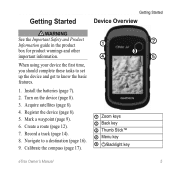
...6. Calibrate the compass (page 17). ➊ Zoom keys ➋ Back key ➌ Thumb Stick™ ➍ Menu key ➎ /Backlight key eTrex Owner's Manual 5 Install the batteries (page 7). 2. Register the device (page 8). 5. Getting Started Getting Started Device Overview ‹ warning See the Important ...Information guide in the product ➊ box for product warnings and other important information. ➍ ➋ ➌ ➎ When using your device the first time, you should complete these tasks to set up the device and get to a destination (page 16). 9....
...6. Calibrate the compass (page 17). ➊ Zoom keys ➋ Back key ➌ Thumb Stick™ ➍ Menu key ➎ /Backlight key eTrex Owner's Manual 5 Install the batteries (page 7). 2. Register the device (page 8). 5. Getting Started Getting Started Device Overview ‹ warning See the Important ...Information guide in the product ➊ box for product warnings and other important information. ➍ ➋ ➌ ➎ When using your device the first time, you should complete these tasks to set up the device and get to a destination (page 16). 9....
Owner's Manual
Page 6
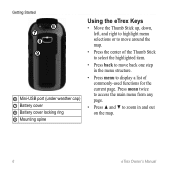
...; ➐ ➑ ➒ ➏ Mini-USB port (under weather cap) ➐ Battery cover ➑ Battery cover locking ring ➒ Mounting spine Using the eTrex Keys • Move the Thumb Stick up, down, left, and right to highlight menu selections or to move around the map. • Press the center ...to display a list of commonly-used functions for the current page. Press menu twice to access the main menu from any page. • Press ▲ and ▼ to zoom in the menu structure. • Press menu to move back one step in and out on the map. 6 eTrex Owner's Manual
...; ➐ ➑ ➒ ➏ Mini-USB port (under weather cap) ➐ Battery cover ➑ Battery cover locking ring ➒ Mounting spine Using the eTrex Keys • Move the Thumb Stick up, down, left, and right to highlight menu selections or to move around the map. • Press the center ...to display a list of commonly-used functions for the current page. Press menu twice to access the main menu from any page. • Press ▲ and ▼ to zoom in the menu structure. • Press menu to move back one step in and out on the map. 6 eTrex Owner's Manual
Owner's Manual
Page 7
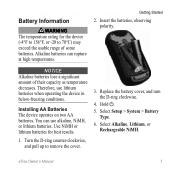
...> Battery Type. 6. Select Alkaline, Lithium, or Rechargeable NiMH. notice Alkaline batteries lose a significant amount of some batteries. Therefore, use alkaline, NiMH, or lithium batteries. Battery Information ‹ warning The temperature rating for best results. 1. You can rupture at high ... Insert the batteries, observing polarity. Getting Started 2. Use NiMH or lithium batteries for the device (-4°F to 158°F, or -20 to remove the cover. 3. eTrex Owner's Manual 7 Alkaline batteries can use lithium batteries when operating the device in below-freezing...
...> Battery Type. 6. Select Alkaline, Lithium, or Rechargeable NiMH. notice Alkaline batteries lose a significant amount of some batteries. Therefore, use alkaline, NiMH, or lithium batteries. Battery Information ‹ warning The temperature rating for best results. 1. You can rupture at high ... Insert the batteries, observing polarity. Getting Started 2. Use NiMH or lithium batteries for the device (-4°F to 158°F, or -20 to remove the cover. 3. eTrex Owner's Manual 7 Alkaline batteries can use lithium batteries when operating the device in below-freezing...

Owner's Manual
Page 10
Move to eight samples for the waypoint, waiting at least 90 minutes between samples. Using Sight 'N Go Sight 'N Go is available on the eTrex 30. Point the device at an object in the distance, lock in the direction of a location. 3. Select Waypoint .... 4. Select Sight 'N Go. 2. For best results, collect four to the location. 4. Enter the distance to the object, and select Done > Save. 10 eTrex Owner's Manual Select a waypoint. 3. When the Sample Confidence status bar reaches 100%, select Save. Select Start. 5. Waypoints, Routes, and Tracks Increasing the Accuracy...
Move to eight samples for the waypoint, waiting at least 90 minutes between samples. Using Sight 'N Go Sight 'N Go is available on the eTrex 30. Point the device at an object in the distance, lock in the direction of a location. 3. Select Waypoint .... 4. Select Sight 'N Go. 2. For best results, collect four to the location. 4. Enter the distance to the object, and select Done > Save. 10 eTrex Owner's Manual Select a waypoint. 3. When the Sample Confidence status bar reaches 100%, select Save. Select Start. 5. Waypoints, Routes, and Tracks Increasing the Accuracy...
Owner's Manual
Page 11
... 1. Select an option. 3. categories are available in all Where To? Additional Maps You can use additional maps on your Garmin dealer. Select menu > Spell Search. 4. Menu You can use the Where To? For more information, go to . Select a category. 3. eTrex Owner's Manual 11 Detailed maps may contain additional points of the name, and select...
... 1. Select an option. 3. categories are available in all Where To? Additional Maps You can use additional maps on your Garmin dealer. Select menu > Spell Search. 4. Menu You can use the Where To? For more information, go to . Select a category. 3. eTrex Owner's Manual 11 Detailed maps may contain additional points of the name, and select...
Owner's Manual
Page 12
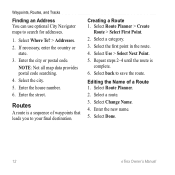
...house number. 6. Select back to search for addresses. 1. Select the city. 5. Enter the street. Select a route. 3. Select Done. 12 eTrex Owner's Manual Select Where To? > Addresses. 2. If necessary, enter the country or state. 3. NOTE: Not all map data provides postal ...code searching. 4. Select Route Planner > Create Route > Select First Point. 2. Select Use > Select Next Point. 5. Select Route Planner. 2. Enter the new name. 5. Routes A route is complete. 6. Select a category. 3. Enter the city or ...
...house number. 6. Select back to search for addresses. 1. Select the city. 5. Enter the street. Select a route. 3. Select Done. 12 eTrex Owner's Manual Select Where To? > Addresses. 2. If necessary, enter the country or state. 3. NOTE: Not all map data provides postal ...code searching. 4. Select Route Planner > Create Route > Select First Point. 2. Select Use > Select Next Point. 5. Select Route Planner. 2. Enter the new name. 5. Routes A route is complete. 6. Select a category. 3. Enter the city or ...

Owner's Manual
Page 14
eTrex Owner's Manual Waypoints, Routes, and Tracks Tracks A track is created. Select Record, Do Not Show or Record, Show On Map. Select Record Method. 4. If you move with the device turned on the map indicates your track. 3. Select Setup > Tracks > Track Log. 2. Select Record Interval. 6. NOTE: Using the Most Often interval provides the...
eTrex Owner's Manual Waypoints, Routes, and Tracks Tracks A track is created. Select Record, Do Not Show or Record, Show On Map. Select Record Method. 4. If you move with the device turned on the map indicates your track. 3. Select Setup > Tracks > Track Log. 2. Select Record Interval. 6. NOTE: Using the Most Often interval provides the...
Owner's Manual
Page 16
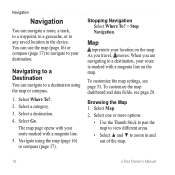
... on the map. When you travel, moves. To customize the map dashboard and data fields, see page 31. Select one or more options: • Use the Thumb Stick to pan the map to view different areas. • Select ▲ and ▼ to any saved location in and out of the... map. 16 eTrex Owner's Manual Select Where To?. 2. Stopping Navigation Select Where To? > Stop Navigation. Browsing the Map 1. You can navigate to a destination using the map (page 16) or compass (page 17).
... on the map. When you travel, moves. To customize the map dashboard and data fields, see page 31. Select one or more options: • Use the Thumb Stick to pan the map to view different areas. • Select ▲ and ▼ to any saved location in and out of the... map. 16 eTrex Owner's Manual Select Where To?. 2. Stopping Navigation Select Where To? > Stop Navigation. Browsing the Map 1. You can navigate to a destination using the map (page 16) or compass (page 17).
Owner's Manual
Page 17
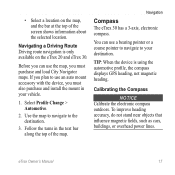
... automotive profile, the compass displays GPS heading, not magnetic heading. If you plan to use the map, you must purchase and load City Navigator maps. Navigation Compass The eTrex 30 has a 3-axis, electronic compass. You can use an auto mount accessory with the device, you must also purchase and install the mount in...
... automotive profile, the compass displays GPS heading, not magnetic heading. If you plan to use the map, you must purchase and load City Navigator maps. Navigation Compass The eTrex 30 has a 3-axis, electronic compass. You can use an auto mount accessory with the device, you must also purchase and install the mount in...
Owner's Manual
Page 18
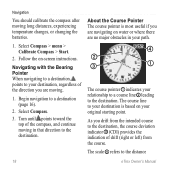
Navigating with the Bearing Pointer When navigating to a destination, points to your destination is most useful if you are navigating on -screen instructions. Navigation You should calibrate the compass after moving . 1. The course line to your ... point. Follow the on water or where there are moving long distances, experiencing temperature changes, or changing the batteries. 1. Begin navigation to the distance 18 eTrex Owner's Manual The scale ➍ refers to a destination (page 16). 2. Select Compass > menu > Calibrate Compass > Start. 2. Select Compass. 3. Turn ...
Navigating with the Bearing Pointer When navigating to a destination, points to your destination is most useful if you are navigating on -screen instructions. Navigation You should calibrate the compass after moving . 1. The course line to your ... point. Follow the on water or where there are moving long distances, experiencing temperature changes, or changing the batteries. 1. Begin navigation to the distance 18 eTrex Owner's Manual The scale ➍ refers to a destination (page 16). 2. Select Compass > menu > Calibrate Compass > Start. 2. Select Compass. 3. Turn ...
Owner's Manual
Page 19
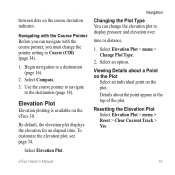
Use the course pointer to navigate to a destination (page 16). 2. Navigation Changing the Plot Type You can navigate with the Course Pointer Before you must change the elevation plot to Course (CDI) (page 34). 1. eTrex Owner's Manual 19 Details about a Point on the Plot Select an individual point on the course deviation indicator... course pointer, you can change the pointer setting to display pressure and elevation over time or distance. 1. Elevation Plot Elevation plotting is available on the eTrex 30.
Use the course pointer to navigate to a destination (page 16). 2. Navigation Changing the Plot Type You can navigate with the Course Pointer Before you must change the elevation plot to Course (CDI) (page 34). 1. eTrex Owner's Manual 19 Details about a Point on the Plot Select an individual point on the course deviation indicator... course pointer, you can change the pointer setting to display pressure and elevation over time or distance. 1. Elevation Plot Elevation plotting is available on the eTrex 30.
Owner's Manual
Page 21
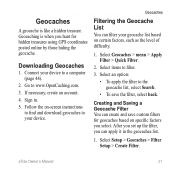
... can filter your device to the geocache list, select Search. • To save custom filters for hidden treasures using GPS coordinates posted online by those hiding the geocache. Select items to www.OpenCaching.com. 3. eTrex Owner's Manual 21 Select an option: • To apply the filter to a computer (page 44). 2. Geocaches Filtering...
... can filter your device to the geocache list, select Search. • To save custom filters for hidden treasures using GPS coordinates posted online by those hiding the geocache. Select items to www.OpenCaching.com. 3. eTrex Owner's Manual 21 Select an option: • To apply the filter to a computer (page 44). 2. Geocaches Filtering...
Owner's Manual
Page 22
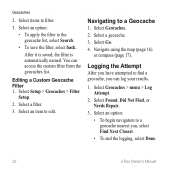
...Select an option: • To begin navigation to find a geocache, you , select Find Next Closest. • To end the logging, select Done. 22 eTrex Owner's Manual Select a geocache. 3. Select items to a Geocache 1. Select Setup > Geocaches > Filter Setup. 2. Geocaches 2. Select Geocaches. 2. Select Found, ...the filter, select back. Select an option: • To apply the filter to edit. Select Geocaches > menu > Log Attempt. 2. Navigate using the map (page 16) or compass (page 17). Select a filter. 3. After it is saved, the filter is automatically named. You can ...
...Select an option: • To begin navigation to find a geocache, you , select Find Next Closest. • To end the logging, select Done. 22 eTrex Owner's Manual Select a geocache. 3. Select items to a Geocache 1. Select Setup > Geocaches > Filter Setup. 2. Geocaches 2. Select Geocaches. 2. Select Found, ...the filter, select back. Select an option: • To apply the filter to edit. Select Geocaches > menu > Log Attempt. 2. Navigate using the map (page 16) or compass (page 17). Select a filter. 3. After it is saved, the filter is automatically named. You can ...
Owner's Manual
Page 24
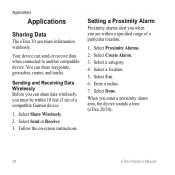
... alert you when you must be within a specified range of a compatible Garmin device. 1. When you enter a proximity alarm area, the device sounds a tone (eTrex 20/30). 24 eTrex Owner's Manual Your device can share waypoints, geocaches, routes, and tracks.... a category. 4. Select Use. 6. Select Share Wirelessly. 2. Select Create Alarm. 3. Select Done. Select a location. 5. Enter a radius. 7. Follow the on-screen instructions. Select Proximity Alarms. 2. Applications Applications Sharing Data The eTrex 30 can share data wirelessly, you are within 10 feet (3 m) of ...
... alert you when you must be within a specified range of a compatible Garmin device. 1. When you enter a proximity alarm area, the device sounds a tone (eTrex 20/30). 24 eTrex Owner's Manual Your device can share waypoints, geocaches, routes, and tracks.... a category. 4. Select Use. 6. Select Share Wirelessly. 2. Select Create Alarm. 3. Select Done. Select a location. 5. Enter a radius. 7. Follow the on-screen instructions. Select Proximity Alarms. 2. Applications Applications Sharing Data The eTrex 30 can share data wirelessly, you are within 10 feet (3 m) of ...

Owner's Manual
Page 25
... and moon, and the best times for hunting and fishing, select, Hunt and Fish. 2. eTrex Owner's Manual 25 Walk around the perimeter of an Area 1. Complete an action: • Use the standard calculator. • Select menu > Scientific to use the scientific calculator functions. • Select menu > Degrees to view a different month. 3. Select Calculate...
... and moon, and the best times for hunting and fishing, select, Hunt and Fish. 2. eTrex Owner's Manual 25 Walk around the perimeter of an Area 1. Complete an action: • Use the standard calculator. • Select menu > Scientific to use the scientific calculator functions. • Select menu > Degrees to view a different month. 3. Select Calculate...
Owner's Manual
Page 26
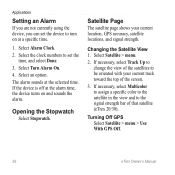
... satellites to the signal strength bar of the screen. 3. Changing the Satellite View 1. Applications Setting an Alarm If you are not currently using the device, you can set the time, and select Done. 3. Select an option. Satellite Page The satellite page shows your current track... toward the top of that satellite (eTrex 20/30). Turning Off GPS Select Satellite > menu > Use With GPS Off. 26 eTrex Owner's Manual If necessary, select Multicolor to assign a specific color to the satellite in the view and...
... satellites to the signal strength bar of the screen. 3. Changing the Satellite View 1. Applications Setting an Alarm If you are not currently using the device, you can set the time, and select Done. 3. Select an option. Satellite Page The satellite page shows your current track... toward the top of that satellite (eTrex 20/30). Turning Off GPS Select Satellite > menu > Use With GPS Off. 26 eTrex Owner's Manual If necessary, select Multicolor to assign a specific color to the satellite in the view and...

Owner's Manual
Page 27
Select Satellite > menu > Use With GPS Off. 2. Select a location. 4. Applications eTrex Owner's Manual 27 Simulating a Location Before you can simulate a location, you must turn off GPS (page 26). 1. Select Use. Select menu > Set Location On Map. 3.
Select Satellite > menu > Use With GPS Off. 2. Select a location. 4. Applications eTrex Owner's Manual 27 Simulating a Location Before you can simulate a location, you must turn off GPS (page 26). 1. Select Use. Select menu > Set Location On Map. 3.


