Owner's Manual
Page 17
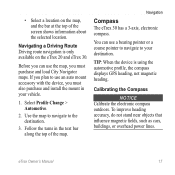
... has a 3-axis, electronic compass. eTrex Owner's Manual 17 Select Profile Change > Automotive. 2. Use the map to navigate to your vehicle. 1. Follow the turns in your destination. If you plan to use a bearing pointer or a course pointer to navigate to the destination. 3. TIP: When the device is only available ...on the map, and the bar at the top of the map. You can use the map, you must purchase and load City Navigator maps. • Select a location on the eTrex 20 and eTrex 30. Before you can ...
... has a 3-axis, electronic compass. eTrex Owner's Manual 17 Select Profile Change > Automotive. 2. Use the map to navigate to your vehicle. 1. Follow the turns in your destination. If you plan to use a bearing pointer or a course pointer to navigate to the destination. 3. TIP: When the device is only available ...on the map, and the bar at the top of the map. You can use the map, you must purchase and load City Navigator maps. • Select a location on the eTrex 20 and eTrex 30. Before you can ...
Owner's Manual
Page 45
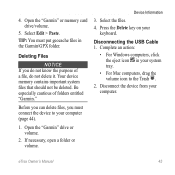
Open the "Garmin" drive or volume. 2. If necessary, open a folder or volume. Press the Delete key on your computer. TIP: You must connect the device to your system tray. • For Mac computers, drag the volume icon to the Trash . 2. Select the files. 4. ... files, you do not delete it. Open the "Garmin" or memory card drive/volume. 5. Select Edit > Paste. Your device memory contains important system files that should not be deleted. Device Information 3. Complete an action: • For Windows computers, click the eject icon in the Garmin\GPX folder. eTrex Owner's Manual 45
Open the "Garmin" drive or volume. 2. If necessary, open a folder or volume. Press the Delete key on your computer. TIP: You must connect the device to your system tray. • For Mac computers, drag the volume icon to the Trash . 2. Select the files. 4. ... files, you do not delete it. Open the "Garmin" or memory card drive/volume. 5. Select Edit > Paste. Your device memory contains important system files that should not be deleted. Device Information 3. Complete an action: • For Windows computers, click the eject icon in the Garmin\GPX folder. eTrex Owner's Manual 45
Owner's Manual
Page 47
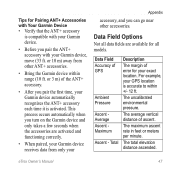
Tips for all models. Total Description The margin of the ANT+ accessory. • After you turn on the Garmin device and only takes a few seconds when the accessories are available for Pairing ANT+ Accessories with your Garmin device automatically recognizes the ANT+ accessory ...8226; When paired, your exact location. or 3 m) of error for your Garmin device receives data from other accessories. The total elevation distance ascended. eTrex Owner's Manual 47 or 10 m) away from only your Garmin device. • Before you can go near other ANT+ accessories. •...
Tips for all models. Total Description The margin of the ANT+ accessory. • After you turn on the Garmin device and only takes a few seconds when the accessories are available for Pairing ANT+ Accessories with your Garmin device automatically recognizes the ANT+ accessory ...8226; When paired, your exact location. or 3 m) of error for your Garmin device receives data from other accessories. The total elevation distance ascended. eTrex Owner's Manual 47 or 10 m) away from only your Garmin device. • Before you can go near other ANT+ accessories. •...
Quick Start Manual
Page 8
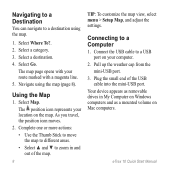
...computer. 2. Connect the USB cable to a USB port on your location on Mac computers. Pull up the weather cap from the mini-USB port. 3. eTrex 10 Quick Start Manual Select a destination. 4. Using the Map 1. Select Go. Complete one or more actions: • Use the Thumb Stick to move the... USB cable into the mini-USB port. Select a category. 3. As you travel, the position icon moves. 2. Plug the small end of the map. 8 Tip: To customize the map view, select menu > Setup Map, and adjust the settings. Navigate using the map. 1. Select Where To?. 2. Navigating to a Destination...
...computer. 2. Connect the USB cable to a USB port on your location on Mac computers. Pull up the weather cap from the mini-USB port. 3. eTrex 10 Quick Start Manual Select a destination. 4. Using the Map 1. Select Go. Complete one or more actions: • Use the Thumb Stick to move the... USB cable into the mini-USB port. Select a category. 3. As you travel, the position icon moves. 2. Plug the small end of the map. 8 Tip: To customize the map view, select menu > Setup Map, and adjust the settings. Navigate using the map. 1. Select Where To?. 2. Navigating to a Destination...