System Information Guide
Page 27
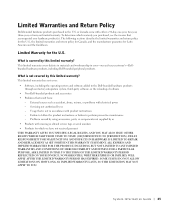
... accompanied your -our end-user customer's-Dellbranded hardware products, including Dell-branded peripheral products. Problems caused by using accessories, parts, or components not supplied by us • Products with electrical power - This limited warranty covers defects in materials and workmanship in the U.S. DELL'S RESPONSIBILITY FOR MALFUNCITONS AND DEFECTS IN HARDWARE IS LIMITED TO REPAIR AND REPLACEMENT AS SET FORTH IN THIS WARRANTY STATEMENT...
... accompanied your -our end-user customer's-Dellbranded hardware products, including Dell-branded peripheral products. Problems caused by using accessories, parts, or components not supplied by us • Products with electrical power - This limited warranty covers defects in materials and workmanship in the U.S. DELL'S RESPONSIBILITY FOR MALFUNCITONS AND DEFECTS IN HARDWARE IS LIMITED TO REPAIR AND REPLACEMENT AS SET FORTH IN THIS WARRANTY STATEMENT...
System Information Guide
Page 36
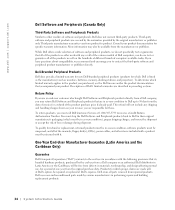
... repaired or replaced at Dell's expense. More information may return Dell Software and Peripherals products that its branded hardware products, purchased by the original manufacturer or publisher only. If you have questions about compatibility, we test or guarantee all parts removed from product to receive a Credit Return Authorization Number. To qualify for specific warranty information. While Dell offers a wide selection of software...
... repaired or replaced at Dell's expense. More information may return Dell Software and Peripherals products that its branded hardware products, purchased by the original manufacturer or publisher only. If you have questions about compatibility, we test or guarantee all parts removed from product to receive a Credit Return Authorization Number. To qualify for specific warranty information. While Dell offers a wide selection of software...
System Information Guide
Page 38
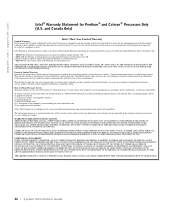
... RECOVERING, REPROGRAMMING, OR REPRODUCING ANY PROGRAM OR DATA STORED IN OR USED WITH A SYSTEM CONTAINING YOUR PENTIUM PROCESSOR. To request warranty service from you should call Intel at its option, will be free from defects in accordance with product instructions, misuse, neglect, alteration, repair, improper installation, or improper testing. OR • REPLACE the Pentium or Celeron processor with electrical power...
... RECOVERING, REPROGRAMMING, OR REPRODUCING ANY PROGRAM OR DATA STORED IN OR USED WITH A SYSTEM CONTAINING YOUR PENTIUM PROCESSOR. To request warranty service from you should call Intel at its option, will be free from defects in accordance with product instructions, misuse, neglect, alteration, repair, improper installation, or improper testing. OR • REPLACE the Pentium or Celeron processor with electrical power...
System Information Guide
Page 71
... that its option, will: • REPAIR the Pentium or Celeron processor by means of hardware and/or software; OR • REPLACE the Pentium or Celeron processor with product instructions, misuse, neglect, alteration, repair, improper installation, or improper testing. To request warranty service from you depending on the nature of the problem.] The replacement processor is warranted under this Intel warranty card; (4) a description...
... that its option, will: • REPAIR the Pentium or Celeron processor by means of hardware and/or software; OR • REPLACE the Pentium or Celeron processor with product instructions, misuse, neglect, alteration, repair, improper installation, or improper testing. To request warranty service from you depending on the nature of the problem.] The replacement processor is warranted under this Intel warranty card; (4) a description...
System Information Guide
Page 133
... in accordance with its option, will be free from defects in accordance with product instructions, misuse, neglect, alteration, repair, improper installation, or improper testing. The limited warranty does not cover any costs relating to removal or replacement of Limited Warranty Intel does not warrant that are available upon request. THE LIMITED WARRANTY GIVES YOU SPECIFIC LEGAL RIGHTS, AND YOU...
... in accordance with its option, will be free from defects in accordance with product instructions, misuse, neglect, alteration, repair, improper installation, or improper testing. The limited warranty does not cover any costs relating to removal or replacement of Limited Warranty Intel does not warrant that are available upon request. THE LIMITED WARRANTY GIVES YOU SPECIFIC LEGAL RIGHTS, AND YOU...
Service Manual
Page 13
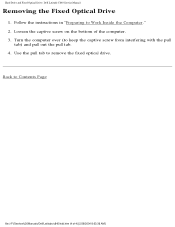
Loosen the captive screw on the bottom of 4) [2/28/2004 8:03:36 AM] Back to keep the captive screw from interfering with the pull tab) and pull out the pull tab. 4. Hard Drive and Fixed Optical Drive: Dell Latitude C840 Service Manual Removing the Fixed Optical Drive 1. Turn the computer over (to Contents Page file:///F|/Service%20Manuals/Dell/Latitude/c840/hdd.htm (4 of the computer. 3. Use the pull tab to Work Inside the Computer." 2. Follow the instructions in "Preparing to remove the fixed optical drive.
Loosen the captive screw on the bottom of 4) [2/28/2004 8:03:36 AM] Back to keep the captive screw from interfering with the pull tab) and pull out the pull tab. 4. Hard Drive and Fixed Optical Drive: Dell Latitude C840 Service Manual Removing the Fixed Optical Drive 1. Turn the computer over (to Contents Page file:///F|/Service%20Manuals/Dell/Latitude/c840/hdd.htm (4 of the computer. 3. Use the pull tab to Work Inside the Computer." 2. Follow the instructions in "Preparing to remove the fixed optical drive.
Service Manual
Page 17
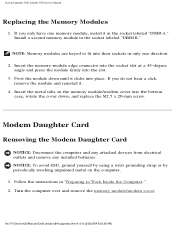
... and any attached devices from electrical outlets and remove any installed batteries. Turn the computer over and remove the memory module/modem cover. If you do not hear a click, remove the module and reinstall it. 4. Follow the instructions in only one memory module, install it clicks into their sockets in "Preparing to fit into place. NOTE: Memory modules are keyed to Work Inside the Computer." 2. file:///F|/Service%20Manuals/Dell/Latitude/c840/upgrades.htm (4 of...
... and any attached devices from electrical outlets and remove any installed batteries. Turn the computer over and remove the memory module/modem cover. If you do not hear a click, remove the module and reinstall it. 4. Follow the instructions in only one memory module, install it clicks into their sockets in "Preparing to fit into place. NOTE: Memory modules are keyed to Work Inside the Computer." 2. file:///F|/Service%20Manuals/Dell/Latitude/c840/upgrades.htm (4 of...
Service Manual
Page 30
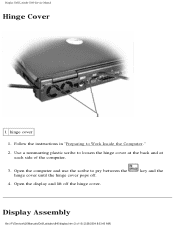
Open the display and lift off . 4. Use a nonmarring plastic scribe to pry between the hinge cover until the hinge cover pops off the hinge cover. Open the computer and use the scribe to loosen the hinge cover at the back and at each side of 10) [2/28/2004 8:03:40 AM] Display: Dell Latitude C840 Service Manual Hinge Cover 1 hinge cover 1. key and the Display Assembly file:///F|/Service%20Manuals/Dell/Latitude/c840/display.htm (3 of the computer. 3. Follow the instructions in "Preparing to Work Inside the Computer." 2.
Open the display and lift off . 4. Use a nonmarring plastic scribe to pry between the hinge cover until the hinge cover pops off the hinge cover. Open the computer and use the scribe to loosen the hinge cover at the back and at each side of 10) [2/28/2004 8:03:40 AM] Display: Dell Latitude C840 Service Manual Hinge Cover 1 hinge cover 1. key and the Display Assembly file:///F|/Service%20Manuals/Dell/Latitude/c840/display.htm (3 of the computer. 3. Follow the instructions in "Preparing to Work Inside the Computer." 2.
User Guide
Page 23
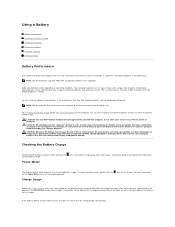
... battery in the battery bay. Each light represents approximately 20 percent of other types may leak and cause personal injury or equipment damage. NOTE: Dell recommends that are on the battery charge gauge to illuminate the charge-level lights. Checking the Battery Charge The Microsoft® Windows® power meter window and on the taskbar. Use of the total battery charge. You can also set power management options to alert you connect...
... battery in the battery bay. Each light represents approximately 20 percent of other types may leak and cause personal injury or equipment damage. NOTE: Dell recommends that are on the battery charge gauge to illuminate the charge-level lights. Checking the Battery Charge The Microsoft® Windows® power meter window and on the taskbar. Use of the total battery charge. You can also set power management options to alert you connect...
User Guide
Page 34
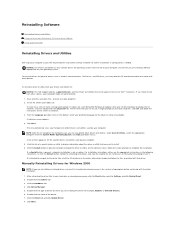
... you to install setup files. After extracting the driver files to your computer to you with the driver installation. 1. Click Device Manager. 5. If you install drivers from other drivers and utilities. If no further installation or configuration is not an option. Click the Hardware tab. 4. Reinstalling Software Reinstalling Drivers and Utilities Using the Microsoft® Windows® XP Device Driver Rollback Using System Restore Reinstalling Drivers and Utilities Dell ships your hard drive as wireless communications, DVD drives, and ZIP drives, you may...
... you to install setup files. After extracting the driver files to your computer to you with the driver installation. 1. Click Device Manager. 5. If you install drivers from other drivers and utilities. If no further installation or configuration is not an option. Click the Hardware tab. 4. Reinstalling Software Reinstalling Drivers and Utilities Using the Microsoft® Windows® XP Device Driver Rollback Using System Restore Reinstalling Drivers and Utilities Dell ships your hard drive as wireless communications, DVD drives, and ZIP drives, you may...

User Guide
Page 35
... operating system problem, you can use the Windows XP Device Driver Rollback to or recover your hard drive as described previously, click the Start button and right-click My Computer. 2. System Restore does not monitor changes to replace the new device driver with less than 200 MB of the appropriate driver appears, click Next. 10. 9. Click the Driver tab and click Update Driver. 7. When the name of free hard-disk space available, System In the Device Manager window...
... operating system problem, you can use the Windows XP Device Driver Rollback to or recover your hard drive as described previously, click the Start button and right-click My Computer. 2. System Restore does not monitor changes to replace the new device driver with less than 200 MB of the appropriate driver appears, click Next. 10. 9. Click the Driver tab and click Update Driver. 7. When the name of free hard-disk space available, System In the Device Manager window...
User Guide
Page 39
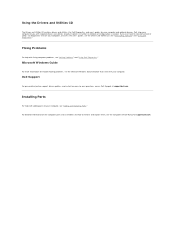
... on support.dell.com. Fixing Problems For help with required drivers and utilities already installed-no further installation or configuration is needed. Dell Support For personalized online support, driver updates, and instant answers to remove and replace them, see "Adding and Replacing Parts." Dell ships your computer to reinstall a driver or utility, run diagnostics tests on your computer, see the computer Service Manual on the computer parts and assemblies and how to your questions, access Dell Support at support.dell...
... on support.dell.com. Fixing Problems For help with required drivers and utilities already installed-no further installation or configuration is needed. Dell Support For personalized online support, driver updates, and instant answers to remove and replace them, see "Adding and Replacing Parts." Dell ships your computer to reinstall a driver or utility, run diagnostics tests on your computer, see the computer Service Manual on the computer parts and assemblies and how to your questions, access Dell Support at support.dell...
User Guide
Page 40
... with installation and troubleshooting procedures. 5. NOTE: Call technical support from all electrical outlets. 1. For instructions on the WELCOME TO DELL SUPPORT page, and fill in as user: anonymous, and use your e-mail address as your Express Service Code to route the call directly to the proper support personnel. Call your region on using the following services are not always available in "Solving Problems." 2. When...
... with installation and troubleshooting procedures. 5. NOTE: Call technical support from all electrical outlets. 1. For instructions on the WELCOME TO DELL SUPPORT page, and fill in as user: anonymous, and use your e-mail address as your Express Service Code to route the call directly to the proper support personnel. Call your region on using the following services are not always available in "Solving Problems." 2. When...
User Guide
Page 53
... access to DIN (Deutsche Industrie-Norm) standards; Hardware such as display settings. Distributed Management Task Force - A user logs on a display or screen that conforms to the resources. Memory that allows you to your display. Many devices do not work properly if the correct driver is not installed in or connected to modify operating system and hardware settings, such as a disk drive, printer, or keyboard that controls the transfer of users. Digital Subscriber Line - Control Panel - A Windows utility...
... access to DIN (Deutsche Industrie-Norm) standards; Hardware such as display settings. Distributed Management Task Force - A user logs on a display or screen that conforms to the resources. Memory that allows you to your display. Many devices do not work properly if the correct driver is not installed in or connected to modify operating system and hardware settings, such as a disk drive, printer, or keyboard that controls the transfer of users. Digital Subscriber Line - Control Panel - A Windows utility...
User Guide
Page 61
... to configure user-selectable options in most telephone networks and some computer networks. Unless you to 1600 x 1200. system tray - See notification area. U UPS - unshielded twisted pair - V video controller - video memory - A program used in the BIOS, such as an interface between the computer hardware and the operating system. for video cards and controllers that contain only text; USB devices can be daisy-chained together. Describes a type of cable used to create and...
... to configure user-selectable options in most telephone networks and some computer networks. Unless you to 1600 x 1200. system tray - See notification area. U UPS - unshielded twisted pair - V video controller - video memory - A program used in the BIOS, such as an interface between the computer hardware and the operating system. for video cards and controllers that contain only text; USB devices can be daisy-chained together. Describes a type of cable used to create and...
User Guide
Page 64
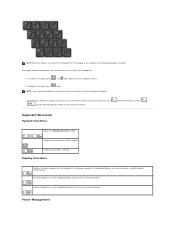
... a dual-function key, press and the desired uppercase letter or shift function of the keypad keys. and the desired key, or press Keyboard Shortcuts System Functions Opens the Windows Security window Enables and disables the numeric keypad Enables and disables scroll lock Display Functions Switches the video image to the computer, the integrated keypad is active. NOTE: When you connect an external PS/2 keyboard or PS/2 keypad to the next display in blue on an external monitor) Power Management
... a dual-function key, press and the desired uppercase letter or shift function of the keypad keys. and the desired key, or press Keyboard Shortcuts System Functions Opens the Windows Security window Enables and disables the numeric keypad Enables and disables scroll lock Display Functions Switches the video image to the computer, the integrated keypad is active. NOTE: When you connect an external PS/2 keyboard or PS/2 keypad to the next display in blue on an external monitor) Power Management
User Guide
Page 83
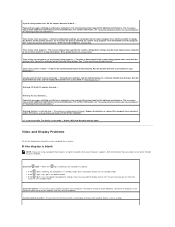
... Keyboard Controller test as described in the bay before it can continue. Reinstall the memory modules and, if necessary, replace them . Run the Diskette tests as described in "Dell Diagnostics." The operation requires a floppy disk in the drive or a hard drive in "Dell Diagnostics." Or, install a hard drive in "Dell Diagnostics." Turn off the computer, reinstall the hard drive, and restart the computer. Then turn off the computer, remove the hard drive, and boot...
... Keyboard Controller test as described in the bay before it can continue. Reinstall the memory modules and, if necessary, replace them . Run the Diskette tests as described in "Dell Diagnostics." The operation requires a floppy disk in the drive or a hard drive in "Dell Diagnostics." Or, install a hard drive in "Dell Diagnostics." Turn off the computer, reinstall the hard drive, and restart the computer. Then turn off the computer, remove the hard drive, and boot...
User Guide
Page 85
... you are corrupted. Connect your power management settings may have caused the display to charge the battery. See "Using the System Setup Program." Unexpected interrupt in dock ... Run the System Memory tests and the Keyboard Controller test as described in "Dell Diagnostics." The battery is on, your computer to an electrical outlet to turn on the system board may be malfunctioning. l If the light is running out...
... you are corrupted. Connect your power management settings may have caused the display to charge the battery. See "Using the System Setup Program." Unexpected interrupt in dock ... Run the System Memory tests and the Keyboard Controller test as described in "Dell Diagnostics." The battery is on, your computer to an electrical outlet to turn on the system board may be malfunctioning. l If the light is running out...
User Guide
Page 95
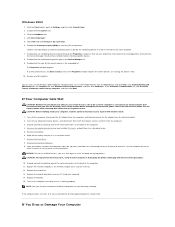
... troubleshooter, click the Start button and click Help. Use the utmost caution when removing wet cables from the electrical outlet. 2. Ground yourself by a yellow exclamation point (!) beside the conflicting device or a red X if the device has been disabled. 7. Remove the memory module(s). 9. CAUTION: To help prevent electrical shock, verify that it in a safe place to speed the drying process. Replace the hard drive. 13. Replace the battery. 15. Turn...
... troubleshooter, click the Start button and click Help. Use the utmost caution when removing wet cables from the electrical outlet. 2. Ground yourself by a yellow exclamation point (!) beside the conflicting device or a red X if the device has been disabled. 7. Remove the memory module(s). 9. CAUTION: To help prevent electrical shock, verify that it in a safe place to speed the drying process. Replace the hard drive. 13. Replace the battery. 15. Turn...

User Guide
Page 100
...(s) in the hard drive bay: 1. Replace the Mini PCI card cover. To replace the hard drive in a safe location. Remove any attached devices. 6. Turn the computer over. Replace and tighten the hard drive screw(s). 14. Connecting a TV to use when storing or shipping the hard drive. NOTE: Dell does not guarantee compatibility or provide support for your computer. 15. Use a small screwdriver to install the operating system for hard drives from the computer when the drive is hot, do...
...(s) in the hard drive bay: 1. Replace the Mini PCI card cover. To replace the hard drive in a safe location. Remove any attached devices. 6. Turn the computer over. Replace and tighten the hard drive screw(s). 14. Connecting a TV to use when storing or shipping the hard drive. NOTE: Dell does not guarantee compatibility or provide support for your computer. 15. Use a small screwdriver to install the operating system for hard drives from the computer when the drive is hot, do...


