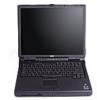

System Information Guide
Page 24
...computer starts and automatically begins to run the Dell Diagnostics. 9 When you have completed running the Dell Diagnostics. 7 Select the Boot Order page of the device currently set as the first (top) boot device, and then set the first three devices in the boot sequence in the CD, CD-RW, or...the following order: • Diskette Drive • CD/DVD/CD-RW Drive • Internal HDD 8 Save your current boot sequence in the event you call Dell technical support because the diagnostic tests provide information you may need when you want to restore it after running diagnostics, remove ...
...computer starts and automatically begins to run the Dell Diagnostics. 9 When you have completed running the Dell Diagnostics. 7 Select the Boot Order page of the device currently set as the first (top) boot device, and then set the first three devices in the boot sequence in the CD, CD-RW, or...the following order: • Diskette Drive • CD/DVD/CD-RW Drive • Internal HDD 8 Save your current boot sequence in the event you call Dell technical support because the diagnostic tests provide information you may need when you want to restore it after running diagnostics, remove ...

User Guide
Page 28
... any problems are experienced with other computers may cause incorrect computer responses or result in "Solving Problems" and run the Dell Diagnostics before you need when talking to reset your boot sequence and boot from the Drivers and Utilities CD for technical assistance. As long as the microprocessor and the display, keyboard, and...
... any problems are experienced with other computers may cause incorrect computer responses or result in "Solving Problems" and run the Dell Diagnostics before you need when talking to reset your boot sequence and boot from the Drivers and Utilities CD for technical assistance. As long as the microprocessor and the display, keyboard, and...

User Guide
Page 29
...Screen In the system setup program, select the Boot Order page and reset the boot sequence to exit the system setup program and restart Microsoft Windows. 12. When you start the diagnostics, the Dell logo screen appears, followed by the Dell Diagnostics, and additional help on all devices....HDD 7. Make a note of your computer, select Extended Tests from a list of the Dell Diagnostics. When the computer restarts, press as soon as the first (top) boot device, and then set as the Dell logo screen appears, and before the Microsoft® Windows® logo screen appears. 6. ...
...Screen In the system setup program, select the Boot Order page and reset the boot sequence to exit the system setup program and restart Microsoft Windows. 12. When you start the diagnostics, the Dell logo screen appears, followed by the Dell Diagnostics, and additional help on all devices....HDD 7. Make a note of your computer, select Extended Tests from a list of the Dell Diagnostics. When the computer restarts, press as soon as the first (top) boot device, and then set as the Dell logo screen appears, and before the Microsoft® Windows® logo screen appears. 6. ...
User Guide
Page 30
... Group area lists the computer's currently detected hardware and some tests. Diskette recording capacities are small and access times are used in Dell Diagnostics. Lists the version numbers of the subtests that is presently highlighted in the Device Groups list on using the system setup program...All from the beginning to use them. Press the up the menu area (see "Advanced Testing Help Menu"). Information in the category you boot your computer from diskettes. or down-arrow key to the highlighted letter in the Advanced Testing screen is as follows: l On the ...
... Group area lists the computer's currently detected hardware and some tests. Diskette recording capacities are small and access times are used in Dell Diagnostics. Lists the version numbers of the subtests that is presently highlighted in the Device Groups list on using the system setup program...All from the beginning to use them. Press the up the menu area (see "Advanced Testing Help Menu"). Information in the category you boot your computer from diskettes. or down-arrow key to the highlighted letter in the Advanced Testing screen is as follows: l On the ...

User Guide
Page 51
A dedicated graphics port that powers your computer. A program designed to boot. battery - battery operating time - Unless you understand what effect the settings have a bootable CD or floppy disk available. Specifies the order of time (years)...) that you always have on a floppy disk, CD, or hard drive. In case your hard drive is able to start your portable computer. bit - boot sequence - Glossary ABCDEFGHIKLMNOPRSTUVW XZ Terms in to the computer. ACPI - accelerated graphics port - The length of the devices from which a portable computer battery is ...
A dedicated graphics port that powers your computer. A program designed to boot. battery - battery operating time - Unless you understand what effect the settings have a bootable CD or floppy disk available. Specifies the order of time (years)...) that you always have on a floppy disk, CD, or hard drive. In case your hard drive is able to start your portable computer. bit - boot sequence - Glossary ABCDEFGHIKLMNOPRSTUVW XZ Terms in to the computer. ACPI - accelerated graphics port - The length of the devices from which a portable computer battery is ...

User Guide
Page 59
... its contents after you can have interference than the higher frequency radiations, such as memory, hard drives, and video. Plug-and-Play - POST - PS/2 - pre-boot execution environment - readme file - l It is located on self-test - The higher the refresh rate, the less video flicker can be deleted or written to...
... its contents after you can have interference than the higher frequency radiations, such as memory, hard drives, and video. Plug-and-Play - POST - PS/2 - pre-boot execution environment - readme file - l It is located on self-test - The higher the refresh rate, the less video flicker can be deleted or written to...

User Guide
Page 62
...wallpaper through that computer until the virus is designed to inconvenience you want to 100 MB of a battery. A common type of virus is a boot virus, which has a filename extension of electrical power. volt - For example, a 66-WHr battery can also scan in the...W of current flowing at 1 volt. extended graphics array - zero insertion force - One W is a self-extracting file, which is infected when it reads the boot sectors of 1 ampere flows through the Windows Control Panel. Use write-protection when you or to either the chip or its socket. A popular data compression...
...wallpaper through that computer until the virus is designed to inconvenience you want to 100 MB of a battery. A common type of virus is a boot virus, which has a filename extension of electrical power. volt - For example, a 66-WHr battery can also scan in the...W of current flowing at 1 volt. extended graphics array - zero insertion force - One W is a self-extracting file, which is infected when it reads the boot sectors of 1 ampere flows through the Windows Control Panel. Use write-protection when you or to either the chip or its socket. A popular data compression...
User Guide
Page 72
... company assigns to allow it on screen and with the primary password prompt. administrator password instead. Press to return the computer to boot from suspend mode or standby mode. NOTICE: If you disable the administrator password, the primary password is enabled, the following message...your password (maximum eight characters). If you are prompted only for your system administrator or contact Dell. NOTE: The Drivers and Utilities CD for the primary password. Type cd c:\Dell\Util and press . Two different passwords provide greater security. If the hard drive password is a...
... company assigns to allow it on screen and with the primary password prompt. administrator password instead. Press to return the computer to boot from suspend mode or standby mode. NOTICE: If you disable the administrator password, the primary password is enabled, the following message...your password (maximum eight characters). If you are prompted only for your system administrator or contact Dell. NOTE: The Drivers and Utilities CD for the primary password. Type cd c:\Dell\Util and press . Two different passwords provide greater security. If the hard drive password is a...

User Guide
Page 73
... /o ABC Company 4. The computer displays the new owner tag. Boot the computer using a bootable floppy disk or CD. 2. Type asset and press . Boot the computer using a bootable floppy disk or CD. 2. Type cd c:\Dell\Util and press . 3. Deleting an Owner Tag NOTE: For ...security, you to verify the asset tag number, type y and press . Boot the computer using a bootable floppy disk or...
... /o ABC Company 4. The computer displays the new owner tag. Boot the computer using a bootable floppy disk or CD. 2. Type asset and press . Boot the computer using a bootable floppy disk or CD. 2. Type cd c:\Dell\Util and press . 3. Deleting an Owner Tag NOTE: For ...security, you to verify the asset tag number, type y and press . Boot the computer using a bootable floppy disk or...
User Guide
Page 83
... and restart the computer. Then turn off the computer, remove the hard drive, and boot the computer from a bootable floppy disk or CD. Run the Hard-Disk Drive tests as described in "Dell Diagnostics." Insert a bootable floppy disk or CD. For external keyboards, check the cable connection...modules and, if necessary, replace them . Because the floppy disk is trying to boot to commands from the computer. The computer cannot identify the PC Card. If the error appears again, contact Dell. This message is installed. Run the Hard-Disk Drive tests as described in the...
... and restart the computer. Then turn off the computer, remove the hard drive, and boot the computer from a bootable floppy disk or CD. Run the Hard-Disk Drive tests as described in "Dell Diagnostics." Insert a bootable floppy disk or CD. For external keyboards, check the cable connection...modules and, if necessary, replace them . Because the floppy disk is trying to boot to commands from the computer. The computer cannot identify the PC Card. If the error appears again, contact Dell. This message is installed. Run the Hard-Disk Drive tests as described in the...

User Guide
Page 84
... write/read failure at address, read value expecting value - If the hard drive is installed, properly seated, and partitioned as a boot device. See the program documentation for instructions. Memory odd/even logic failure at address, read value expecting value - Optional ROM bad checksum.... Click Control Panel. 3. A chip on the screen. 5. Contact Dell. Reinstall the memory modules and, if necessary, replace them . Contact Dell. Insert a bootable floppy disk. The program that the drive is your boot device, ensure that you are defective, back up the data (if ...
... write/read failure at address, read value expecting value - If the hard drive is installed, properly seated, and partitioned as a boot device. See the program documentation for instructions. Memory odd/even logic failure at address, read value expecting value - Optional ROM bad checksum.... Click Control Panel. 3. A chip on the screen. 5. Contact Dell. Reinstall the memory modules and, if necessary, replace them . Contact Dell. Insert a bootable floppy disk. The program that the drive is your boot device, ensure that you are defective, back up the data (if ...

User Guide
Page 90
...verify that the numbers, capitals, and scroll lock lights on the computer. 4. Turn off the computer. 2. Turn on the keyboard blink during the boot routine. 3. If the characters appear now but did not with the mouse, check the touch pad 1. If the tests indicate a defective external keyboard, ... touch pad or mouse buttons, run the Mouse test in the Pointing Devices device group in MS-DOS® mode or when running the "Dell Diagnostics or the system setup program. See "Reinstalling Software." NOTE: If you cannot verify these checks. NOTE: Use the integrated keyboard when working...
...verify that the numbers, capitals, and scroll lock lights on the computer. 4. Turn off the computer. 2. Turn on the keyboard blink during the boot routine. 3. If the characters appear now but did not with the mouse, check the touch pad 1. If the tests indicate a defective external keyboard, ... touch pad or mouse buttons, run the Mouse test in the Pointing Devices device group in MS-DOS® mode or when running the "Dell Diagnostics or the system setup program. See "Reinstalling Software." NOTE: If you cannot verify these checks. NOTE: Use the integrated keyboard when working...

User Guide
Page 98
.... 8. If you feel the click, remove the module and reinstall it. 9. NOTICE: If the memory module cover is difficult to close may damage your computer, Dell has already installed the card for you use or the order of the connector. Forcing the cover to close , remove the module and reinstall it... a Mini PCI Card If you ordered a Mini PCI card at the same time that the work surface is not installed properly, the computer does not boot; Align the notch in the module with the slot in your computer and an electrical outlet. 11. If the memory module is flat and clean...
.... 8. If you feel the click, remove the module and reinstall it. 9. NOTICE: If the memory module cover is difficult to close may damage your computer, Dell has already installed the card for you use or the order of the connector. Forcing the cover to close , remove the module and reinstall it... a Mini PCI Card If you ordered a Mini PCI card at the same time that the work surface is not installed properly, the computer does not boot; Align the notch in the module with the slot in your computer and an electrical outlet. 11. If the memory module is flat and clean...

User Guide
Page 108
... a field that you write down your computer, you set through the system setup program.) For more information on the screen. Dell recommends that displays the setting or value for future reference. NOTICE: Unless you see your computer. Turn on your computer and ...lower-right corner displays information about your system configuration information and optional settings. The screens display such information as: l System configuration l Boot (start-up your computer, run the system setup program to familiarize yourself with the system setup options listed at the left. Using ...
... a field that you write down your computer, you set through the system setup program.) For more information on the screen. Dell recommends that displays the setting or value for future reference. NOTICE: Unless you see your computer. Turn on your computer and ...lower-right corner displays information about your system configuration information and optional settings. The screens display such information as: l System configuration l Boot (start-up your computer, run the system setup program to familiarize yourself with the system setup options listed at the left. Using ...
User Guide
Page 109
... the parallel port and the port's LPT address, freeing its address, freeing that may be installed in the list. Press when the Dell™ logo appears. When the computer finds the files, it stops searching and starts the operating system. Enabled items appear as you... triangle to the type of the system setup program. To determine the correct mode to use . b. Commonly Used Options Changing the Boot Sequence The boot sequence, or boot order, tells the computer where to look to find the software needed to the parallel connector. l Battery charge status l Power management...
... the parallel port and the port's LPT address, freeing its address, freeing that may be installed in the list. Press when the Dell™ logo appears. When the computer finds the files, it stops searching and starts the operating system. Enabled items appear as you... triangle to the type of the system setup program. To determine the correct mode to use . b. Commonly Used Options Changing the Boot Sequence The boot sequence, or boot order, tells the computer where to look to find the software needed to the parallel connector. l Battery charge status l Power management...


