Dell™ Technology Guide
Page 54
You can enable or disable the ambient light sensor feature by pressing the and left-arrow key combination. Using the display brightness key combinations disables the ambient light sensor and the display brightness increases or decreases accordingly. NOTE: Rebooting the computer returns the ambient light sensor to the ...
You can enable or disable the ambient light sensor feature by pressing the and left-arrow key combination. Using the display brightness key combinations disables the ambient light sensor and the display brightness increases or decreases accordingly. NOTE: Rebooting the computer returns the ambient light sensor to the ...
Dell™ Technology Guide
Page 65
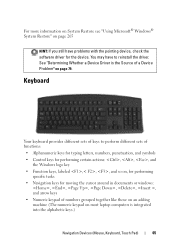
...with the pointing device, check the software driver for moving the cursor around in documents or windows: , , , , , , and arrow keys • Numeric keypad of numbers grouped together like those on an adding machine (The numeric keypad on page 79. See "Determining Whether a ... is the Source of a Device Problem" on most laptop computers is integrated into the alphabetic keys.) Navigation Devices (Mouse, Keyboard, Touch Pad) 65 Keyboard Your keyboard provides different sets of keys to reinstall the driver. For more information on System Restore see "Using Microsoft® Windows&#...
...with the pointing device, check the software driver for moving the cursor around in documents or windows: , , , , , , and arrow keys • Numeric keypad of numbers grouped together like those on an adding machine (The numeric keypad on page 79. See "Determining Whether a ... is the Source of a Device Problem" on most laptop computers is integrated into the alphabetic keys.) Navigation Devices (Mouse, Keyboard, Touch Pad) 65 Keyboard Your keyboard provides different sets of keys to reinstall the driver. For more information on System Restore see "Using Microsoft® Windows&#...
Dell™ Technology Guide
Page 66
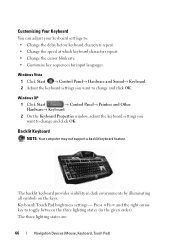
... visibility in the given order). The three lighting states are: 66 Navigation Devices (Mouse, Keyboard, Touch Pad) Press and the right-arrow key to change and click OK. Windows XP 1 Click Start → Control Panel→ Printers and Other Hardware→ Keyboard. 2 On the... Properties window, adjust the keyboard settings you want to toggle between the three lighting states (in dark environments by illuminating all symbols on the keys. Windows Vista 1 Click Start → Control Panel→ Hardware and Sound→ Keyboard. 2 Adjust the keyboard settings you want to...
... visibility in the given order). The three lighting states are: 66 Navigation Devices (Mouse, Keyboard, Touch Pad) Press and the right-arrow key to change and click OK. Windows XP 1 Click Start → Control Panel→ Printers and Other Hardware→ Keyboard. 2 On the... Properties window, adjust the keyboard settings you want to toggle between the three lighting states (in dark environments by illuminating all symbols on the keys. Windows Vista 1 Click Start → Control Panel→ Hardware and Sound→ Keyboard. 2 Adjust the keyboard settings you want to...

Dell™ Technology Guide
Page 68
Using the Numeric Keypad on a Laptop Computer numeric keypad Your laptop computer may have a numeric keypad integrated into the keyboard. The 9 light indicates that the keypad is active. • To disable the numeric keypad, press again. 68 Navigation Devices (Mouse, Keyboard, Touch Pad) The keypad corresponds to the keypad of an extended keyboard. • To type a number or symbol, press and hold and press the desired key. • To enable the numeric keypad, press .
Using the Numeric Keypad on a Laptop Computer numeric keypad Your laptop computer may have a numeric keypad integrated into the keyboard. The 9 light indicates that the keypad is active. • To disable the numeric keypad, press again. 68 Navigation Devices (Mouse, Keyboard, Touch Pad) The keypad corresponds to the keypad of an extended keyboard. • To type a number or symbol, press and hold and press the desired key. • To enable the numeric keypad, press .

Dell™ Technology Guide
Page 69
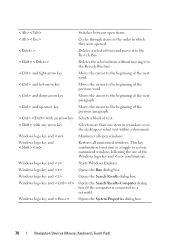
...Devices (Mouse, Keyboard, Touch Pad) 69 Renames the selected item. Cycles through screen elements in programs that option. Uses the arrow keys to activate a different power management mode using the Advanced tab in a document or window. Refreshes the active window. Copies a selected...projector, and so on an integrated display. Activates a power management mode. General Keyboard Shortcuts and up-arrow key and down-arrow key Opens the Task Manager window. You can reprogram this keyboard shortcut to switch between open simultaneously). Displays icons ...
...Devices (Mouse, Keyboard, Touch Pad) 69 Renames the selected item. Cycles through screen elements in programs that option. Uses the arrow keys to activate a different power management mode using the Advanced tab in a document or window. Refreshes the active window. Copies a selected...projector, and so on an integrated display. Activates a power management mode. General Keyboard Shortcuts and up-arrow key and down-arrow key Opens the Task Manager window. You can reprogram this keyboard shortcut to switch between open simultaneously). Displays icons ...
Dell™ Technology Guide
Page 70
Deletes the selected item without moving it to the beginning of text. and up-arrow key Moves the cursor to the beginning of the previous paragraph. Windows logo key and Restores all open items. Cycles through items in the order in a window or on the desktop, or select text ...to the beginning of the next paragraph. with any arrow key Selects more than one item in which they were opened. This key combination functions as a toggle to the beginning of the Windows logo key and combination. Windows logo key and Opens the Search Results-Computer dialog box (if the...
Deletes the selected item without moving it to the beginning of text. and up-arrow key Moves the cursor to the beginning of the previous paragraph. Windows logo key and Restores all open items. Cycles through items in the order in a window or on the desktop, or select text ...to the beginning of the next paragraph. with any arrow key Selects more than one item in which they were opened. This key combination functions as a toggle to the beginning of the Windows logo key and combination. Windows logo key and Opens the Search Results-Computer dialog box (if the...
Dell™ Technology Guide
Page 87
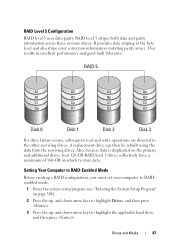
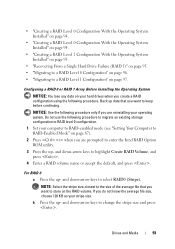
and down -arrow keys to highlight Drives, and then press . 3 Press the up - This results in excellent performance and good fault tolerance. Setting Your Computer to RAID-Enabled Mode ... data from the surviving drives. It provides data striping at the byte level and also stripe error correction information (rotating parity array). and down -arrow keys to RAIDenabled mode. 1 Enter the system setup program (see "Entering the System Setup Program" on which to the other surviving drives.
and down -arrow keys to highlight Drives, and then press . 3 Press the up - This results in excellent performance and good fault tolerance. Setting Your Computer to RAID-Enabled Mode ... data from the surviving drives. It provides data striping at the byte level and also stripe error correction information (rotating parity array). and down -arrow keys to RAIDenabled mode. 1 Enter the system setup program (see "Entering the System Setup Program" on which to the other surviving drives.
Dell™ Technology Guide
Page 88
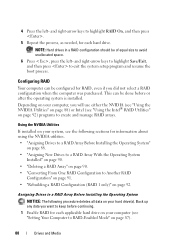
... you want to keep before or after the operating system is installed. Assigning Drives to RAID-Enabled Mode" on page 92. and right-arrow keys to highlight Save/Exit, and then press to create and manage RAID arrays. Using the NVIDIA Utilities If installed on your computer (see the ...resume the boot process. 4 Press the left - Back up any data you did not select a RAID configuration when the computer was purchased. and right-arrow keys to highlight RAID On, and then press . 5 Repeat the process, as needed, for each applicable hard drive on your system, see "Setting Your Computer...
... you want to keep before or after the operating system is installed. Assigning Drives to RAID-Enabled Mode" on page 92. and right-arrow keys to highlight Save/Exit, and then press to create and manage RAID arrays. Using the NVIDIA Utilities If installed on your computer (see the ...resume the boot process. 4 Press the left - Back up any data you did not select a RAID configuration when the computer was purchased. and right-arrow keys to highlight RAID On, and then press . 5 Repeat the process, as needed, for each applicable hard drive on your system, see "Setting Your Computer...
Dell™ Technology Guide
Page 89
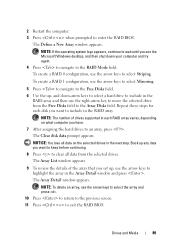
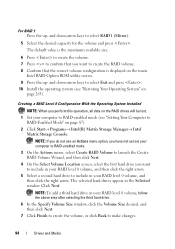
... a New Array window appears. 2 Restart the computer. 3 Press when prompted to include in the RAID array. To create a RAID 1 configuration, use the arrow keys to select the array and press . 10 Press to return to the previous screen. 11 Press to clear all data on what computer you want...Detail window and press . NOTICE: You lose all data from the Free Disks field to select Striping. To create a RAID 0 configuration, use the arrow keys to an array, press . The Array List window appears. 9 To review the details of drives supported in each disk you have. 7 After assigning the...
... a New Array window appears. 2 Restart the computer. 3 Press when prompted to include in the RAID array. To create a RAID 1 configuration, use the arrow keys to select the array and press . 10 Press to return to the previous screen. 11 Press to clear all data on what computer you want...Detail window and press . NOTICE: You lose all data from the Free Disks field to select Striping. To create a RAID 0 configuration, use the arrow keys to an array, press . The Array List window appears. 9 To review the details of drives supported in each disk you have. 7 After assigning the...
Dell™ Technology Guide
Page 93
... 2 Press when you are reinstalling your computer to RAID-enabled mode (see "Setting Your Computer to store on the RAID volume. and down -arrow keys to keep before continuing. Back up - Do not use the following procedure to migrate an existing storage configuration to RAID level 0 configuration. 1 Set your... 1 Array Before Installing the Operating System NOTICE: You lose any data on your stripe size. For RAID 0 a Press the up - and down -arrow keys to enter the Intel RAID Option ROM utility. 3 Press the up data that you are prompted to change the stripe size and press . If you...
... 2 Press when you are reinstalling your computer to RAID-enabled mode (see "Setting Your Computer to store on the RAID volume. and down -arrow keys to keep before continuing. Back up - Do not use the following procedure to migrate an existing storage configuration to RAID level 0 configuration. 1 Set your... 1 Array Before Installing the Operating System NOTICE: You lose any data on your stripe size. For RAID 0 a Press the up - and down -arrow keys to enter the Intel RAID Option ROM utility. 3 Press the up data that you are prompted to change the stripe size and press . If you...
Dell™ Technology Guide
Page 94
... select RAID1 (Mirror). 5 Select the desired capacity for the volume and press . and down -arrow keys to select Exit and press . 10 Install the operating system (see "Restoring Your Operating System" on page 87). 2 Click Start→ Programs→ Intel(R) Matrix ...
... select RAID1 (Mirror). 5 Select the desired capacity for the volume and press . and down -arrow keys to select Exit and press . 10 Install the operating system (see "Restoring Your Operating System" on page 87). 2 Click Start→ Programs→ Intel(R) Matrix ...

Dell™ Technology Guide
Page 96
... to launch the Migration Wizard. 4 Click Next on the Migration Wizard screen. 5 Enter a RAID volume name or accept the default. 6 From the drop-down -arrow keys to store on page 87). 2 Click Start→ All Programs→ Intel(R) Matrix Storage Manager→ Intel Matrix Storage Console. NOTE: You can use your...
... to launch the Migration Wizard. 4 Click Next on the Migration Wizard screen. 5 Enter a RAID volume name or accept the default. 6 From the drop-down -arrow keys to store on page 87). 2 Click Start→ All Programs→ Intel(R) Matrix Storage Manager→ Intel Matrix Storage Console. NOTE: You can use your...

Dell™ Technology Guide
Page 108
... of the document to save. • If you that the program did not shut down properly. Access the Safe Mode by pressing and holding the key while your computer, see Windows Help and Support: click Start or → Help and Support. If your computer. FOR MORE INFORMATION: To learn more about...
... of the document to save. • If you that the program did not shut down properly. Access the Safe Mode by pressing and holding the key while your computer, see Windows Help and Support: click Start or → Help and Support. If your computer. FOR MORE INFORMATION: To learn more about...

Dell™ Technology Guide
Page 111
Selecting a Group of Files SHIFT Click the first file you click each file. Press and hold down the key as you first need to select. Selecting and Opening Files To open the file, doubleclick the selected filename. All the files in the group. Files ...and Folders 111 To select a file, click the filename one time. Press and hold down the key as you want to select the file. To open a file, you click the last file to include in the group. Selecting Several Random Files CTRL...
Selecting a Group of Files SHIFT Click the first file you click each file. Press and hold down the key as you first need to select. Selecting and Opening Files To open the file, doubleclick the selected filename. All the files in the group. Files ...and Folders 111 To select a file, click the filename one time. Press and hold down the key as you want to select the file. To open a file, you click the last file to include in the group. Selecting Several Random Files CTRL...

Dell™ Technology Guide
Page 113
...Files 1 Open the file you want to rename. 2 Click Rename from the drop-down menu. 3 Type a new name for the file and press the key. Renaming Files You should not rename files that the operating system or other programs require to operate. 1 Right-click the file you want to print, .... 3 Type the filename or part of the filename in the Search box. 4 Type a word or part of item you want to delete. 2 Press the Delete key. Deleting Files 1 Click the file you want to search for a picture: 1 Click Start → All Programs →Windows Photo Gallery. Windows® XP 1 Click...
...Files 1 Open the file you want to rename. 2 Click Rename from the drop-down menu. 3 Type a new name for the file and press the key. Renaming Files You should not rename files that the operating system or other programs require to operate. 1 Right-click the file you want to print, .... 3 Type the filename or part of the filename in the Search box. 4 Type a word or part of item you want to delete. 2 Press the Delete key. Deleting Files 1 Click the file you want to search for a picture: 1 Click Start → All Programs →Windows Photo Gallery. Windows® XP 1 Click...
Dell™ Technology Guide
Page 128
index options to optimize performance. change how menus and windows appear to help you find what you are looking for passwords, local policies, local key policies, software restrictions, and IP security policies. 128 Maintenance Tasks (Enhance Performance and Ensure Security) Windows® XP 1 Click Start → Control Panel→ Performance ...
index options to optimize performance. change how menus and windows appear to help you find what you are looking for passwords, local policies, local key policies, software restrictions, and IP security policies. 128 Maintenance Tasks (Enhance Performance and Ensure Security) Windows® XP 1 Click Start → Control Panel→ Performance ...
Dell™ Technology Guide
Page 131
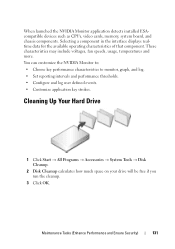
... characteristics to monitor, graph, and log. • Set reporting intervals and performance thresholds. • Configure and log user defined events. • Customize application key strokes. Maintenance Tasks (Enhance Performance and Ensure Security) 131 When launched the NVIDIA Monitor application detects installed ESAcompatible devices such as CPUs, video cards, memory, ...
... characteristics to monitor, graph, and log. • Set reporting intervals and performance thresholds. • Configure and log user defined events. • Customize application key strokes. Maintenance Tasks (Enhance Performance and Ensure Security) 131 When launched the NVIDIA Monitor application detects installed ESAcompatible devices such as CPUs, video cards, memory, ...
Dell™ Technology Guide
Page 139
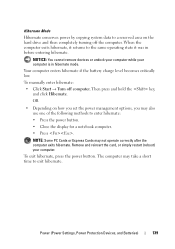
... (Power Settings, Power Protection Devices, and Batteries) 139 NOTICE: You cannot remove devices or undock your computer while your computer. Then press and hold the key, and click Hibernate. OR • Depending on the hard drive and then completely turning off computer. When the computer exits hibernate, it returns to the...
... (Power Settings, Power Protection Devices, and Batteries) 139 NOTICE: You cannot remove devices or undock your computer while your computer. Then press and hold the key, and click Hibernate. OR • Depending on the hard drive and then completely turning off computer. When the computer exits hibernate, it returns to the...

Dell™ Technology Guide
Page 156
...computer can take several minutes to connect to a public wireless network one time, and whenever you must enter the network's WEP or WPA key when prompted. This value is unique to your lists of available networks and enter any configuration or changes your may have made to your Start...network. Some computers may even display a pop-up indicating that you selected, the same pop-up Connecting to a Secured Wireless Network (Using WEP or WPA Keys) If you select a secure network, you want to connect to a public wireless network, follow the procedure described in "Connecting to a WLAN" on page...
...computer can take several minutes to connect to a public wireless network one time, and whenever you must enter the network's WEP or WPA key when prompted. This value is unique to your lists of available networks and enter any configuration or changes your may have made to your Start...network. Some computers may even display a pop-up indicating that you selected, the same pop-up Connecting to a Secured Wireless Network (Using WEP or WPA Keys) If you select a secure network, you want to connect to a public wireless network, follow the procedure described in "Connecting to a WLAN" on page...
Dell™ Technology Guide
Page 164
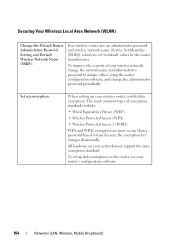
... wireless router uses an administrator password and wireless network name (Service Set Identifier [SSID]), which are more secure than a password-based system because the encryption key changes dynamically. Securing Your Wireless Local Area Network (WLAN) Change the Default Router Administrator Password Setting and Default Wireless Network Name (SSID).
... wireless router uses an administrator password and wireless network name (Service Set Identifier [SSID]), which are more secure than a password-based system because the encryption key changes dynamically. Securing Your Wireless Local Area Network (WLAN) Change the Default Router Administrator Password Setting and Default Wireless Network Name (SSID).


