Dell™ Technology Guide
Page 10
Removing Applications From Your Computer . . . . . 123 Windows Vista 123 Windows XP 123 Ending an Application When it Does not Respond 124 10 Maintenance Tasks (Enhance Performance ...; XP 128 Performance Tuning 129 System Setup Based Performance Tuning . . . . 129 Software Based Performance Tuning 129 NVIDIA Performance 129 NVIDIA Monitor 130 Cleaning Up Your Hard Drive 131 Defragmenting Your Hard Drive 132 Detecting and Repairing Disk Errors 133 Scanning for Viruses and Spyware 133 10 Contents
Removing Applications From Your Computer . . . . . 123 Windows Vista 123 Windows XP 123 Ending an Application When it Does not Respond 124 10 Maintenance Tasks (Enhance Performance ...; XP 128 Performance Tuning 129 System Setup Based Performance Tuning . . . . 129 Software Based Performance Tuning 129 NVIDIA Performance 129 NVIDIA Monitor 130 Cleaning Up Your Hard Drive 131 Defragmenting Your Hard Drive 132 Detecting and Repairing Disk Errors 133 Scanning for Viruses and Spyware 133 10 Contents
Dell™ Technology Guide
Page 80
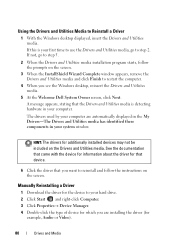
...and Utilities media. 5 At the Welcome Dell System Owner screen, click Next. See the documentation that came with the device for information about the driver for example, Audio or Video). 80 Drives and Media If this is detecting hardware in your hard drive. 2 Click Start and right-click ... 1 Download the driver for additionally installed devices may not be included on the screen. 3 When the InstallShield Wizard Complete window appears, remove the Drivers and Utilities media and click Finish to step 2. A message appears, stating that you want to reinstall and follow the prompts...
...and Utilities media. 5 At the Welcome Dell System Owner screen, click Next. See the documentation that came with the device for information about the driver for example, Audio or Video). 80 Drives and Media If this is detecting hardware in your hard drive. 2 Click Start and right-click ... 1 Download the driver for additionally installed devices may not be included on the screen. 3 When the InstallShield Wizard Complete window appears, remove the Drivers and Utilities media and click Finish to step 2. A message appears, stating that you want to reinstall and follow the prompts...
Dell™ Technology Guide
Page 97
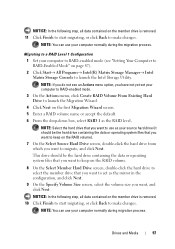
... Hard Drive screen, double-click the hard drive to select the member drive that you want to keep on the RAID volume). 7 On the Select Source Hard Drive screen, double-click the hard drive from which you want to act as the RAID level. Drives and Media 97 NOTICE: In the following step, all data contained on the member drive is removed...
... Hard Drive screen, double-click the hard drive to select the member drive that you want to keep on the RAID volume). 7 On the Select Source Hard Drive screen, double-click the hard drive from which you want to act as the RAID level. Drives and Media 97 NOTICE: In the following step, all data contained on the member drive is removed...
Dell™ Technology Guide
Page 129
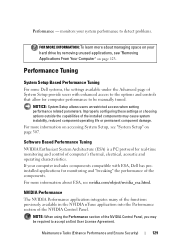
...related parameters. Maintenance Tasks (Enhance Performance and Ensure Security) 129 For more information about managing space on your hard drive by removing unused applications, see "Removing Applications From Your Computer" on page 123. For more information on page 307. Performance - Performance Tuning ...System Setup Based Performance Tuning For some Dell systems, the settings available under the Advanced page of System Setup provide users with ESA, Dell has...
...related parameters. Maintenance Tasks (Enhance Performance and Ensure Security) 129 For more information about managing space on your hard drive by removing unused applications, see "Removing Applications From Your Computer" on page 123. For more information on page 307. Performance - Performance Tuning ...System Setup Based Performance Tuning For some Dell systems, the settings available under the Advanced page of System Setup provide users with ESA, Dell has...
Dell™ Technology Guide
Page 139
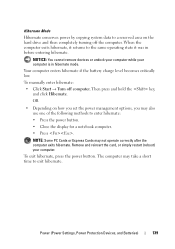
... power management options, you may also use one of the following methods to a reserved area on the hard drive and then completely turning off computer. The computer may not operate correctly after the computer exits hibernate. Remove and reinsert the card, or simply restart (reboot) your computer is in before entering hibernate. Your...
... power management options, you may also use one of the following methods to a reserved area on the hard drive and then completely turning off computer. The computer may not operate correctly after the computer exits hibernate. Remove and reinsert the card, or simply restart (reboot) your computer is in before entering hibernate. Your...
Dell™ Technology Guide
Page 265
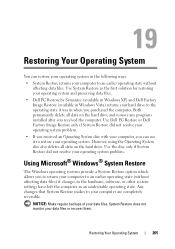
...the hard drive. Use Dell PC Restore or Dell Factory Image Restore only if System Restore did not resolve your operating system problem. Restoring Your Operating System 265 NOTICE: Make regular backups of your data files or recover them. Both permanently delete all data on the hard drive and remove any... reversible. Use System Restore as the first solution for restoring your operating system and preserving data files. • Dell PC Restore by Symantec (available in Windows XP) and Dell Factory Image Restore (available in Windows Vista) returns your hard drive to your operating system.
...the hard drive. Use Dell PC Restore or Dell Factory Image Restore only if System Restore did not resolve your operating system problem. Restoring Your Operating System 265 NOTICE: Make regular backups of your data files or recover them. Both permanently delete all data on the hard drive and remove any... reversible. Use System Restore as the first solution for restoring your operating system and preserving data files. • Dell PC Restore by Symantec (available in Windows XP) and Dell Factory Image Restore (available in Windows Vista) returns your hard drive to your operating system.
Dell™ Technology Guide
Page 267
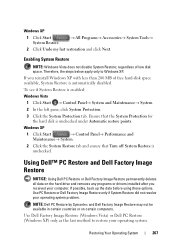
... Windows XP. Therefore, the steps below apply only to restore your operating system problem. NOTE: Dell PC Restore by Symantec and Dell Factory Image Restore may not be available in certain countries or on the hard drive and removes any programs or drivers installed after you reinstall Windows XP with less than 200 MB of...
... Windows XP. Therefore, the steps below apply only to restore your operating system problem. NOTE: Dell PC Restore by Symantec and Dell Factory Image Restore may not be available in certain countries or on the hard drive and removes any programs or drivers installed after you reinstall Windows XP with less than 200 MB of...
Dell™ Technology Guide
Page 343
...PCMCIA standard. EPP - A rapid discharge of memory. Use the Express Service Code when contacting Dell for hard drives and CD drives. fully-buffered DIMM - agency responsible for enforcing communications-related regulations that provides improved bidirectional data ...enhanced parallel port - ESD - expansion card - expansion slot - Express Service Code - F Fahrenheit - Federal Communications Commission - A removable I/O card adhering to transfer data and often improves performance. Also see Service Tag. A display setting that extends beyond the edge ...
...PCMCIA standard. EPP - A rapid discharge of memory. Use the Express Service Code when contacting Dell for hard drives and CD drives. fully-buffered DIMM - agency responsible for enforcing communications-related regulations that provides improved bidirectional data ...enhanced parallel port - ESD - expansion card - expansion slot - Express Service Code - F Fahrenheit - Federal Communications Commission - A removable I/O card adhering to transfer data and often improves performance. Also see Service Tag. A display setting that extends beyond the edge ...
Dell™ Technology Guide
Page 348
... that you can set and the device are Plug and Play compliant. ns - nonvolatile random access memory - A drive that establishes standards for maintaining computer configuration information such as date, time, and other system setup options that stores data...is assigned to create an image. A removable I/O card adhering to automatically configure devices. PCI Express - PCMCIA - programmed input/output - A video resolution, such as video, drives, and networks. nanosecond - O optical drive - A physical storage area on a hard drive that boosts the data transfer rate between...
... that you can set and the device are Plug and Play compliant. ns - nonvolatile random access memory - A drive that establishes standards for maintaining computer configuration information such as date, time, and other system setup options that stores data...is assigned to create an image. A removable I/O card adhering to automatically configure devices. PCI Express - PCMCIA - programmed input/output - A video resolution, such as video, drives, and networks. nanosecond - O optical drive - A physical storage area on a hard drive that boosts the data transfer rate between...

Setup Guide
Page 66
... Restore" on page 67) to restore your operating system. 64 You can use Dell DataSafe Local Backup to restore your hard drive to the operating state it was in all the devices (USB drive, printer, etc.) connected to the computer and remove any programs or drivers installed after you to: • Backup and restore your...
... Restore" on page 67) to restore your operating system. 64 You can use Dell DataSafe Local Backup to restore your hard drive to the operating state it was in all the devices (USB drive, printer, etc.) connected to the computer and remove any programs or drivers installed after you to: • Backup and restore your...

Setup Guide
Page 69
.... This option restores your hard drive to restore your operating system. If possible, back up the data before using this option. NOTE: Dell Factory Image Restore may not be available in when you see "Dell DataSafe Local Backup" on the hard drive and removes any programs or drivers installed... after you received your operating system problem. Use Dell Factory Image Restore only as the last...
.... This option restores your hard drive to restore your operating system. If possible, back up the data before using this option. NOTE: Dell Factory Image Restore may not be available in when you see "Dell DataSafe Local Backup" on the hard drive and removes any programs or drivers installed... after you received your operating system problem. Use Dell Factory Image Restore only as the last...
Setup Guide
Page 75
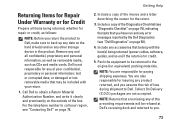
... and prominently on any accessories that may be returned in the product. NOTE: You are not accepted. Call Dell to back up any data on the hard drive(s) and on the outside of your return. 1. Remove any product returned, and you assume the risk of the invoice and a letter describing the reason for the...
... and prominently on any accessories that may be returned in the product. NOTE: You are not accepted. Call Dell to back up any data on the hard drive(s) and on the outside of your return. 1. Remove any product returned, and you assume the risk of the invoice and a letter describing the reason for the...

Service Manual
Page 23
... as a connector on your computer). CAUTION: Only a certified service technician should perform repairs on the new hard drive (see the Dell Technology Guide). Damage due to Contents Page Hard Drive Dell™ Inspiron™ N5010/M5010 Service Manual Removing the Hard Drive Replacing the Hard Drive WARNING: Before working inside your computer, read the safety information that shipped with your computer). 8. CAUTION: To...
... as a connector on your computer). CAUTION: Only a certified service technician should perform repairs on the new hard drive (see the Dell Technology Guide). Damage due to Contents Page Hard Drive Dell™ Inspiron™ N5010/M5010 Service Manual Removing the Hard Drive Replacing the Hard Drive WARNING: Before working inside your computer, read the safety information that shipped with your computer). 8. CAUTION: To...

Service Manual
Page 24
... your computer, as needed. Replace the base cover (see Replacing the Battery). Connect the interposer to disconnect the hard-drive assembly from its packaging. 9. Remove the new drive from the connector on the system board. 1 hard-drive assembly 10. Turn the computer over and replace the four screws that no stray screws remain inside the computer.
... your computer, as needed. Replace the base cover (see Replacing the Battery). Connect the interposer to disconnect the hard-drive assembly from its packaging. 9. Remove the new drive from the connector on the system board. 1 hard-drive assembly 10. Turn the computer over and replace the four screws that no stray screws remain inside the computer.
Service Manual
Page 46
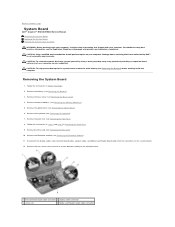
... instructions in Removing the Hard Drive. 9. Remove the base cover (see Removing the Optical Drive). 6. Remove the optical drive (see Removing the Base Cover). 4. Follow the instructions in step 8 and step 9 in Before You Begin. 2. Remove the Mini-Card (see Removing the Battery). 3. Remove the two screws that shipped with your computer). Back to Contents Page System Board Dell™ Inspiron™ N5010/M5010 Service...
... instructions in Removing the Hard Drive. 9. Remove the base cover (see Removing the Optical Drive). 6. Remove the optical drive (see Removing the Base Cover). 4. Follow the instructions in step 8 and step 9 in Before You Begin. 2. Remove the Mini-Card (see Removing the Battery). 3. Remove the two screws that shipped with your computer). Back to Contents Page System Board Dell™ Inspiron™ N5010/M5010 Service...
Service Manual
Page 47
.... Follow the instructions in the BIOS). Replace the two screws that no stray screws remain inside the computer. Replace the Mini-Card (see Removing the Processor Module). Replace the keyboard (see Replacing the Battery). Replace the battery (see Replacing the Keyboard). 15. Enter the service tag...Turn the system board assembly over . 6. NOTE: After you have replaced the system board, enter the computer Service Tag in Replacing the Hard Drive. 13. Gently press the system board to connect the connector on the system board to the connector on the computer. Entering the Service ...
.... Follow the instructions in the BIOS). Replace the two screws that no stray screws remain inside the computer. Replace the Mini-Card (see Removing the Processor Module). Replace the keyboard (see Replacing the Battery). Replace the battery (see Replacing the Keyboard). 15. Enter the service tag...Turn the system board assembly over . 6. NOTE: After you have replaced the system board, enter the computer Service Tag in Replacing the Hard Drive. 13. Gently press the system board to connect the connector on the system board to the connector on the computer. Entering the Service ...


