User's Guide
Page 3
...151 Printing Area 151 How to Read the On-screen Manuals ........ 153 Uninstalling the On-screen Manuals........... 153 Transporting Machine 154 Specifications 155 Users in Canada 166 Pre-Installation Requirements for MP530... 160 Connection of the Equipment 160 In Case of ...Equipment Malfunction 161 Rights of the Telephone Company 161 FCC Notice 161 Canon U.S.A., INC. LIMITED ...
...151 Printing Area 151 How to Read the On-screen Manuals ........ 153 Uninstalling the On-screen Manuals........... 153 Transporting Machine 154 Specifications 155 Users in Canada 166 Pre-Installation Requirements for MP530... 160 Connection of the Equipment 160 In Case of ...Equipment Malfunction 161 Rights of the Telephone Company 161 FCC Notice 161 Canon U.S.A., INC. LIMITED ...
User's Guide
Page 5
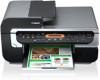
...Approximately 3 seconds per page which results in part, without notice. Sending and receiving fax machines need to conform to your Canon MP530 Series. with all rights reserved. Super G3 is a phrase used and optimized, yielding extremely high quality prints. 3 The ...to change without the prior written consent of Canon Inc. © 2006 Canon Inc. All information regarding the accuracy thereof. No representation is copyrighted by Canon Inc. Canon MP530 User's Guide Copyright This manual is made regarding non-Canon products was compiled from publicly available information....
...Approximately 3 seconds per page which results in part, without notice. Sending and receiving fax machines need to conform to your Canon MP530 Series. with all rights reserved. Super G3 is a phrase used and optimized, yielding extremely high quality prints. 3 The ...to change without the prior written consent of Canon Inc. © 2006 Canon Inc. All information regarding the accuracy thereof. No representation is copyrighted by Canon Inc. Canon MP530 User's Guide Copyright This manual is made regarding non-Canon products was compiled from publicly available information....
User's Guide
Page 6
...'s Guide (This guide) On-screen Manuals Read this guide when starting to read this guide for instructions on some of the more advanced features. After following instructions in the Easy Setup Instructions, read this guide for full instructions on scanning operation and settings. Model Name K10269 (PIXMA MP530) Trademarks z "Windows" is a trademark of...
...'s Guide (This guide) On-screen Manuals Read this guide when starting to read this guide for instructions on some of the more advanced features. After following instructions in the Easy Setup Instructions, read this guide for full instructions on scanning operation and settings. Model Name K10269 (PIXMA MP530) Trademarks z "Windows" is a trademark of...
User's Guide
Page 44
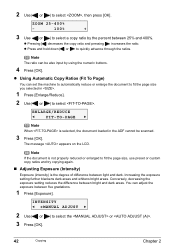
... areas. 2 Use [ ] or [ ] to quickly advance through the ratios. ZOOM 25-400% - 100% + 3 Use [ ] or [ ] to select the or . 3 Press [OK]. 42 Copying Chapter 2 INTENSITY W MANUAL ADJUST X 2 Use [ ] or [ ] to select a copy ratio by using the numeric buttons. 4 Press [OK]. z Pressing [ ] decreases the copy ratio and pressing [ ] increases the ratio.
... areas. 2 Use [ ] or [ ] to quickly advance through the ratios. ZOOM 25-400% - 100% + 3 Use [ ] or [ ] to select the or . 3 Press [OK]. 42 Copying Chapter 2 INTENSITY W MANUAL ADJUST X 2 Use [ ] or [ ] to select a copy ratio by using the numeric buttons. 4 Press [OK]. z Pressing [ ] decreases the copy ratio and pressing [ ] increases the ratio.
User's Guide
Page 45
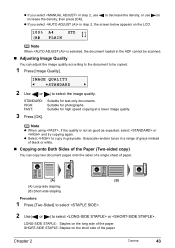
z If you select in the ADF cannot be copied. 1 Press [Image Quality]. IMAGE QUALITY W STANDARD X 2 Use [ ] or [ ] to increase the density, then press [OK]. z Select to be scanned. „ Adjusting Image Quality You can copy two document pages onto the sides of a single sheet of the paper. Chapter 2 Copying 43 Grayscale renders tones in a range of grays instead of black or white. „ Copying onto Both Sides of the Paper (Two-sided copy) You can adjust the image quality according to the document to copy in grayscale. LONG-SIDE STAPLE: Staples on the long side of ...
z If you select in the ADF cannot be copied. 1 Press [Image Quality]. IMAGE QUALITY W STANDARD X 2 Use [ ] or [ ] to increase the density, then press [OK]. z Select to be scanned. „ Adjusting Image Quality You can copy two document pages onto the sides of a single sheet of the paper. Chapter 2 Copying 43 Grayscale renders tones in a range of grays instead of black or white. „ Copying onto Both Sides of the Paper (Two-sided copy) You can adjust the image quality according to the document to copy in grayscale. LONG-SIDE STAPLE: Staples on the long side of ...
User's Guide
Page 52
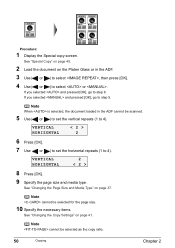
If you selected and pressed [OK], go to step 8. VERTICAL HORIZONTAL 2 8 Press [OK]. 9 Specify the page size and media type. See "Special Copy" on page 45. 2 Load the document on page 41. VERTICAL HORIZONTAL 2 6 Press [OK]. 7 Use [ ] or [ ] to set the vertical repeats (1 to step 5. If you selected and pressed [OK], go to 4). Note When is selected, the document loaded in the ADF. 3 Use [ ] or [ ] to select , then press [OK]. 4 Use [ ] or [ ] to 4). Note cannot be selected for the page size. 10 Specify the necessary items. See "Changing the Copy Settings" on...
If you selected and pressed [OK], go to step 8. VERTICAL HORIZONTAL 2 8 Press [OK]. 9 Specify the page size and media type. See "Special Copy" on page 45. 2 Load the document on page 41. VERTICAL HORIZONTAL 2 6 Press [OK]. 7 Use [ ] or [ ] to set the vertical repeats (1 to step 5. If you selected and pressed [OK], go to 4). Note When is selected, the document loaded in the ADF. 3 Use [ ] or [ ] to select , then press [OK]. 4 Use [ ] or [ ] to 4). Note cannot be selected for the page size. 10 Specify the necessary items. See "Changing the Copy Settings" on...
User's Guide
Page 56
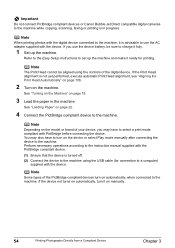
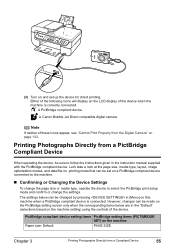
... from a Compliant Device Chapter 3 If the device not turns on automatically, turn on the device or select Play mode manually after connecting the device to the machine. Note Depending on automatically, when connected to the machine. Note Some types of the... in progress. See "Loading Paper" on the machine. Perform necessary operations according to the instruction manual supplied with the device. Important Do not connect PictBridge compliant devices or Canon Bubble Jet Direct compatible digital cameras to the machine while copying, scanning, faxing or printing is not...
... from a Compliant Device Chapter 3 If the device not turns on automatically, turn on the device or select Play mode manually after connecting the device to the machine. Note Depending on automatically, when connected to the machine. Note Some types of the... in progress. See "Loading Paper" on the machine. Perform necessary operations according to the instruction manual supplied with the device. Important Do not connect PictBridge compliant devices or Canon Bubble Jet Direct compatible digital cameras to the machine while copying, scanning, faxing or printing is not...
User's Guide
Page 57
...print setup mode and confirm or change the page size or media type, operate the device to follow the instructions given in the instruction manual supplied with the PictBridge compliant device. Note If neither of these icons appear, see "Cannot Print Properly from a Compliant Device 55 The... (PICTBRIDGE SET) on the machine Paper size: Default PAGE SIZE Chapter 3 Printing Photographs Directly from the Digital Camera" on page 133. A Canon Bubble Jet Direct compatible digital camera. Either of the following icons will display on the LCD display of the device. (3) Turn on and set...
...print setup mode and confirm or change the page size or media type, operate the device to follow the instructions given in the instruction manual supplied with the PictBridge compliant device. Note If neither of these icons appear, see "Cannot Print Properly from a Compliant Device 55 The... (PICTBRIDGE SET) on the machine Paper size: Default PAGE SIZE Chapter 3 Printing Photographs Directly from the Digital Camera" on page 133. A Canon Bubble Jet Direct compatible digital camera. Either of the following icons will display on the LCD display of the device. (3) Turn on and set...
User's Guide
Page 60
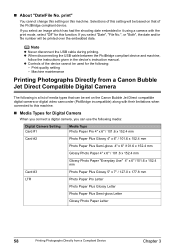
If you select an image which has had the shooting date embedded in the device's instruction manual. Note z Never disconnect the USB cable during printing. z When disconnecting the USB cable between the PictBridge compliant device and machine, follow the ..., you can be set on that can use the following is a list of media types that of this function. Machine maintenance Printing Photographs Directly from a Canon Bubble Jet Direct Compatible Digital Camera The following media: Digital Camera Setting Card #1 Media Type Photo Paper Pro 4" x 6" / 101.6 x 152.4 mm Card #2 ...
If you select an image which has had the shooting date embedded in the device's instruction manual. Note z Never disconnect the USB cable during printing. z When disconnecting the USB cable between the PictBridge compliant device and machine, follow the ..., you can be set on that can use the following is a list of media types that of this function. Machine maintenance Printing Photographs Directly from a Canon Bubble Jet Direct Compatible Digital Camera The following media: Digital Camera Setting Card #1 Media Type Photo Paper Pro 4" x 6" / 101.6 x 152.4 mm Card #2 ...
User's Guide
Page 61
... the following prints: - Machine maintenance Chapter 3 Printing Photographs Directly from the digital camera, the date when the photograph was taken is to your digital camera's manual. You can be scaled automatically according to the image size set on the digital camera and the size of images, or make a standard print from...
... the following prints: - Machine maintenance Chapter 3 Printing Photographs Directly from the digital camera, the date when the photograph was taken is to your digital camera's manual. You can be scaled automatically according to the image size set on the digital camera and the size of images, or make a standard print from...
User's Guide
Page 62
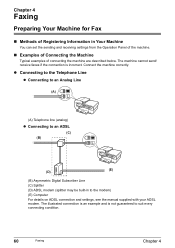
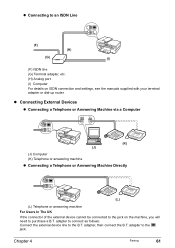
The machine cannot send/ receive faxes if the connection is not guaranteed to the modem) (E) Computer For details on ADSL connection and settings, see the manual supplied with your ADSL modem. z Connecting to the Telephone Line z Connecting to an Analog Line (A) (A) Telephone line (analog) z Connecting to an ADSL (C) (B) (E) (D) (B) Asymmetric Digital Subscriber ...
The machine cannot send/ receive faxes if the connection is not guaranteed to the modem) (E) Computer For details on ADSL connection and settings, see the manual supplied with your ADSL modem. z Connecting to the Telephone Line z Connecting to an Analog Line (A) (A) Telephone line (analog) z Connecting to an ADSL (C) (B) (E) (D) (B) Asymmetric Digital Subscriber ...
User's Guide
Page 63
... For Users In The UK If the connector of the external device cannot be connected to the jack on ISDN connection and settings, see the manuals supplied with your terminal adapter or dial-up router. Chapter 4 Faxing 61 z Connecting to an ISDN Line (F) (H) (G) (I) (F) ISDN line (G) Terminal adapter, etc. (H) Analog port (I) Computer...
... For Users In The UK If the connector of the external device cannot be connected to the jack on ISDN connection and settings, see the manuals supplied with your terminal adapter or dial-up router. Chapter 4 Faxing 61 z Connecting to an ISDN Line (F) (H) (G) (I) (F) ISDN line (G) Terminal adapter, etc. (H) Analog port (I) Computer...
User's Guide
Page 72
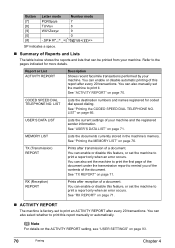
...to print a report only when an error occurs. You can enable or disable this feature, or set the machine to print this report manually or automatically. Report or List ACTIVITY REPORT Description Shows recent facsimile transactions performed by your machine and the registered sender information. You can ...LIST Lists the destination numbers and names registered for more details. USER'S DATA LIST Lists the current settings of the document. You can also manually set the machine to print the first page of this feature, or set to print a report only when an error occurs. You can...
...to print a report only when an error occurs. You can enable or disable this feature, or set the machine to print this report manually or automatically. Report or List ACTIVITY REPORT Description Shows recent facsimile transactions performed by your machine and the registered sender information. You can ...LIST Lists the destination numbers and names registered for more details. USER'S DATA LIST Lists the current settings of the document. You can also manually set the machine to print the first page of this feature, or set to print a report only when an error occurs. You can...
User's Guide
Page 75
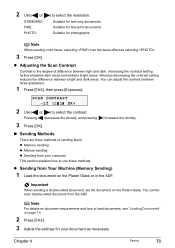
...: Suitable for your computer This section explains how to select the resolution. z Adjusting the Scan Contrast Contrast is the degree of sending faxes: z Memory sending z Manual sending z Sending from your document as selecting . 3 Press [OK]. 2 Use [ ] or [ ] to use these methods. Pressing [ ] decreases the density, and pressing [ ] increases the density. 3 Press...
...: Suitable for your computer This section explains how to select the resolution. z Adjusting the Scan Contrast Contrast is the degree of sending faxes: z Memory sending z Manual sending z Sending from your document as selecting . 3 Press [OK]. 2 Use [ ] or [ ] to use these methods. Pressing [ ] decreases the density, and pressing [ ] increases the density. 3 Press...
User's Guide
Page 76
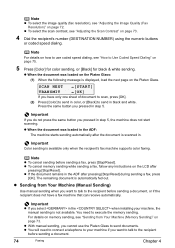
... z To select the scan contrast, see "Adjusting the Image Quality (Fax Resolution)" on how to use the Platen Glass to your machine, the manual sending is displayed, load the next page on page 73. Note For details on page 72. You need to connect a telephone to send documents.... the recipient does not have only one sheet of document to scan, press [OK]. (2) Press [Color] to send in black and white. z With manual sending, you pressed in the ADF: The machine starts sending automatically after pressing [Stop/Reset] during sending a fax, press [OK]. z When the document...
... z To select the scan contrast, see "Adjusting the Image Quality (Fax Resolution)" on how to use the Platen Glass to your machine, the manual sending is displayed, load the next page on page 73. Note For details on page 72. You need to connect a telephone to send documents.... the recipient does not have only one sheet of document to scan, press [OK]. (2) Press [Color] to send in black and white. z With manual sending, you pressed in the ADF: The machine starts sending automatically after pressing [Stop/Reset] during sending a fax, press [OK]. z When the document...
User's Guide
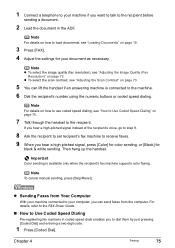
Page 77
... For details on how to use coded speed dialing, see "Loading Documents" on page 75. 7 Talk through the handset to the recipient. Note To cancel manual sending, press [Stop/Reset]. Chapter 4 Faxing 75 Note For details on how to load documents, see "How to Use Coded Speed Dialing" on page 19...
... For details on how to use coded speed dialing, see "Loading Documents" on page 75. 7 Talk through the handset to the recipient. Note To cancel manual sending, press [Stop/Reset]. Chapter 4 Faxing 75 Note For details on how to load documents, see "How to Use Coded Speed Dialing" on page 19...
User's Guide
Page 78
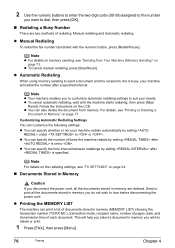
... LIST) showing the transaction number (TX/RX NO.), transaction mode, recipient name, number of pages, date, and transmission time of redialing: Manual redialing and Automatic redialing. Note z For details on memory sending, see "Sending from memory. z You can specify whether or not your ... machine can specify the time interval between redialings by setting after a specified interval. z Manual Redialing To redial the fax number last dialed with the numeric button, press [Redial/Pause]. z To cancel manual redialing, press [Stop/Reset]. z You can print a list of documents stored in...
... LIST) showing the transaction number (TX/RX NO.), transaction mode, recipient name, number of pages, date, and transmission time of redialing: Manual redialing and Automatic redialing. Note z For details on memory sending, see "Sending from memory. z You can specify whether or not your ... machine can specify the time interval between redialings by setting after a specified interval. z Manual Redialing To redial the fax number last dialed with the numeric button, press [Redial/Pause]. z To cancel manual redialing, press [Stop/Reset]. z You can print a list of documents stored in...
User's Guide
Page 81
... be applied when the paper size for fax use only: z If you receive mainly voice calls and sometimes faxes, or you want to receive faxes manually: z If you want to receive voice messages on your answering machine and receive faxes automatically: z If you want your telephone company (US and Canada only...
... be applied when the paper size for fax use only: z If you receive mainly voice calls and sometimes faxes, or you want to receive faxes manually: z If you want to receive voice messages on your answering machine and receive faxes automatically: z If you want your telephone company (US and Canada only...
User's Guide
Page 82
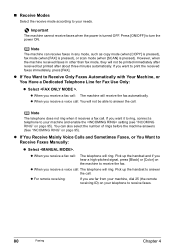
... mode (when [COPY] is pressed), fax mode (when [FAX] is pressed), or scan mode (when [SCAN] is turned OFF. z If You Want to Receive Faxes Manually: z Select . z When you receive a voice call: You will ring. z When you receive a fax call . You can receive faxes in other than fax mode, they will...
... mode (when [COPY] is pressed), fax mode (when [FAX] is pressed), or scan mode (when [SCAN] is turned OFF. z If You Want to Receive Faxes Manually: z Select . z When you receive a voice call: You will ring. z When you receive a fax call . You can receive faxes in other than fax mode, they will...
User's Guide
Page 85
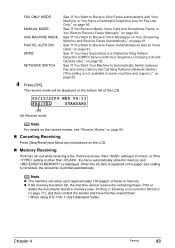
... and regions.):" on page 82. The receive mode will be displayed on the bottom left of faxes in Memory" on page 80. FAX ONLY MODE: MANUAL MODE: ANS.MACHINE MODE: FAX/TEL AUTO SW: DRPD: NETWORK SWITCH: See "If You Want to Receive Only Faxes Automatically with Your Telephone Company (... Modes" on page 80. „ Canceling Receiving Press [Stop/Reset] and follow any instructions on page 81. See "If You Have Subscribed to Receive Faxes Manually:" on page 77), and then contact the sender and have him/her resend them. * When using ITU-T No.1 chart (Standard mode) Chapter 4 Faxing 83 ...
... and regions.):" on page 82. The receive mode will be displayed on the bottom left of faxes in Memory" on page 80. FAX ONLY MODE: MANUAL MODE: ANS.MACHINE MODE: FAX/TEL AUTO SW: DRPD: NETWORK SWITCH: See "If You Want to Receive Only Faxes Automatically with Your Telephone Company (... Modes" on page 80. „ Canceling Receiving Press [Stop/Reset] and follow any instructions on page 81. See "If You Have Subscribed to Receive Faxes Manually:" on page 77), and then contact the sender and have him/her resend them. * When using ITU-T No.1 chart (Standard mode) Chapter 4 Faxing 83 ...


