User's Guide
Page 19
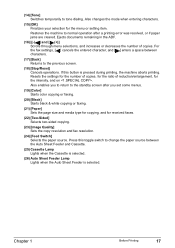
.... (14) [Tone] Switches temporarily to change the paper source between characters. (17) [Back] Returns to the previous screen. (18) [Stop/Reset] Cancels operations. Also changes the mode when entering characters. (15) [OK] Finalizes your selection for the ratio of copies. Chapter 1 Before Printing 17... Resets the settings for the number of copies, for the menu or setting item. Press this button is selected. For the fax settings, [ ...
.... (14) [Tone] Switches temporarily to change the paper source between characters. (17) [Back] Returns to the previous screen. (18) [Stop/Reset] Cancels operations. Also changes the mode when entering characters. (15) [OK] Finalizes your selection for the ratio of copies. Chapter 1 Before Printing 17... Resets the settings for the number of copies, for the menu or setting item. Press this button is selected. For the fax settings, [ ...

User's Guide
Page 21
...] repeatedly to select . 2 Use [ ] or [ ] to select , and press [OK]. 3 Use [ ] or [ ] to the Power Saver 5 MINUTES / 15 MINUTES / 1 HOUR / 8 HOURS 6 Press [OK]. 7 Press [Stop/Reset]. Chapter 1 Before Printing 19 OTHERS W PWR SAVE SETTING X 4 Press [OK]. 5 Use [ ] or [ mode. ] to select the time to switch the machine to select . Document Handling...
...] repeatedly to select . 2 Use [ ] or [ ] to select , and press [OK]. 3 Use [ ] or [ ] to the Power Saver 5 MINUTES / 15 MINUTES / 1 HOUR / 8 HOURS 6 Press [OK]. 7 Press [Stop/Reset]. Chapter 1 Before Printing 19 OTHERS W PWR SAVE SETTING X 4 Press [OK]. 5 Use [ ] or [ mode. ] to select the time to switch the machine to select . Document Handling...
User's Guide
Page 28
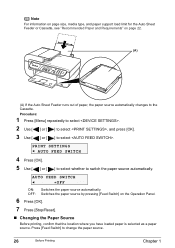
..., and paper support load limit for the Auto Sheet Feeder or Cassette, see "Recommended Paper and Requirements" on the Operation Panel. 6 Press [OK]. 7 Press [Stop/Reset]. „ Changing the Paper Source Before printing, confirm that the location where you have loaded paper is selected as a paper source. Procedure: 1 Press [Menu] repeatedly...
..., and paper support load limit for the Auto Sheet Feeder or Cassette, see "Recommended Paper and Requirements" on the Operation Panel. 6 Press [OK]. 7 Press [Stop/Reset]. „ Changing the Paper Source Before printing, confirm that the location where you have loaded paper is selected as a paper source. Procedure: 1 Press [Menu] repeatedly...
User's Guide
Page 43
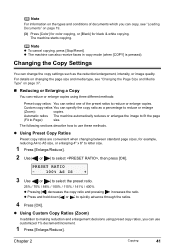
... RATIO - 100% AS IS + 3 Use [ ] or [ ] to Page): size. z Press and hold down [ ] or [ ] to select , then press [OK]. Note z To cancel copying, press [Stop/Reset]. z Using Custom Copy Ratios (Zoom) In addition to making reduction and enlargement decisions using preset copy ratios, you can copy, see "Changing the Page Size...
... RATIO - 100% AS IS + 3 Use [ ] or [ ] to Page): size. z Press and hold down [ ] or [ ] to select , then press [OK]. Note z To cancel copying, press [Stop/Reset]. z Using Custom Copy Ratios (Zoom) In addition to making reduction and enlargement decisions using preset copy ratios, you can copy, see "Changing the Page Size...
User's Guide
Page 64
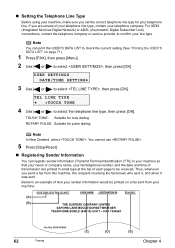
... sender information (Transmit Terminal Identification (TTI)) in small type at the top of how your sender information would be received. You cannot use . 5 Press [Stop/Reset]. „ Registering Sender Information You can print the USER'S DATA LIST to check the current setting (See "Printing the USER'S DATA LIST" on a fax sent...
... sender information (Transmit Terminal Identification (TTI)) in small type at the top of how your sender information would be received. You cannot use . 5 Press [Stop/Reset]. „ Registering Sender Information You can print the USER'S DATA LIST to check the current setting (See "Printing the USER'S DATA LIST" on a fax sent...
User's Guide
Page 65
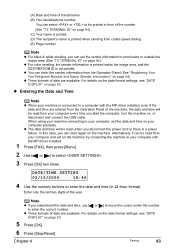
... to your computer precisely. z Entering the Date and Time Note z When your computer and set it can be reset when you start the computer, turn the machine on page 93. 5 Press [OK]. 6 Press [Stop/Reset]. z The date and time will be read from your machine is connected to a computer with the MP...
... to your computer precisely. z Entering the Date and Time Note z When your computer and set it can be reset when you start the computer, turn the machine on page 93. 5 Press [OK]. 6 Press [Stop/Reset]. z The date and time will be read from your machine is connected to a computer with the MP...
User's Guide
Page 66
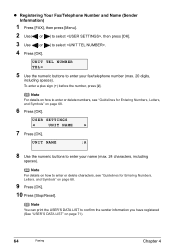
... press [OK]. 3 Use [ ] or [ ] to enter or delete characters, see "Guidelines for Entering Numbers, Letters, and Symbols" on page 68. 9 Press [OK]. 10 Press [Stop/Reset]. USER SETTINGS W UNIT NAME X 7 Press [OK]. To enter a plus sign (+) before the number, press [#]. Note For details on how to confirm the sender information you...
... press [OK]. 3 Use [ ] or [ ] to enter or delete characters, see "Guidelines for Entering Numbers, Letters, and Symbols" on page 68. 9 Press [OK]. 10 Press [Stop/Reset]. USER SETTINGS W UNIT NAME X 7 Press [OK]. To enter a plus sign (+) before the number, press [#]. Note For details on how to confirm the sender information you...
User's Guide
Page 67
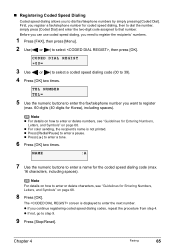
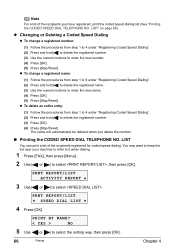
...; Registering Coded Speed Dialing Coded speed dialing allows you continue registering coded speed dialing codes, repeat the procedure from step 4. z Press [ ] to step 9. 9 Press [Stop/Reset]. The screen is not printed. z If you to enter or delete numbers, see "Guidelines for Entering Numbers, Letters, and Symbols" on page 68. 8 Press [OK...
...; Registering Coded Speed Dialing Coded speed dialing allows you continue registering coded speed dialing codes, repeat the procedure from step 4. z Press [ ] to step 9. 9 Press [Stop/Reset]. The screen is not printed. z If you to enter or delete numbers, see "Guidelines for Entering Numbers, Letters, and Symbols" on page 68. 8 Press [OK...
User's Guide
Page 68
... and hold [ ] to delete the registered name. (3) Use the numeric buttons to enter the new number. (4) Press [OK]. (5) Press [Stop/Reset]. Note For a list of the recipients registered for coded speed dialing. LIST" on page 66). PRNT REPORT/LIST W SPEED DIAL LIST X 4 Press...it when dialing. 1 Press [FAX], then press [Menu]. 2 Use [ ] or [ ] to delete the registered number. (3) Press [OK]. (4) Press [Stop/Reset]. z Changing or Deleting a Coded Speed Dialing z To change a registered name: (1) Follow the procedures from step 1 to 4 under "Registering Coded Speed Dialing". (2) ...
... and hold [ ] to delete the registered name. (3) Use the numeric buttons to enter the new number. (4) Press [OK]. (5) Press [Stop/Reset]. Note For a list of the recipients registered for coded speed dialing. LIST" on page 66). PRNT REPORT/LIST W SPEED DIAL LIST X 4 Press...it when dialing. 1 Press [FAX], then press [Menu]. 2 Use [ ] or [ ] to delete the registered number. (3) Press [OK]. (4) Press [Stop/Reset]. z Changing or Deleting a Coded Speed Dialing z To change a registered name: (1) Follow the procedures from step 1 to 4 under "Registering Coded Speed Dialing". (2) ...
User's Guide
Page 70
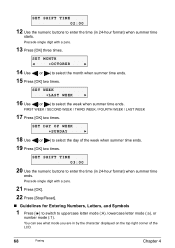
... Use [ ] or [ ] to enter the time (in 24-hour format) when summer time starts. Precede single digit with a zero. 21 Press [OK]. 22 Press [Stop/Reset]. „ Guidelines for Entering Numbers, Letters, and Symbols 1 Press [ ] to switch to select the month when summer time ends. 15 Press [OK] two times. FIRST...
... Use [ ] or [ ] to enter the time (in 24-hour format) when summer time starts. Precede single digit with a zero. 21 Press [OK]. 22 Press [Stop/Reset]. „ Guidelines for Entering Numbers, Letters, and Symbols 1 Press [ ] to switch to select the month when summer time ends. 15 Press [OK] two times. FIRST...
User's Guide
Page 76
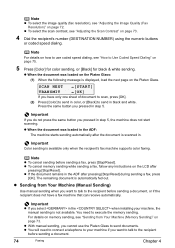
... z If you pressed in the when installing your machine if you want to talk to the recipient before sending a fax, press [Stop/Reset]. For details on memory sending, see "Adjusting the Scan Contrast" on page 73. 4 Dial the recipient's number (DESTINATION NUMBER) using the... Your Machine (Memory Sending)" on page 73. z With manual sending, you pressed in the ADF: The machine starts sending automatically after pressing [Stop/Reset] during sending a fax, press [OK]. Press the same button you cannot use coded speed dialing, see "Adjusting the Image Quality (Fax Resolution)"...
... z If you pressed in the when installing your machine if you want to talk to the recipient before sending a fax, press [Stop/Reset]. For details on memory sending, see "Adjusting the Scan Contrast" on page 73. 4 Dial the recipient's number (DESTINATION NUMBER) using the... Your Machine (Memory Sending)" on page 73. z With manual sending, you pressed in the ADF: The machine starts sending automatically after pressing [Stop/Reset] during sending a fax, press [OK]. Press the same button you cannot use coded speed dialing, see "Adjusting the Image Quality (Fax Resolution)"...
User's Guide
Page 77
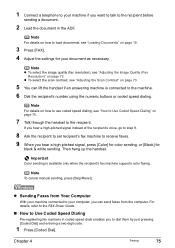
... recipient's fax machine to the machine. 6 Dial the recipient's number using the numeric buttons or coded speed dialing. Note To cancel manual sending, press [Stop/Reset]. z To select the scan contrast, see "Adjusting the Scan Contrast" on page 73. 5 You can send faxes from Your Computer With your machine connected to...
... recipient's fax machine to the machine. 6 Dial the recipient's number using the numeric buttons or coded speed dialing. Note To cancel manual sending, press [Stop/Reset]. z To select the scan contrast, see "Adjusting the Scan Contrast" on page 73. 5 You can send faxes from Your Computer With your machine connected to...
User's Guide
Page 78
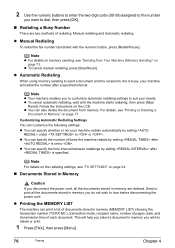
z To cancel manual redialing, press [Stop/Reset]. z Automatic Redialing When using memory sending to send a document and the recipient's line is busy, your machine will help you select a document in memory you ... page 77. Note z For details on memory sending, see "Sending from memory. z To cancel automatic redialing, wait until the machine starts redialing, then press [Stop/ Reset]. Note z Your machine enables you to customize automatic redialing settings to suit your machine redials automatically by setting after a specified interval. z Manual Redialing To redial...
z To cancel manual redialing, press [Stop/Reset]. z Automatic Redialing When using memory sending to send a document and the recipient's line is busy, your machine will help you select a document in memory you ... page 77. Note z For details on memory sending, see "Sending from memory. z To cancel automatic redialing, wait until the machine starts redialing, then press [Stop/ Reset]. Note z Your machine enables you to customize automatic redialing settings to suit your machine redials automatically by setting after a specified interval. z Manual Redialing To redial...
User's Guide
Page 79
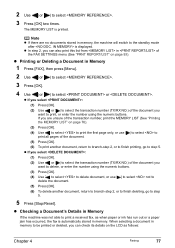
2 Use [ ] or [ ] to step 5. 5 Press [Stop/Reset]. z In step 2, you can also print this list from in of the document you want to delete, or enter the number using the numeric buttons. z ...
2 Use [ ] or [ ] to step 5. 5 Press [Stop/Reset]. z In step 2, you can also print this list from in of the document you want to delete, or enter the number using the numeric buttons. z ...
User's Guide
Page 85
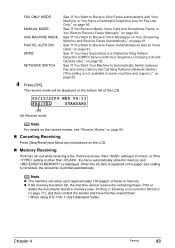
... Fax Use Only:" on page 80. Print or delete the documents stored in memory (see "Receive Modes" on page 80. „ Canceling Receiving Press [Stop/Reset] and follow any instructions on the LCD. „ Memory Receiving If ink has run out while receiving a fax, if ink level is low, if the...
... Fax Use Only:" on page 80. Print or delete the documents stored in memory (see "Receive Modes" on page 80. „ Canceling Receiving Press [Stop/Reset] and follow any instructions on the LCD. „ Memory Receiving If ink has run out while receiving a fax, if ink level is low, if the...
User's Guide
Page 88
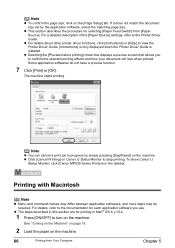
...installed. z Selecting the [Preview before printing] check box displays a preview screen that allows you use. The machine starts printing. To show Canon IJ Status Monitor, click [Canon MP530 Series Printer] on the [Page Setup] tab. z For details about other printer driver functions, click [Instructions] or [Help] to ...Chapter 5 If it does not match the document size set by simply pressing [Stop/Reset] on the machine. See "Turning on the Machine" on page 18. 2 Load the paper on Canon IJ Status Monitor to confirm the selected printing effects and how your document will look when...
...installed. z Selecting the [Preview before printing] check box displays a preview screen that allows you use. The machine starts printing. To show Canon IJ Status Monitor, click [Canon MP530 Series Printer] on the [Page Setup] tab. z For details about other printer driver functions, click [Instructions] or [Help] to ...Chapter 5 If it does not match the document size set by simply pressing [Stop/Reset] on the machine. See "Turning on the Machine" on page 18. 2 Load the paper on Canon IJ Status Monitor to confirm the selected printing effects and how your document will look when...

User's Guide
Page 98
... receiving. If you are using your usage condition). 96 Changing the Machine Settings Chapter 7 This setting is not available in some data may not be reset depending on the Operation Panel. OTHERS „ AUDIBLE TONES Selects the volume. z REMOTE RX Enables/disables remote receiving. z ALARM VOLUME Selects the alarm volume. „...
... receiving. If you are using your usage condition). 96 Changing the Machine Settings Chapter 7 This setting is not available in some data may not be reset depending on the Operation Panel. OTHERS „ AUDIBLE TONES Selects the volume. z REMOTE RX Enables/disables remote receiving. z ALARM VOLUME Selects the alarm volume. „...
User's Guide
Page 101
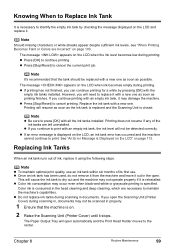
... is reinstalled. The Paper Output Tray will resume as soon as possible. z Press [OK] to cancel the current print job. z Press [Stop/Reset] to continue printing. Replace the ink tank with all the ink tanks installed. Printing will open . z Do not replace ink tanks during printing. ...z Press [Stop/Reset] to press [OK] with a new one as soon as printing finishes. Note z To maintain optimal print quality, use an ink tank within...
... is reinstalled. The Paper Output Tray will resume as soon as possible. z Press [OK] to cancel the current print job. z Press [Stop/Reset] to continue printing. Replace the ink tank with all the ink tanks installed. Printing will open . z Do not replace ink tanks during printing. ...z Press [Stop/Reset] to press [OK] with a new one as soon as printing finishes. Note z To maintain optimal print quality, use an ink tank within...
User's Guide
Page 116
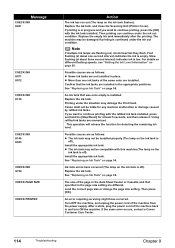
... the Print Head. For details on different flashing speeds, see "Getting the Ink Level Information" on page 98. Confirm that the ink tanks are different. Canon shall not be compatible with this machine (The lamp on the ink tank is in the Auto Sheet Feeder or Cassette and that was once... machine. Replace the ink tank. If you want to continue printing, press the [OK] with the refilled ink tank installed, press and hold the [Stop/Reset] for at about one ink tanks of the machine from the power supply. z The ink tank may not be damaged if printing is off ). See...
... the Print Head. For details on different flashing speeds, see "Getting the Ink Level Information" on page 98. Confirm that the ink tanks are different. Canon shall not be compatible with this machine (The lamp on the ink tank is in the Auto Sheet Feeder or Cassette and that was once... machine. Replace the ink tank. If you want to continue printing, press the [OK] with the refilled ink tank installed, press and hold the [Stop/Reset] for at about one ink tanks of the machine from the power supply. z The ink tank may not be damaged if printing is off ). See...
User's Guide
Page 117
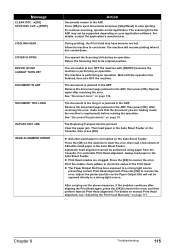
... Output Slot will resume printing when it has cooled down . See "Document Requirements" on your application software. Press [OK] to eject documents and press [Stop/Reset] to resolve the error. Then load paper in the ADF. COVER IS OPEN DEVICE IN USE CANNOT TURN OFF DOCUMENT IN ADF DOCUMENT TOO LONG...
... Output Slot will resume printing when it has cooled down . See "Document Requirements" on your application software. Press [OK] to eject documents and press [Stop/Reset] to resolve the error. Then load paper in the ADF. COVER IS OPEN DEVICE IN USE CANNOT TURN OFF DOCUMENT IN ADF DOCUMENT TOO LONG...


