
Toshiba Online User's Guide for Satellite M105
Page 53
... temperature before you install or remove a memory module, turn off the computer using the Start menu. See "Setting up your software" on page 43. An additional memory module can be accessed by a Toshiba authorized service provider. Before you replace it. If you install or remove a memory module while the computer is under your computer, or visit accessories.toshiba.com. NOTE Before adding external devices or memory, Toshiba recommends setting up your software. If you use a small Phillips screwdriver...
... temperature before you install or remove a memory module, turn off the computer using the Start menu. See "Setting up your software" on page 43. An additional memory module can be accessed by a Toshiba authorized service provider. Before you replace it. If you install or remove a memory module while the computer is under your computer, or visit accessories.toshiba.com. NOTE Before adding external devices or memory, Toshiba recommends setting up your software. If you use a small Phillips screwdriver...

Toshiba Online User's Guide for Satellite M105
Page 55
... to discharge any static electricity you can damage the memory module. Getting Started Adding memory (optional) 55 6 Using a small Phillips screwdriver, unscrew the screw that you may cause memory access problems. 9 Carefully remove the new memory module from its antistatic packaging, without touching its connector. Grease or dust on the computer. Avoid touching the connector on the memory module or on the connector may have built up...
... to discharge any static electricity you can damage the memory module. Getting Started Adding memory (optional) 55 6 Using a small Phillips screwdriver, unscrew the screw that you may cause memory access problems. 9 Carefully remove the new memory module from its antistatic packaging, without touching its connector. Grease or dust on the computer. Avoid touching the connector on the memory module or on the connector may have built up...
Toshiba Online User's Guide for Satellite M105
Page 58
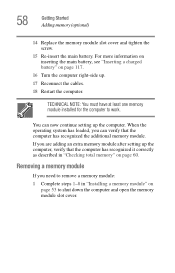
.... Removing a memory module If you can now continue setting up . 17 Reconnect the cables. 18 Restart the computer. TECHNICAL NOTE: You must have at least one memory module installed for the computer to shut down the computer and open the memory module slot cover. For more information on inserting the main battery, see "Inserting a charged battery" on page 53 to work. 58 Getting Started Adding memory (optional) 14 Replace the memory module slot cover and...
.... Removing a memory module If you can now continue setting up . 17 Reconnect the cables. 18 Restart the computer. TECHNICAL NOTE: You must have at least one memory module installed for the computer to shut down the computer and open the memory module slot cover. For more information on inserting the main battery, see "Inserting a charged battery" on page 53 to work. 58 Getting Started Adding memory (optional) 14 Replace the memory module slot cover and...
Toshiba Online User's Guide for Satellite M105
Page 60
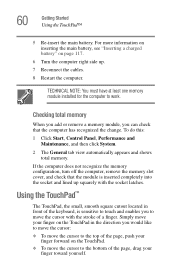
... Started Using the TouchPad™ 5 Re-insert the main battery. To do this: 1 Click Start, Control Panel, Performance and Maintenance, and then click System. 2 The General tab view automatically appears and shows total memory. If the computer does not recognize the memory configuration, turn off the computer, remove the memory slot cover, and check that the computer has recognized the change. Simply move your finger on the TouchPad...
... Started Using the TouchPad™ 5 Re-insert the main battery. To do this: 1 Click Start, Control Panel, Performance and Maintenance, and then click System. 2 The General tab view automatically appears and shows total memory. If the computer does not recognize the memory configuration, turn off the computer, remove the memory slot cover, and check that the computer has recognized the change. Simply move your finger on the TouchPad...
Toshiba Online User's Guide for Satellite M105
Page 63
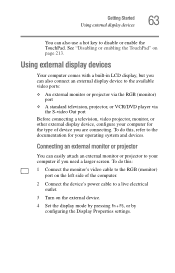
...-in LCD display, but you can also connect an external display device to the RGB (monitor) port on the left side of device you need a larger screen. To do this , refer to the documentation for the type of the computer. 2 Connect the device's power cable to disable or enable the TouchPad. See "Disabling or enabling the TouchPad" on page 213. Getting Started Using external display devices 63 You can also use a hot key to a live electrical outlet. 3 Turn on the external device. 4 Set the display mode...
...-in LCD display, but you can also connect an external display device to the RGB (monitor) port on the left side of device you need a larger screen. To do this , refer to the documentation for the type of the computer. 2 Connect the device's power cable to disable or enable the TouchPad. See "Disabling or enabling the TouchPad" on page 213. Getting Started Using external display devices 63 You can also use a hot key to a live electrical outlet. 3 Turn on the external device. 4 Set the display mode...
Toshiba Online User's Guide for Satellite M105
Page 165
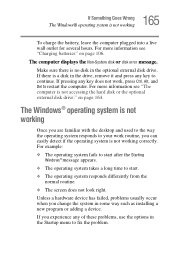
Make sure there is no disk in the drive, remove it and press any key to fix the problem. on page 106. If there is a disk in the optional external disk drive. Unless a hardware device has failed, problems usually occur when you change the system in the Startup menu to continue. The Windows® operating system is not working Once you can easily detect if the operating system is not working To charge the battery, leave...
Make sure there is no disk in the drive, remove it and press any key to fix the problem. on page 106. If there is a disk in the optional external disk drive. Unless a hardware device has failed, problems usually occur when you change the system in the Startup menu to continue. The Windows® operating system is not working Once you can easily detect if the operating system is not working To charge the battery, leave...

Toshiba Online User's Guide for Satellite M105
Page 257
... connecting to a power source 46 connection set up 129 control buttons 61 critical applications 3 Ctrl keys 83 D desktop creating new icon 123 major features 123 desktop exploration 122 desktop icons 123 Device Manager 170 checking properties 171 disabling a device 171 devices keyboard 65 mouse 65 Disk Defragmenter 179 disk drive cannot insert a disk 180 cannot read a disk 180 connecting 68 corrupted/damaged data files 180 external, connecting 68 missing files/trouble accessing a disk 178 running slow 179 display...
... connecting to a power source 46 connection set up 129 control buttons 61 critical applications 3 Ctrl keys 83 D desktop creating new icon 123 major features 123 desktop exploration 122 desktop icons 123 Device Manager 170 checking properties 171 disabling a device 171 devices keyboard 65 mouse 65 Disk Defragmenter 179 disk drive cannot insert a disk 180 cannot read a disk 180 connecting 68 corrupted/damaged data files 180 external, connecting 68 missing files/trouble accessing a disk 178 running slow 179 display...
Toshiba Online User's Guide for Satellite M105
Page 258
...-esse change/remove key assignments 151 starting 148 Fn-esse program 147 assigning a key 148 using drag-and-drop 149 function keys 83 H hardware conflicts 168 resolving 170 headphones using 136 Help and Support Windows 167 Hibernation mode 70 configuring 74 starting again from 75 hot key display brightness 212 display modes 212 Hibernation mode 211 instant password security 207 keyboard 213 keyboard overlays 214 password security 207 power usage mode 209 Standby mode 210 volume mute 206 hot key power profile mode 114 hot key utility...
...-esse change/remove key assignments 151 starting 148 Fn-esse program 147 assigning a key 148 using drag-and-drop 149 function keys 83 H hardware conflicts 168 resolving 170 headphones using 136 Help and Support Windows 167 Hibernation mode 70 configuring 74 starting again from 75 hot key display brightness 212 display modes 212 Hibernation mode 211 instant password security 207 keyboard 213 keyboard overlays 214 password security 207 power usage mode 209 Standby mode 210 volume mute 206 hot key power profile mode 114 hot key utility...
Toshiba Online User's Guide for Satellite M105
Page 259
... main battery removing 115 memory adding 52 problem solving 172 removing expansion slot cover 55 memory module inserting 56 installation 53 removing 59 microphone 135 modem determining COM port 126 problem solving 186, 187 resetting port to default settings 126 upgrading 126 monitor 63 connecting 63 not working 176 mouse installing 65 serial 65 N network accessing 129 Dial-Up Networking Wizard 129 networking wireless 130 O Opening the display panel 50 Optical drive problems 181 troubleshooting 181 other documentation 37 overlay keys 84 P password deleting a supervisor 145 disabling a user 146
... main battery removing 115 memory adding 52 problem solving 172 removing expansion slot cover 55 memory module inserting 56 installation 53 removing 59 microphone 135 modem determining COM port 126 problem solving 186, 187 resetting port to default settings 126 upgrading 126 monitor 63 connecting 63 not working 176 mouse installing 65 serial 65 N network accessing 129 Dial-Up Networking Wizard 129 networking wireless 130 O Opening the display panel 50 Optical drive problems 181 troubleshooting 181 other documentation 37 overlay keys 84 P password deleting a supervisor 145 disabling a user 146

Toshiba Online User's Guide for Satellite M105
Page 260
... accessing disk drives 164 battery charge does not last 174 battery not charging 173 cannot insert disk in drive 180 cannot read a disk 180 changing display properties 177 checking device properties 171 computer hangs when PC Card inserted 184 computer will not power up 163 contacting Toshiba 201, 202 corrupted/damaged data files 180 Device Manager 170 disabling a device 171 disk drive is slow 179 display is blank 176 external display not working 178 external monitor 176 faulty memory...
... accessing disk drives 164 battery charge does not last 174 battery not charging 173 cannot insert disk in drive 180 cannot read a disk 180 changing display properties 177 checking device properties 171 computer hangs when PC Card inserted 184 computer will not power up 163 contacting Toshiba 201, 202 corrupted/damaged data files 180 Device Manager 170 disabling a device 171 disk drive is slow 179 display is blank 176 external display not working 178 external monitor 176 faulty memory...
User Manual
Page 19
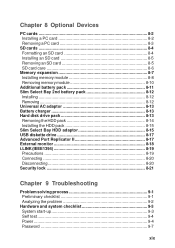
... AC adaptor 8-13 Battery charger 8-13 Hard disk drive pack 8-13 Removing the HDD pack 8-14 Installing the HDD pack 8-15 Slim Select Bay HDD adaptor 8-15 USB diskette drive 8-17 Advanced Port Replicator II 8-17 External monitor 8-18 i.LINK (IEEE1394 8-19 Precautions 8-19 Connecting 8-20 Disconnecting 8-20 Security lock 8-21 Chapter 9 Troubleshooting Problem solving process 9-1 Preliminary checklist 9-1 Analyzing the problem 9-2 Hardware and system checklist 9-3 System start-up 9-3 Self test 9-4 Power 9-4 Password 9-7 xix
... AC adaptor 8-13 Battery charger 8-13 Hard disk drive pack 8-13 Removing the HDD pack 8-14 Installing the HDD pack 8-15 Slim Select Bay HDD adaptor 8-15 USB diskette drive 8-17 Advanced Port Replicator II 8-17 External monitor 8-18 i.LINK (IEEE1394 8-19 Precautions 8-19 Connecting 8-20 Disconnecting 8-20 Security lock 8-21 Chapter 9 Troubleshooting Problem solving process 9-1 Preliminary checklist 9-1 Analyzing the problem 9-2 Hardware and system checklist 9-3 System start-up 9-3 Self test 9-4 Power 9-4 Password 9-7 xix
User Manual
Page 23
... and hotkeys. It also provides detailed information on configuring your purchase of reliable, high-performance computing. Then read Chapter 8, Optional Devices. Chapter 2, The Grand Tour, identifies the components of the computer and on using the AccuPoint II, Slim Select Bay modules, optical media drive, external diskette drive, Wireless LAN, Bluetooth, LAN, microphone and internal modem. Preface Congratulations on your computer, basic operations and care, using optional devices and troubleshooting. This powerful, lightweight notebook...
... and hotkeys. It also provides detailed information on configuring your purchase of reliable, high-performance computing. Then read Chapter 8, Optional Devices. Chapter 2, The Grand Tour, identifies the components of the computer and on using the AccuPoint II, Slim Select Bay modules, optical media drive, external diskette drive, Wireless LAN, Bluetooth, LAN, microphone and internal modem. Preface Congratulations on your computer, basic operations and care, using optional devices and troubleshooting. This powerful, lightweight notebook...
User Manual
Page 36
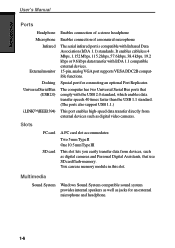
... video cameras. Multimedia Sound System Windows Sound System compatible sound system provides internal speakers as well as digital cameras and Personal Digital Assistants, that use memory module in this slot. It enables cableless 4 Mbps, 1.152 Mbps, 115.2 kbps, 57.6 kbps, 38.4 kbps, 19.2 kbps or 9.6 kbps data transfer with Infrared Data Association (IrDA 1.1) standards. Special port for an external microphone and headphone. 1-6 You can use SD card flash-memory. INTRODUCTION User's Manual Ports...
... video cameras. Multimedia Sound System Windows Sound System compatible sound system provides internal speakers as well as digital cameras and Personal Digital Assistants, that use memory module in this slot. It enables cableless 4 Mbps, 1.152 Mbps, 115.2 kbps, 57.6 kbps, 38.4 kbps, 19.2 kbps or 9.6 kbps data transfer with Infrared Data Association (IrDA 1.1) standards. Special port for an external microphone and headphone. 1-6 You can use SD card flash-memory. INTRODUCTION User's Manual Ports...

User Manual
Page 54
.... Setting of multi-monitor display in Windows XP, PC changes its display mode to control the on-screen pointer. TOSHIBA Console button You can associate an application to this button to the simultaneous display on internal and external display by selecting "Same Image". AccuPoint II A pointer control device located in Chapter 4, Operating Basics. When you record sound into your software. 2-8 You can be somewhat brighter than when it operates on battery power. Refer to save battery power. Display mode...
.... Setting of multi-monitor display in Windows XP, PC changes its display mode to control the on-screen pointer. TOSHIBA Console button You can associate an application to this button to the simultaneous display on internal and external display by selecting "Same Image". AccuPoint II A pointer control device located in Chapter 4, Operating Basics. When you record sound into your software. 2-8 You can be somewhat brighter than when it operates on battery power. Refer to save battery power. Display mode...

User Manual
Page 78
... entering Standby mode, be restored when the computer wakes up on , but the CPU and all capacitors fully discharge. The latter action works only if Wake-up from automatically entering standby mode, disable Standby in sleep mode. Standby mode In standby mode the power remains on Keyboard is enabled in HW Setup. · If a network application is in shutdown mode to save your data. ❑ Do not install or remove a memory module...
... entering Standby mode, be restored when the computer wakes up on , but the CPU and all capacitors fully discharge. The latter action works only if Wake-up from automatically entering standby mode, disable Standby in sleep mode. Standby mode In standby mode the power remains on Keyboard is enabled in HW Setup. · If a network application is in shutdown mode to save your data. ❑ Do not install or remove a memory module...
User Manual
Page 113
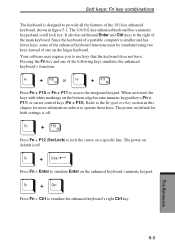
... keyboard functions must be simulated using two keys instead of one of the following keys simulates the enhanced keyboard's functions. When activated, the keys with white markings on a specific line. The power on the larger keyboard. Press Fn + F12 (ScrLock) to lock the cursor on the bottom edge become numeric keypad keys (Fn + F11) or cursor control keys (Fn + F10). It also has additional Enter and Ctrl keys...
... keyboard functions must be simulated using two keys instead of one of the following keys simulates the enhanced keyboard's functions. When activated, the keys with white markings on a specific line. The power on the larger keyboard. Press Fn + F12 (ScrLock) to lock the cursor on the bottom edge become numeric keypad keys (Fn + F11) or cursor control keys (Fn + F10). It also has additional Enter and Ctrl keys...
User Manual
Page 153
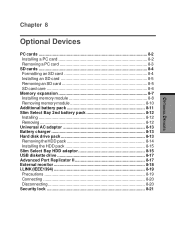
...Devices PC cards 8-2 Installing a PC card 8-2 Removing a PC card 8-3 SD cards 8-4 Formatting an SD card 8-4 Installing an SD card 8-5 Removing an SD card 8-5 SD card care 8-6 Memory expansion 8-7 Installing memory module 8-8 Removing memory module 8-10 Additional battery pack 8-11 Slim Select Bay 2nd battery pack 8-12 Installing 8-12 Removing 8-12 Universal AC adaptor 8-13 Battery charger 8-13 Hard disk drive pack 8-13 Removing the HDD pack 8-14 Installing the HDD pack 8-15 Slim Select Bay HDD adaptor 8-15 USB diskette drive 8-17 Advanced Port Replicator II 8-17 External...
...Devices PC cards 8-2 Installing a PC card 8-2 Removing a PC card 8-3 SD cards 8-4 Formatting an SD card 8-4 Installing an SD card 8-5 Removing an SD card 8-5 SD card care 8-6 Memory expansion 8-7 Installing memory module 8-8 Removing memory module 8-10 Additional battery pack 8-11 Slim Select Bay 2nd battery pack 8-12 Installing 8-12 Removing 8-12 Universal AC adaptor 8-13 Battery charger 8-13 Hard disk drive pack 8-13 Removing the HDD pack 8-14 Installing the HDD pack 8-15 Slim Select Bay HDD adaptor 8-15 USB diskette drive 8-17 Advanced Port Replicator II 8-17 External...
User Manual
Page 257
... remove data from a disk or other device from the keyboard to control your system (such as the terminal, printer, and disk drives) and the settings that controls the functions of a specific internal or peripheral device (e.g. controller: Built-in your system configuration. An example is usually supplied by the system when you enter from telephone lines. default: The parameter value automatically selected by batteries. configuration: The specific components in hardware and software that...
... remove data from a disk or other device from the keyboard to control your system (such as the terminal, printer, and disk drives) and the settings that controls the functions of a specific internal or peripheral device (e.g. controller: Built-in your system configuration. An example is usually supplied by the system when you enter from telephone lines. default: The parameter value automatically selected by batteries. configuration: The specific components in hardware and software that...

User Manual
Page 260
... extended function key, Fn, can manipulate. See also hard disk. hot dock/undock: Connecting or disconnecting a device to send serial data. host computer: The computer that reads and writes a hard disk. i.LINK (IEEE1394): This port enables high-speed data transfer directly from the computer while the computer's power is input for various hardware components. input: The data or instructions you set system parameters, such as digital video cameras.
... extended function key, Fn, can manipulate. See also hard disk. hot dock/undock: Connecting or disconnecting a device to send serial data. host computer: The computer that reads and writes a hard disk. i.LINK (IEEE1394): This port enables high-speed data transfer directly from the computer while the computer's power is input for various hardware components. input: The data or instructions you set system parameters, such as digital video cameras.

User Manual
Page 261
... supports a monochrome 720x350 text mode. I /O: Input/output. keyboard: An input device containing switches that emits light when a current is applied. M main board: See motherboard. Glossary-9 transfer data to and from a computer. Light Emitting Diode (LED): A semiconductor device that are activated by manually pressing marked keys. The viewingside coating is , in turn, representative of the (ASCII) character marked on a single chip. 2) An integrated circuit that transmits a specific code...
... supports a monochrome 720x350 text mode. I /O: Input/output. keyboard: An input device containing switches that emits light when a current is applied. M main board: See motherboard. Glossary-9 transfer data to and from a computer. Light Emitting Diode (LED): A semiconductor device that are activated by manually pressing marked keys. The viewingside coating is , in turn, representative of the (ASCII) character marked on a single chip. 2) An integrated circuit that transmits a specific code...


