Operating Instructions
Page 5
... Customizing the picture quality 38 Selecting the aspect ratio 38 Settings Basic setting operation 39 General settings 40 Sound settings 42 Screen settings 43 DVD and other playback settings 44 Setting the security code 46 Setting the clock 46 Using Optional Equipment Auxiliary...33 Using Gesture Command 34 Sound Adjustment Selecting the sound quality - RBE 36 Adjusting the speaker volume 37 Monitor Adjustment Touch panel calibration 37 Setting the background screen 37 Selecting the picture quality - List 33 Selecting a track/image/video file 33 Selecting a file type 33 ...
... Customizing the picture quality 38 Selecting the aspect ratio 38 Settings Basic setting operation 39 General settings 40 Sound settings 42 Screen settings 43 DVD and other playback settings 44 Setting the security code 46 Setting the clock 46 Using Optional Equipment Auxiliary...33 Using Gesture Command 34 Sound Adjustment Selecting the sound quality - RBE 36 Adjusting the speaker volume 37 Monitor Adjustment Touch panel calibration 37 Setting the background screen 37 Selecting the picture quality - List 33 Selecting a track/image/video file 33 Selecting a file type 33 ...
Operating Instructions
Page 11
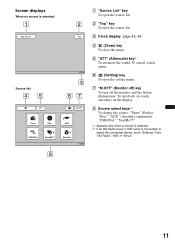
..." key To open the source list. G "M.OFF" (Monitor off) key To turn back on, touch anywhere on the display. C Clock display page 43, 46 D (Close) key To close the menu. To cancel, touch again. F (Setting) key To open the source list. To turn off the monitor and the button... illumination. E "ATT" (Attenuate) key*1 To attenuate the sound. Screen displays When no source is connected: to select the connected device...
..." key To open the source list. G "M.OFF" (Monitor off) key To turn back on, touch anywhere on the display. C Clock display page 43, 46 D (Close) key To close the menu. To cancel, touch again. F (Setting) key To open the source list. To turn off the monitor and the button... illumination. E "ATT" (Attenuate) key*1 To attenuate the sound. Screen displays When no source is connected: to select the connected device...
Operating Instructions
Page 28
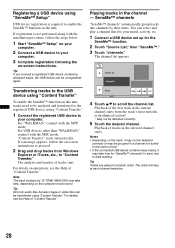
...performed along with the installation procedure, follow the on the unit. If registration is required to enable the SensMe™ function on -screen instructions to proceed. 2 Drag and drop tracks from the track's most melodic or rhythmical section*. * May not be analyzed and... USB device contains many tracks, it may take time for the SensMe™ function. 2 Touch "Source List," then "SensMe™." 3 Touch "channels." For details on -screen instructions. Relax 15 ZAP 12:00 4 Touch v/V to start . Notes • Depending on the track, it may not be detected correctly...
...performed along with the installation procedure, follow the on the unit. If registration is required to enable the SensMe™ function on -screen instructions to proceed. 2 Drag and drop tracks from the track's most melodic or rhythmical section*. * May not be analyzed and... USB device contains many tracks, it may take time for the SensMe™ function. 2 Touch "Source List," then "SensMe™." 3 Touch "channels." For details on -screen instructions. Relax 15 ZAP 12:00 4 Touch v/V to start . Notes • Depending on the track, it may not be detected correctly...

Operating Instructions
Page 31
...video playback "Movie," "Rental," "TV Show," "Music Video," "Playlist," "Podcast"* * May not appear depending on iPod setting. 1 During playback, touch "List." 2 Touch "Music" or "Video." 3 Touch the desired play modes. Playing an iPod 1 Reduce the volume on this unit. 2 Remove the cap from the item last played. In order...iPod screen*2, then playback starts from the USB connector, and connect the iPod to avoid sudden loud sound after a call, do not increase the volume on the unit during playback, see "Playback controls" on page 18. Support site http://esupport.sony.com http://www.sony....
...video playback "Movie," "Rental," "TV Show," "Music Video," "Playlist," "Podcast"* * May not appear depending on iPod setting. 1 During playback, touch "List." 2 Touch "Music" or "Video." 3 Touch the desired play modes. Playing an iPod 1 Reduce the volume on this unit. 2 Remove the cap from the item last played. In order...iPod screen*2, then playback starts from the USB connector, and connect the iPod to avoid sudden loud sound after a call, do not increase the volume on the unit during playback, see "Playback controls" on page 18. Support site http://esupport.sony.com http://www.sony....
Operating Instructions
Page 37
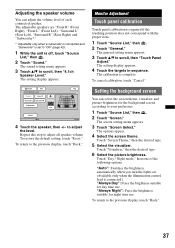
..."Subwoofer*." * Adjustable only when a subwoofer is connected and "Subwoofer" is set to adjust all speaker volume. Touch "Screen Theme," then the desired type. 5 Select the visualizer. Touch "Day / Night mode," then one of each connected speaker. Repeat this step to "ON" (page 42...suitable for night time use . The general setting menu appears. 3 Touch v/V to your preference. 1 Touch "Source List," then . 2 Touch "Screen." The setting display appears. 4 Touch the targets in sequence. Setting the background screen You can adjust the volume level of the following options. The ...
..."Subwoofer*." * Adjustable only when a subwoofer is connected and "Subwoofer" is set to adjust all speaker volume. Touch "Screen Theme," then the desired type. 5 Select the visualizer. Touch "Day / Night mode," then one of each connected speaker. Repeat this step to "ON" (page 42...suitable for night time use . The general setting menu appears. 3 Touch v/V to your preference. 1 Touch "Source List," then . 2 Touch "Screen." The setting display appears. 4 Touch the targets in sequence. Setting the background screen You can adjust the volume level of the following options. The ...
Operating Instructions
Page 38
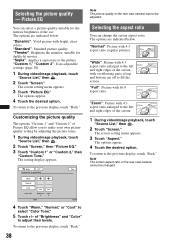
... the picture quality - "Custom 1," "Custom 2": User-adjustable settings (page 38). 1 During video/image playback, touch "Source List," then . 2 Touch "Screen." To return to the previous display, touch "Back." Customizing the picture quality The options "Custom 1" and "Custom 2" of the car. "Full": Picture with...the interior brightness of Picture EQ allow you to the left and right edges of the screen. 1 During video/image playback, touch "Source List," then . 2 Touch "Screen." Back ATT Top Picture EQ : Custom Tune Warm Normal Cool Color Tone Brightness Color 0 0 ...
... the picture quality - "Custom 1," "Custom 2": User-adjustable settings (page 38). 1 During video/image playback, touch "Source List," then . 2 Touch "Screen." To return to the previous display, touch "Back." Customizing the picture quality The options "Custom 1" and "Custom 2" of the car. "Full": Picture with...the interior brightness of Picture EQ allow you to the left and right edges of the screen. 1 During video/image playback, touch "Source List," then . 2 Touch "Screen." Back ATT Top Picture EQ : Custom Tune Warm Normal Cool Color Tone Brightness Color 0 0 ...
Operating Instructions
Page 39
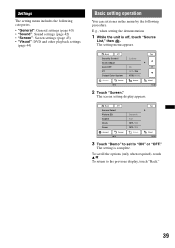
... System General Sound 15 Locked No OFF / ON NTSC / PAL Screen Top 1/4 Visual 12:00 2 Touch "Screen." The setting is off, touch "Source List," then . E.g., when setting the demonstration 1 While the unit is complete. The setting menu appears. The screen setting display appears. Back ATT Screen Select Picture EQ Aspect Clock Demo General Sound 15 Dynamic...
... System General Sound 15 Locked No OFF / ON NTSC / PAL Screen Top 1/4 Visual 12:00 2 Touch "Screen." The setting is off, touch "Source List," then . E.g., when setting the demonstration 1 While the unit is complete. The setting menu appears. The screen setting display appears. Back ATT Screen Select Picture EQ Aspect Clock Demo General Sound 15 Dynamic...

Operating Instructions
Page 43
.... Unit off . Unit status During reception/ playback. During video/ image playback. "z" indicates the default setting. To hide the clock display. Screen settings Touch c "Screen" c the desired item c the desired option. Theater, Sepia Custom 1, Custom 2 To customize the picture quality. Follow the page reference for... To select the mode. To show the clock display. Aspect (page 38) Full (z), Normal, Wide, Zoom To select the screen aspect ratio. LPF: 50 Hz, 60 Hz, 80 Hz, 100 Hz (z), 120 Hz To select the cut-off frequency. (Available only when "Subwoofer" is set ...
.... Unit off . Unit status During reception/ playback. During video/ image playback. "z" indicates the default setting. To hide the clock display. Screen settings Touch c "Screen" c the desired item c the desired option. Theater, Sepia Custom 1, Custom 2 To customize the picture quality. Follow the page reference for... To select the mode. To show the clock display. Aspect (page 38) Full (z), Normal, Wide, Zoom To select the screen aspect ratio. LPF: 50 Hz, 60 Hz, 80 Hz, 100 Hz (z), 120 Hz To select the cut-off frequency. (Available only when "Subwoofer" is set ...
Operating Instructions
Page 47
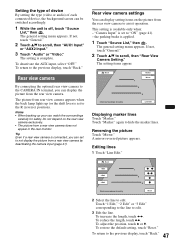
Setting the type of device By setting the type (video or audio) of each connected device, the background screen can display the picture from the rear view camera. Rear view camera By connecting the optional rear view camera to the CAMERA IN ... car, watch the surroundings carefully for safety. Notes • When backing up (or the shift lever is complete. This setting is applied. 1 Touch "Source List," then . If not, touch "General." 2 Touch v/V to edit. Back Check surroundings for safety. Back 1 Edit 2 Edit 3 Edit Check surroundings for safety. 1 2 3 Reset 2 Select the line to ...
Setting the type of device By setting the type (video or audio) of each connected device, the background screen can display the picture from the rear view camera. Rear view camera By connecting the optional rear view camera to the CAMERA IN ... car, watch the surroundings carefully for safety. Notes • When backing up (or the shift lever is complete. This setting is applied. 1 Touch "Source List," then . If not, touch "General." 2 Touch v/V to edit. Back Check surroundings for safety. Back 1 Edit 2 Edit 3 Edit Check surroundings for safety. 1 2 3 Reset 2 Select the line to ...
Operating Instructions
Page 52
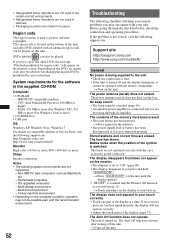
...region code is located on the bottom of the unit, and only DVDs labeled with your touch correctly. • Touch one part of the ignition is not connected properly. Support site http://esupport.sony.com http://www.sony.com/mobileAV General No power is being supplied to the unit. • Check the ... is used in cabinets. • Packaging cushions are made from /does not appear on the monitor. • The dimmer is turned on the monitor screen. will appear on . System requirements for the software in the supplied CD-ROM Computer • CPU/RAM - Non IBM PC type computers, such as...
...region code is located on the bottom of the unit, and only DVDs labeled with your touch correctly. • Touch one part of the ignition is not connected properly. Support site http://esupport.sony.com http://www.sony.com/mobileAV General No power is being supplied to the unit. • Check the ... is used in cabinets. • Packaging cushions are made from /does not appear on the monitor. • The dimmer is turned on the monitor screen. will appear on . System requirements for the software in the supplied CD-ROM Computer • CPU/RAM - Non IBM PC type computers, such as...
Operating Instructions
Page 58
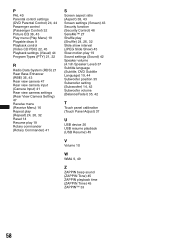
...Receive Menu) 16 Repeat play (Repeat) 24, 26, 32 Reset 14 Resume play 19 Rotary commander (Rotary Commander) 41 S Screen aspect ratio (Aspect) 38, 43 Screen settings (Screen) 43 Security function (Security Control) 46 SensMe™ 27 Shuffle play (Shuffle) 24, 26, 32 Slide show interval (JPEG ... language (Subtitle, DVD Subtitle Language) 19, 44 Subwoofer position 35 Subwoofer setting (Subwoofer) 14, 42 Subwoofer volume (Balance/Fader) 35, 42 T Touch panel calibration (Touch Panel Adjust) 37 U USB device 26 USB resume playback (USB Resume) 45 V Volume 10 W WMA 9, 49 Z ZAPPIN beep sound (ZAPPIN ...
...Receive Menu) 16 Repeat play (Repeat) 24, 26, 32 Reset 14 Resume play 19 Rotary commander (Rotary Commander) 41 S Screen aspect ratio (Aspect) 38, 43 Screen settings (Screen) 43 Security function (Security Control) 46 SensMe™ 27 Shuffle play (Shuffle) 24, 26, 32 Slide show interval (JPEG ... language (Subtitle, DVD Subtitle Language) 19, 44 Subwoofer position 35 Subwoofer setting (Subwoofer) 14, 42 Subwoofer volume (Balance/Fader) 35, 42 T Touch panel calibration (Touch Panel Adjust) 37 U USB device 26 USB resume playback (USB Resume) 45 V Volume 10 W WMA 9, 49 Z ZAPPIN beep sound (ZAPPIN ...


