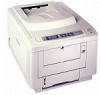

Quick Start Guide OKICOLOR 8 Series
Page 14
Install the Oil Roller 1 Remove the shipping tape (1) from the fuser lock levers. 3 Lower the right end of the toner cartridge, aligning the slot on the cartridge with the ridge in the locked position) before proceeding. Repeat steps 1 through 4 for each of the printer until it stops. Make sure the levers are pulled forward (in the image drum and push the blue lock lever toward the back of the three remaining toner cartridges. |14 OKICOLOR 8
Install the Oil Roller 1 Remove the shipping tape (1) from the fuser lock levers. 3 Lower the right end of the toner cartridge, aligning the slot on the cartridge with the ridge in the locked position) before proceeding. Repeat steps 1 through 4 for each of the printer until it stops. Make sure the levers are pulled forward (in the image drum and push the blue lock lever toward the back of the three remaining toner cartridges. |14 OKICOLOR 8

Quick Start Guide OKICOLOR 8 Series
Page 15
Turn it over and take a quick look at the gear end of the unit: if you see a blue shipping retainer (1), remove it. 4 Make sure the blue lever is toward the back of the printer, then lower the right end of the oil roller into the fuser unit and pull the lever forward to lock the oil roller in place. 3 Holding the oil roller by the fins with the caution label facing you, lower the oil roller into the fuser unit, sliding the left end under the retaining ledge (1). 5 Close the cover. | Quick Start 15 2 Remove the oil roller from its packaging.
Turn it over and take a quick look at the gear end of the unit: if you see a blue shipping retainer (1), remove it. 4 Make sure the blue lever is toward the back of the printer, then lower the right end of the oil roller into the fuser unit and pull the lever forward to lock the oil roller in place. 3 Holding the oil roller by the fins with the caution label facing you, lower the oil roller into the fuser unit, sliding the left end under the retaining ledge (1). 5 Close the cover. | Quick Start 15 2 Remove the oil roller from its packaging.

OKICOLOR 8 Series Setup Guide
Page 3
back of the printer. oil roller in place. 3 Open the printer cover. 6 Lower the oil roller into the fuser unit. 2 Turn it over and look at the gear end: if you 5 Make sure the blue lock lever is toward the 8 Pull the blue lock lever forward to lock the see a blue shipping retainer, remove it. Make sure the levers are pulled forward. 7 Lower the right end into the fuser unit, sliding the left end under the retaining ledge. | Setup Guide 3 3 Install the Oil Roller 1 Remove the oil roller packaging. 4 Remove the shipping tape from the blue levers.
back of the printer. oil roller in place. 3 Open the printer cover. 6 Lower the oil roller into the fuser unit. 2 Turn it over and look at the gear end: if you 5 Make sure the blue lock lever is toward the 8 Pull the blue lock lever forward to lock the see a blue shipping retainer, remove it. Make sure the levers are pulled forward. 7 Lower the right end into the fuser unit, sliding the left end under the retaining ledge. | Setup Guide 3 3 Install the Oil Roller 1 Remove the oil roller packaging. 4 Remove the shipping tape from the blue levers.
Handy Reference Guide
Page 3
and Canada 8 Warranty Service: Latin America 8 Oki Data Authorized Dealers and Service Centers 9 Shipping Your Printer 10 Print Media 11 Usable Media: Paper Tray(s 11 Usable Media: Front Tray 12 Loading Paper ... Cartridge 21 Replacing an Image Drum 24 Replacing the Waste Toner Box 28 Replacing the Oil Roller 28 Replacing the Transfer Belt 29 Replacing the Fuser 29 Setting the Color Registration Windows 95 / 98 / NT 4.0 30 Windows 3.1x 32 Macintosh 34 Setting the Color Balance 36 | Handy Reference 3 CoOnvteernvtisew Obtaining Service...
and Canada 8 Warranty Service: Latin America 8 Oki Data Authorized Dealers and Service Centers 9 Shipping Your Printer 10 Print Media 11 Usable Media: Paper Tray(s 11 Usable Media: Front Tray 12 Loading Paper ... Cartridge 21 Replacing an Image Drum 24 Replacing the Waste Toner Box 28 Replacing the Oil Roller 28 Replacing the Transfer Belt 29 Replacing the Fuser 29 Setting the Color Registration Windows 95 / 98 / NT 4.0 30 Windows 3.1x 32 Macintosh 34 Setting the Color Balance 36 | Handy Reference 3 CoOnvteernvtisew Obtaining Service...

Handy Reference Guide
Page 21
... Black Image Drum Kit 40370301 Yellow Image Drum Kit 40370302 Magenta Image Drum Kit 40370303 Cyan Image Drum Kit Miscellaneous 40490801 Transfer Belt Kit 40490901 Fuser Kit 120V 40645301 Oil Roller Kit 40645401 Toner Waste Box Replacing a Toner Cartridge Replace a toner cartridge when the TONER EMPTY message displays. Be careful to...
... Black Image Drum Kit 40370301 Yellow Image Drum Kit 40370302 Magenta Image Drum Kit 40370303 Cyan Image Drum Kit Miscellaneous 40490801 Transfer Belt Kit 40490901 Fuser Kit 120V 40645301 Oil Roller Kit 40645401 Toner Waste Box Replacing a Toner Cartridge Replace a toner cartridge when the TONER EMPTY message displays. Be careful to...

Handy Reference Guide
Page 22
... from its packaging and shake it back and forth a few times to distribute the toner evenly, then peel the tape off and wait for the fuser to remove it according to local regulations. |22 OKICOLOR 8 allow at least 20 minutes for parts in this area to cool before handling. 1 Turn the...
... from its packaging and shake it back and forth a few times to distribute the toner evenly, then peel the tape off and wait for the fuser to remove it according to local regulations. |22 OKICOLOR 8 allow at least 20 minutes for parts in this area to cool before handling. 1 Turn the...

Handy Reference Guide
Page 24
... an image drum needs changing and the toner is near the end of its corresponding color. Warning! Caution! allow at least 20 minutes for the fuser to Replace an Image Drum Each image drum, toner cartridge, and slot in this message appears, be sure you have a replacement drum on hand. You...
... an image drum needs changing and the toner is near the end of its corresponding color. Warning! Caution! allow at least 20 minutes for the fuser to Replace an Image Drum Each image drum, toner cartridge, and slot in this message appears, be sure you have a replacement drum on hand. You...

Handy Reference Guide
Page 29
When you see the message BELT LIFE on the printer display, you need to change the transfer belt. Purchase Kit # 40490901 (120V). Replacing the Transfer Belt Replacing the Fuser When you see the message FUSER LIFE on the printer display, you need to change the fuser. Replacement instructions are included in the kit and in the on -line OKICOLOR 8 User's Guide. Replacement instructions are included in the kit and in the on -line OKICOLOR 8 User's Guide. | Handy Reference 29 Purchase Kit # 40490801.
When you see the message BELT LIFE on the printer display, you need to change the transfer belt. Purchase Kit # 40490901 (120V). Replacing the Transfer Belt Replacing the Fuser When you see the message FUSER LIFE on the printer display, you need to change the fuser. Replacement instructions are included in the kit and in the on -line OKICOLOR 8 User's Guide. Replacement instructions are included in the kit and in the on -line OKICOLOR 8 User's Guide. | Handy Reference 29 Purchase Kit # 40490801.

Handy Reference Guide
Page 38
... down . Paper has jammed between the tray and the first image drum cartridge. 1 Turn off the printer and allow at least 20 minutes for the fuser to cool before handling. |38 OKICOLOR 8 switch off the printer and wait for parts in this area to cool down . Warning! High temperature; PaOpveerrvJaiemws If...
... down . Paper has jammed between the tray and the first image drum cartridge. 1 Turn off the printer and allow at least 20 minutes for the fuser to cool before handling. |38 OKICOLOR 8 switch off the printer and wait for parts in this area to cool down . Warning! High temperature; PaOpveerrvJaiemws If...

Handy Reference Guide
Page 40
Paper Feed Jam Paper has jammed under the image drums. 1 Turn off the printer and allow at least 20 minutes for parts in this area to cool before handling. 2 Press the OPEN button and lift the top cover all the way open. 3 Lift out each image drum cartridge and check underneath for the fuser to light can temporarily damage the drums. |40 OKICOLOR 8 Warning! High temperature; switch off the printer and wait for sheets of paper. Caution! Extended exposure to cool down.
Paper Feed Jam Paper has jammed under the image drums. 1 Turn off the printer and allow at least 20 minutes for parts in this area to cool before handling. 2 Press the OPEN button and lift the top cover all the way open. 3 Lift out each image drum cartridge and check underneath for the fuser to light can temporarily damage the drums. |40 OKICOLOR 8 Warning! High temperature; switch off the printer and wait for sheets of paper. Caution! Extended exposure to cool down.

Handy Reference Guide
Page 42
Paper Exit Jam Paper has jammed in the fuser or between the fuser and the paper exit. 1 Turn off the printer and wait for parts in this area to cool before handling. 2 Press the OPEN button and lift the top cover all the way open. 3 Cover the image drum cartridges with sheets of paper (1) to cool down. Warning! High temperature; allow at least 20 minutes for the fuser to protect them from light, then push the two colored fuser latch levers (2) towards the rear of the printer. |42 OKICOLOR 8
Paper Exit Jam Paper has jammed in the fuser or between the fuser and the paper exit. 1 Turn off the printer and wait for parts in this area to cool before handling. 2 Press the OPEN button and lift the top cover all the way open. 3 Cover the image drum cartridges with sheets of paper (1) to cool down. Warning! High temperature; allow at least 20 minutes for the fuser to protect them from light, then push the two colored fuser latch levers (2) towards the rear of the printer. |42 OKICOLOR 8

Handy Reference Guide
Page 43
4 Lift the fuser by its two handles straight up and out of the printer. 6 Lower the fuser back into the printer, press down firmly to seat it, and then pull on the two blue levers to make sure that the fuser is locked in position. 5 Pull the sheet of paper out of the fuser. 7 Open the Special Media Stacker. | Handy Reference 43
4 Lift the fuser by its two handles straight up and out of the printer. 6 Lower the fuser back into the printer, press down firmly to seat it, and then pull on the two blue levers to make sure that the fuser is locked in position. 5 Pull the sheet of paper out of the fuser. 7 Open the Special Media Stacker. | Handy Reference 43

Handy Reference Guide
Page 44
Printing continues automatically when you find. 9 Close the Special Media Stacker. 10 Remove the paper covering the image drums, then close the top cover, after a short pause to allow the fuser to make sure that it is locked. 8 Look into the rear of the printer and remove any pieces of paper you close the top cover and press down firmly on both sides to warm up. |44 OKICOLOR 8
Printing continues automatically when you find. 9 Close the Special Media Stacker. 10 Remove the paper covering the image drums, then close the top cover, after a short pause to allow the fuser to make sure that it is locked. 8 Look into the rear of the printer and remove any pieces of paper you close the top cover and press down firmly on both sides to warm up. |44 OKICOLOR 8

Handy Reference Guide
Page 50
OIL ROLLER LIFE The fuser oil roller needs to be replaced. For replacement instructions, refer to the online User's Guide. |50 OKICOLOR 8 CHANGE DRUM [color] One or more of the ...
OIL ROLLER LIFE The fuser oil roller needs to be replaced. For replacement instructions, refer to the online User's Guide. |50 OKICOLOR 8 CHANGE DRUM [color] One or more of the ...

Handy Reference Guide
Page 51
... data from the computer to the second paper tray when Tray 1 paper ran out. If this happens often, consider adding memory to be replaced. FUSER LIFE The fuser needs to the printer. ERROR RECEIVE BUFFER OVERFLOW The transfer of the metal rod below the image drum-make sure there is too complex...
... data from the computer to the second paper tray when Tray 1 paper ran out. If this happens often, consider adding memory to be replaced. FUSER LIFE The fuser needs to the printer. ERROR RECEIVE BUFFER OVERFLOW The transfer of the metal rod below the image drum-make sure there is too complex...

Handy Reference Guide
Page 52
ERROR E0 [#########] The fuser unit is not installed properly. ERROR D7 [#########] Magenta image drum is not installed correctly. Open the top and left-hand side covers, check and reinstall ...
ERROR E0 [#########] The fuser unit is not installed properly. ERROR D7 [#########] Magenta image drum is not installed correctly. Open the top and left-hand side covers, check and reinstall ...

Handy Reference Guide
Page 55
...SEC* Reduces power consumption. Immediately after the printer stops receiving data, the fuser heating element shuts off; 30 seconds later, the fan shuts off . Eight minutes after the printer stops receiving data, the fuser heating element shuts off: 30 seconds later, the fan shuts off . ...When the printer receives data, the fuser warms up before printing begins. 8 MIN Reduces power consumption. DISABLE The fuser and fan are always on; When the printer receives data, the fuser warms up before printing begins. the printer is ready to print immediately...
...SEC* Reduces power consumption. Immediately after the printer stops receiving data, the fuser heating element shuts off; 30 seconds later, the fan shuts off . Eight minutes after the printer stops receiving data, the fuser heating element shuts off: 30 seconds later, the fan shuts off . ...When the printer receives data, the fuser warms up before printing begins. 8 MIN Reduces power consumption. DISABLE The fuser and fan are always on; When the printer receives data, the fuser warms up before printing begins. the printer is ready to print immediately...


