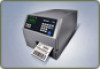
PX4i and PX6i High Performance Printer User's Manual
Page 5
... xi Send Feedback xi Telephone Support xi Who Should Read This Manual xii Related Documents xii 1 Using the Printer 1 Learning About the Printers 2 Identifying the Parts of the Printer 2 Selecting a Printer Language 3 Understanding the Control Panel 5 Understanding the Buttons 5 Understanding the LEDs 6 Understanding the Screen 7... for Internal Batch Takeup Printing 32 Loading Media for Printing From an External Supply 41 Loading Ribbon 43 Printing a Test Label 51 Creating and Printing Labels 53 Printing on RFID Media 54 PX4i and PX6i High Performance Printer User's Manual v
PX4i and PX6i High Performance Printer User's Manual
Page 15
This chapter contains these sections: • Learning About the Printers • Loading Media • Loading Ribbon • Printing a Test Label • Creating and Printing Labels • Printing on RFID Media 1 1 Using the Printer Use this chapter to familiarize yourself with the PX4i and PX6i printers.
PX4i and PX6i High Performance Printer User's Manual
Page 21
.... For help , see the Intermec Printer Language (IPL) Developer's Guide. • If you are running Fingerprint: • the printer beeps when you press a button. You can also use a Fingerprint command to operate. Loading Media The PX4i and PX6i can use Fingerprint commands to specify the frequency and duration of media or ribbon. • you can...
PX4i and PX6i High Performance Printer User's Manual
Page 57
... use a wide range of receiving face material and set up the printer accordingly. PX4i and PX6i High Performance Printer User's Manual 43 Make sure to select ribbon that matches the type of receiving face materials and provides a durable printout that is less vulnerable to external influences, such as oil, chemicals, heat, and ...
PX4i and PX6i High Performance Printer User's Manual
Page 58
f 44 PX4i and PX6i High Performance Printer User's Manual Chapter 1 - Using the Printer To load ribbon for thermal transfer printing 1 Open the front door and media cover. 2 (PX6i only) Pull the locking handle down.
PX4i and PX6i High Performance Printer User's Manual
Page 59
Using the Printer 3 Turn the printhead lift lever counter-clockwise to raise the printhead. 4 Remove any unused ribbon and the empty ribbon core. Chapter 1 - EasyCoder PX4i PX4i and PX6i High Performance Printer User's Manual 45
PX4i and PX6i High Performance Printer User's Manual
Page 60
Using the Printer 5 Adjust the ribbon supply bobbin for your ribbon. • If your ribbon is 55 to 60 mm (2.16 to 2.3 in) wide, compress the ribbon supply bobbin and move it so it snaps into the first (innermost) groove. 55-60 mm (2.1-2.3") • If your ribbon is 88 to 90 mm (3.5 in) wide, compress the ribbon supply bobbin and move it so it snaps into the second groove. 80-90 mm (3.5") 46 PX4i and PX6i High Performance Printer User's Manual Chapter 1 -
PX4i and PX6i High Performance Printer User's Manual
Page 61
PX4i and PX6i High Performance Printer User's Manual 47 Using the Printer • If your ribbon is 110 mm (4.3 in ) of ribbon. Pull out 20 cm (8 in ) wide, compress the ribbon supply bobbin and move it so it snaps into the third (outermost) groove. 110 mm (4.3") 6 Press the ribbon roll onto the ribbon supply bobbin and route the ribbon through the print unit. Chapter 1 -
PX4i and PX6i High Performance Printer User's Manual
Page 62
During printing, the rewind hub rotates counterclockwise. 48 PX4i and PX6i High Performance Printer User's Manual Using the Printer 7 Without releasing the ribbon, turn the printhead lift lever clockwise to lower the printhead and lock the ribbon. 8 Press the cardboard core at the front end of the ribbon onto the rewind hub. Chapter 1 -
PX4i and PX6i High Performance Printer User's Manual
Page 63
Chapter 1 - PX4i and PX6i High Performance Printer User's Manual 49 Using the Printer 9 Turn the printhead lift lever counter-clockwise to raise the printhead. 10 Wind up the ribbon until all of the transparent leader has passed the printhead and the ribbon becomes tight.
PX4i and PX6i High Performance Printer User's Manual
Page 65
...and network information. • get RFID tag information. • check print quality and determine which adjustments to perform. d Press T to Thermal Transfer Ribbon (TTR). To perform a testprint 1 Press T to enter the Setup menu, and use the keypad to go to the TESTPRINT menu: • ... set of bar codes. Prints a chess board pattern. Using the Printer 13 Set the Paper Type to exit the Setup menu. If you are using IPL, go to enter the Setup menu. Chapter 1 - c Press E. Prints a vertical set of bar codes. PX4i and PX6i High Performance Printer User's Manual 51
PX4i and PX6i High Performance Printer User's Manual
Page 68
... make sure that the RFID labels are using a high-quality ink ribbon, such as TMX 2304 or TMX 1500. For help configuring RFID parameters, see the Intermec Fingerprint Command Reference Manual or the IPL Command Reference Manual. 54 PX4i and PX6i High Performance Printer User's Manual To achieve the best possible print quality, follow...
PX4i and PX6i High Performance Printer User's Manual
Page 94
... Web Shell Settings Use the Web Shell page to reboot the printer. • For the settings in the bottom of ribbon during printing. [value] 80 PX4i and PX6i High Performance Printer User's Manual Ribbon Sensor Detects if the printer runs out of the screen, select the settings you to view and change the command language. Understanding...
PX4i and PX6i High Performance Printer User's Manual
Page 96
... the Notification method. 4 Click Submit Settings. Cutter Error There was lifted. Out of Ribbon You have to be sent when the preset value is not taken from mail, SNMP-trap, or both. 82 PX4i and PX6i High Performance Printer User's Manual Application Break A running Fingerprint application has been (Fingerprint only) interrupted manually or...
PX4i and PX6i High Performance Printer User's Manual
Page 121
... Blinking Cutter error3 Open and shut the cutter. For help , see "Loading Ribbon" on page 7. 1005 1031 1027 1058 1022 1059 1701 1702 1703 1704 1007 PX4i and PX6i High Performance Printer User's Manual 107 Keep in mind that some error messages: • are .... Troubleshooting and Maintaining the Printer Understanding Error Messages Use the following tables to troubleshoot common error messages you have corresponding error numbers. • cause the Intermec Ready-to-Work indicator to -Work Error Indicator Status Number Out of ribbon. Fingerprint Error Messages Message ...
PX4i and PX6i High Performance Printer User's Manual
Page 124
... Cutter Blinking Paper Fault LSS too high. This message appears Blinking when the print job is out of transfer ribbon. Chapter 4 - Ribbon Out The printer is paused. Printhead Up The printhead is out of media. Blinking Paper Fault LSS too low. Press the F... button to -Work Error Indicator Status Number Paper Out The printer is lifted. Blinking 1005 1031 1027 1058 1022 1059 1701 110 PX4i and PX6i High Performance Printer...
PX4i and PX6i High Performance Printer User's Manual
Page 126
...may be incorrect or the energy control may be faulty. There are compatible. • Make sure that your Intermec service representative. 112 PX4i and PX6i High Performance Printer User's Manual Clean the path. For help , see "Adjusting the Printhead Pressure" on the printhead. For help... may be missing dots on the printhead. Troubleshooting and Maintaining the Printer Print Quality Problems and Possible Solutions (continued) Problem Possible Solution There are using high quality media and ribbon. • The contrast may be foreign particles on the printhead....
PX4i and PX6i High Performance Printer User's Manual
Page 127
...Fingerprint, go to Media > Paper Type > TTR. 3 Press E. 4 Press T to adjust the label stop sensor. For help , contact your Intermec service representative. For help , see "Loading Media" on page 119. • The printhead pressure may be in order: • Make sure that the... The small core and supply post may need to exit the Setup menu. For help , see "Loading Ribbon" on my printout is not taken up on page 123. PX4i and PX6i High Performance Printer User's Manual 113 media. Chapter 4 - Reload the media. Try these possible solutions in the upper position...
PX4i and PX6i High Performance Printer User's Manual
Page 132
.... To adjust the pressure arm 1 Turn off the printer. 2 Open the front door and media cover. 3 If necessary, remove the ribbon. 118 PX4i and PX6i High Performance Printer User's Manual Troubleshooting and Maintaining the Printer Adjusting the Printer You may be detected by a weaker printout on the... provides even pressure. A poorly adjusted pressure arm may need to adjust your printer to accommodate your printing needs or improve performance. If you are using media that is less than full width, Intermec recommends that you adjust the position of the media path. Chapter 4 -
PX4i and PX6i High Performance Printer User's Manual
Page 133
... the arm is a photoelectric sensor that secures the pressure arm. PX4i and PX6i High Performance Printer User's Manual 119 Note: Move the pressure arm at the part closest to secure the arm. 7 Adjust the edge guides. 8 If necessary, load ribbon. 9 Close the front door and media cover. Adjusting the Label... type setup. The LSS must be aligned with the front tips of the labels. Troubleshooting and Maintaining the Printer 4 Loosen the knob that controls the printer's media feed by detecting gaps between labels, or slots or black marks in the arm. 6 When the pressure arm is centered ...