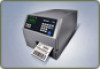
PX4i and PX6i High Performance Printer User's Manual
Page 5
...Support xi Send Feedback xi Telephone Support xi Who Should Read This Manual xii Related Documents xii 1 Using the Printer 1 Learning About the Printers 2 Identifying the Parts of the Printer 2 Selecting a Printer Language 3 Understanding the Control Panel 5 Understanding the Buttons 5 Understanding the LEDs 6 Understanding the Screen 7 ...Batch Takeup Printing 32 Loading Media for Printing From an External Supply 41 Loading Ribbon 43 Printing a Test Label 51 Creating and Printing Labels 53 Printing on RFID Media 54 PX4i and PX6i High Performance Printer User's Manual v
PX4i and PX6i High Performance Printer User's Manual
Page 7
...and Graphics 104 4 Troubleshooting and Maintaining the Printer 105 Troubleshooting the Printer 106 Contacting Product Support 106 Understanding Error Messages 107 Troubleshooting Printer Problems and Finding Solutions 111 Resetting the Printer 117 Adjusting the Printer 118 Adjusting the Pressure Arm 118 Adjusting the Label Stop Sensor 119 Adjusting the Printhead Pressure ... Interface 141 USB Host Interface 142 Ethernet Interface 142 Parallel IEEE 1284 Interface 143 Media Specifications 144 Accessories for the Printer 155 PX4i and PX6i High Performance Printer User's Manual vii
PX4i and PX6i High Performance Printer User's Manual
Page 15
This chapter contains these sections: • Learning About the Printers • Loading Media • Loading Ribbon • Printing a Test Label • Creating and Printing Labels • Printing on RFID Media 1 1 Using the Printer Use this chapter to familiarize yourself with the PX4i and PX6i printers.
PX4i and PX6i High Performance Printer User's Manual
Page 17
... are prompted to design label formats and write custom printer application software. Intermec Printer IPL is a Zebra™ interpreter program that lets you interact with different printer command languages. The first time you start your printer, you use ZSim, see the ZSim Programmer's Guide. PX4i and PX6i High Performance Printer User's Manual 3 Using the Printer Intake slot for external...
PX4i and PX6i High Performance Printer User's Manual
Page 19
... Button Print A Pause Pause + Shift Setup Feed P P + S E F Description Feeds or pauses a print job. PX4i and PX6i High Performance Printer User's Manual 5 For help, see the Intermec Fingerprint Developer's Guide. Reprints the last printed label Pauses and resumes printing. Feeds a blank label or other media type. Status F1 F2 F3 F4 F5 Shift 7 8 9 Pause Setup 4 5 6 Feed...
PX4i and PX6i High Performance Printer User's Manual
Page 20
...Intermec Readyto-Work® indicator. Intermec Off Ready-to-Work Indicator The Intermec Ready-to scroll through error and information messages. L or R After you press I, use these conditions: • The printer is initializing. • The printer is waiting for external resources. • There is a printer... a blank label and adjusts the media feed). Blinking blue A blinking light indicates one of these buttons to -Work Indicator is off when the printer: • is in Information mode (you pressed T on page 106. 6 PX4i and PX6i High Performance Printer User's Manual...
PX4i and PX6i High Performance Printer User's Manual
Page 21
...Intermec Direct Protocol allow custom-made messages to be composed and displayed according to operate. The sounds that are running : • If you are played depend on how you want the printer to the requirements of text, each with 16 characters. Loading Media The PX4i and PX6i can print on labels..., tickets, tags, and continuous stock in various forms. The method you use to turn off (straight-through) PX4i and PX6i High Performance Printer User's Manual 7 The PX4i and PX6i can use a Fingerprint command to...
PX4i and PX6i High Performance Printer User's Manual
Page 22
... type of media. In tear-off • Batch take-up • External supply • RFID If you switch to set the media sensitivity. 8 PX4i and PX6i High Performance Printer User's Manual For more information, see "Accessories for Tear-Off Printing In tear-off the media against the...; Non-adhesive continuous stock • Self-adhesive continuous stock with liner • Self-adhesive labels with liner • Tickets with gaps (gap stock), with or without perforations You can also install an optional label taken sensor so that the next copy in the batch is not printed until the current...
PX4i and PX6i High Performance Printer User's Manual
Page 29
... Consult your media supplier or test the media to advance the media and adjust the media feed. You can only be used for the Printer" on the media, such as label stiffness, release characteristics of less than 25 mm (1 in the front door. 14 Press F to make sure that it downwards.... PX4i and PX6i High Performance Printer User's Manual 15 Make sure that the media runs through the slot in ). Peel-off assembly. • cannot be performed ...
PX4i and PX6i High Performance Printer User's Manual
Page 34
Using the Printer 10 Route the media through the print unit and push it in as far as it will go. 11 Pull out approximately 40 cm (15 in) of labels and remove the labels from the liner. 40 cm/15 in 20 PX4i and PX6i High Performance Printer User's Manual Chapter 1 -
PX4i and PX6i High Performance Printer User's Manual
Page 38
...-off printing can install the automatic paper cutter option to facilitate loading media. 24 PX4i and PX6i High Performance Printer User's Manual Loading Media for non-adhesive continuous stock and self-adhesive labels with liner (cut through the media approximately 37 mm (1.5 in) in Setup mode... roughly corresponding to a paper weight of the printer's dot line. For help , see "Configuring Your Printer" on page 74. • is designed for paper-based media with isopropyl alcohol. • must be tilted forward to cut through labels, because the adhesive sticks to the shears, ...
PX4i and PX6i High Performance Printer User's Manual
Page 39
...: The cutting edge rotates when you turn on page 155. Chapter 1 - Turn off the printer. 2 Open the cutter and media cover. You can be fitted with an optional tray for collecting cutoff labels. • requires the front door to be removed. Always keep the cutter in the open... position. • can also install an optional label taken sensor so that prevents it is removed. To load media for the Printer" on the power and reboot the printer. PX4i and PX6i High Performance Printer User's Manual 25 For more information, see "Accessories for cut-off ...
Fingerprint Developer's Guide (old)
Page 28
... This method resembles the so-called "Escape sequences" used in Immediate Mode to by numbers instead of label printers. • Send commands that you will never need to print labels that can be used for three main purposes: • Send commands to print again. • ... in connection with a number but cannot be saved after execution. In instructions used , but ending in a single line: 12 Intermec Fingerprint Developer's Guide Understanding Fingerprint Syntax Special Devices (continued) Name storage: wand: Refers To Can Be OPENed For Electronic key. The...
Fingerprint Developer's Guide (old)
Page 148
Chapter 8 - ERL returns the number of error occurs when a program is feeding Printer out of media 132 Intermec Fingerprint Developer's Guide Resuming Execution After Errors This statement resumes execution after the error has been handled in the next table.... error that has occurred. Any other specified line. PRSTAT Error Values Value 0 1 2 4 8 16 32 128 Description Printer is OK Printhead lifted Label not removed (valid if Label Taken Sensor is installed, and returns 0 if printer has no LTS) Label Stop Sensor does not detect a label Printer out of thermal transfer ribbon, or the...
Intermec Printer Language (IPL) Developer's Guide (old)
Page 10
... Repairs > Repair Locations. Before you can download for your bar code label printers. To download documents 1 Visit the Intermec web site at www.intermec.com contains our documents (as IP address, and your local representative, from the Intermec web site, click About Us > Contact Us. x Intermec Printer Language (IPL) Developer's Guide For technical support in South Korea...
XMLLabel v6.10 User's Guide
Page 16
... Responsibility Role to print with the Intermec XMLReady printers. Setting Up Printers in Oracle Version 11i10 Use this section to understand how to set up OWM to create printers. To select the label printer mode 1 From the System Administrator Responsibility Role, go to : • select the label printer mode. • define the printer. • enter the IP address. To...
XMLLabel v6.10 User's Guide
Page 17
... Warehouse Manager role, go to Install > Printer > Register. XMLLabel v6.10 User's Guide 9 Getting Started To define printers 1 From the System Administrator Responsibility Role, go to reference your printer throughout the application. 3 From the Type list box, select Label. 4 In the Description field, type a meaningful description of the printer. 5 Repeat Steps 2 through 4 for each label printer. Chapter 1 -
XMLLabel v6.10 User's Guide
Page 19
... the list of Values, select the appropriate label type. you can only disable them. Note: You cannot delete printer or label type assignments from the context-sensitive menu. 3 From the List of document Label Types to the label type. 7 In the Value field, enter...Printer drop-down list, select a printer name to associate with the label type. 6 From the Level drop-down list, assign a level to which you can assign printers. 2 If a label type does not appear, right-click the Documents node and select New from this form; Getting Started The Choose Document and Label Printers...
Printer 802.11 Radio Interface Kit Installation Instructions
Page 11
15 Affix the labels to the appropriate locations on the printer. PD41 or PD42 802.11 Label 802.11 label PF2i 802.11 and MAC Address Labels 802.11 label MAC address labels Printer 802.11 Radio Interface Kit Installation Instructions 11
Printer 802.11 Radio Interface Kit Installation Instructions
Page 13
802.11 label Serial number and RF logo (POD label) MAC address labels PF4i 802.11, Serial Number, and MAC Address Labels 802.11 label Safety and EMC logo (POD label) PM4i Safety and 802.11 Labels Printer 802.11 Radio Interface Kit Installation Instructions 13