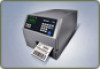
Intermec End User License Agreement
Page 1
...unauthorized copies are licensed to use the Software. 2.3 You may not duplicate or copy the Software except that is recorded, any printed Documentation or any "on which the Software was pre-installed or onto which have the right to obtain an injunction against the ...Documentation. 1.5 "You" or "Your" refers to the end user licensed to use the Software under this EULA. 1.6 "Intermec" means Intermec Technologies Corporation, a Washington corporation. 2.0 License 2.1 Intermec hereby grants You a license to use the Software only if You agree to be provided to You or installed on an...
PX4i and PX6i High Performance Printer User's Manual
Page 5
... Media for Tear-Off Printing 8 Loading Media for Peel-Off Printing 15 Loading Media for Cut-Off Printing 24 Loading Media for Internal Batch Takeup Printing 32 Loading Media for Printing From an External Supply 41 Loading Ribbon 43 Printing a Test Label 51 Creating and Printing Labels 53 Printing on RFID Media 54 PX4i and PX6i High Performance Printer...
PX4i and PX6i High Performance Printer User's Manual
Page 6
...Your Printer From the Printer Home Page 76 Configuring Communications Settings 77 Configuring Media Settings 77 Configuring RFID Settings (Printer With RFID Option 78 Configuring Print Engine Settings 79 Configuring Web Shell Settings 80 Configuring Alerts 81 Configuring General Network Settings 83 Configuring Mail Settings 85 Configuring SNMP Settings 87 Configuring... Your Printer With Commands Sent From Your PC 98 Configuring Your Printer Using SmartSystems Foundation 99 Configuring Your Printer Using Wavelink Avalanche 100 vi PX4i and PX6i High Performance Printer User's Manual
PX4i and PX6i High Performance Printer User's Manual
Page 8
...-Com,NET1 Menu 166 Fingerprint COM Menu 167 Fingerprint Network Menu 167 Fingerprint RFID Menu 167 Fingerprint Feedadj Menu 167 Fingerprint Media Menu 168 Fingerprint Print Defs Menu 169 IPL Setup Menus 170 IPL Main Level Setup Menu 170 IPL Ser-Com Menu 170 IPL COM Menu 170 IPL Network Menu... Required Environment Variables 177 Optional Environment Variables 178 x-www-url-Encoding Syntax Rules 179 Memory and Storage 180 Creating a Web Style Guide File 180 viii PX4i and PX6i High Performance Printer User's Manual
PX4i and PX6i High Performance Printer User's Manual
Page 11
... in this icon, you must be strictly observed to avoid death or serious injury to the persons working on the equipment. PX4i and PX6i High Performance Printer User's Manual xi Before You Begin Before You Begin This section provides you with safety information, ... or contain special instructions for additional product information. When you see this document before handling and operating Intermec equipment. A caution alerts you to touch components (such as printed circuit boards) that must follow standard ESD guidelines to damage from electrostatic discharge (ESD). Read and ...
PX4i and PX6i High Performance Printer User's Manual
Page 15
1 Using the Printer Use this chapter to familiarize yourself with the PX4i and PX6i printers. This chapter contains these sections: • Learning About the Printers • Loading Media • Loading Ribbon • Printing a Test Label • Creating and Printing Labels • Printing on RFID Media 1
PX4i and PX6i High Performance Printer User's Manual
Page 16
...parts of the printers. With sturdy, all-metal construction, these printers are rugged, high-volume, thermal transfer printers. The PX4i and PX6i support a maximum print width of the printer are referred to changes in harsh industrial environments and easily adapt to as "printer" unless otherwise noted.... Using the Printer Learning About the Printers The PX4i and PX6i High Performance printers are designed to excel at 24/7 printing in host environments or applications. Identifying the Parts of the Printer Use this manual, both models of...
PX4i and PX6i High Performance Printer User's Manual
Page 18
To select your printer language • Press the key that corresponds to the printer language you want to SETUP > PRINT DEFS > CMD LANGUAGE. 4 PX4i and PX6i High Performance Printer User's Manual Status F1=FP, F2=IPL F3=ZSIM, F4=DSIM F1 F2 F3 F4 F5 Shift 7 8 9 Pause Setup 4 5 6 Feed ...
PX4i and PX6i High Performance Printer User's Manual
Page 19
..., you to interact with the buttons and lights on the printer. For help, see the Intermec Fingerprint Developer's Guide. Reprints the last printed label Pauses and resumes printing. Understanding the Control Panel The control panel provides buttons, LEDs, and a liquid crystal display ... F5 Shift 7 8 9 Pause Setup 4 5 6 Feed Enter 123 ./- 0 Clear Control Panel: Use this illustration to SETUP > PRINT DEFS > CMD LANGUAGE. PX4i and PX6i High Performance Printer User's Manual 5 Stops a Fingerprint application. Understanding the Function Buttons Button Name Button...
PX4i and PX6i High Performance Printer User's Manual
Page 21
For help , see the Intermec Fingerprint Developer's Guide. The PX4i and PX6i can print on labels, tickets, tags, and continuous stock in various forms. The method you press a button. The screen displays error messages, as well as useful information ...when you want the printer to the requirements of text, each with 16 characters. The Intermec Fingerprint programming language and...
PX4i and PX6i High Performance Printer User's Manual
Page 22
... key to load the same type of media. You need this number to perform a "testfeed." For more information, see "Accessories for Tear-Off Printing In tear-off • Batch take-up • External supply • RFID If you are using IPL, save the label indicating the sensitivity ...number attached to set the media sensitivity. 8 PX4i and PX6i High Performance Printer User's Manual If you change the media type, or if the printer does not feed the media properly, simultaneously...
PX4i and PX6i High Performance Printer User's Manual
Page 23
f PX4i and PX6i High Performance Printer User's Manual 9 Chapter 1 - Using the Printer To load media for tear-off printing 1 Turn off the printer. 2 Open the front door and media cover. 3 (PX6i only) Pull the locking handle down.
PX4i and PX6i High Performance Printer User's Manual
Page 26
Chapter 1 - The slack absorber can be routed for better access and then snap-locked in open position. 9 Route the media through the print unit and push it in as far as it will go. Route the Media 12 PX4i and PX6i High Performance Printer User's Manual Using the Printer 8 Route the media under the slack absorber and forward toward the print mechanism.
PX4i and PX6i High Performance Printer User's Manual
Page 29
...F to make sure that the media runs through the slot in the batch is not printed until the current copy is suitable for self-adhesive labels with liner. • requires the optional peel-off printing: • can also install an optional label taken sensor so that have a label length... of the adhesive and liner, and resistance against electrostatic charging. Make sure that it downwards. Consult your media supplier or test the media to advance the media and adjust the media feed. PX4i ...
PX4i and PX6i High Performance Printer User's Manual
Page 30
f 16 PX4i and PX6i High Performance Printer User's Manual Using the Printer To load media for peel-off printing 1 Turn off the printer. 2 Open the front door and media cover. 3 (PX6i only) Pull the locking handle down. Chapter 1 -
PX4i and PX6i High Performance Printer User's Manual
Page 33
The slack absorber can be rotated for better access and then snap-locked in as far as it will go. 9 Route the media under the slack absorber and forward toward the print mechanism. Using the Printer 8 Fit a new roll of media onto the media supply hub and push the roll in open position. PX4i and PX6i High Performance Printer User's Manual 19 Chapter 1 -
PX4i and PX6i High Performance Printer User's Manual
Page 34
Chapter 1 - Using the Printer 10 Route the media through the print unit and push it in as far as it will go. 11 Pull out approximately 40 cm (15 in) of labels and remove the labels from the liner. 40 cm/15 in 20 PX4i and PX6i High Performance Printer User's Manual
PX4i and PX6i High Performance Printer User's Manual
Page 35
Using the Printer 12 Route the liner around the tear bar and back under the print unit. 13 Secure the liner to the takeup hub with the green clip and rotate the hub until the media is pulled tight. Chapter 1 - Secure the Liner PX4i and PX6i High Performance Printer User's Manual 21
PX4i and PX6i High Performance Printer User's Manual
Page 38
... cutter down and clean it with isopropyl alcohol. • must be used for Cut-Off Printing You can be tilted forward to cut off printing can install the automatic paper cutter option to facilitate loading media. 24 PX4i and PX6i High Performance Printer User's Manual If you do cut only liner between labels...
PX4i and PX6i High Performance Printer User's Manual
Page 39
...fitted with an optional tray for collecting cutoff labels. • requires the front door to be removed. For more information, see "Accessories for cut-off printing 1 Turn off the power or disconnect the cutter before cleaning. Warning: The cutting edge rotates when you turn on page 155. Keep your fingers away...can also install an optional label taken sensor so that prevents it from cutting edges. Turn off the printer. 2 Open the cutter and media cover. PX4i and PX6i High Performance Printer User's Manual 25 To load media for the Printer" on the power and reboot the printer.