Owners Manual
Page 1
K840PCM1DKX E Digital Camera EX-Z57 User's Guide Thank you for purchasing this CASIO product. • Before using it, be sure to read the precautions contained in this User's Guide. • Keep the User's Guide in a safe place for future reference. • For the most up-to-date information about this product, visit the official EXILIM Website at http://www.exilim.com/.
K840PCM1DKX E Digital Camera EX-Z57 User's Guide Thank you for purchasing this CASIO product. • Before using it, be sure to read the precautions contained in this User's Guide. • Keep the User's Guide in a safe place for future reference. • For the most up-to-date information about this product, visit the official EXILIM Website at http://www.exilim.com/.

Owners Manual
Page 2
... Adaptor (Inlet Type) (AD-C51G or AD-C52G) * The shape of the AC adaptor depends on the area where you purchased the camera. If something is missing, contact your camera. Camera Rechargeable Lithium Ion Battery (NP-40) USB Cradle (CA-27) Strap CD-ROM USB Cable Basic Reference • Note that all of...
... Adaptor (Inlet Type) (AD-C51G or AD-C52G) * The shape of the AC adaptor depends on the area where you purchased the camera. If something is missing, contact your camera. Camera Rechargeable Lithium Ion Battery (NP-40) USB Cradle (CA-27) Strap CD-ROM USB Cable Basic Reference • Note that all of...

Owners Manual
Page 3
...record an image 19 To view a recorded image 20 To delete an image 20 21 GETTING READY About This Manual 21 General Guide 22 Camera 22 USB Cradle 24 Monitor Screen Contents 25 Changing the Contents of the Monitor Screen 27 Attaching the Strap 29 Power Requirements 30 To ...load the battery 30 To charge the battery 31 To replace the battery 36 Power Supply Precautions 37 Turning the Camera On and Off 40 Configuring Power Saving Settings 42 Using the On-screen Menus 43 Configuring Display Language and Clock Settings ... 45 To ...
...record an image 19 To view a recorded image 20 To delete an image 20 21 GETTING READY About This Manual 21 General Guide 22 Camera 22 USB Cradle 24 Monitor Screen Contents 25 Changing the Contents of the Monitor Screen 27 Attaching the Strap 29 Power Requirements 30 To ...load the battery 30 To charge the battery 31 To replace the battery 36 Power Supply Precautions 37 Turning the Camera On and Off 40 Configuring Power Saving Settings 42 Using the On-screen Menus 43 Configuring Display Language and Clock Settings ... 45 To ...
Owners Manual
Page 4
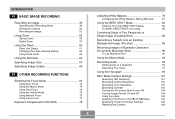
INTRODUCTION 49 BASIC IMAGE RECORDING Recording an Image 49 Specifying the Recording Mode 49 Aiming the Camera 50 Recording an Image 51 Using Zoom 56 Optical Zoom 56 Digital Zoom 57 Using the Flash 59 Flash Unit Status 61 Changing the Flash Intensity Setting 62 Using ... Movie Mode 93 Recording Audio 95 Adding Audio to a Snapshot 95 Recording Your Voice 97 Using the Histogram 99 REC Mode Camera Settings 101 Specifying ISO Sensitivity 101 Specifying Outline Sharpness 102 Specifying Color Saturation 103 Specifying Contrast 103 Turning the On-screen Grid ...
INTRODUCTION 49 BASIC IMAGE RECORDING Recording an Image 49 Specifying the Recording Mode 49 Aiming the Camera 50 Recording an Image 51 Using Zoom 56 Optical Zoom 56 Digital Zoom 57 Using the Flash 59 Flash Unit Status 61 Changing the Flash Intensity Setting 62 Using ... Movie Mode 93 Recording Audio 95 Adding Audio to a Snapshot 95 Recording Your Voice 97 Using the Histogram 99 REC Mode Camera Settings 101 Specifying ISO Sensitivity 101 Specifying Outline Sharpness 102 Specifying Color Saturation 103 Specifying Contrast 103 Turning the On-screen Grid ...

Owners Manual
Page 6
...On/Off Functions 146 Formatting Built-in Memory 147 149 USING A MEMORY CARD Using a Memory Card 150 To insert a memory card into the camera 150 To replace the memory card 151 Formatting a Memory Card 151 Copying Files 153 To copy all the files in built-in memory to ...USB DIRECT-PRINT 159 Date Printing 162 PRINT Image Matching 163 Exif Print 164 165 VIEWING IMAGES ON A COMPUTER Using the Camera with a Windows Computer ........ 165 Using the Camera with a Macintosh Computer ....... 171 Operations You Can Perform from Your Computer .. 175 Using a Memory Card to Transfer ...
...On/Off Functions 146 Formatting Built-in Memory 147 149 USING A MEMORY CARD Using a Memory Card 150 To insert a memory card into the camera 150 To replace the memory card 151 Formatting a Memory Card 151 Copying Files 153 To copy all the files in built-in memory to ...USB DIRECT-PRINT 159 Date Printing 162 PRINT Image Matching 163 Exif Print 164 165 VIEWING IMAGES ON A COMPUTER Using the Camera with a Windows Computer ........ 165 Using the Camera with a Macintosh Computer ....... 171 Operations You Can Perform from Your Computer .. 175 Using a Memory Card to Transfer ...
Owners Manual
Page 7
... Album Files 185 Saving an Album 187 To delete an album 188 Installing the Software from the CD-ROM 188 About the bundled CD-ROM (CASIO Digital Camera Software) 188 Computer System Requirements 190 Installing Software from the CD-ROM in Windows .. 191 Getting Started 192 Selecting a Language 192 Viewing the Contents of...
... Album Files 185 Saving an Album 187 To delete an album 188 Installing the Software from the CD-ROM 188 About the bundled CD-ROM (CASIO Digital Camera Software) 188 Computer System Requirements 190 Installing Software from the CD-ROM in Windows .. 191 Getting Started 192 Selecting a Language 192 Viewing the Contents of...
Owners Manual
Page 8
...use of Adobe Systems Incorporated in the United States and/or other related rights to these applications revert to change without notice. • CASIO COMPUTER CO., LTD. Be sure to back up all copyrights and other countries. • Other company, product and service names used...., LTD. assumes no responsibility for any damages or losses suffered by you or any loss or claims by the screens and configuration of the actual camera. • The SD logo is a registered trademark. • Windows, Internet Explorer, and DirectX are registered trademarks of Microsoft Corporation. •...
...use of Adobe Systems Incorporated in the United States and/or other related rights to these applications revert to change without notice. • CASIO COMPUTER CO., LTD. Be sure to back up all copyrights and other countries. • Other company, product and service names used...., LTD. assumes no responsibility for any damages or losses suffered by you or any loss or claims by the screens and configuration of the actual camera. • The SD logo is a registered trademark. • Windows, Internet Explorer, and DirectX are registered trademarks of Microsoft Corporation. •...
Owners Manual
Page 9
...point. 9 This means that provides a pixel yield of 99.99%. I LCD Panel The LCD panel is selected for the Auto Focus area, the camera takes simultaneous meter readings at seven different points and automatically selects the best one. • Pan Focus (page 74) This feature lets you want ...to provide more recording and playback between charges. • 12X zoom (page 56) 3X optical zoom, 4X digital zoom • 9.3MB flash memory Images can be recorded without permission of the copyright holder, whether for profit or for free, violates copyright laws ...
...point. 9 This means that provides a pixel yield of 99.99%. I LCD Panel The LCD panel is selected for the Auto Focus area, the camera takes simultaneous meter readings at seven different points and automatically selects the best one. • Pan Focus (page 74) This feature lets you want ...to provide more recording and playback between charges. • 12X zoom (page 56) 3X optical zoom, 4X digital zoom • 9.3MB flash memory Images can be recorded without permission of the copyright holder, whether for profit or for free, violates copyright laws ...

Owners Manual
Page 10
...• Support for SD memory cards and MMC (MultiMedia Cards) for your friend, even if you are trying to record and the camera performs troublesome setups automatically for Auto Focus to be performed. This means you can create images that matches the type of an alarm clock... current location. INTRODUCTION • Auto Pan Focus (page 71) When you press the shutter button all the way down without pausing, the camera immediately records the image without waiting for beautiful pictures every time. • Business Shot (page 90) Business Shot automatically corrects rectangular shapes when...
...• Support for SD memory cards and MMC (MultiMedia Cards) for your friend, even if you are trying to record and the camera performs troublesome setups automatically for Auto Focus to be performed. This means you can create images that matches the type of an alarm clock... current location. INTRODUCTION • Auto Pan Focus (page 71) When you press the shutter button all the way down without pausing, the camera immediately records the image without waiting for beautiful pictures every time. • Business Shot (page 90) Business Shot automatically corrects rectangular shapes when...
Owners Manual
Page 11
...record them . 11 Images can also be used when specifying images and quantities for Camera File system) data storage protocol provides image compatibility between the digital camera and printers. • Digital Print Order Format (DPOF) (page 156) Images can configure different sounds to play... whenever you turn on the camera's monitor screen. DPOF can be printed easily in the sequence ...
...record them . 11 Images can also be used when specifying images and quantities for Camera File system) data storage protocol provides image compatibility between the digital camera and printers. • Digital Print Order Format (DPOF) (page 156) Images can configure different sounds to play... whenever you turn on the camera's monitor screen. DPOF can be printed easily in the sequence ...
Owners Manual
Page 12
...create the risk of small children. Always leave maintenance and repair work up to a CASIO authorized service center. • Keep the small parts and accessories of this manual to "camera" refer to the CASIO EX-Z57 Digital Camera. • Never try to open the case of accident. 12 All references in... this camera out of the reach of electric shock when exposed. Doing so creates the risk ...
...create the risk of small children. Always leave maintenance and repair work up to a CASIO authorized service center. • Keep the small parts and accessories of this manual to "camera" refer to the CASIO EX-Z57 Digital Camera. • Never try to open the case of accident. 12 All references in... this camera out of the reach of electric shock when exposed. Doing so creates the risk ...

Owners Manual
Page 13
...ever notice smoke or a strange odor coming from the power outlet, and contact your dealer or nearest CASIO authorized service center. Never use any other liquids, and never let it get into the camera, immediately turn it off . Intense light from the power outlet and clean the area around the ..., or other cover while it is in use, and do not burn your fingers, remove the camera's battery and/or unplug the AC adaptor power cord from the power outlet, and contact your dealer or nearest CASIO authorized service center. • Never use it near a heater. • At least once a ...
...ever notice smoke or a strange odor coming from the power outlet, and contact your dealer or nearest CASIO authorized service center. Never use any other liquids, and never let it get into the camera, immediately turn it off . Intense light from the power outlet and clean the area around the ..., or other cover while it is in use, and do not burn your fingers, remove the camera's battery and/or unplug the AC adaptor power cord from the power outlet, and contact your dealer or nearest CASIO authorized service center. • Never use it near a heater. • At least once a ...
Owners Manual
Page 14
... 208). Follow the instructions provided by the message to ensure that the camera is configured correctly and operating properly (page 17). I Data Error Precautions • Your digital camera is manufactured using the camera to record important images, make storage of test images and check the ...can also corrupt other image data already stored in file memory. - Before using precision digital components. INTRODUCTION • Never open the battery cover, disconnect the AC adaptor from the camera, or unplug the AC adaptor from the USB cradle while a data communication operation is...
... 208). Follow the instructions provided by the message to ensure that the camera is configured correctly and operating properly (page 17). I Data Error Precautions • Your digital camera is manufactured using the camera to record important images, make storage of test images and check the ...can also corrupt other image data already stored in file memory. - Before using precision digital components. INTRODUCTION • Never open the battery cover, disconnect the AC adaptor from the camera, or unplug the AC adaptor from the USB cradle while a data communication operation is...

Owners Manual
Page 15
...When you should avoid exposing it to conditions that might cause condensation. • To keep the camera in the sun - Condensation can form on the exterior or on a cold day or otherwise... reach the same temperature as the new location. If condensation does form, remove the battery from the camera and leave the battery cover open for use or keep condensation from 0°C to 40°C (...32°F to 104°F). • Do not use in temperatures ranging from forming, place the camera into a plastic bag before moving it in the plastic bag until the air inside the bag has a chance...
...When you should avoid exposing it to conditions that might cause condensation. • To keep the camera in the sun - Condensation can form on the exterior or on a cold day or otherwise... reach the same temperature as the new location. If condensation does form, remove the battery from the camera and leave the battery cover open for use or keep condensation from 0°C to 40°C (...32°F to 104°F). • Do not use in temperatures ranging from forming, place the camera into a plastic bag before moving it in the plastic bag until the air inside the bag has a chance...
Owners Manual
Page 16
... dust particles from both the battery and USB cradle). This is totally cut off (from the lens surface by using a lens blower to power this camera. I Power Supply • Use only the special NP-40 rechargeable lithium ion battery to blow them off. Never touch the lens with a soft,... dry cloth. 16 I Other • The camera may sometimes notice some distortion in certain types of images, such as a slight bend in lines that should be straight. INTRODUCTION I Lens • Never ...
... dust particles from both the battery and USB cradle). This is totally cut off (from the lens surface by using a lens blower to power this camera. I Power Supply • Use only the special NP-40 rechargeable lithium ion battery to blow them off. Never touch the lens with a soft,... dry cloth. 16 I Other • The camera may sometimes notice some distortion in certain types of images, such as a slight bend in lines that should be straight. INTRODUCTION I Lens • Never ...

Owners Manual
Page 17
Place the camera onto the USB cradle to charge the battery (page 31). • Note that the shape of the AC adaptor depends on the area where you purchased the camera. • It takes about 190 minutes to achieve a full charge. 1 Inlet Type 2 2 Stopper 1 Plug-in Type [CHARGE] lamp Charging: Lights red Charging Complete: Lights green 3 17 QUICK START GUIDE QUICK START GUIDE First, charge the battery! 1. Load the battery into the camera (page 30). 1 2.
Place the camera onto the USB cradle to charge the battery (page 31). • Note that the shape of the AC adaptor depends on the area where you purchased the camera. • It takes about 190 minutes to achieve a full charge. 1 Inlet Type 2 2 Stopper 1 Plug-in Type [CHARGE] lamp Charging: Lights red Charging Complete: Lights green 3 17 QUICK START GUIDE QUICK START GUIDE First, charge the battery! 1. Load the battery into the camera (page 30). 1 2.

Owners Manual
Page 18
... then press [SET]. 7. Use [̆] and [̄] to select the date format setting you want , and then press [SET]. 8. Press [SET] to turn on the camera. 2. Press the power button to register the language setting. 4. QUICK START GUIDE To configure display language and clock settings • Be sure to configure the...
... then press [SET]. 7. Use [̆] and [̄] to select the date format setting you want , and then press [SET]. 8. Press [SET] to turn on the camera. 2. Press the power button to register the language setting. 4. QUICK START GUIDE To configure display language and clock settings • Be sure to configure the...

Owners Manual
Page 19
... press [SET]. • This causes " " (Snapshot mode) to compose the image, and then press the shutter button half way. • When the camera finishes its Auto Focus operation, the focus frame will turn green and the operation lamp will light green. 7. Press [ ] (REC). • This enters the... REC (recording) mode. 2. Holding the camera still, gently press the shutter button all the way down. 19 Point the camera at the subject, use the monitor screen to appear on the monitor screen. 6. Operation lamp Snapshot mode icon 7...
... press [SET]. • This causes " " (Snapshot mode) to compose the image, and then press the shutter button half way. • When the camera finishes its Auto Focus operation, the focus frame will turn green and the operation lamp will light green. 7. Press [ ] (REC). • This enters the... REC (recording) mode. 2. Holding the camera still, gently press the shutter button all the way down. 19 Point the camera at the subject, use the monitor screen to appear on the monitor screen. 6. Operation lamp Snapshot mode icon 7...

Owners Manual
Page 21
...currently storing images you record (page 51) The NP-40 Rechargeable Lithium Ion Battery The optionally available CASIO BC-30L rapid charger This term as used in this manual: "digital noise" "a REC mode" Means this manual. I Supplementary Information • IMPORTANT! GETTING READY ...GETTING READY This section contains information about things you need to know about the conventions used in this : The CASIO EX-Z57 Digital Camera The location where the camera is always ...
...currently storing images you record (page 51) The NP-40 Rechargeable Lithium Ion Battery The optionally available CASIO BC-30L rapid charger This term as used in this manual: "digital noise" "a REC mode" Means this manual. I Supplementary Information • IMPORTANT! GETTING READY ...GETTING READY This section contains information about things you need to know about the conventions used in this : The CASIO EX-Z57 Digital Camera The location where the camera is always ...

Owners Manual
Page 22
...Self-timer lamp 6 Lens 6 22 General Guide The following illustrations show the names of the following three locations. • The camera's built-in flash memory • An SD memory card loaded in the camera • A MultiMediaCard loaded in this manual is a general term that refers to the location where your... camera is currently storing the images you record. Camera I File Memory The term "file memory" in the camera For more information about how the camera stores images, see page 177. File memory can be any one of ...
...Self-timer lamp 6 Lens 6 22 General Guide The following illustrations show the names of the following three locations. • The camera's built-in flash memory • An SD memory card loaded in the camera • A MultiMediaCard loaded in this manual is a general term that refers to the location where your... camera is currently storing the images you record. Camera I File Memory The term "file memory" in the camera For more information about how the camera stores images, see page 177. File memory can be any one of ...


