
User Guide
Page 4
Table of Contents Troubleshooting 116 Cannot Install the Printer Driver 117 Print Quality Is Poor or Contains Errors 119 Printer Does Not Start or Stops During Print Jobs 136 Paper Does Not Feed Properly or Paper Jams 142 The POWER Lamp Flashes Orange 145 An Error Message Is Displayed on the Screen 148 Problems Unique to Windows 158 Problems Unique to the Macintosh 163 Appendices 166 Deleting an Unknown Device (USB interface 167 For Faster Printing 170 Specifications 173 Index ...187 4
Table of Contents Troubleshooting 116 Cannot Install the Printer Driver 117 Print Quality Is Poor or Contains Errors 119 Printer Does Not Start or Stops During Print Jobs 136 Paper Does Not Feed Properly or Paper Jams 142 The POWER Lamp Flashes Orange 145 An Error Message Is Displayed on the Screen 148 Problems Unique to Windows 158 Problems Unique to the Macintosh 163 Appendices 166 Deleting an Unknown Device (USB interface 167 For Faster Printing 170 Specifications 173 Index ...187 4

User Guide
Page 20
...;eld. Then click the [Properties] button. s Opening the Printer Properties dialog box from the [File] menu. For further details, see the user's manual for opening the Printer Properties dialog box. The Printer Properties dialog box opens. ® Depending on your application. Note 2 Ensure that [Canon S600] / [Canon S630] is generally used to print a document. Printer Driver Functions (Windows®) Opening the Printer Properties Dialog Box The Printer Properties dialog box can usually be...
...;eld. Then click the [Properties] button. s Opening the Printer Properties dialog box from the [File] menu. For further details, see the user's manual for opening the Printer Properties dialog box. The Printer Properties dialog box opens. ® Depending on your application. Note 2 Ensure that [Canon S600] / [Canon S630] is generally used to print a document. Printer Driver Functions (Windows®) Opening the Printer Properties Dialog Box The Printer Properties dialog box can usually be...

User Guide
Page 21
Printer Driver Functions (Windows®) s Opening the Printer Properties dialog box directly from the [Start] menu This method is used for maintenance operations, such as print head cleaning, or to specify printer settings common to your Windows documentation. 1 Click the [Start] button, then select [Settings], [Printers]. 2 Select the [Canon S600] / [Canon S630] icon. 3 Open the [File] menu and select: • Windows 95/Windows 98/Windows Me [Properties] • Windows 2000 [Printing Preferences...] • Windows NT 4.0 [Document Defaults...] The Printer Properties dialog box opens....
Printer Driver Functions (Windows®) s Opening the Printer Properties dialog box directly from the [Start] menu This method is used for maintenance operations, such as print head cleaning, or to specify printer settings common to your Windows documentation. 1 Click the [Start] button, then select [Settings], [Printers]. 2 Select the [Canon S600] / [Canon S630] icon. 3 Open the [File] menu and select: • Windows 95/Windows 98/Windows Me [Properties] • Windows 2000 [Printing Preferences...] • Windows NT 4.0 [Document Defaults...] The Printer Properties dialog box opens....
User Guide
Page 24
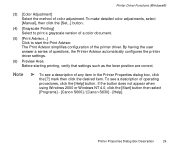
... Description 24 By having the user answer a series of color adjustment. If the button does not appear when using Windows 2000 or Windows NT 4.0, click the [Start] button then select [Programs] - [Canon S600] / [Canon S630] - [Help]. Printer Driver Functions (Windows®) (3) [Color Adjustment] Select the method of questions, the Printer Advisor automatically configures the printer driver settings. (6) Preview Area Before starting printing, verify that settings such as the lever position are correct. Note ® To see a description...
... Description 24 By having the user answer a series of color adjustment. If the button does not appear when using Windows 2000 or Windows NT 4.0, click the [Start] button then select [Programs] - [Canon S600] / [Canon S630] - [Help]. Printer Driver Functions (Windows®) (3) [Color Adjustment] Select the method of questions, the Printer Advisor automatically configures the printer driver settings. (6) Preview Area Before starting printing, verify that settings such as the lever position are correct. Note ® To see a description...

User Guide
Page 38
Printer Driver Functions (Windows®) Note ® To open the BJ Status Monitor when the printer is not printing, click the [Maintenance] tab in the Printer Properties dialog box and click the [Start Status Monitor] button. BJ Status Monitor Functions 38
Printer Driver Functions (Windows®) Note ® To open the BJ Status Monitor when the printer is not printing, click the [Maintenance] tab in the Printer Properties dialog box and click the [Start Status Monitor] button. BJ Status Monitor Functions 38
User Guide
Page 45
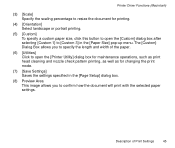
... how the document will print with the selected paper settings. Printer Driver Functions (Macintosh) (3) [Scale] Specify the scaling percentage to resize the document for printing. (4) [Orientation] Select landscape or portrait printing. (5) [Custom] To specify a custom paper size, click this button to open the [Printer Utility] dialog box for maintenance operations, such as print head cleaning and nozzle check pattern printing, as well as for changing the print mode. (7) [Save Settings] Saves the settings specified in the [Page Setup] dialog box...
... how the document will print with the selected paper settings. Printer Driver Functions (Macintosh) (3) [Scale] Specify the scaling percentage to resize the document for printing. (4) [Orientation] Select landscape or portrait printing. (5) [Custom] To specify a custom paper size, click this button to open the [Printer Utility] dialog box for maintenance operations, such as print head cleaning and nozzle check pattern printing, as well as for changing the print mode. (7) [Save Settings] Saves the settings specified in the [Page Setup] dialog box...

User Guide
Page 49
Description of Print Settings 49 Printer Driver Functions (Macintosh) (4) [Details...] Allows you to manually set the print quality and color settings in the [Detailed Setting] Dialog Box. (5) [Options...] Specify the output destination, print order and page layout for the document you are printing. (6) [Apply...] Allows you to register print settings or to implement a previously registered print setting.
Description of Print Settings 49 Printer Driver Functions (Macintosh) (4) [Details...] Allows you to manually set the print quality and color settings in the [Detailed Setting] Dialog Box. (5) [Options...] Specify the output destination, print order and page layout for the document you are printing. (6) [Apply...] Allows you to register print settings or to implement a previously registered print setting.

User Guide
Page 62
... [S600] / [S630] icon, then select the printer name in [Connected to:]. Follow the steps described below to connect the printer to the computer that will function as the print server. s Printer Setup To use the printer on a network, first set up the print server, then set up the Printer • Install the printer driver on installation, refer to the Quick Start Guide. • Use a USB cable to connect the printer to the network. Using the Printer with an Ethernet network environment. Using the Printer...
... [S600] / [S630] icon, then select the printer name in [Connected to:]. Follow the steps described below to connect the printer to the computer that will function as the print server. s Printer Setup To use the printer on a network, first set up the print server, then set up the Printer • Install the printer driver on installation, refer to the Quick Start Guide. • Use a USB cable to connect the printer to the network. Using the Printer with an Ethernet network environment. Using the Printer...

User Guide
Page 64
... Status Window] in the [File] menu. • The BJ Print Monitor and BJ Status Monitor The BJ Print Monitor and the BJ Status Monitor both display a list of a print job from the print server, start the BJ Status Monitor. This information includes the document name, number of pages, number of the queued documents. ¬ BJ Print Monitor Functions ¬ BJ Status Monitor Functions Using the Printer with a Network 64 The BJ Print Monitor allows you to change...
... Status Window] in the [File] menu. • The BJ Print Monitor and BJ Status Monitor The BJ Print Monitor and the BJ Status Monitor both display a list of a print job from the print server, start the BJ Status Monitor. This information includes the document name, number of pages, number of the queued documents. ¬ BJ Print Monitor Functions ¬ BJ Status Monitor Functions Using the Printer with a Network 64 The BJ Print Monitor allows you to change...

User Guide
Page 97
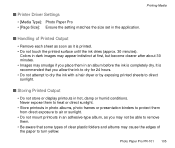
s Printable Area ¬ Printing Area High Resolution Paper HR-101N 97 Printing Media s Handling of Printed Output Do not stack more than 50 sheets in the application. If the output paper is printed. s Printer Driver Settings • [Media Type]: High Resolution Paper • [Page Size]: Ensure the setting matches the size set in the paper output tray. In this case, or if the ink takes a long time to dry, remove each sheet as soon as it is curled, it may prevent the next sheet being ejected.
s Printable Area ¬ Printing Area High Resolution Paper HR-101N 97 Printing Media s Handling of Printed Output Do not stack more than 50 sheets in the application. If the output paper is printed. s Printer Driver Settings • [Media Type]: High Resolution Paper • [Page Size]: Ensure the setting matches the size set in the paper output tray. In this case, or if the ink takes a long time to dry, remove each sheet as soon as it is curled, it may prevent the next sheet being ejected.

User Guide
Page 99
s Printable Area ¬ Printing Area Glossy Photo Paper GP-301 99 two minutes). s Printer Driver Settings • [Media Type]: Glossy Photo Paper • [Page Size]: Ensure the setting matches the size set in the paper output tray. • Do not touch the printed surface until the ink dries (approx. Printing Media s Handling of Printed Output • Do not stack more than 10 sheets in the application.
s Printable Area ¬ Printing Area Glossy Photo Paper GP-301 99 two minutes). s Printer Driver Settings • [Media Type]: Glossy Photo Paper • [Page Size]: Ensure the setting matches the size set in the paper output tray. • Do not touch the printed surface until the ink dries (approx. Printing Media s Handling of Printed Output • Do not stack more than 10 sheets in the application.

User Guide
Page 103
s Printer Driver Settings • [Media Type]: Glossy Photo Cards • [Page Size]: Canon 4 x 6 in (Canon 101.6 x 152.4 mm) Printing Media s Handling of Printed Output • Do not stack more than 20 sheets in the paper output tray. • Do not touch the printed surface until the ink dries (approx. two minutes). s Printable Area ¬ Printing Area Glossy Photo Cards FM-101 103
s Printer Driver Settings • [Media Type]: Glossy Photo Cards • [Page Size]: Canon 4 x 6 in (Canon 101.6 x 152.4 mm) Printing Media s Handling of Printed Output • Do not stack more than 20 sheets in the paper output tray. • Do not touch the printed surface until the ink dries (approx. two minutes). s Printable Area ¬ Printing Area Glossy Photo Cards FM-101 103
User Guide
Page 105
... remove them from direct exposure to turn yellow. Colors in an album before the ink is printed. • Do not touch the printed surface until the ink dries (approx. 30 minutes). Photo Paper Pro PR-101 105 Printing Media s Handling of the paper to air or sunlight. • Do not mount printouts in an adhesive-type album, as it is completely dry. s Printer Driver Settings • [Media Type]: Photo Paper Pro • [Page Size...
... remove them from direct exposure to turn yellow. Colors in an album before the ink is printed. • Do not touch the printed surface until the ink dries (approx. 30 minutes). Photo Paper Pro PR-101 105 Printing Media s Handling of the paper to air or sunlight. • Do not mount printouts in an adhesive-type album, as it is completely dry. s Printer Driver Settings • [Media Type]: Photo Paper Pro • [Page Size...

User Guide
Page 112
Printing Media s Handling of Printed Output • Remove each T-shirt transfer as soon as it is printed. • The T-shirt transfer should be used as soon as possible. s Printable Area ¬ Printing Area T-Shirt Transfers TR-201 112 Refer to the supplied instructions for details on how to use the paper. s Printer Driver Settings • [Media Type]: T-Shirt Transfer • [Page Size]: Ensure the setting matches the size set in the application.
Printing Media s Handling of Printed Output • Remove each T-shirt transfer as soon as it is printed. • The T-shirt transfer should be used as soon as possible. s Printable Area ¬ Printing Area T-Shirt Transfers TR-201 112 Refer to the supplied instructions for details on how to use the paper. s Printer Driver Settings • [Media Type]: T-Shirt Transfer • [Page Size]: Ensure the setting matches the size set in the application.

User Guide
Page 116
Troubleshooting • Cannot Install the Printer Driver • Print Quality Is Poor or Contains Errors • Printer Does Not Start or Stops During Print Jobs • Paper Does Not Feed Properly or Paper Jams • The POWER Lamp Flashes Orange • An Error Message Is Displayed on the Screen • Problems Unique to Windows Windows • Problems Unique to the Macintosh Macintosh Troubleshooting 116
Troubleshooting • Cannot Install the Printer Driver • Print Quality Is Poor or Contains Errors • Printer Does Not Start or Stops During Print Jobs • Paper Does Not Feed Properly or Paper Jams • The POWER Lamp Flashes Orange • An Error Message Is Displayed on the Screen • Problems Unique to Windows Windows • Problems Unique to the Macintosh Macintosh Troubleshooting 116

User Guide
Page 118
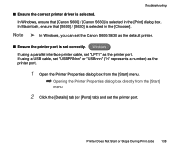
..., check that the CD-ROM icon is computer dependent. Troubleshooting s If the Installer for the printer driver does not start up automatically when you are no problems with the CD-ROM, contact the Canon Customer Care Center. Cannot Install the Printer Driver 118 The CD-ROM drive letter is visible. If there is a problem with the Setup Software & User's Guide CD-ROM. Windows Note ® If you insert the Setup Software & User's Guide CD...
..., check that the CD-ROM icon is computer dependent. Troubleshooting s If the Installer for the printer driver does not start up automatically when you are no problems with the CD-ROM, contact the Canon Customer Care Center. Cannot Install the Printer Driver 118 The CD-ROM drive letter is visible. If there is a problem with the Setup Software & User's Guide CD-ROM. Windows Note ® If you insert the Setup Software & User's Guide CD...
User Guide
Page 138
... printer port. s Ensure the printer port is selected in the [Print] dialog box. Printer Does Not Start or Stops During Print Jobs 138 In Windows, ensure that [S600] / [S630] is set "LPT1" as the default printer. In Macintosh, ensure that [Canon S600] / [Canon S630] is selected. Troubleshooting s Ensure the correct printer driver is selected in the [Chooser]. Windows If using a USB cable, set "USBPRNnn" or "USBnnn" ("n" represents a number) as the printer port. 1 Open the Printer Properties dialog box from the [Start] menu. ¬ Opening...
... printer port. s Ensure the printer port is selected in the [Print] dialog box. Printer Does Not Start or Stops During Print Jobs 138 In Windows, ensure that [S600] / [S630] is set "LPT1" as the default printer. In Macintosh, ensure that [Canon S600] / [Canon S630] is selected. Troubleshooting s Ensure the correct printer driver is selected in the [Chooser]. Windows If using a USB cable, set "USBPRNnn" or "USBnnn" ("n" represents a number) as the printer port. 1 Open the Printer Properties dialog box from the [Start] menu. ¬ Opening...

User Guide
Page 150
... then click [Print directly to printer]. An Error Message Is Displayed on your system environment. 4 On the [General] tab, check for any indication of a problem with the port and if the connected device is available. Troubleshooting 2 On the [Details] tab, click [Spool Settings] and then select [Print directly to the printer]. s Verify the printer port status. • When using the parallel interface (in Windows 95/Windows 98/Windows Me/Windows 2000...
... then click [Print directly to printer]. An Error Message Is Displayed on your system environment. 4 On the [General] tab, check for any indication of a problem with the port and if the connected device is available. Troubleshooting 2 On the [Details] tab, click [Spool Settings] and then select [Print directly to the printer]. s Verify the printer port status. • When using the parallel interface (in Windows 95/Windows 98/Windows Me/Windows 2000...

User Guide
Page 167
.... 1 Click the [Start] button, select [Settings] and click [Control Panel]. 2 Double-click [System]. 3 Click the [Device Manager] tab. Windows may not function properly if another device is incorrectly deleted. If the problem remains, follow the steps below to remove any other device. In Windows 2000, click the unknown device, then click [Uninstall] in the Quick Start Guide. Deleting an Unknown Device (USB interface) 167
.... 1 Click the [Start] button, select [Settings] and click [Control Panel]. 2 Double-click [System]. 3 Click the [Device Manager] tab. Windows may not function properly if another device is incorrectly deleted. If the problem remains, follow the steps below to remove any other device. In Windows 2000, click the unknown device, then click [Uninstall] in the Quick Start Guide. Deleting an Unknown Device (USB interface) 167

User Guide
Page 169
and then click [OK] in the Quick Start Guide. Appendices 6 Click [Close] to close it. 8 Turn the printer off. 9 Remove the Setup Software & User's Guide CD-ROM, if it is in the drive. 10 Restart Windows. 11 Install the printer driver again following the instructions in the [System Properties] 7 Click at the top right of the [Control Panel] window to close the [System Properties] window. Deleting an Unknown Device (USB interface) 169 In Windows 2000, click window. 5 When the confirmation message appears, click [OK].
and then click [OK] in the Quick Start Guide. Appendices 6 Click [Close] to close it. 8 Turn the printer off. 9 Remove the Setup Software & User's Guide CD-ROM, if it is in the drive. 10 Restart Windows. 11 Install the printer driver again following the instructions in the [System Properties] 7 Click at the top right of the [Control Panel] window to close the [System Properties] window. Deleting an Unknown Device (USB interface) 169 In Windows 2000, click window. 5 When the confirmation message appears, click [OK].


