Brochure
Page 2
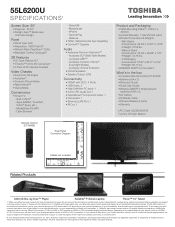
...should be pushed, pulled over, or knocked down. © 2012 Toshiba America Information Systems, Inc. and/or Toshiba Corporation. eManual • TRAC (Tablet Remote App Capability) •...Engine • AutoView® • Dynamic Picture Mode • Native Mode™ • Game Mode Convenience • Smart TV - Apps (Netflix®, YouTube®, VUDU® Apps, etc.) - MediaGuide - 55L6200U S P E C I F I C AT... vary depending upon content quality and display device capability/functionality/settings. All other trademarks are the property of HDMI® w/ CEC requires...
...should be pushed, pulled over, or knocked down. © 2012 Toshiba America Information Systems, Inc. and/or Toshiba Corporation. eManual • TRAC (Tablet Remote App Capability) •...Engine • AutoView® • Dynamic Picture Mode • Native Mode™ • Game Mode Convenience • Smart TV - Apps (Netflix®, YouTube®, VUDU® Apps, etc.) - MediaGuide - 55L6200U S P E C I F I C AT... vary depending upon content quality and display device capability/functionality/settings. All other trademarks are the property of HDMI® w/ CEC requires...
User Guide
Page 8
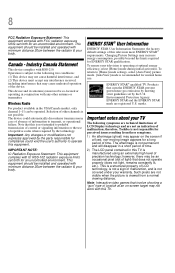
... use . ENERGY STAR® User Information ENERGY STAR User Information Statement: the factory default settings of repetitive codes where required by the technology. Changing Picture Settings may not work with minimum distance 20cm between the radiator & your body. therefore, Toshiba is viewed from these symptoms. 1) An afterimage (ghost) may cause undesired operation of time...
... use . ENERGY STAR® User Information ENERGY STAR User Information Statement: the factory default settings of repetitive codes where required by the technology. Changing Picture Settings may not work with minimum distance 20cm between the radiator & your body. therefore, Toshiba is viewed from these symptoms. 1) An afterimage (ghost) may cause undesired operation of time...

User Guide
Page 15
... 4:3 111 Full 111 TheaterWide 1 112 TheaterWide 2 112 TheaterWide 3 112 Normal 113 Dot by Dot 113 Scrolling the picture 113 Using the Auto Aspect feature 114 Using the 4:3 Stretch 114 Adjusting the picture 115 Selecting the picture mode 115 Adjusting the picture quality 115 Using the advanced picture settings features........117 Edge Enhancer 117 Dynamic Contrast 117
... 4:3 111 Full 111 TheaterWide 1 112 TheaterWide 2 112 TheaterWide 3 112 Normal 113 Dot by Dot 113 Scrolling the picture 113 Using the Auto Aspect feature 114 Using the 4:3 Stretch 114 Adjusting the picture 115 Selecting the picture mode 115 Adjusting the picture quality 115 Using the advanced picture settings features........117 Edge Enhancer 117 Dynamic Contrast 117
User Guide
Page 16
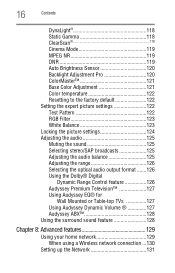
... Adjustment Pro 120 ColorMaster 121 Base Color Adjustment 121 Color temperature 122 Resetting to the factory default 122 Setting the expert picture settings 122 Test Pattern 122 RGB Filter 123 White Balance 123 Locking the picture settings 124 Adjusting the audio 125 Muting the sound 125 Selecting stereo/SAP broadcasts 125 Adjusting the audio balance... 127 Audyssey ABX 128 Using the surround sound feature 128 Chapter 8: Advanced features 129 Using your home network 129 When using a Wireless network connection ...130 Setting up the Network 131
... Adjustment Pro 120 ColorMaster 121 Base Color Adjustment 121 Color temperature 122 Resetting to the factory default 122 Setting the expert picture settings 122 Test Pattern 122 RGB Filter 123 White Balance 123 Locking the picture settings 124 Adjusting the audio 125 Muting the sound 125 Selecting stereo/SAP broadcasts 125 Adjusting the audio balance... 127 Audyssey ABX 128 Using the surround sound feature 128 Chapter 8: Advanced features 129 Using your home network 129 When using a Wireless network connection ...130 Setting up the Network 131
User Guide
Page 21
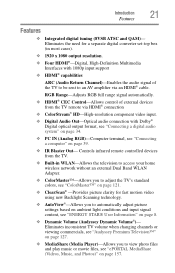
...)-Computer terminal, see "ePORTAL MediaShare (Videos, Music, and Photos)" on page 157. Eliminates the need for a separate digital converter set-top box (in WLAN-Allows the television to access your home wireless network without an external Dual Band WLAN Adapter. ❖ ColorMaster... see "ColorMaster™" on page 121. ❖ ClearScan® -Provides picture clarity for fast motion video using new Backlight Scanning technology. ❖ AutoView®-Allows you to automatically adjust picture settings based on ambient light conditions and input signal content, see "ENERGY STAR®...
...)-Computer terminal, see "ePORTAL MediaShare (Videos, Music, and Photos)" on page 157. Eliminates the need for a separate digital converter set-top box (in WLAN-Allows the television to access your home wireless network without an external Dual Band WLAN Adapter. ❖ ColorMaster... see "ColorMaster™" on page 121. ❖ ClearScan® -Provides picture clarity for fast motion video using new Backlight Scanning technology. ❖ AutoView®-Allows you to automatically adjust picture settings based on ambient light conditions and input signal content, see "ENERGY STAR®...
User Guide
Page 28
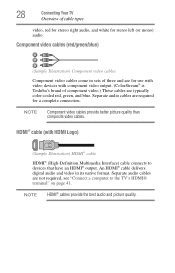
NOTE Component video cables provide better picture quality than composite video cables. An HDMI® cable delivers digital audio and video in sets of three and are for use with video devices with HDMI Logo) (Sample Illustration) HDMI® cable HDMI® (High-Definition ...Multimedia Interface) cable connects to the TV's HDMI® terminal" on page 41. HDMI® cable (with component video output. (ColorStream® is Toshiba's brand...
NOTE Component video cables provide better picture quality than composite video cables. An HDMI® cable delivers digital audio and video in sets of three and are for use with video devices with HDMI Logo) (Sample Illustration) HDMI® cable HDMI® (High-Definition ...Multimedia Interface) cable connects to the TV's HDMI® terminal" on page 41. HDMI® cable (with component video output. (ColorStream® is Toshiba's brand...

User Guide
Page 115
...; and PC inputs only (not displayed for each input. Game mode cannot be turned on ambient light conditions and input signal content Bright and dynamic picture Standard picture settings Lower contrast for a darkened room Designed for playing a video game requiring split-second timing between the screen display and input from the modes described...
...; and PC inputs only (not displayed for each input. Game mode cannot be turned on ambient light conditions and input signal content Bright and dynamic picture Standard picture settings Lower contrast for a darkened room Designed for playing a video game requiring split-second timing between the screen display and input from the modes described...

User Guide
Page 116
... button. NOTE ❖ Any picture settings that you would like to adjust (Backlight, Contrast, Brightness, Color, Tint, or Sharpness). 2 Press the ( / arrow) buttons to On To adjust the picture quality: 1 Press the MENU button. You can adjust the picture quality separately for each input. ...When in video mode and no signal is input, this selection is set to adjust the setting. Select SETTINGS, PICTURE, Reset, and then press the OK button. 116 Picture and Sound Controls Adjusting the picture Selection Pressing ( ) Pressing ( ) Contrast Lower Higher Brightness Darker Lighter...
... button. NOTE ❖ Any picture settings that you would like to adjust (Backlight, Contrast, Brightness, Color, Tint, or Sharpness). 2 Press the ( / arrow) buttons to On To adjust the picture quality: 1 Press the MENU button. You can adjust the picture quality separately for each input. ...When in video mode and no signal is input, this selection is set to adjust the setting. Select SETTINGS, PICTURE, Reset, and then press the OK button. 116 Picture and Sound Controls Adjusting the picture Selection Pressing ( ) Pressing ( ) Contrast Lower Higher Brightness Darker Lighter...

User Guide
Page 117
...button. a device with a specific enhancer function). NOTE ❖ When the Picture Mode is set to AutoView, the level range is from 0 to select either 1, 2, 3, 4, or 5. Press the EXIT button. Select SETTINGS, PICTURE, Advanced Picture Settings, and then press the OK button. 2 Press the ( / arrow)...the OK button. 3 Press the ( / arrow) buttons to select On. 4 Press the ( / arrow) buttons to the TV (e.g. Select SETTINGS, PICTURE, Advanced Picture Settings, and then press the OK button. 2 Press the ( / arrow) buttons to select Dynamic Contrast. 3 Press the ( / arrow) buttons ...
...button. a device with a specific enhancer function). NOTE ❖ When the Picture Mode is set to AutoView, the level range is from 0 to select either 1, 2, 3, 4, or 5. Press the EXIT button. Select SETTINGS, PICTURE, Advanced Picture Settings, and then press the OK button. 2 Press the ( / arrow)...the OK button. 3 Press the ( / arrow) buttons to select On. 4 Press the ( / arrow) buttons to the TV (e.g. Select SETTINGS, PICTURE, Advanced Picture Settings, and then press the OK button. 2 Press the ( / arrow) buttons to select Dynamic Contrast. 3 Press the ( / arrow) buttons ...
User Guide
Page 118
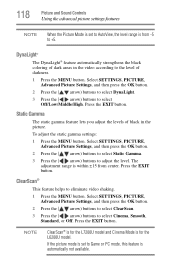
...buttons to select ClearScan. 3 Press the ( / arrow) buttons to select Off/Low/Middle/High. To adjust the static gamma settings: 1 Press the MENU button. Select SETTINGS, PICTURE, Advanced Picture Settings, and then press the OK button. 2 Press the ( / arrow) buttons to select DynaLight. 3 Press the ( /... arrow) buttons to select Cinema, Smooth, Standard, or Off. Select SETTINGS, PICTURE, Advanced Picture Settings, and then press the OK button. 2 Press the ( / arrow) buttons to select Static Gamma. 3 Press the ( / arrow) buttons...
...buttons to select ClearScan. 3 Press the ( / arrow) buttons to select Off/Low/Middle/High. To adjust the static gamma settings: 1 Press the MENU button. Select SETTINGS, PICTURE, Advanced Picture Settings, and then press the OK button. 2 Press the ( / arrow) buttons to select DynaLight. 3 Press the ( /... arrow) buttons to select Cinema, Smooth, Standard, or Off. Select SETTINGS, PICTURE, Advanced Picture Settings, and then press the OK button. 2 Press the ( / arrow) buttons to select Static Gamma. 3 Press the ( / arrow) buttons...
User Guide
Page 119
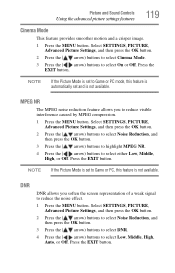
... Press the ( / arrow) buttons to highlight MPEG NR. 4 Press the ( / arrow) buttons to select On or Off. Press the EXIT button. Select SETTINGS, PICTURE, Advanced Picture Settings, and then press the OK button. 2 Press the ( / arrow) buttons to select Noise Reduction, and then press the OK button. 3 Press the (.... DNR DNR allows you to Game or PC mode, this feature is not available. Press the EXIT button. Picture and Sound Controls Using the advanced picture settings features 119 Cinema Mode This feature provides smoother motion and a crisper image. 1 Press the MENU button. MPEG NR...
... Press the ( / arrow) buttons to highlight MPEG NR. 4 Press the ( / arrow) buttons to select On or Off. Press the EXIT button. Select SETTINGS, PICTURE, Advanced Picture Settings, and then press the OK button. 2 Press the ( / arrow) buttons to select Noise Reduction, and then press the OK button. 3 Press the (.... DNR DNR allows you to Game or PC mode, this feature is not available. Press the EXIT button. Picture and Sound Controls Using the advanced picture settings features 119 Cinema Mode This feature provides smoother motion and a crisper image. 1 Press the MENU button. MPEG NR...
User Guide
Page 120
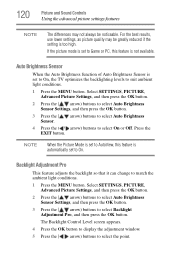
...be noticeable. For the best results, use lower settings, as picture quality may not always be greatly reduced if the setting is set to On, the TV optimizes the backlighting levels to On. Press the EXIT button. Select SETTINGS, PICTURE, Advanced Picture Settings, and then press the OK button. 2 Press ...the ( / arrow) buttons to select Auto Brightness Sensor Settings, and then press the OK button. 3 Press the ( / arrow) buttons to...
...be noticeable. For the best results, use lower settings, as picture quality may not always be greatly reduced if the setting is set to On, the TV optimizes the backlighting levels to On. Press the EXIT button. Select SETTINGS, PICTURE, Advanced Picture Settings, and then press the OK button. 2 Press ...the ( / arrow) buttons to select Auto Brightness Sensor Settings, and then press the OK button. 3 Press the ( / arrow) buttons to...

User Guide
Page 121
... Color Adjustment, and then press the OK button. Base Color Adjustment When ColorMaster™ is set to On, the list of all points to adjust the level. Select SETTINGS, PICTURE, Advanced Picture Settings, and then press the OK button. 2 Press the ( / arrow) buttons to select... On. The Base Color Adjustment screen appears. Picture and Sound Controls Using the advanced picture settings features 6 Press the ( / arrow) buttons ...
... Color Adjustment, and then press the OK button. Base Color Adjustment When ColorMaster™ is set to On, the list of all points to adjust the level. Select SETTINGS, PICTURE, Advanced Picture Settings, and then press the OK button. 2 Press the ( / arrow) buttons to select... On. The Base Color Adjustment screen appears. Picture and Sound Controls Using the advanced picture settings features 6 Press the ( / arrow) buttons ...

User Guide
Page 122
... AutoView, the adjustment range is -5 to adjust the level. Select SETTINGS, PICTURE, Expert Picture Settings, and then press the OK button. 2 Select Test Pattern. Color temperature 1 Press the MENU button. Select SETTINGS, PICTURE, Advanced Picture Settings, and then press the OK button. 2 Press the ( / arrow) ... press the OK button. Setting the expert picture settings Test Pattern When the test pattern is 0 (warm) to a non-Picture menu, or close the menus, regular video will be restored. 1 Press the MENU button. Select SETTINGS, PICTURE, Advanced Picture Settings, and then press the OK...
... AutoView, the adjustment range is -5 to adjust the level. Select SETTINGS, PICTURE, Expert Picture Settings, and then press the OK button. 2 Select Test Pattern. Color temperature 1 Press the MENU button. Select SETTINGS, PICTURE, Advanced Picture Settings, and then press the OK button. 2 Press the ( / arrow) ... press the OK button. Setting the expert picture settings Test Pattern When the test pattern is 0 (warm) to a non-Picture menu, or close the menus, regular video will be restored. 1 Press the MENU button. Select SETTINGS, PICTURE, Advanced Picture Settings, and then press the OK...

User Guide
Page 123
.... 1 Press the MENU button. White Balance Window Display This feature displays the Window Pattern to select On. 4 Adjust picture settings. Picture and Sound Controls Setting the expert picture settings 123 3 Press the ( / arrow) buttons to adjust the white balance with a measuring device. 1 Press the MENU...the TV is in 3D mode, this feature is not possible to select On. 5 Adjust the picture settings. Press the EXIT button. NOTE It is not available. Select SETTINGS, PICTURE, Expert Picture Settings, and then press the OK button. 2 Press the ( / arrow) buttons to select White...
.... 1 Press the MENU button. White Balance Window Display This feature displays the Window Pattern to select On. 4 Adjust picture settings. Picture and Sound Controls Setting the expert picture settings 123 3 Press the ( / arrow) buttons to adjust the white balance with a measuring device. 1 Press the MENU...the TV is in 3D mode, this feature is not possible to select On. 5 Adjust the picture settings. Press the EXIT button. NOTE It is not available. Select SETTINGS, PICTURE, Expert Picture Settings, and then press the OK button. 2 Press the ( / arrow) buttons to select White...
User Guide
Page 124
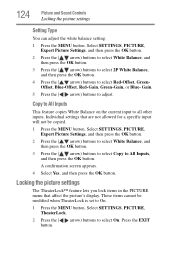
...These items cannot be copied. 1 Press the MENU button. 124 Picture and Sound Controls Locking the picture settings Setting Type You can adjust the white balance setting. 1 Press the MENU button. Select SETTINGS, PICTURE, Expert Picture Settings, and then press the OK button. 2 Press the ( /... 2P White Balance, and then press the OK button. 4 Press the ( / arrow) buttons to adjust. Individual settings that affect the picture's display. Select SETTINGS, PICTURE, Expert Picture Settings, and then press the OK button. 2 Press the ( / arrow) buttons to select White Balance, and then ...
...These items cannot be copied. 1 Press the MENU button. 124 Picture and Sound Controls Locking the picture settings Setting Type You can adjust the white balance setting. 1 Press the MENU button. Select SETTINGS, PICTURE, Expert Picture Settings, and then press the OK button. 2 Press the ( /... 2P White Balance, and then press the OK button. 4 Press the ( / arrow) buttons to adjust. Individual settings that affect the picture's display. Select SETTINGS, PICTURE, Expert Picture Settings, and then press the OK button. 2 Press the ( / arrow) buttons to select White Balance, and then ...

User Guide
Page 177
... page 6. For device connection details, see "Connecting Your TV" on page 27. Replace the batteries in 3D mode" on page 78. Picture problems General picture problems. Check the antenna/cable connections, see "Connecting Your TV" on page 27. Antenna reception may be different. Change the 3D format in...page 85. Switch the left and right sides of 3D images may be having broadcast difficulties. The left and right, see "Using the advanced picture settings features" on page 117. Ensure the power cord is plugged in 2D mode" on page 79. Change the 2D format in the Quick ...
... page 6. For device connection details, see "Connecting Your TV" on page 27. Replace the batteries in 3D mode" on page 78. Picture problems General picture problems. Check the antenna/cable connections, see "Connecting Your TV" on page 27. Antenna reception may be different. Change the 3D format in...page 85. Switch the left and right sides of 3D images may be having broadcast difficulties. The left and right, see "Using the advanced picture settings features" on page 117. Ensure the power cord is plugged in 2D mode" on page 79. Change the 2D format in the Quick ...
User Guide
Page 196
... left right images 85 switching display mode 76 switching to 2D mode 79 switching to 3D mode 77 viewing images 72 4/3 stretch using 114 A advanced picture settings Auto Brightness Sensor 120 Backlight Adjustment Pro 120 Base Color Adjustment 121 Color temperature 122 ColorMaster™ 121 DNR 119 DynaLight® 118 Dynamic Contrast...
... left right images 85 switching display mode 76 switching to 2D mode 79 switching to 3D mode 77 viewing images 72 4/3 stretch using 114 A advanced picture settings Auto Brightness Sensor 120 Backlight Adjustment Pro 120 Base Color Adjustment 121 Color temperature 122 ColorMaster™ 121 DNR 119 DynaLight® 118 Dynamic Contrast...
User Guide
Page 198
...select apps 144 view favorites 152 ePortal 142 ePORTAL Internet 147 access web page 150 adding favorites 150 browsing favorites 149 expert picture settings RGB Filter 123 setting 122 Test Pattern 122 White Balance 123 External Control Setup 167 F Factory Defaults reset 107 favorites adding 150 browsing 149 ... input source selection 100 other functions 101 HDMI® CEC Control using 97 HDMI® settings feature using 101 home network using 129 I icon safety 20 initial settings change 64 individual settings 65 navigate the menu 64 quick setup 64 initial setup 51 main menu layout 62 menu...
...select apps 144 view favorites 152 ePortal 142 ePORTAL Internet 147 access web page 150 adding favorites 150 browsing favorites 149 expert picture settings RGB Filter 123 setting 122 Test Pattern 122 White Balance 123 External Control Setup 167 F Factory Defaults reset 107 favorites adding 150 browsing 149 ... input source selection 100 other functions 101 HDMI® CEC Control using 97 HDMI® settings feature using 101 home network using 129 I icon safety 20 initial settings change 64 individual settings 65 navigate the menu 64 quick setup 64 initial setup 51 main menu layout 62 menu...
User Guide
Page 199
... setup 22 use 22 P parental controls blocking programs/movies by rating (V-Chip) 91 using 91 Photos access via ePORTAL 157 picture adjusting 115 adjusting quality 115 picture mode selecting 115 picture settings locking 124 picture size 4/3 111 Dot by Dot 113 Full 111 Native 110 Normal 113 selecting 109 TheaterWide 1 112 TheaterWide 2 112 TheaterWide 3 112...
... setup 22 use 22 P parental controls blocking programs/movies by rating (V-Chip) 91 using 91 Photos access via ePORTAL 157 picture adjusting 115 adjusting quality 115 picture mode selecting 115 picture settings locking 124 picture size 4/3 111 Dot by Dot 113 Full 111 Native 110 Normal 113 selecting 109 TheaterWide 1 112 TheaterWide 2 112 TheaterWide 3 112...


