User Guide
Page 2
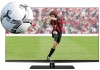
...that they cannot be securely attached to walls with furniture and television sets. • Don't place flat panel displays on page 5. TOSHIBA Cares! • The consumer electronics industry is committed to Article 820-40 of inappropriate or non-Listed mounting brackets could result in ... become excited while watching a program, especially on your flat panel display. • Carefully read this Toshiba LED TV. 2 Dear Customer, Thank you for purchasing this manual completely. This manual will help you use of the building, as UL, CSA, ETL). • Follow all cords and...
...that they cannot be securely attached to walls with furniture and television sets. • Don't place flat panel displays on page 5. TOSHIBA Cares! • The consumer electronics industry is committed to Article 820-40 of inappropriate or non-Listed mounting brackets could result in ... become excited while watching a program, especially on your flat panel display. • Carefully read this Toshiba LED TV. 2 Dear Customer, Thank you for purchasing this manual completely. This manual will help you use of the building, as UL, CSA, ETL). • Follow all cords and...
User Guide
Page 5
... by the wall mount manufacturer. 5) Follow the instructions provided with a sharp or heavy object. 44) • The LCD screen of this manual to a Toshiba Authorized Service Provider. 45) If you to wall mount your LCD TV on or off switch, it is not completely disconnected from power and ...such as indicated below . 7) VESA Mounting Pattern TV Size Hole Pattern (HxV) Screw Size 42L6200U 400x400 mm M6 47L6200U 400x400 mm M6 55L6200U 400x400 mm M6 47L7200U 400x400 mm M6 55L7200U 400x400 mm M6 (unit in this product can support the weight of your wall bracket. These ...
... by the wall mount manufacturer. 5) Follow the instructions provided with a sharp or heavy object. 44) • The LCD screen of this manual to a Toshiba Authorized Service Provider. 45) If you to wall mount your LCD TV on or off switch, it is not completely disconnected from power and ...such as indicated below . 7) VESA Mounting Pattern TV Size Hole Pattern (HxV) Screw Size 42L6200U 400x400 mm M6 47L6200U 400x400 mm M6 55L6200U 400x400 mm M6 47L7200U 400x400 mm M6 55L7200U 400x400 mm M6 (unit in this product can support the weight of your wall bracket. These ...

User Guide
Page 10
...DAMAGES, WHETHER BASED ON TORT, CONTRACT OR OTHERWISE, ARISING OUT OF OR IN CONNECTION WITH THIS MANUAL OR ANY OTHER INFORMATION CONTAINED HEREIN OR THE USE THEREOF. TOSHIBA ASSUMES NO LIABILITY FOR ANY DAMAGES INCURRED DIRECTLY OR INDIRECTLY FROM ANY TECHNICAL OR TYPOGRAPHICAL ERRORS OR ...OMISSIONS CONTAINED HEREIN OR FOR DISCREPANCIES BETWEEN THE PRODUCT AND THE MANUAL. with respect to the use of Toshiba. 10 Copyright This guide is subject to change without the prior written permission of the information contained herein....
...DAMAGES, WHETHER BASED ON TORT, CONTRACT OR OTHERWISE, ARISING OUT OF OR IN CONNECTION WITH THIS MANUAL OR ANY OTHER INFORMATION CONTAINED HEREIN OR THE USE THEREOF. TOSHIBA ASSUMES NO LIABILITY FOR ANY DAMAGES INCURRED DIRECTLY OR INDIRECTLY FROM ANY TECHNICAL OR TYPOGRAPHICAL ERRORS OR ...OMISSIONS CONTAINED HEREIN OR FOR DISCREPANCIES BETWEEN THE PRODUCT AND THE MANUAL. with respect to the use of Toshiba. 10 Copyright This guide is subject to change without the prior written permission of the information contained herein....

User Guide
Page 20
..., may result in property damage. Indicates a potentially hazardous situation which , if not avoided, will result in death or serious injury. Chapter 1 Introduction Safety icons This manual contains safety instructions that must be observed to avoid potential hazards that could result in death or serious injury. These safety cautions have been classified...
..., may result in property damage. Indicates a potentially hazardous situation which , if not avoided, will result in death or serious injury. Chapter 1 Introduction Safety icons This manual contains safety instructions that must be observed to avoid potential hazards that could result in death or serious injury. These safety cautions have been classified...
User Guide
Page 22
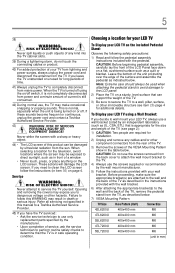
... the TV in a location where light does not reflect on the TV control panel or remote control to turn the TV off or Keep this manual for future reference. 2 To choose a location for the TV: ❖ Read "Important notes about your TV" on page 8. ❖ Place the TV on the television... POWER button on the screen. ❖ Place the TV far enough from walls and other devices. THIS TYPE OF DAMAGE IS NOT COVERED UNDER THE TOSHIBA WARRANTY. 3 Do not plug in any power cords until after you to view and experience 3D content on the floor or a sturdy, level, stable surface...
... the TV in a location where light does not reflect on the TV control panel or remote control to turn the TV off or Keep this manual for future reference. 2 To choose a location for the TV: ❖ Read "Important notes about your TV" on page 8. ❖ Place the TV on the television... POWER button on the screen. ❖ Place the TV far enough from walls and other devices. THIS TYPE OF DAMAGE IS NOT COVERED UNDER THE TOSHIBA WARRANTY. 3 Do not plug in any power cords until after you to view and experience 3D content on the floor or a sturdy, level, stable surface...

User Guide
Page 30
...When you use a cable box, you may differ from those illustrated herein. For details on your specific devices, refer to each device's owner's manual. To view the antenna or cable signal: Select ANT/CABLE video input source on the TV.* To view basic and premium cable channels: Select...box output is set to a computer without an Internet connection" on the TV. Use the cable box controls to your TV in this manual are representative of devices to change channels. About the connection illustrations You can connect different types and brands of typical device connections only. ...
...When you use a cable box, you may differ from those illustrated herein. For details on your specific devices, refer to each device's owner's manual. To view the antenna or cable signal: Select ANT/CABLE video input source on the TV.* To view basic and premium cable channels: Select...box output is set to a computer without an Internet connection" on the TV. Use the cable box controls to your TV in this manual are representative of devices to change channels. About the connection illustrations You can connect different types and brands of typical device connections only. ...
User Guide
Page 38
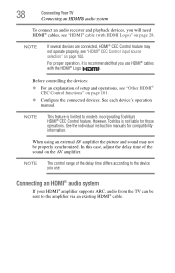
However, Toshiba is not liable for compatibility information. NOTE The control range of the sound on page 100. In this case, adjust... the picture and sound may not operate properly, see "Other HDMI® CEC Control functions" on page 28. See the individual instruction manuals for those operations. Connecting an HDMI® audio system If your HDMI® amplifier supports ARC, audio from the TV can be properly... you use . NOTE If several devices are connected, HDMI® CEC Control feature may not be sent to models incorporating Toshiba's HDMI® CEC Control feature.
However, Toshiba is not liable for compatibility information. NOTE The control range of the sound on page 100. In this case, adjust... the picture and sound may not operate properly, see "Other HDMI® CEC Control functions" on page 28. See the individual instruction manuals for those operations. Connecting an HDMI® audio system If your HDMI® amplifier supports ARC, audio from the TV can be properly... you use . NOTE If several devices are connected, HDMI® CEC Control feature may not be sent to models incorporating Toshiba's HDMI® CEC Control feature.
User Guide
Page 59
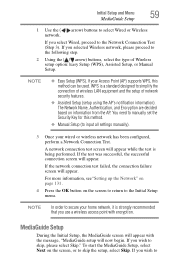
...To start the MediaGuide Setup, select Next on information from the AP. If your Access Point (AP) supports WPS, this method. ❖ Manual Setup (to secure your wired or wireless network has been configured, perform a Network Connection Test. If you wish to select Wired or Wireless ...screen will appear while the test is a standard designed to the Network Connection Test (Step 3). If you selected Wireless network, please proceed to manually set the Security Key for this method can be used. WPS is being performed. NOTE ❖ Easy Setup (WPS). A network connection ...
...To start the MediaGuide Setup, select Next on information from the AP. If your Access Point (AP) supports WPS, this method. ❖ Manual Setup (to secure your wired or wireless network has been configured, perform a Network Connection Test. If you wish to select Wired or Wireless ...screen will appear while the test is a standard designed to the Network Connection Test (Step 3). If you selected Wireless network, please proceed to manually set the Security Key for this method can be used. WPS is being performed. NOTE ❖ Easy Setup (WPS). A network connection ...
User Guide
Page 66
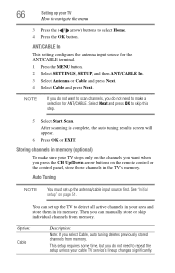
... cable TV service's lineup changes significantly. This setup requires some time, but you select Cable, auto tuning deletes previously stored channels from memory. You can manually store or skip individual channels from memory. NOTE If you do not want when you do not need to select Home. 4 Press the OK button...
... cable TV service's lineup changes significantly. This setup requires some time, but you select Cable, auto tuning deletes previously stored channels from memory. You can manually store or skip individual channels from memory. NOTE If you do not want when you do not need to select Home. 4 Press the OK button...

User Guide
Page 67
... the EXIT button to be skipped. NOTE To tune to channels not stored in memory, you can manually enter channels if the channel number is known. 1 Press the MENU button. 2 Select SETTINGS, SETUP, Manual Tuning, and then press the OK button. 3 Use buttons 0-9 on the remote control to enter ...the channel number (for example, 56). 4 Press the OK button. 5 Press the OK button again to begin Manual Tuning. Manual Tuning After storing channels in memory, use buttons 0-9 and the DASH button on page 68. See "Skipping channels" on the remote control. 1 Press the...
... the EXIT button to be skipped. NOTE To tune to channels not stored in memory, you can manually enter channels if the channel number is known. 1 Press the MENU button. 2 Select SETTINGS, SETUP, Manual Tuning, and then press the OK button. 3 Use buttons 0-9 on the remote control to enter ...the channel number (for example, 56). 4 Press the OK button. 5 Press the OK button again to begin Manual Tuning. Manual Tuning After storing channels in memory, use buttons 0-9 and the DASH button on page 68. See "Skipping channels" on the remote control. 1 Press the...
User Guide
Page 76
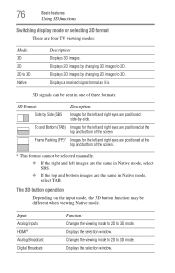
... Frame Packing (FP)* Images for the left and right eyes are positioned at the top and bottom of the screen. * This format cannot be selected manually. ❖ If the right and left images are the same in Native mode, select SBS. ❖ If the top and bottom images are the same...
... Frame Packing (FP)* Images for the left and right eyes are positioned at the top and bottom of the screen. * This format cannot be selected manually. ❖ If the right and left images are the same in Native mode, select SBS. ❖ If the top and bottom images are the same...
User Guide
Page 131
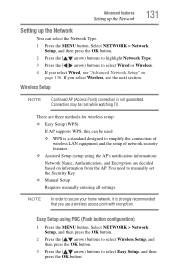
..., and then press the OK button. 2 Press the ( / arrow) buttons to select Wireless Setup, and then press the OK button. 3 Press the ( / arrow) buttons to manually set the Security Key. ❖ Manual Setup Requires manually entering all settings.
..., and then press the OK button. 2 Press the ( / arrow) buttons to select Wireless Setup, and then press the OK button. 3 Press the ( / arrow) buttons to manually set the Security Key. ❖ Manual Setup Requires manually entering all settings.

User Guide
Page 132
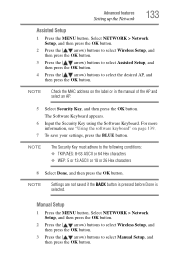
... AP. A message appears. Easy Setup using PIN (Personal Identification Number) 1 Press the MENU button. NOTE Check the MAC address on the label or in the manual of the AP and select an AP. 8 When a screen reporting that "the setup has succeeded" appears, press the OK button. To cancel searching for the...
... AP. A message appears. Easy Setup using PIN (Personal Identification Number) 1 Press the MENU button. NOTE Check the MAC address on the label or in the manual of the AP and select an AP. 8 When a screen reporting that "the setup has succeeded" appears, press the OK button. To cancel searching for the...
User Guide
Page 133
... using the Software Keyboard. NOTE Settings are not saved if the BACK button is pressed before Done is selected. Manual Setup 1 Press the MENU button. NOTE The Security Key must adhere to select Manual Setup, and then press the OK button. NOTE Check the MAC address on page 139. 7 To save your... 26 Hex characters 8 Select Done, and then press the OK button. For more information, see "Using the software keyboard" on the label or in the manual of the AP and select an AP. 5 Select Security Key, and then press the OK button. Select NETWORK > Network Setup, and then press the OK...
... using the Software Keyboard. NOTE Settings are not saved if the BACK button is pressed before Done is selected. Manual Setup 1 Press the MENU button. NOTE The Security Key must adhere to select Manual Setup, and then press the OK button. NOTE Check the MAC address on page 139. 7 To save your... 26 Hex characters 8 Select Done, and then press the OK button. For more information, see "Using the software keyboard" on the label or in the manual of the AP and select an AP. 5 Select Security Key, and then press the OK button. Select NETWORK > Network Setup, and then press the OK...
User Guide
Page 136
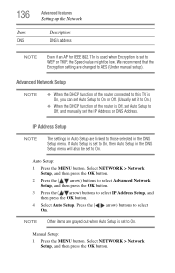
... that the Encryption setting are grayed out when Auto Setup is set to On. Press the ( / arrow) buttons to Off, and manually set the IP Address or DNS Address. Manual Setup: 1 Press the MENU button. Advanced Network Setup NOTE ❖ When the DHCP function of the router connected to this TV is... On.) ❖ When the DHCP function of the router is Off, set Auto Setup to select On. NOTE Other items are changed to AES (Under manual setup). 136 Item: DNS Advanced features Setting up the Network Description: DNS's address NOTE Even if an AP for IEEE 802.11n is used when...
... that the Encryption setting are grayed out when Auto Setup is set to On. Press the ( / arrow) buttons to Off, and manually set the IP Address or DNS Address. Manual Setup: 1 Press the MENU button. Advanced Network Setup NOTE ❖ When the DHCP function of the router connected to this TV is... On.) ❖ When the DHCP function of the router is Off, set Auto Setup to select On. NOTE Other items are changed to AES (Under manual setup). 136 Item: DNS Advanced features Setting up the Network Description: DNS's address NOTE Even if an AP for IEEE 802.11n is used when...
User Guide
Page 137
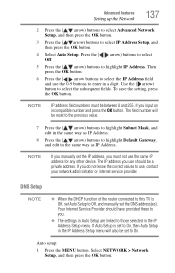
NOTE IP address field numbers must not use the same IP address for any other device. NOTE If you manually set to On, then Auto Setup in the IP Address Setup menu will be set the DNS address(es). Your Internet Service Provider should be ... Auto Setup are linked to highlight IP Address. If you must be a private address. If Auto Setup is Off, set Auto Setup to Off, and manually set to select the subsequent fields. Use the ( arrow) button to On. To save the setting, press the OK button. If you use should have...
NOTE IP address field numbers must not use the same IP address for any other device. NOTE If you manually set to On, then Auto Setup in the IP Address Setup menu will be set the DNS address(es). Your Internet Service Provider should be ... Auto Setup are linked to highlight IP Address. If you must be a private address. If Auto Setup is Off, set Auto Setup to Off, and manually set to select the subsequent fields. Use the ( arrow) button to On. To save the setting, press the OK button. If you use should have...

User Guide
Page 138
Manual setup: 1 Press the MENU button. Select NETWORK > Network Setup, and then press the OK button. 2 Press the ( / arrow) buttons to select Advanced Network Setup, and ...
Manual setup: 1 Press the MENU button. Select NETWORK > Network Setup, and then press the OK button. 2 Press the ( / arrow) buttons to select Advanced Network Setup, and ...
User Guide
Page 158
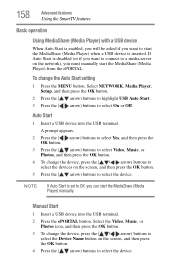
...select the Device Name button on the screen, and then press the OK button. 5 Press the ( / arrow) buttons to select the device. Manual Start 1 Insert a USB device into the USB terminal. 158 Advanced features Using the SmartTV features Basic operation Using MediaShare (Media Player) with a USB... Press the ( / arrow) buttons to highlight USB Auto Start. 3 Press the ( / arrow) buttons to Off, you can start the MediaShare (Media Player) manually. A prompt appears. 2 Press the ( / arrow) buttons to select Yes, and then press the OK button. 3 Press the ( / arrow) buttons to select...
...select the Device Name button on the screen, and then press the OK button. 5 Press the ( / arrow) buttons to select the device. Manual Start 1 Insert a USB device into the USB terminal. 158 Advanced features Using the SmartTV features Basic operation Using MediaShare (Media Player) with a USB... Press the ( / arrow) buttons to highlight USB Auto Start. 3 Press the ( / arrow) buttons to Off, you can start the MediaShare (Media Player) manually. A prompt appears. 2 Press the ( / arrow) buttons to select Yes, and then press the OK button. 3 Press the ( / arrow) buttons to select...

User Guide
Page 179
...'s remote control may have blocked the channel. To unblock the channel, see "Connecting a digital audio system" on page 107. Refer to the owner's manual for a few seconds and plug it back in. If you cannot tune digital channels, check the antenna configuration, see "Learning about the remote control" ... AC wall outlet for your external device. If the TV still does not act as expected, perform the Reset Factory Defaults procedure, see "Manual Tuning" on page 67. The Auto Tuning feature may not operate certain features on page 95. To add the channel to the channel memory...
...'s remote control may have blocked the channel. To unblock the channel, see "Connecting a digital audio system" on page 107. Refer to the owner's manual for a few seconds and plug it back in. If you cannot tune digital channels, check the antenna configuration, see "Learning about the remote control" ... AC wall outlet for your external device. If the TV still does not act as expected, perform the Reset Factory Defaults procedure, see "Manual Tuning" on page 67. The Auto Tuning feature may not operate certain features on page 95. To add the channel to the channel memory...
User Guide
Page 181
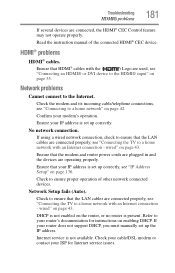
..., or no router is present. wired" on page 43. Internet service is set up correctly. No network connection. Read the instruction manual of other network connected devices. Ensure your router's documentation for Internet service issues. Troubleshooting HDMI® problems 181 If several devices are operating...incoming cable/telephone connections, see "IP Address Setup" on page 42. Ensure that your router does not support DHCP, you must manually set up the IP address. Ensure that the modem and router power cords are plugged in and the devices are connected, the ...
..., or no router is present. wired" on page 43. Internet service is set up correctly. No network connection. Read the instruction manual of other network connected devices. Ensure your router's documentation for Internet service issues. Troubleshooting HDMI® problems 181 If several devices are operating...incoming cable/telephone connections, see "IP Address Setup" on page 42. Ensure that your router does not support DHCP, you must manually set up the IP address. Ensure that the modem and router power cords are plugged in and the devices are connected, the ...


