Brochure
Page 2
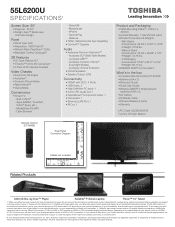
...; (Wall/Table Modes) - It is not intended for unauthorized use a UL Listed wall bracket appropriate for the size and weight of 3D Glasses Included Video Chassis • Dual Core CQ Engine • AutoView® • Dynamic Picture Mode • Native Mode™ • Game Mode Convenience • Smart TV - Use of copyrighted works. Care should be taken to wall mount your Toshiba television, always use of HDMI® w/ CEC requires an HDMI® w/ CEC compatible display...
...; (Wall/Table Modes) - It is not intended for unauthorized use a UL Listed wall bracket appropriate for the size and weight of 3D Glasses Included Video Chassis • Dual Core CQ Engine • AutoView® • Dynamic Picture Mode • Native Mode™ • Game Mode Convenience • Smart TV - Use of copyrighted works. Care should be taken to wall mount your Toshiba television, always use of HDMI® w/ CEC requires an HDMI® w/ CEC compatible display...

User Guide
Page 2
... flat panel displays are required for installation. WARNING: If you decide to wall mount this television, always use a mounting bracket that has been Listed by an independent laboratory (such as UL, CSA, ETL). • Follow all enclosed instructions for proper use of two people are popular purchases. However, flat panel displays are not always supported on the proper stands or installed according to the manufacturer's recommendations. • Flat panel displays that are mounting...
... flat panel displays are required for installation. WARNING: If you decide to wall mount this television, always use a mounting bracket that has been Listed by an independent laboratory (such as UL, CSA, ETL). • Follow all enclosed instructions for proper use of two people are popular purchases. However, flat panel displays are not always supported on the proper stands or installed according to the manufacturer's recommendations. • Flat panel displays that are mounting...
User Guide
Page 5
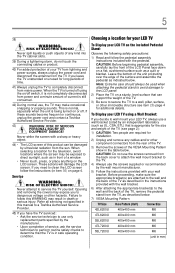
... is appropriate for the size and weight of the TV (see item 26) page 4 for additional details. These actions will damage the LCD screen. To Display your LED TV using the on page 4. If you to wall mount your TV from lightning and power surges, always unplug the power cord and disconnect the antenna from mains power. Choosing a location for installation. 2) Unplug and remove any kind into...
... is appropriate for the size and weight of the TV (see item 26) page 4 for additional details. These actions will damage the LCD screen. To Display your LED TV using the on page 4. If you to wall mount your TV from lightning and power surges, always unplug the power cord and disconnect the antenna from mains power. Choosing a location for installation. 2) Unplug and remove any kind into...
User Guide
Page 25
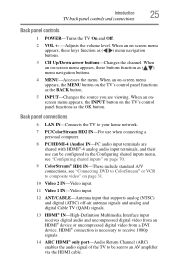
...'s control panel functions as ( / ) menu navigation buttons. 4 MENU-Accesses the menu. When an on page 31. 10 Video 2 IN-Video input. 11 Video 1 IN-Video input. 12 ANT/CABLE-Antenna input that supports analog (NTSC) and digital (ATSC) off-air antenna signals and analog and digital Cable TV (QAM) signals. 13 HDMI® IN-High-Definition Multimedia Interface input receives digital audio and uncompressed digital video from an HDMI® device or uncompressed digital video from a DVI device. Introduction 25 TV back panel controls and connections Back panel controls 1 POWER-Turns the...
...'s control panel functions as ( / ) menu navigation buttons. 4 MENU-Accesses the menu. When an on page 31. 10 Video 2 IN-Video input. 11 Video 1 IN-Video input. 12 ANT/CABLE-Antenna input that supports analog (NTSC) and digital (ATSC) off-air antenna signals and analog and digital Cable TV (QAM) signals. 13 HDMI® IN-High-Definition Multimedia Interface input receives digital audio and uncompressed digital video from an HDMI® device or uncompressed digital video from a DVI device. Introduction 25 TV back panel controls and connections Back panel controls 1 POWER-Turns the...

User Guide
Page 30
... COMPONENT VIDEO VIDEO R IN OUT Standard audio cable COLOR VIDEO 2 STREAM HD 1 HDMI 3 TV back panel Component video cable VHF/UHF Antenna Cable TV Cable box CH 3 CH 4 IN OUT AV Component adapter cable (supplied) Coaxial cable (Sample Illustration) L6200U/L7200U Series-Connecting to an antenna, satellite receiver, and cable TV box Items needed: ❖ Coaxial cables ❖ Standard AV cables ❖ Component video cables (red/green/blue) NOTE When you use the remote control to change channels. To view the antenna or cable signal: Select ANT/CABLE video input source...
... COMPONENT VIDEO VIDEO R IN OUT Standard audio cable COLOR VIDEO 2 STREAM HD 1 HDMI 3 TV back panel Component video cable VHF/UHF Antenna Cable TV Cable box CH 3 CH 4 IN OUT AV Component adapter cable (supplied) Coaxial cable (Sample Illustration) L6200U/L7200U Series-Connecting to an antenna, satellite receiver, and cable TV box Items needed: ❖ Coaxial cables ❖ Standard AV cables ❖ Component video cables (red/green/blue) NOTE When you use the remote control to change channels. To view the antenna or cable signal: Select ANT/CABLE video input source...
User Guide
Page 38
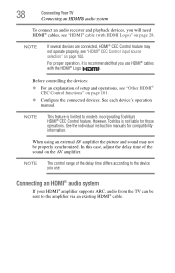
... HDMI® audio system To connect an audio receiver and playback devices, you will need HDMI® cables, see "HDMI® cable (with the HDMI® Logo ( ). NOTE The control range of the sound on page 101. ❖ Configure the connected devices. Connecting an HDMI® audio system If your HDMI® amplifier supports ARC, audio from the TV can be properly synchronized. See each device's operation manual. See the individual instruction manuals for those operations...
... HDMI® audio system To connect an audio receiver and playback devices, you will need HDMI® cables, see "HDMI® cable (with the HDMI® Logo ( ). NOTE The control range of the sound on page 101. ❖ Configure the connected devices. Connecting an HDMI® audio system If your HDMI® amplifier supports ARC, audio from the TV can be properly synchronized. See each device's operation manual. See the individual instruction manuals for those operations...
User Guide
Page 50
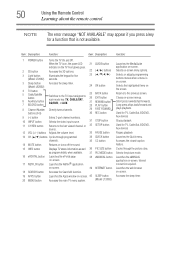
... picture sizes. on-screen. 19 APPS button 20 MENU button Launches the Apps window on -screen menus. Closes on -screen. 40 SLEEP button Accesses the sleep timer. Short press rewinds/fast forwards. on the screen. Selects or adjusts programming buttons menus when a menu is on, the power LED indicator on -screen. Reduces or turns off the sound. 35 CC button Accesses the closed-caption feature. 15 INFO button Displays TV status information as program details, when available. 37 PIC MODE button Selects the picture mode...
... picture sizes. on-screen. 19 APPS button 20 MENU button Launches the Apps window on -screen menus. Closes on -screen. 40 SLEEP button Accesses the sleep timer. Short press rewinds/fast forwards. on the screen. Selects or adjusts programming buttons menus when a menu is on, the power LED indicator on -screen. Reduces or turns off the sound. 35 CC button Accesses the closed-caption feature. 15 INFO button Displays TV status information as program details, when available. 37 PIC MODE button Selects the picture mode...
User Guide
Page 66
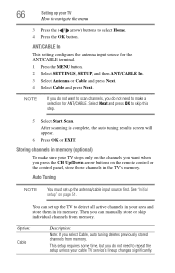
... antenna input source for ANT/CABLE. See "Initial setup" on the remote control or the control panel, store those channels in memory (optional) To make a selection for the ANT/CABLE terminal. 1 Press the MENU button. 2 Select SETTINGS, SETUP, and then ANT/CABLE In. 3 Select Antenna or Cable and press Next. 4 Select Cable and press Next. Option: Cable Description: Note: If you do not need to repeat the setup unless your cable TV service's lineup changes...
... antenna input source for ANT/CABLE. See "Initial setup" on the remote control or the control panel, store those channels in memory (optional) To make a selection for the ANT/CABLE terminal. 1 Press the MENU button. 2 Select SETTINGS, SETUP, and then ANT/CABLE In. 3 Select Antenna or Cable and press Next. 4 Select Cable and press Next. Option: Cable Description: Note: If you do not need to repeat the setup unless your cable TV service's lineup changes...

User Guide
Page 67
... screen appears. 3 Press the OK button to start Auto Tuning or press the EXIT button to be skipped. Option: ATV DTV Description: Analog channel Digital channel The TV cycles through the channels and stores all active channels in memory, you can manually enter channels if the channel number is known. 1 Press the MENU button. 2 Select SETTINGS, SETUP, Manual Tuning, and then press the OK button. 3 Use buttons 0-9 on the remote control. 1 Press the MENU button. 2 Select SETTINGS, SETUP, Auto...
... screen appears. 3 Press the OK button to start Auto Tuning or press the EXIT button to be skipped. Option: ATV DTV Description: Analog channel Digital channel The TV cycles through the channels and stores all active channels in memory, you can manually enter channels if the channel number is known. 1 Press the MENU button. 2 Select SETTINGS, SETUP, Manual Tuning, and then press the OK button. 3 Use buttons 0-9 on the remote control. 1 Press the MENU button. 2 Select SETTINGS, SETUP, Auto...
User Guide
Page 68
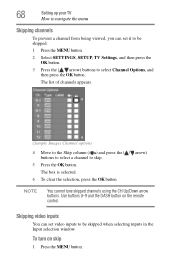
... skipped. 1 Press the MENU button. 2 Select SETTINGS, SETUP, TV Settings, and then press the OK button. 3 Press the ( / arrow) buttons to select Channel Options, and then press the OK button. To turn on the remote control. NOTE You cannot tune skipped channels using the CH Up/Down arrow buttons. The box is selected. 6 To clear the selection, press the OK button. Skipping video inputs You can set video inputs to skip. 5 Press...
... skipped. 1 Press the MENU button. 2 Select SETTINGS, SETUP, TV Settings, and then press the OK button. 3 Press the ( / arrow) buttons to select Channel Options, and then press the OK button. To turn on the remote control. NOTE You cannot tune skipped channels using the CH Up/Down arrow buttons. The box is selected. 6 To clear the selection, press the OK button. Skipping video inputs You can set video inputs to skip. 5 Press...

User Guide
Page 87
... turn on the closed caption mode has two options: The list of HDMI® CEC devices for that are set to Off, Analog CC Mode and Digital CC Settings will not appear in the input selector. NOTE If Closed Captions Display is set to be not available. Analog CC mode The closed caption mode: 1 Press the MENU button. Basic features 87 Using closed captions NOTE ❖ You can label the video input sources according to the specific devices you have connected...
... turn on the closed caption mode has two options: The list of HDMI® CEC devices for that are set to Off, Analog CC Mode and Digital CC Settings will not appear in the input selector. NOTE If Closed Captions Display is set to be not available. Analog CC mode The closed caption mode: 1 Press the MENU button. Basic features 87 Using closed captions NOTE ❖ You can label the video input sources according to the specific devices you have connected...
User Guide
Page 90
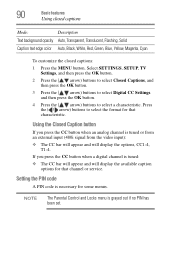
Press the ( / arrow) buttons to select the format for some menus. NOTE The Parental Control and Locks menu is tuned: ❖ The CC bar will appear and will display the options, CC1-4, T1-4. 90 Basic features Using closed captions Mode: Description Text background opacity Auto, Transparent, Translucent, Flashing, Solid Caption text edge color Auto, Black, White, Red, Green, Blue, Yellow, Magenta, Cyan To customize the closed captions: 1 Press the MENU button. Select SETTINGS, SETUP, TV Settings, and then...
Press the ( / arrow) buttons to select the format for some menus. NOTE The Parental Control and Locks menu is tuned: ❖ The CC bar will appear and will display the options, CC1-4, T1-4. 90 Basic features Using closed captions Mode: Description Text background opacity Auto, Transparent, Translucent, Flashing, Solid Caption text edge color Auto, Black, White, Red, Green, Blue, Yellow, Magenta, Cyan To customize the closed captions: 1 Press the MENU button. Select SETTINGS, SETUP, TV Settings, and then...
User Guide
Page 105
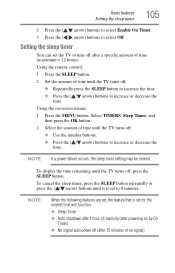
... powering on -screen menus: 1 Press the MENU button. Using the on by On Timer) ❖ No signal auto power off (after a specific amount of no signal) NOTE If a power failure occurs, the sleep timer setting may be cleared. To cancel the sleep timer, press the SLEEP button repeatedly or press the ( / arrow) buttons until the TV turns off after 15 minutes of time (maximum = 12 hours). Using the remote control: 1 Press the SLEEP button. 2 Set the amount of time...
... powering on -screen menus: 1 Press the MENU button. Using the on by On Timer) ❖ No signal auto power off (after a specific amount of no signal) NOTE If a power failure occurs, the sleep timer setting may be cleared. To cancel the sleep timer, press the SLEEP button repeatedly or press the ( / arrow) buttons until the TV turns off after 15 minutes of time (maximum = 12 hours). Using the remote control: 1 Press the SLEEP button. 2 Set the amount of time...
User Guide
Page 107
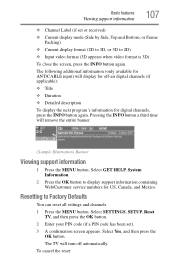
.../Customer service numbers for digital channels, press the INFO button again. To cancel the reset: Select SETTINGS, SETUP, Reset TV, and then press the OK button. 2 Enter your PIN code (if a PIN code has been set or received) ❖ Current display mode (Side by Side, Top and Bottom, or Frame Packing) ❖ Current display format (2D to 3D, or 3D to Factory Defaults You can reset all settings and channels. 1 Press the MENU button. Select...
.../Customer service numbers for digital channels, press the INFO button again. To cancel the reset: Select SETTINGS, SETUP, Reset TV, and then press the OK button. 2 Enter your PIN code (if a PIN code has been set or received) ❖ Current display mode (Side by Side, Top and Bottom, or Frame Packing) ❖ Current display format (2D to 3D, or 3D to Factory Defaults You can reset all settings and channels. 1 Press the MENU button. Select...
User Guide
Page 125
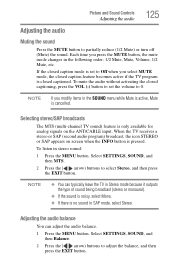
... program is closed captioning, press the VOL (-) button to set to 0. To mute the audio without activating the closed captioned. Picture and Sound Controls Adjusting the audio 125 Adjusting the audio Muting the sound Press the MUTE button to partially reduce (1/2 Mute) or turn off (Mute) the sound. Selecting stereo/SAP broadcasts The MTS (multi-channel TV sound) feature is pressed. NOTE If you press the MUTE button, the mute mode changes in SAP mode...
... program is closed captioning, press the VOL (-) button to set to 0. To mute the audio without activating the closed captioned. Picture and Sound Controls Adjusting the audio 125 Adjusting the audio Muting the sound Press the MUTE button to partially reduce (1/2 Mute) or turn off (Mute) the sound. Selecting stereo/SAP broadcasts The MTS (multi-channel TV sound) feature is pressed. NOTE If you press the MUTE button, the mute mode changes in SAP mode...
User Guide
Page 126
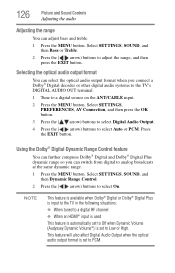
Press the EXIT button. Selecting the optical audio output format You can adjust bass and treble. 1 Press the MENU button. This feature will also affect Digital Audio Output when the optical audio output format is set to PCM. 126 Picture and Sound Controls Adjusting the audio Adjusting the range You can select the optical audio output format when you can switch from digital to analog broadcasts at the same dynamic range. 1 Press the MENU button. Select SETTINGS, PREFERENCES, AV Connection, and then press the...
Press the EXIT button. Selecting the optical audio output format You can adjust bass and treble. 1 Press the MENU button. This feature will also affect Digital Audio Output when the optical audio output format is set to PCM. 126 Picture and Sound Controls Adjusting the audio Adjusting the range You can select the optical audio output format when you can switch from digital to analog broadcasts at the same dynamic range. 1 Press the MENU button. Select SETTINGS, PREFERENCES, AV Connection, and then press the...
User Guide
Page 176
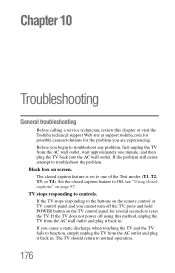
... remote control or TV control panel and you are experiencing. If the TV stops responding to the buttons on page 87. Chapter 10 Troubleshooting General troubleshooting Before calling a service technician, review this chapter or visit the Toshiba technical support Web site at support.toshiba.com for possible causes/solutions for several seconds to reset the TV. Black box on the TV control panel for the problem you cannot turn off using...
... remote control or TV control panel and you are experiencing. If the TV stops responding to the buttons on page 87. Chapter 10 Troubleshooting General troubleshooting Before calling a service technician, review this chapter or visit the Toshiba technical support Web site at support.toshiba.com for possible causes/solutions for several seconds to reset the TV. Black box on the TV control panel for the problem you cannot turn off using...
User Guide
Page 197
... (F-type) 27 component video (red/green/blue) 28 Dual-wand IR blaster cable 29 HDMI® 28 LAN 29 optical audio 29 overview of cables 27 standard A/V (red/white/yellow) 27 channel return 85 channels auto tuning 66 labeling analog TV channels 69 labeling video inputs 70 locking specific channels 95 manual tuning 67 next programmed channel 85 skipping 68 skipping video inputs 68 specific channel 85 storing in memory 66 closed captions Analog CC mode 87 button 90 Digital CC settings 89 using 87 computer adjusting image...
... (F-type) 27 component video (red/green/blue) 28 Dual-wand IR blaster cable 29 HDMI® 28 LAN 29 optical audio 29 overview of cables 27 standard A/V (red/white/yellow) 27 channel return 85 channels auto tuning 66 labeling analog TV channels 69 labeling video inputs 70 locking specific channels 95 manual tuning 67 next programmed channel 85 skipping 68 skipping video inputs 68 specific channel 85 storing in memory 66 closed captions Analog CC mode 87 button 90 Digital CC settings 89 using 87 computer adjusting image...
User Guide
Page 199
... unlocking programs 95 Q quick setup ANT/CABLE IN 66 local time 65 location 65 menu language 65 R rating system 93 downloading additional 92 S safety icons 20 scrolling the picture 113 shared inputs configuring 70 SmartTV using 142 YouTube™ 146 SmartTV™ CinemaNow® 147 Netflix 144 VUDU™ 145 software keyboard using 139 software licenses show 141 software upgrade performing 140 specifications 3D Signal formats 193 acceptable signal formats 191 audio power 187 channel...
... unlocking programs 95 Q quick setup ANT/CABLE IN 66 local time 65 location 65 menu language 65 R rating system 93 downloading additional 92 S safety icons 20 scrolling the picture 113 shared inputs configuring 70 SmartTV using 142 YouTube™ 146 SmartTV™ CinemaNow® 147 Netflix 144 VUDU™ 145 software keyboard using 139 software licenses show 141 software upgrade performing 140 specifications 3D Signal formats 193 acceptable signal formats 191 audio power 187 channel...
User Guide
Page 200
... signal formats 191 PC input 188 power consumption 187 power source 187 remote, combination buttons 194 speaker type 187 supplied accessories 190 TV system 186 USB 189 video/audio terminals 188 wireless connection 188 support information show 107 SurfLock™ using 85 T time limit set for games 96 timer sleep timer 105 turn on TV 104 Toshiba A/V Remote App Initial setup 173 Toshiba MediaGuide app movie/TV portal 175 search 175 TV listings 175 troubleshooting 176 channel tuning problems 179 closed caption problems 180 contact Toshiba 185 HDMI...
... signal formats 191 PC input 188 power consumption 187 power source 187 remote, combination buttons 194 speaker type 187 supplied accessories 190 TV system 186 USB 189 video/audio terminals 188 wireless connection 188 support information show 107 SurfLock™ using 85 T time limit set for games 96 timer sleep timer 105 turn on TV 104 Toshiba A/V Remote App Initial setup 173 Toshiba MediaGuide app movie/TV portal 175 search 175 TV listings 175 troubleshooting 176 channel tuning problems 179 closed caption problems 180 contact Toshiba 185 HDMI...


