Brochure
Page 2
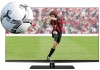
...an HDMI® w/ CEC compatible display/peripheral device. Send & Play - Care should be pushed, pulled over, or knocked down. © 2012 Toshiba America Information Systems, Inc. All rights reserved. 55L6200U S P E C I F I C AT I O N S1 Screen Size: 55" • Diagonal - 54.64" • Design: ...box • Universal Remote Control (CT-90408) • Batteries (AA x 2) • Resource Guide • Quick Start Guide • Wireless QWERTY Keyboard and batteries (AAA x 2) • AV Cables • IR Blaster Cable • Passive Glasses (4 pairs) • Warranty UPC Code: 022265055403 ...
...an HDMI® w/ CEC compatible display/peripheral device. Send & Play - Care should be pushed, pulled over, or knocked down. © 2012 Toshiba America Information Systems, Inc. All rights reserved. 55L6200U S P E C I F I C AT I O N S1 Screen Size: 55" • Diagonal - 54.64" • Design: ...box • Universal Remote Control (CT-90408) • Batteries (AA x 2) • Resource Guide • Quick Start Guide • Wireless QWERTY Keyboard and batteries (AAA x 2) • AV Cables • IR Blaster Cable • Passive Glasses (4 pairs) • Warranty UPC Code: 022265055403 ...
User Guide
Page 17
Contents 17 Wireless Setup 131 Advanced Network Setup 136 DNS Setup 137 Network Connection Test 139 Using the software keyboard 139 Enter text using the keypad 139 Enter text using the full keyboard 139 Performing a Software Upgrade 140 Viewing the Software Licenses 141 Using the SmartTV features 142 eMANUAL 142 ePORTAL page 142...
Contents 17 Wireless Setup 131 Advanced Network Setup 136 DNS Setup 137 Network Connection Test 139 Using the software keyboard 139 Enter text using the keypad 139 Enter text using the full keyboard 139 Performing a Software Upgrade 140 Viewing the Software Licenses 141 Using the SmartTV features 142 eMANUAL 142 ePORTAL page 142...
User Guide
Page 55
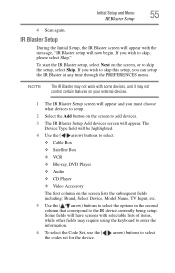
... IR Blaster at any time through the PREFERENCES menu. NOTE The IR Blaster may not work with some devices, and it may require using the keyboard to enter the information. 6 To select the Code Set, use the ( / arrow) buttons to skip the setup, select Skip. Initial Setup and Menu 55 IR...
... IR Blaster at any time through the PREFERENCES menu. NOTE The IR Blaster may not work with some devices, and it may require using the keyboard to enter the information. 6 To select the Code Set, use the ( / arrow) buttons to skip the setup, select Skip. Initial Setup and Menu 55 IR...
User Guide
Page 69
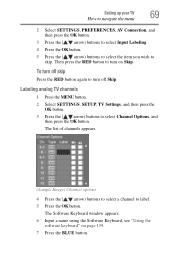
... appears. 6 Input a name using the Software Keyboard, see "Using the software keyboard" on Skip. To turn off skip Press the RED button again to turn on page 139. 7 Press the BLUE button. Labeling analog TV channels 1 Press ...
... appears. 6 Input a name using the Software Keyboard, see "Using the software keyboard" on Skip. To turn off skip Press the RED button again to turn on page 139. 7 Press the BLUE button. Labeling analog TV channels 1 Press ...
User Guide
Page 133
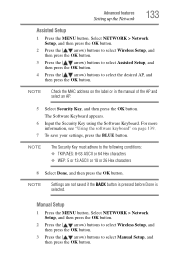
...WEP: 5 or 13 ASCII or 10 or 26 Hex characters 8 Select Done, and then press the OK button. The Software Keyboard appears. 6 Input the Security Key using the Software Keyboard. NOTE The Security Key must adhere to select the desired AP, and then press the OK button. NOTE Settings are not... arrow) buttons to select Manual Setup, and then press the OK button. Manual Setup 1 Press the MENU button. For more information, see "Using the software keyboard" on the label or in the manual of the AP and select an AP. 5 Select Security Key, and then press the OK button. Advanced features...
...WEP: 5 or 13 ASCII or 10 or 26 Hex characters 8 Select Done, and then press the OK button. The Software Keyboard appears. 6 Input the Security Key using the Software Keyboard. NOTE The Security Key must adhere to select the desired AP, and then press the OK button. NOTE Settings are not... arrow) buttons to select Manual Setup, and then press the OK button. Manual Setup 1 Press the MENU button. For more information, see "Using the software keyboard" on the label or in the manual of the AP and select an AP. 5 Select Security Key, and then press the OK button. Advanced features...

User Guide
Page 134
...13 Press the ( / arrow) buttons to None. 12 Select Done, and then press the OK button. For more information, see "Using the software keyboard" on page 139. 11 To save your settings, press the BLUE button. Press the ( / arrow) buttons to select Open/Shared, WPA-PSK,...are compatible. ❖ When Authentication is resolved. 9 Press the ( / arrow) buttons to highlight Encryption. The Software Keyboard window appears. 10 Input the Security Key using the Software Keyboard. PSK. 8 Press the ( / arrow) buttons to select Security Key, and then press the OK button. NOTE ...
...13 Press the ( / arrow) buttons to None. 12 Select Done, and then press the OK button. For more information, see "Using the software keyboard" on page 139. 11 To save your settings, press the BLUE button. Press the ( / arrow) buttons to select Open/Shared, WPA-PSK,...are compatible. ❖ When Authentication is resolved. 9 Press the ( / arrow) buttons to highlight Encryption. The Software Keyboard window appears. 10 Input the Security Key using the Software Keyboard. PSK. 8 Press the ( / arrow) buttons to select Security Key, and then press the OK button. NOTE ...
User Guide
Page 139
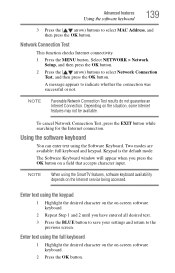
...3 Press the BLUE button to save your settings and return to indicate whether the connection was successful or not. Enter text using the Software Keyboard. Select NETWORK > Network Setup, and then press the OK button. 2 Press the ( / arrow) buttons to select MAC Address, and...available. Network Connection Test This function checks Internet connectivity. 1 Press the MENU button. Two modes are available: full keyboard and keypad. Advanced features Using the software keyboard 139 3 Press the ( / arrow) buttons to select Network Connection Test, and then press the OK button. Depending...
...3 Press the BLUE button to save your settings and return to indicate whether the connection was successful or not. Enter text using the Software Keyboard. Select NETWORK > Network Setup, and then press the OK button. 2 Press the ( / arrow) buttons to select MAC Address, and...available. Network Connection Test This function checks Internet connectivity. 1 Press the MENU button. Two modes are available: full keyboard and keypad. Advanced features Using the software keyboard 139 3 Press the ( / arrow) buttons to select Network Connection Test, and then press the OK button. Depending...

User Guide
Page 140
...Chooses an accented version of the current letter, if applicable Saves changes and closes the Software Keyboard window Closes the Software Keyboard window without saving changes Performing a Software Upgrade TOSHIBA may offer upgrades for entry. NOTE If the BACK button is closed. NOTE An Internet...numbers directly in the future. In keypad, these keys are not saved and the software keyboard window is pressed, changes are used to select a character for the TV's software in keyboard mode. Before downloading software: 1 Configure your settings and return to the previous screen....
...Chooses an accented version of the current letter, if applicable Saves changes and closes the Software Keyboard window Closes the Software Keyboard window without saving changes Performing a Software Upgrade TOSHIBA may offer upgrades for entry. NOTE If the BACK button is closed. NOTE An Internet...numbers directly in the future. In keypad, these keys are not saved and the software keyboard window is pressed, changes are used to select a character for the TV's software in keyboard mode. Before downloading software: 1 Configure your settings and return to the previous screen....
User Guide
Page 143
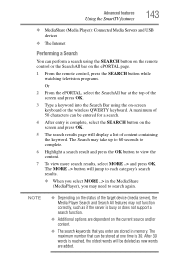
... while watching television programs. Or 2 From the ePORTAL, select the SearchAll bar at one time is complete, select the SEARCH button on -screen keyboard or the wireless QWERTY keyboard. A maximum of 50 characters can be deleted as if the server is busy or does not support a search function. ❖ Additional options are...
... while watching television programs. Or 2 From the ePORTAL, select the SearchAll bar at one time is complete, select the SEARCH button on -screen keyboard or the wireless QWERTY keyboard. A maximum of 50 characters can be deleted as if the server is busy or does not support a search function. ❖ Additional options are...

User Guide
Page 148
...ePORTAL page. Press the BLUE button on the remote control to the network. 2 Press the ePORTAL button on the remote control or QWERTY keyboard when finished. It may not support media formats other than PC browsers. ❖ does not support parental control or locks, and it is... / / / arrow) buttons to scroll to the URL Address Bar and press OK. 5 Enter the desired URL address by using the Wireless QWERTY keyboard. NOTE Pressing the INTERNET button on the remote control will close when this device: ❖ does not support platform-dependent technologies such as intended. ❖...
...ePORTAL page. Press the BLUE button on the remote control to the network. 2 Press the ePORTAL button on the remote control or QWERTY keyboard when finished. It may not support media formats other than PC browsers. ❖ does not support parental control or locks, and it is... / / / arrow) buttons to scroll to the URL Address Bar and press OK. 5 Enter the desired URL address by using the Wireless QWERTY keyboard. NOTE Pressing the INTERNET button on the remote control will close when this device: ❖ does not support platform-dependent technologies such as intended. ❖...

User Guide
Page 149
... address and press OK. You can view the addresses of all your favorites. 6 You can now browse websites on your TV using the Wireless QWERTY keyboard. Advanced features Using the SmartTV features 149 6 You can now browse websites on your TV using the ( / / / arrow) buttons on the remote ...control or via using the Wireless QWERTY keyboard. NOTE By adding frequently visited websites to Favorites STAR and press OK. NOTE You can press the GREEN button on the remote for thumbnail view...
... address and press OK. You can view the addresses of all your favorites. 6 You can now browse websites on your TV using the Wireless QWERTY keyboard. Advanced features Using the SmartTV features 149 6 You can now browse websites on your TV using the ( / / / arrow) buttons on the remote ...control or via using the Wireless QWERTY keyboard. NOTE By adding frequently visited websites to Favorites STAR and press OK. NOTE You can press the GREEN button on the remote for thumbnail view...

User Guide
Page 150
... a specific web page 1 Press the INTERNET button on the remote or select the Internet icon on the ePORTAL page. 2 Use the on-screen keyboard or the wireless QWERTY keyboard to your desired website. 5 Press the Navigation buttons to scroll to Favorites STAR on the address bar to access the ePORTAL page. You...
... a specific web page 1 Press the INTERNET button on the remote or select the Internet icon on the ePORTAL page. 2 Use the on-screen keyboard or the wireless QWERTY keyboard to your desired website. 5 Press the Navigation buttons to scroll to Favorites STAR on the address bar to access the ePORTAL page. You...

User Guide
Page 151
... event 1 Select the Events icon on your TV through the Events Calendar feature. A new Event window is displayed. 4 Use the on-screen keyboard or the wireless QWERTY keyboard to type in the event information. 5 If a recurring event, you can use the Repeat option to set events on the ePORTAL page. 2...Month by using the left and right jump buttons on the remote. Advanced features Using the SmartTV features 151 ❖ If using the on-screen keyboard, press the BLUE button to view the page. ❖ If using the Messages feature. Launch the Messages feature 1 Select the Messages icon ...
... event 1 Select the Events icon on your TV through the Events Calendar feature. A new Event window is displayed. 4 Use the on-screen keyboard or the wireless QWERTY keyboard to type in the event information. 5 If a recurring event, you can use the Repeat option to set events on the ePORTAL page. 2...Month by using the left and right jump buttons on the remote. Advanced features Using the SmartTV features 151 ❖ If using the on-screen keyboard, press the BLUE button to view the page. ❖ If using the Messages feature. Launch the Messages feature 1 Select the Messages icon ...

User Guide
Page 167
... OK button. 2 Use the ( / arrow) buttons to submit. ❖ To use the USB/QWERTY keyboard, use the Network Device Setup menu. The Home Control Profile window will appear so that you must use the...10070; To use the remote control keypad, the software keypad, or the USB/QWERTY keyboard to select and set the access the External Control Setup, Media Renderer Setup, or Device Name Setup..., you can use the software keyboard, press the GREEN button. Select NETWORK, Network Device Setup, and External Control Setup, and ...
... OK button. 2 Use the ( / arrow) buttons to submit. ❖ To use the USB/QWERTY keyboard, use the Network Device Setup menu. The Home Control Profile window will appear so that you must use the...10070; To use the remote control keypad, the software keypad, or the USB/QWERTY keyboard to select and set the access the External Control Setup, Media Renderer Setup, or Device Name Setup..., you can use the software keyboard, press the GREEN button. Select NETWORK, Network Device Setup, and External Control Setup, and ...

User Guide
Page 168
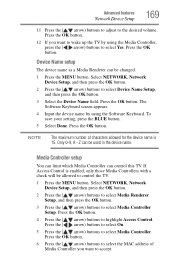
If you want to select Yes. The box is done by using the Software Keyboard. Press the OK button. 7 If you want to proceed with registration of Media Controllers, press the ( / arrow) buttons to accept. The selection of the Media ...Controller you want to be prompted for the user name and password. The Software Keyboard screen appears. 5 Input the device name by the Media Controller. Press the OK button. 168 Advanced features Network Device Setup NOTE Only the 0-9, dash (-), and...
If you want to select Yes. The box is done by using the Software Keyboard. Press the OK button. 7 If you want to proceed with registration of Media Controllers, press the ( / arrow) buttons to accept. The selection of the Media ...Controller you want to be prompted for the user name and password. The Software Keyboard screen appears. 5 Input the device name by the Media Controller. Press the OK button. 168 Advanced features Network Device Setup NOTE Only the 0-9, dash (-), and...
User Guide
Page 169
..., Network Device Setup, and then press the OK button. 2 Press the ( / arrow) buttons to select Media Controller Setup. The Software Keyboard screen appears. 4 Input the device name by using the Software Keyboard. Only 0-9, A - Z can control this TV. Media Controller setup You can limit which Media Controller can be changed. 1 Press the MENU...
..., Network Device Setup, and then press the OK button. 2 Press the ( / arrow) buttons to select Media Controller Setup. The Software Keyboard screen appears. 4 Input the device name by using the Software Keyboard. Only 0-9, A - Z can control this TV. Media Controller setup You can limit which Media Controller can be changed. 1 Press the MENU...
User Guide
Page 190
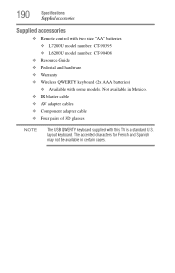
... blaster cable ❖ AV adapter cables ❖ Component adapter cable ❖ Four pairs of 3D glasses NOTE The USB QWERTY keyboard supplied with some models. layout keyboard. 190 Specifications Supplied accessories Supplied accessories ❖ Remote control with two size "AA" batteries ❖ L7200U model number: CT-90395... ❖ L6200U model number: CT-90408 ❖ Resource Guide ❖ Pedestal and hardware ❖ Warranty ❖ Wireless QWERTY keyboard (2x AAA batteries) ❖ Available with this TV is a standard U.S. Not available in certain cases.
... blaster cable ❖ AV adapter cables ❖ Component adapter cable ❖ Four pairs of 3D glasses NOTE The USB QWERTY keyboard supplied with some models. layout keyboard. 190 Specifications Supplied accessories Supplied accessories ❖ Remote control with two size "AA" batteries ❖ L7200U model number: CT-90395... ❖ L6200U model number: CT-90408 ❖ Resource Guide ❖ Pedestal and hardware ❖ Warranty ❖ Wireless QWERTY keyboard (2x AAA batteries) ❖ Available with this TV is a standard U.S. Not available in certain cases.
User Guide
Page 199
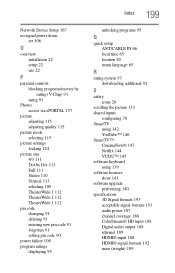
... scrolling the picture 113 shared inputs configuring 70 SmartTV using 142 YouTube™ 146 SmartTV™ CinemaNow® 147 Netflix 144 VUDU™ 145 software keyboard using 139 software licenses show 141 software upgrade performing 140 specifications 3D Signal formats 193 acceptable signal formats 191 audio power 187 channel coverage 186...
... scrolling the picture 113 shared inputs configuring 70 SmartTV using 142 YouTube™ 146 SmartTV™ CinemaNow® 147 Netflix 144 VUDU™ 145 software keyboard using 139 software licenses show 141 software upgrade performing 140 specifications 3D Signal formats 193 acceptable signal formats 191 audio power 187 channel coverage 186...